
I put this together because I wanted you to have a quick plan for nails that grab attention. Nails are a small canvas, but they can change how you feel in seconds. This post rounds up 25 nail art designs that are doable, bold, and ready to wear. Whether you have a busy week or a fun date night, these ideas fit real life.
Who it’s for? If you love bold style, quick glam, and sharing your look online, this one is for you. You care about nails that stay neat, dry fast, and still pop in photos. You want ideas that work with your budget and your routine, not a project that takes days. Here is why this matters: a great mani can lift your mood and show a bit of your personality in a small frame.
What you’ll get is a gallery of 25 nail art designs. Each idea comes with a simple how-to and a short list of materials, so you can start tonight. These are manicure ideas you can actually pull off in minutes. From glossy neons to soft neutrals, there is something for every mood and skin tone. This guide is a toolbox you can reuse again and again.
And yes, you won’t believe what #12 looks like. It’s a playful, clever twist you can recreate with just a thin brush and a piece of tape. That surprise reminds you how tiny tools can make a big impact on your whole look. You’ll find ideas that mix color, shape, and shine in fresh ways.
Here are practical tips you can use right away. Prep nails with a clean base, push back cuticles, and choose a base coat that grips. Apply color in thin layers and let each one dry before the next. Use striping tape, stamping plates, or stickers to add detail. Finish with a quick top coat for shine or a matte top coat for drama. The goal is nails that look good longer without a big hassle.
Next steps: pick a few designs you love, gather a few supplies, and try them this week. Take photos to see what works in real life. Share your favorite looks and tweak colors to fit your style. If you need a quick hit, start with one easy idea and build from there.
Contents
- 1. Marble Effect Nails
- 2. Neon Ombre Nails
- 3. Floral Nail Art
- 4. Geometric Patterns
- 5. Glitter Glam
- 6. Animal Print
- 7. Matte Nails
- 8. Foil Accents
- 9. Negative Space Nails
- 10. Candy Cane Stripes
- 11. Holographic Nails
- 12. Color-Block Nails
- 13. Abstract Art Nails
- 14. Tie-Dye Nails
- 15. Vintage Polka Dots
- 16. Gradient Glitter Nails
- 17. Sweet Pastels
- 18. Retro Stripes
- 19. Blue & Gold Elegance
- 20. Crystal Nails
- 21. Space Nails
- 22. Rainbow Nails
- 23. Fall Leaves
- 24. Ice Cream Nails
- 25. Metallic Nails
1. Marble Effect Nails

You want nails that look chic without a lot of fuss. Marble effect nails do just that. They blend drama with a clean, classy vibe and fit any outfit.
What you’ll need
– White, gray, and black nail polish or a marble gel mix
– A thin brush or dotting tool
– Base coat and top coat
– Optional: gold or silver accent nail foil
– Cuticle oil for afterward care
How to get the marble look
1. Prep your nails. Push back cuticles and file smooth. A clean nail helps the design last.
2. Apply a light base. A pale shade makes the veins pop.
3. Dot on your colors. Place small wisps of white, gray, and black on the nail.
4. Create the marble veins. Use a fine brush or wooden stick to swirl colors gently. Don’t overmix.
5. Clean edges. Wipe any stray lines with a small brush dipped in remover.
6. Seal and shine. Finish with a top coat for a glassy look.
7. Add a glam touch. Place a metallic accent nail on one finger if you like.
Tips and variations
– For depth, vary the amount of black and gray in each nail. Each nail becomes a tiny work of art.
– Try a matte top coat for a velvety finish or keep it glossy for extra shine.
Next steps. Keep nails hydrated with cuticle oil to maintain the smooth marble lines.
1. Marble Effect Nails
Editor’s Choice

Artdone 31pcs Nail Art Brushes, Nail Art Tool Set, Dotting Tools, Dust B…

Born Pretty Nail Blooming Gel, 15ml Clear Clear U V Led Blossom Gel Poli…

Cuccio Naturale Revitalizing- Hydrating Oil For Repaired Cuticles Overni…
2. Neon Ombre Nails
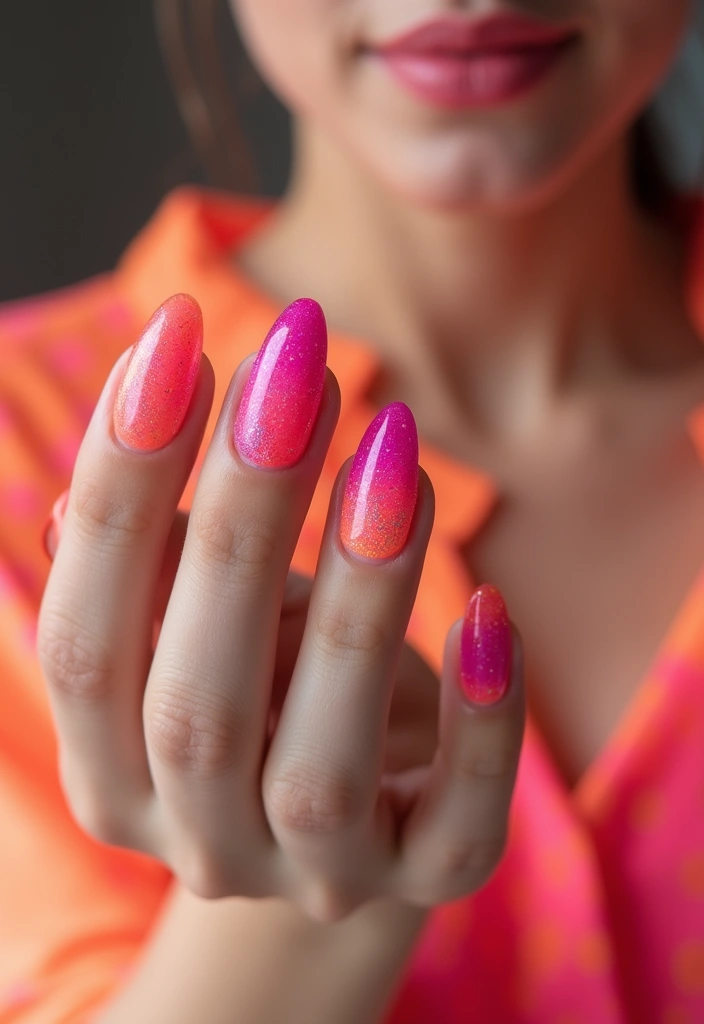
Neon ombre nails
You want nails that grab attention but stay wearable. Neon ombre blends two or more bright colors into a smooth fade. Picture electric pink melting into bold orange. It screams summer and can brighten a rainy day.
Here is why the sponge method matters. The sponge lets the colors meet softly, not harshly. You can control how much the darker shade shows at the tip and how fast it fades.
Next steps to try it at home:
1) Prep your nails. Remove old polish, trim, shape, and push back cuticles. Apply a thin base coat.
2) Paint the lightest neon shade as your base. Let it dry completely.
3) Dab the darker neon color onto a clean makeup sponge. Tap the sponge onto the tips and gently roll the edge toward the middle. Repeat until the tip looks saturated but the fade stays smooth.
4) Finish with a fast-drying top coat. If you like, add a touch of glitter to the tips for extra sparkle.
This style works on short and long nails and goes with casual looks or a night out. It’s bold, but you can change the colors to suit any mood.
Tips for best results: pick colors that blend well, start with a sheer base, and seal with top coat to keep shine and prevent chipping.
2. Neon Ombre Nails
Editor’s Choice
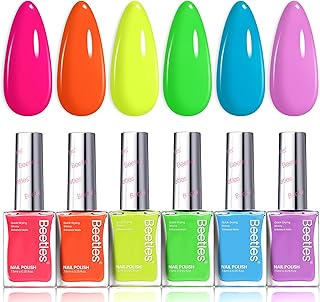
Beetles Neon Nail polish Set, 6 Colors Bright Rainbow Nail Polish Kit Qu…

Seche Vite Dry Fast Top Coat Nail Polish – Quick Dry, Long Lasting, Clea…
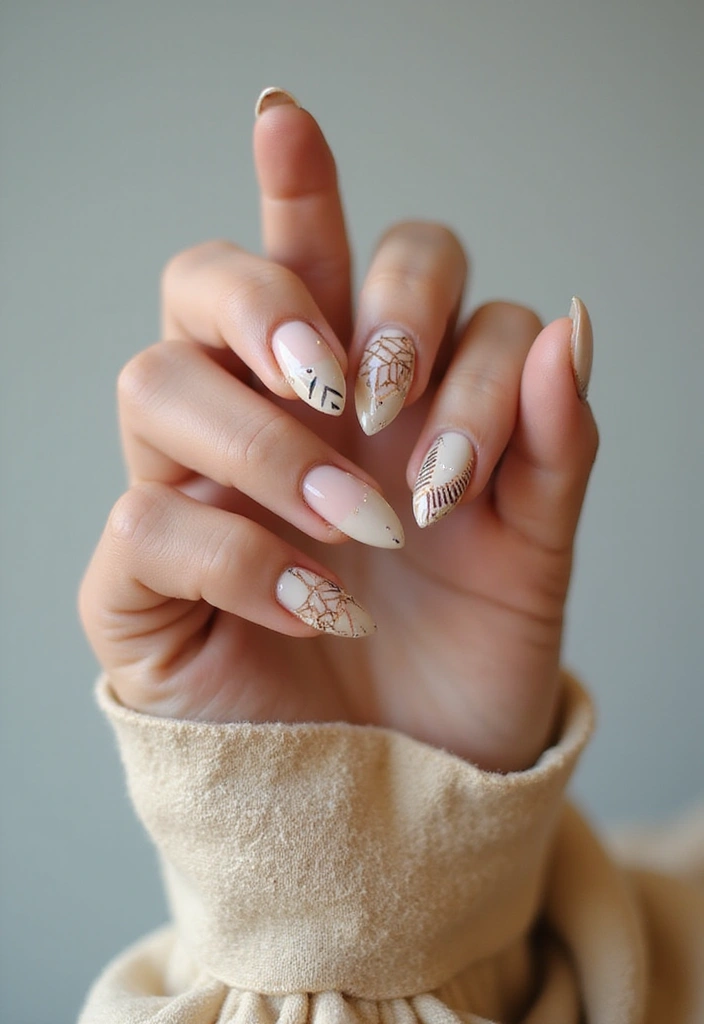
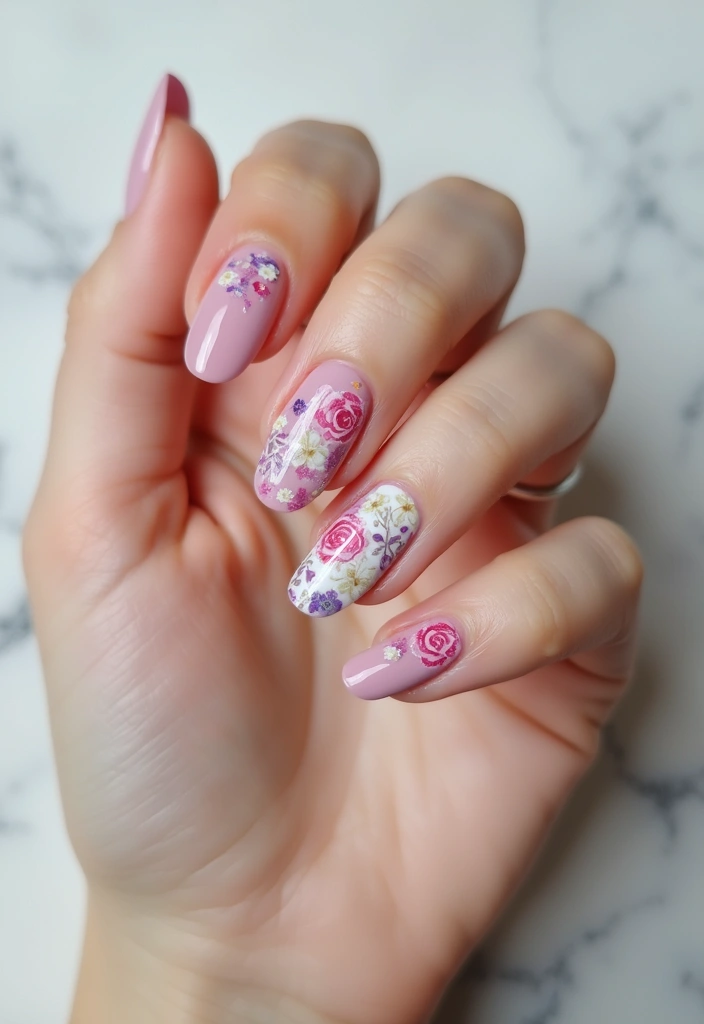
3. Floral Nail Art
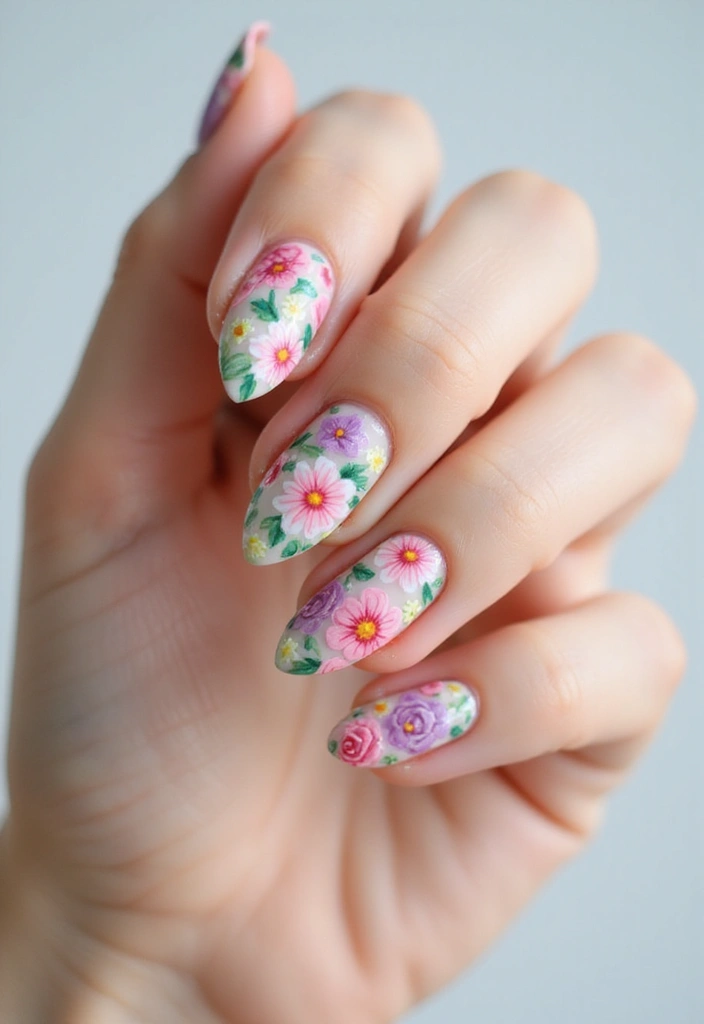
Floral nail art brings a gentle, natural vibe to your hands. You can choose from tiny daisies to bold roses and still keep it clean and easy to wear.
Ways to get the look
– Stamping for quick prints that repeat a motif.
– Hand painting for unique petals and subtle shading.
– Nail stickers for a no-fuss option that lasts.
– Try a sheer nude or pink base so petals stand out.
Color ideas
– Soft pastels like mint, blush, or lavender give a dreamy feel.
– Bright hues like coral or yellow make the design pop.
– A gradient or one accent nail adds balance.
Finishes
– Matte top coat adds a modern, muted vibe.
– Glossy finish makes colors look vibrant and fresh.
Placement matters
– Put flowers on accent nails to draw the eye exactly where you want.
– A few petals on one nail can feel fresh without overdoing it.
– Spreading blooms across two nails can create a tiny bouquet look.
DIY tips
– Use a fine nail art brush for crisp petals.
– Start with a dry base and paint slowly from the center outward.
– Seal with a top coat to prevent chipping and extend wear.
Seasonality and wear
– Perfect for spring and summer, but can lift any outfit year-round.
– For longer life, add a thin protective top coat every few days.
That’s it. Mix styles and colors to fit your mood and wardrobe.
3. Floral Nail Art
Editor’s Choice

Biutee Nail Stamping Plates Set 15PCS Nail Art Stamper Scraper Nail Stam…
Artdone 31pcs Nail Art Brushes, Nail Art Tool Set, Dotting Tools, Dust B…

Teenitor 50 Sheets Nail Stickers for Nail Art, Flower Nail Art Stickers …
4. Geometric Patterns
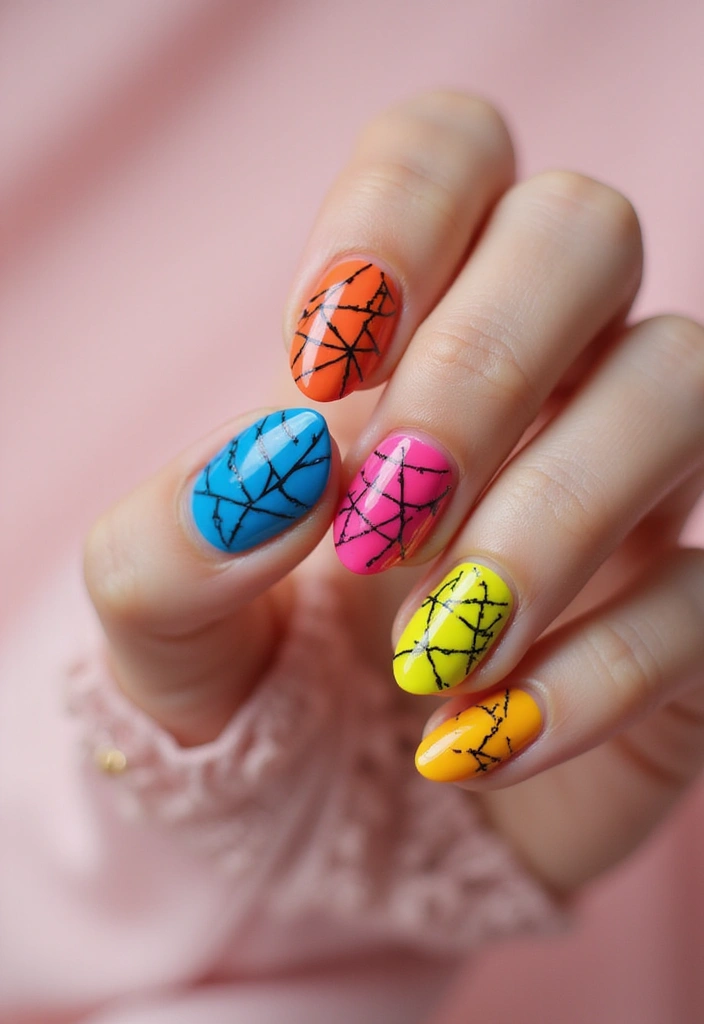
Geometric Patterns
Geometric nails give you an edge without trying too hard. Sharp lines, bold angles, and simple shapes blend into a clean, modern look. Think triangles, stripes, and squares in colors that pop or stay soft. Here is why this style works and how to pull it off.
– Shapes to try: triangles, straight stripes, little squares. Mix one or two shapes for a balanced look.
– How to get clean lines: use tape to guard edges for a crisp finish. You can also sketch lines freehand if you want a rougher, more artistic vibe.
– Color ideas: combine metallics with bright neons, or pair bold hues with pale pastels. Contrast makes the patterns stand out.
– Finish combos: go matte on the base and add a shiny top coat on the lines for depth. The matte base makes colors pop more.
– How to apply: start with a fully dry base coat. Place tape where you want the gaps, paint, and pull the tape away while the color is still fresh. Small details can be added with a dotting tool.
– Sealing and care: finish with a protective top coat to prevent chipping. Reapply every few days for lasting style.
– Day to night: complex patterns read as polished in daylight and still chic under dimmer lights.
Next steps: pick two shapes, one or two colors, and test on a nail wheel before you try it on you.
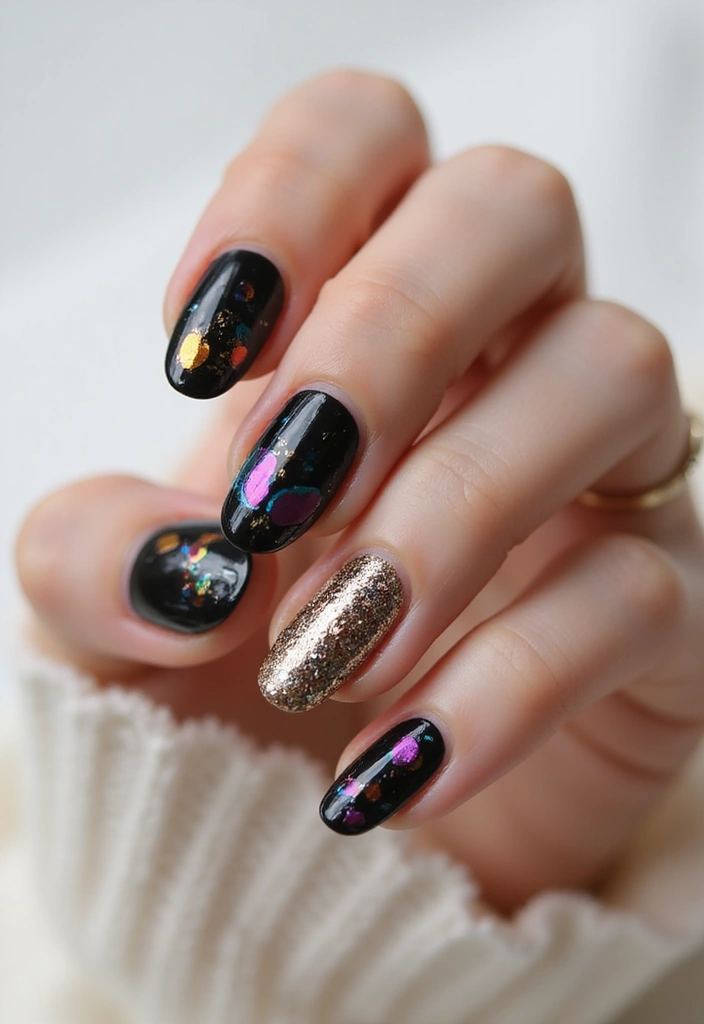
5. Glitter Glam
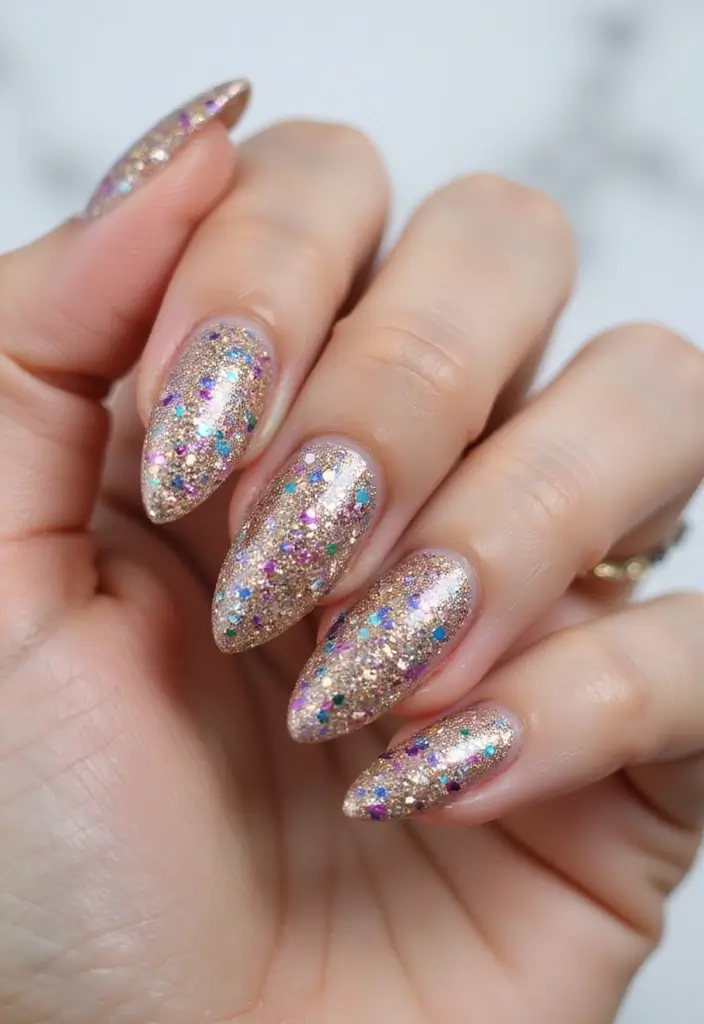
Glitter Glam nails explained
You want nails that grab attention. Glitter glam nails make that happen. You can cover all nails with glitter or use a glitter accent nail. Fine glitter gives a subtle glow, chunky glitter gives a bold flash.
Glitter options at a glance
– Full glitter on every nail
– A glitter accent nail
– Holographic glitter that shifts color
– Subtle fine glitter on a base color
Glitter works over many base shades. Try nude, pink, blue, or black to fit your mood.
Gradient glitter
To get a fade, paint the base color first. Dab glitter toward the tips with a small sponge. Finish with a clear top coat for a smooth edge.
Top coats and removal tips
Use a strong top coat to lock glitter in. Peel-off base coats help when you want easy cleanup.
Mix and match ideas
Mix colors for a custom look. Deep blue with holo glitter shines in light. Gold glitter on cream feels warm. You can invent combos that match your outfits.
How to apply in simple steps
1. Prep nails and dry completely.
2. Paint base color and dry.
3. Apply glitter in layers or with a sponge.
4. Seal with top coat and let it dry.
Care and timing
Reapply top coat every 2–3 days. Remove with care to avoid lifting.
Perfect for
Parties, holidays, and days you want to stand out.
5. Glitter Glam
Editor’s Choice

modelones Nail Polish Set 6 Colors Red Nude Gold Glitter Min Nail Polish…

Beetles Peel Off Gel Base Coat for Gel Nail Polish: 15ml Peel Off Base C…

Modelones Glitter Gel Top Coat, Iridescent Silver Mix Glitter Gel Polish…
6. Animal Print
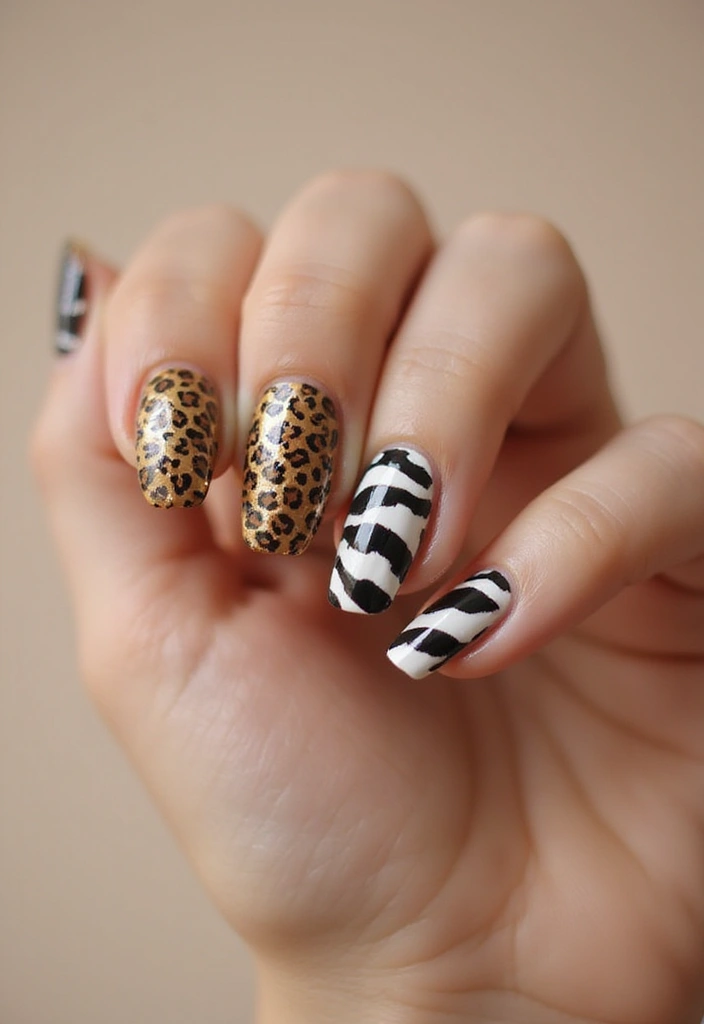
If you want nails that pop but don’t feel loud, animal print nails are a great pick. They give you edge with a clean look. You can do this on all nails or just on one accent nail.
Why this style works
– It stays playful yet classy. Leopard spots add warmth; zebra stripes feel bold and modern.
– It fits every season. Pair it with jeans or a dress, day or night.
– It’s easy to adapt. Try browns and blacks for a classic look, or mix in a splash of color for a fun twist.
What you’ll need
– Your favorite base color
– A way to add the print: a freehand brush, stamping plates, or nail stickers
– A reliable top coat to seal everything
– Optional finishes: a glossy shine or a soft matte
How to nail the look
– Step 1: Paint a smooth base and let it dry completely.
– Step 2: Create the print. Use a small brush for leopard spots, a stamping plate for zebra stripes, or apply stickers. Start with thin lines or points to keep the design clean.
– Step 3: Add the print to one or two nails as an accent. Keep the rest in a solid color for balance.
– Step 4: Finish with top coat. Decide between glossy for bold shine or matte for chic subtleness.
Tips for staying fresh
– Thin layers work best. They dry faster and stay neat.
– Lightly seal the edges to prevent chipping.
– Reapply a thin top coat every few days.
Common questions
– Short nails can rock animal prints too. Pick smaller prints or just one accent nail.
– Prints look busy if you crowd many nails. Pick 1–2 nails to feature the pattern.
Next steps
Choose your print, pick a base color, and try this on one hand first. You’ll get a bold look with minimal effort.
Animal print nails strike the perfect balance between playful and classy. Whether it’s leopard spots or zebra stripes, these nail art designs are your go-to for effortless edge and style, any season!
6. Animal Print
Editor’s Choice

5PCS Dotting Pens with 3 PCS Nail Painting Brushes, Nail Art Design Tools
7. Matte Nails
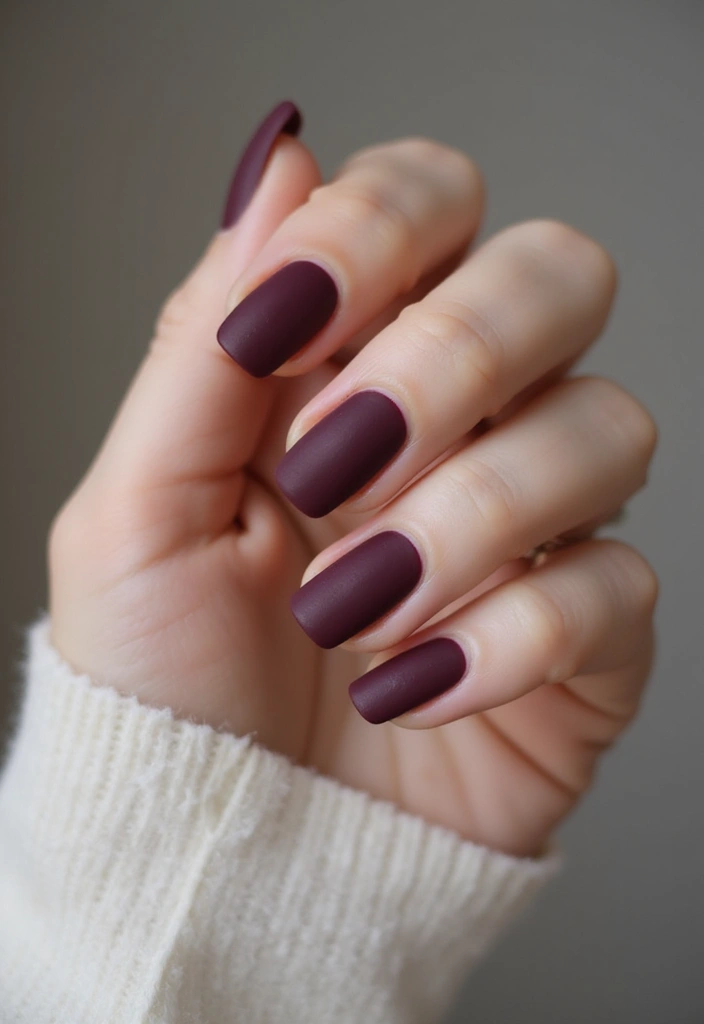
Matte nails
You want nails that look chic without glare. Matte nails give this calm, velvety finish. You can get it with matte top coats or matte polishes.
Here is why matte nails work for you:
– Prep nails by shaping and buffing until smooth.
– Use matte top coat over color or a full matte polish.
– Deep burgundy or navy adds drama.
– Soft pastels feel gentle.
– Apply with base coat, two color coats, then matte finish.
– Add a small contrast with glossy accents.
A smooth surface helps the matte finish stay even longer. If you spot rough patches, buff lightly and recoat.
Long wear tips
– Smooth surfaces stay smooth. If ridges appear, lightly buff and recoat.
– Protect nails. Use a base coat and avoid harsh removers.
– Refresh as needed. Matte looks fade after a week; top up.
Next steps
– To go bold, try dark shades; to stay soft, pick light mauve or peach.
– Change accents every few days to keep the look fresh.
Materials you’ll want
– Matte top coat or matte polish.
– A clean base coat.
– A soft buffing block.
– A gentle remover and cotton pads.
– Cuticle oil to keep moisture in.
FAQs
– Do matte nails chip easily. They chip like other finishes if you do heavy chores. Reapply a thin coat of matte top coat to refresh.
– Can I wear matte nails at events. Yes. Matte works for both casual and formal looks.
Matte nails are the chicest way to embrace elegance! With a smooth, velvety finish, they turn heads without the shine. Pair them with deep hues or soft pastels for a look that truly stands out!
7. Matte Nails
Editor’s Choice
VENALISA Matte Gel Top Coat- No Wipe Long Lasting Matte Top Coat Clear G…

COSMOO Black Matte Nail Polish, Quick Dry Nail Lacquer for Nail Art Varn…

Maryton Nail Buffer Blocks, Fine Grit 180/240 Professional Salon Quality…
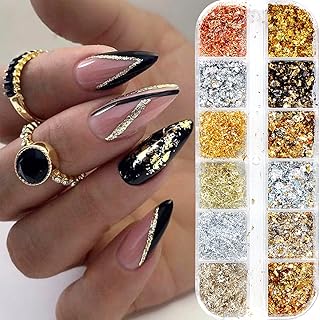
8. Foil Accents
Foil accents grab attention fast. They add shine and color with a tiny effort. The look feels like jewelry on your nails.
Here is why this trend fits you. Foil creates drama with minor work. It works on a single accent nail while others stay quiet. Black or white bases make the foil pop. You can also try nude shades for a softer style. You can swap colors to match your outfit. Foil nails can peel if you scrub hard.
Let’s break it down with simple steps.
– Quick start steps. Clean nails. Shape nails. Push back cuticles. Lightly buff the surface.
– Apply foil. Use a strong foil adhesive or nail glue. Let the glue dry to a tacky feel. Pick a foil piece with tweezers. Place it on the nail. Press from the center outward. Smooth any wrinkles gently.
– Seal and finish. Wipe away excess foil if needed. Apply a clear top coat over the foil. Cure or air-dry as required. Apply a second coat for extra shine.
Next steps. For longevity, avoid rubbing the foil after it sticks. Add top coat at the tip to protect edges. Foil nails work great for parties, weddings, or any event when you want to sparkle.
8. Foil Accents
Editor’s Choice

Beetles15ml Nail Foil Glue, Foil Transfer Gel for Nails Stickers Transfe…
9. Negative Space Nails
You want nails that stand out without shouting. Negative space nails let your natural nail peek through while color frames the design. This style keeps things chic, simple, and easy to wear anywhere.
– What negative space nails are This look uses bare areas of the nail on purpose. The colored parts frame the natural skin and create a bold contrast.
– Shape ideas Try circles, triangles, or skinny lines. Leave a curved strip or a diagonal slice of bare nail for a modern twist.
– Tools and setup Gather striping tape, a small brush, and a clear top coat. Tweezers can help place tape edges cleanly.
– How to apply Paint the areas you want colored while leaving the bare space intact. If you use tape, press it down firmly and peel before the polish dries.
– Color choices and layering Choose base colors that match your skin tone or go soft neutrals. Add a bold line or shape in a contrasting shade for impact.
– Finish and wear Seal with a clear top coat for shine and durability. Reapply every few days to prevent chips.
With this approach, your nails stay chic from day to night. Ready to try a design this week? Start with a simple shape and practice.
9. Negative Space Nails
Editor’s Choice

60 Colors Nail Striping Tape Line 2 Pieces Nail Tape Dispensers Free Tap…
Artdone 31pcs Nail Art Brushes, Nail Art Tool Set, Dotting Tools, Dust B…

Top Coat Nail Polish Clear: Quick Dry Nail Polish No Chip High Shine Lon…
10. Candy Cane Stripes
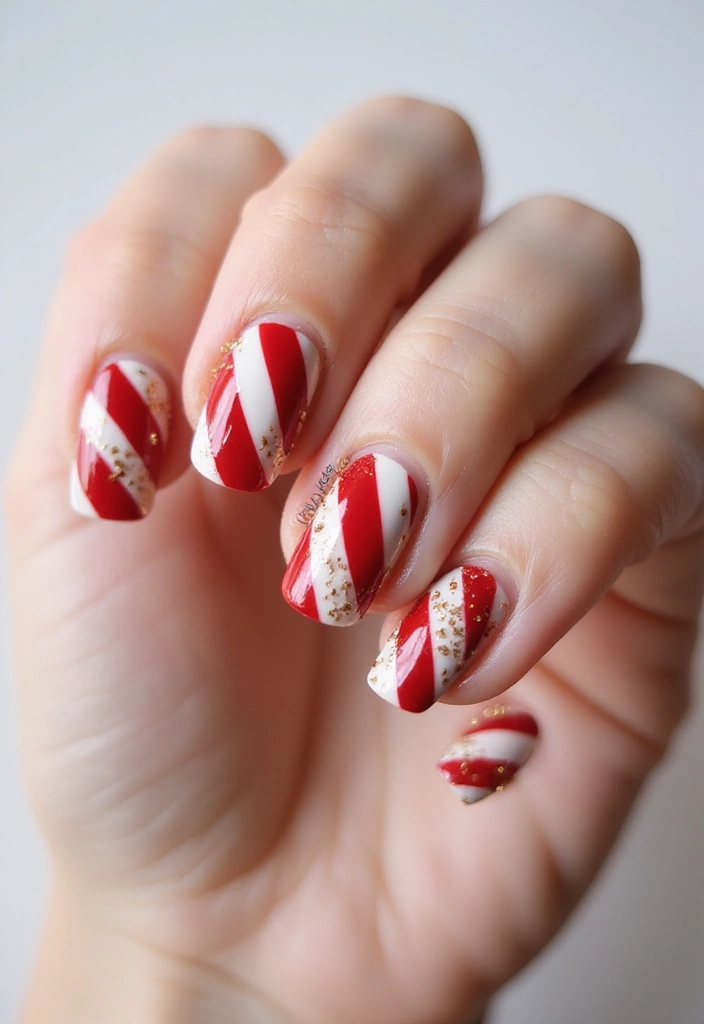
Candy Cane Stripes
You want nails that stand out during the holidays. Candy cane stripes give a festive look fast. Red and white lines feel playful and bright.
Choose how you wear them: full striped nails, or a tip or accent stripe on one nail.
How to create clean stripes:
– Start with a smooth base. White or pale pink makes the colors pop.
– Paint one color as your base. Classic: white base with red stripes. Bold twist: red base with white stripes.
– For crisp lines, apply striping tape where you want the stripes. Press down firmly, paint over with the other color, then peel off the tape.
– If you like a softer pattern, use a thin brush to freehand delicate lines. A bit of glitter on some stripes adds sparkle.
– Finish with a glossy top coat to lock colors and add shine.
Want more ideas? Try pink and silver for a non-traditional holiday look. Or place candy cane stripes on just one nail to keep it simple. A glittery top coat can catch light like twinkling lights.
Next steps: Practice on a nail wheel or a single nail before a big day. With a bit of practice, lines stay neat and nails hold up longer.
10. Candy Cane Stripes
Editor’s Choice
60 Colors Nail Striping Tape Line 2 Pieces Nail Tape Dispensers Free Tap…
Artdone 31pcs Nail Art Brushes, Nail Art Tool Set, Dotting Tools, Dust B…

beetles Gel Polish Glitter Top coat Gel Polish 15ml Reflective Silver Mi…
You might also like

11. Holographic Nails

– Holographic nails that stand out You want nails that glow in light. Holographic nails catch the light and show a rainbow shimmer. The look feels magical, yet not over the top. Perfect for parties, festivals, or a day when you want to shine.
– Two easy ways to wear the trend Full holo nails for a bold vibe. Or use one or two holographic nails as an accent for a chic twist.
– How to get the look Start with a clean base. Use a good base coat to help the holo polish stick and last longer. Apply holo polish in two thin coats. Let each coat dry. For extra depth, add a thin third coat. Finish with a top coat to seal and boost shine. If you want extra shine, holo powder can be brushed on and sealed.
– Make it last Avoid harsh removers. Wear gloves when cleaning. Reapply top coat after a few days. Keep nails hydrated with cuticle oil.
– Pairing and care Let the nails pop with simple outfits. Neutral tones make the rainbow stand out. Short nails also look stunning in holo.
– FAQs in brief Will holo look good on short nails? Yes. Can you use holo powder with gel or regular polish? Yes, as long as you seal properly.
– Next steps Choose a holo shade, prep your nails, and try the accent style or full set this weekend.
11. Holographic Nails
Editor’s Choice
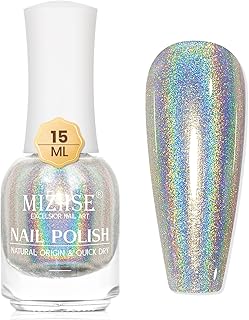
MIZHSE Holographic Nail Polish, Silver Glitter Nail Polish Air Dry Fast,…

Holographic Nail Powder Fine Rainbow Holo Unicorn Mirror Laser Effect Mu…

OPI Nail Polish Top and Base Coat, Protective High-Gloss Shine, 0.5 Fl O…
12. Color-Block Nails
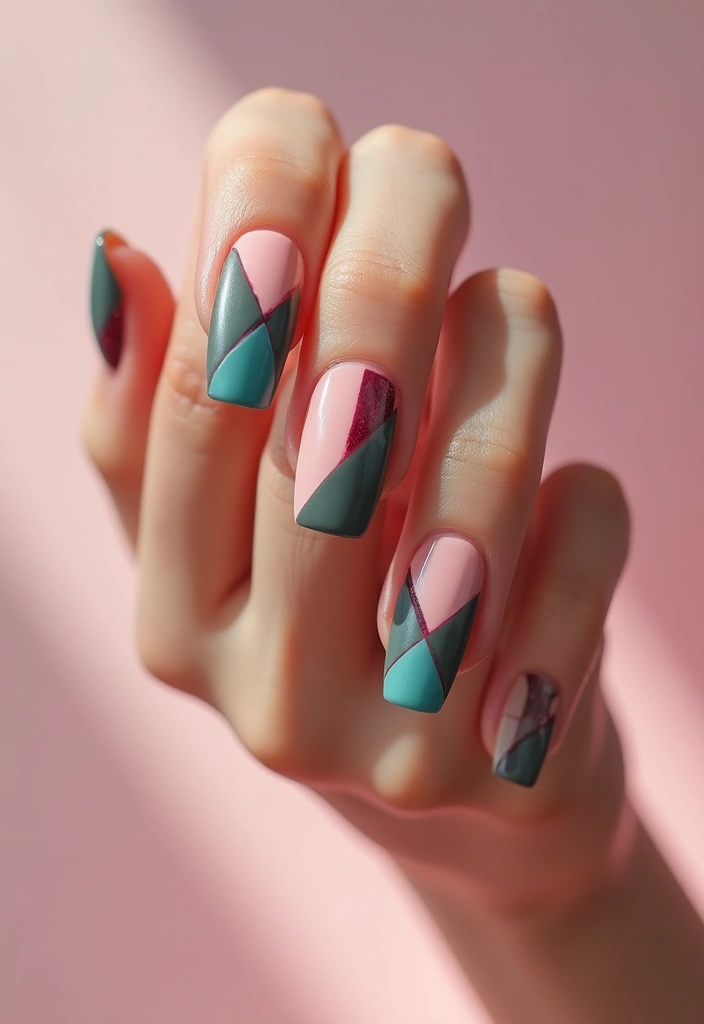
Color-block nails are a simple way to add art to your fingertips. You get clean lines and bold contrast without lots of tools. You can mix two or more colors to fit your mood or outfit. Let’s break it down so you can try it at home.
– Step 1: Prep your nails by pushing back cuticles, shaping the nails, and wiping the surface so paint will stick well.
– Step 2: Base coat and first color. Apply a clear base coat, then paint your first color and let it dry.
– Step 3: Add the lines. Place thin tape where you want the blocks, and press the edges to seal.
– Step 4: Second color. Paint the second color over the exposed area and wait a bit for it to set.
– Step 5: Reveal crisp lines. Lift the tape while the polish is still tacky to expose sharp edges. If needed, fix any thin mistakes with a tiny brush.
– Step 6: Seal the look. Finish with a top coat and let everything dry completely.
Add variety by trying different shapes and finishes. You can do vertical blocks, horizontal bands, or diagonal slices. Pastel tones feel soft in spring and summer, while bold shades pop in fall and winter. Matte and glossy finishes can live together for depth.
12. Color-Block Nails
Editor’s Choice

3pcs/Set Nail Art Tape Roll Wrap Adhesive Decoration Edge Guide Tips Des…

Beetles 2 Pcs 15ml No Wipe Gel Top Coat and Base Coat Set – Shine Finish…
Artdone 31pcs Nail Art Brushes, Nail Art Tool Set, Dotting Tools, Dust B…
13. Abstract Art Nails
If you want nails that express you, abstract art nails are a great fit. They skip strict lines and invite color, shape, and texture to tell your story. You control the vibe, and this look forgives mistakes. Your nails become tiny pieces of art you carry.
1) Tools Grab brushes, dotting tools, and a small sponge.
2) Color plan Choose two to four colors or stick to one shade.
3) Base coat Apply a light base to give shapes a clean space.
4) Shape and stroke Layer random lines, blotches, and dots to build your design.
5) Texture tricks Try a quick sponge dab or a brush flick for texture.
6) Top coat Seal with a clear top coat to lock in the art and add shine.
Here is why this works. Abstract nails look lively yet balanced if you keep the base simple and let color do the talking. Next steps: mix finishes like a matte dot with a glossy line to add interest. Clean up edges with a small brush dipped in remover for a neat look. Experiment until the pieces feel like you.
Want to try at home? Start simple and grow your style. If a design feels off, wipe it and start again. The best abstract nails show your personality, not perfection.
14. Tie-Dye Nails
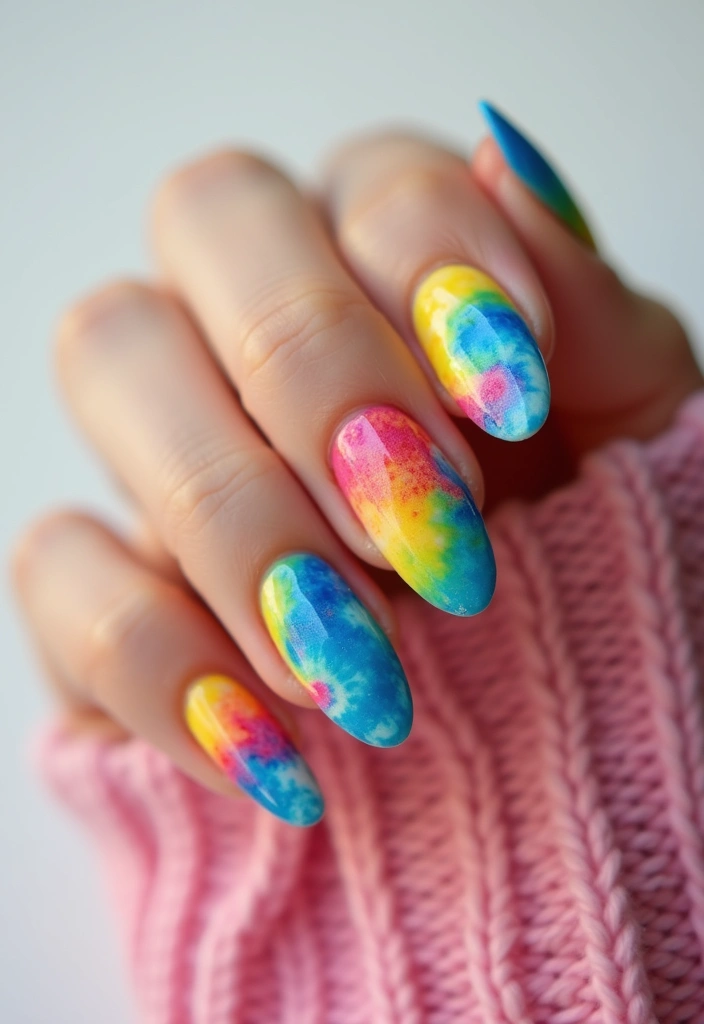
Want nails that grab attention and stay doable? Tie-dye nails let you mix bold colors into a single artful look. The result looks excited and playful without being messy.
Here is why this style works: blending colors on the nail creates movement. You control the palette, from bright neon to soft pastels.
Materials you need:
– Clear base coat
– White or light base color
– 3 to 5 nail polish shades in your chosen palette
– A small makeup sponge
– Top coat (glossy or matte)
Next, the steps:
1) Prep nails. Push back cuticles and clean the surface. A clean nail helps the colors grab hold.
2) Apply a thin base color and let it dry. White helps colors pop, but a nude works too.
3) Dab the sponge with several colors. Lightly press onto the nail in a random, circular pattern. Repeat with different colors until you like the blend.
4) Let it dry, then seal with a top coat. If you want a modern twist, use a matte top coat for a softer finish.
Tips you can try:
– Use neon shades for a festival feel or pastels for a subtler look.
– Keep the edges clean with a small brush dipped in remover.
– For best results, practice on a nail wheel first.
Here is why you should try it next: tie-dye nails are fast to update with new colors, perfect for summer or whenever you want a carefree vibe.
14. Tie-Dye Nails
Editor’s Choice

Morovan 15 Bright Color 0.27oz Air Quick Dry Nail Polish Gift Set for Women

beetles Gel Polish No Wipe Gel Top Coat – Clear Color Top Coat Gel Nail …
15. Vintage Polka Dots

Want a retro vibe on your nails without a long list of steps? Vintage polka dots give that classic look in a simple way. This design stays fresh and pairs with many outfits. You can switch colors to fit your mood or the season. Polka dot nails are easy to master.
Here is how to do it fast and clean.
– Base color: soft pastels, nude, or pale pink for a true vintage vibe.
– Tools: dotting tool, tiny brush, or nail stickers help you place dots perfectly.
– Base coats: apply two coats and let them dry fully before dot work.
– Dots: use the tool to place evenly spaced dots in a neat pattern.
– Dot size: keep the same size on every nail for a tidy look.
– Top coat: finish with a glossy top coat to seal color.
– Color ideas: pastel base with dark dots works best; bright base with white dots looks bold.
– Where to wear: tea parties, casual days, or a night out with friends.
– Care tips: reapply top coat after a week and use cuticle oil.
– Accent twist: add a single accent nail with extra dots for contrast.
Next steps: pick your colors, gather tools, and practice on one nail to nail the spacing.
15. Vintage Polka Dots
Editor’s Choice
5PCS Dotting Pens with 3 PCS Nail Painting Brushes, Nail Art Design Tools
Artdone 31pcs Nail Art Brushes, Nail Art Tool Set, Dotting Tools, Dust B…
Teenitor 50 Sheets Nail Stickers for Nail Art, Flower Nail Art Stickers …
16. Gradient Glitter Nails
If you want nails that sparkle from every angle, gradient glitter nails are a perfect pick. The glitter fades from tip to base, giving you a glow that looks polished and chic.
Here is how you can create this at home.
– What you’ll need
Base coat, your chosen solid base color, fine glitter plus optional chunky glitter, a clear gel top coat, a UV or LED lamp, a small makeup sponge, a nail file, and cotton pads.
– Step by step
1. Prep your nails. Shape them, buff the surface, and push back cuticles.
2. Paint the base color near the cuticle area and leave the tips a bit lighter, so the fade has room to form.
3. Dip a small sponge into glitter. Tap it lightly at the tip and press upward toward the base to start the fade.
4. Add more layers to deepen the gradient. Use finer glitter for a smoother look and chunkier bits for extra pop.
5. Seal with a clear gel top coat. Cure under your lamp until it’s hard and shiny.
6. Wipe away any sticky layer, then apply cuticle oil to finish.
– Tips you can use
Keep the edges sealed by brushing the top coat along the free edge. If you want extra drama, mix a dash of silver or rose gold with clear glitter.
This style works for a fancy event or a fun everyday vibe. With the right technique, your gradient glitter nails will catch light and turn heads.
16. Gradient Glitter Nails
Editor’s Choice
Beetles 2 Pcs 15ml No Wipe Gel Top Coat and Base Coat Set – Shine Finish…

Ultra Fine Glitter for Nails, Set of 45 Colors, Extra Fine Resin Glitter…

SUNUV UV LED Nail Lamp, Gel Light for Nail Polish UV Dryer with 3 Timers…
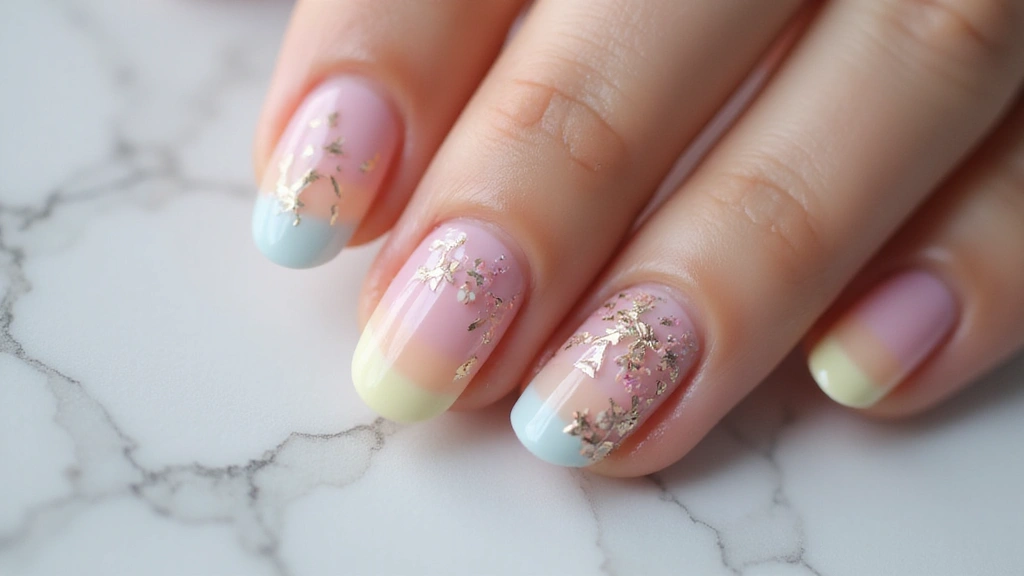
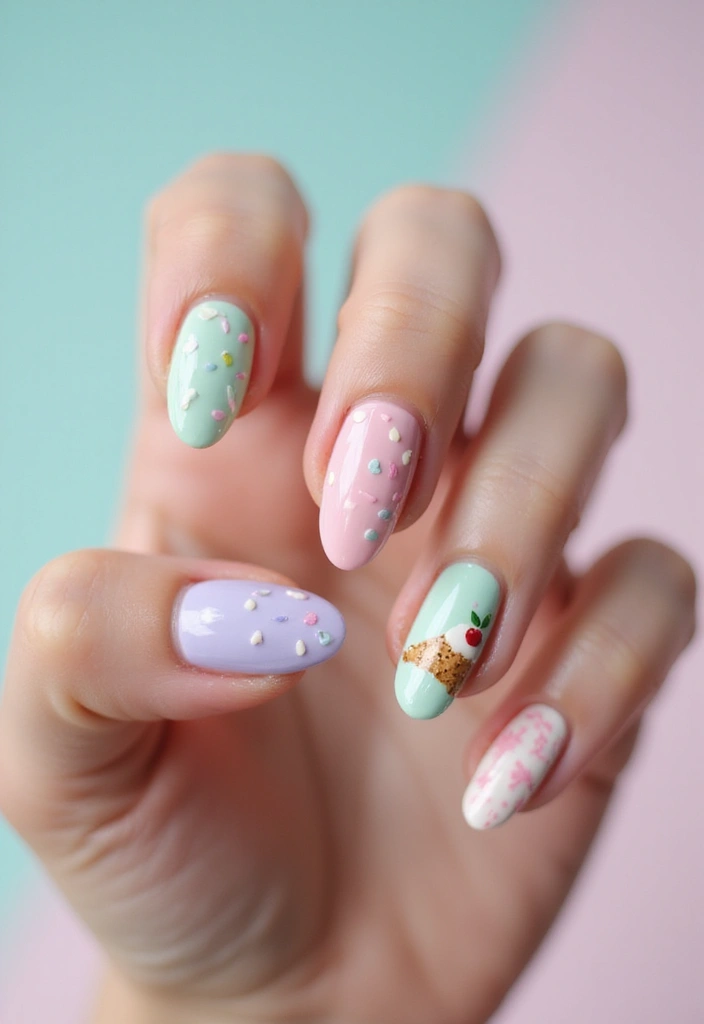
17. Sweet Pastels
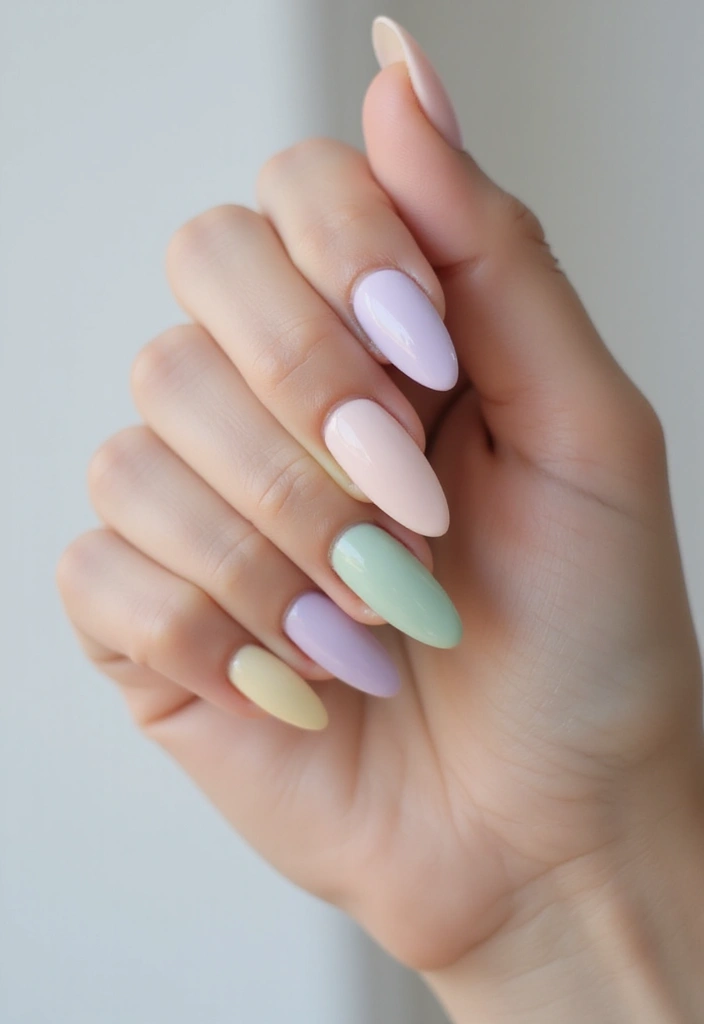
Sweet Pastels
You want nails that feel soft and friendly. Sweet pastel nails in soft pinks, lavenders, mint, or baby blue give that calm look you can wear every day.
Choose colors like these. Pick one for a solid pastel nail or mix two colors on a few nails for a gentle, playful vibe.
Pastel nail colors shine in spring and summer, but they can brighten any outfit year round. They pair well with light fabrics and simple jewelry.
Finish matters. A matte top coat adds a muted feel to pastel nails. A glossy top coat keeps every shade bright and clean.
Here is why this style works: pastel tones make your hands look neat and well cared for, without shouting for attention. They also work on short nails and long nails the same way.
Next steps to get it right:
– Prep nails: clean, file, and push back cuticles.
– Apply a thin base coat to protect the nail.
– Paint with two light coats, letting each dry before the next.
– Cap the tips and add your chosen top coat.
Be honest about wear. Pastel colors can show chips sooner. If you see wear, touch up with a thin layer or switch to a solid accent nail to keep the look fresh.
17. Sweet Pastels
Editor’s Choice
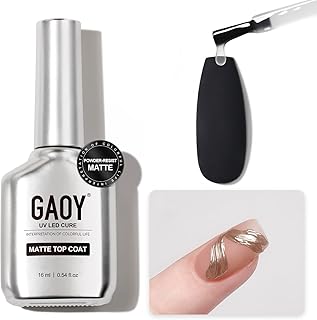
GAOY Matte Gel Top Coat, 16ml Powder-Resist Matte Finish for Detail Chro…
beetles Gel Polish No Wipe Gel Top Coat – Clear Color Top Coat Gel Nail …

Beetles Pastel Nail Polish Set -6 Colors Pink Blue Yellow Nude Pink Purp…
18. Retro Stripes
Retro Stripes
Want nails that catch the eye but stay easy to wear? Retro stripes nails fit that bill. This look uses stripes of different widths, colors, and directions. You can go classic with black and white, or pick bright hues for a playful vibe. Mix diagonal and vertical lines for an artful touch. It can move from day to night with a simple swap of colors or accents.
What you’ll need
– base coat and top coat
– one or two nail colors for the stripes
– striping tape or nail art tape
– a small brush or dot tool
– optional dots or glitter for extra flair
How to do it in simple steps
– Prep nails and apply a base coat. Let it dry so edges stay neat.
– Paint your base color and wait until it’s fully dry.
– Place striping tape to map out the stripes you want. Press the edges down so they don’t lift.
– Paint stripes over the tape with a steady hand. Use a fine brush for thin lines.
– Peel the tape away while the polish is still wet. If any line edge looks off, touch it with a tiny brush.
– Add dots or a splash of glitter if you like. Finish with a clear top coat to seal the design.
Tips to make it last
– Work in thin layers and let each layer dry.
– Clean edges with a small brush dipped in remover for a crisp look.
– Keep a quick dry top coat on hand for fixes on the go.
Next steps: try two colors to start, then mix in black or white lines for extra contrast. Retro stripes nails are your easy path to a stylish, eye-catching manicure.
18. Retro Stripes
Editor’s Choice

Nail Art Striping Tape Lines Kit 36 pcs 1mm 2mm 3mm Nail Tape Strips for…
Artdone 31pcs Nail Art Brushes, Nail Art Tool Set, Dotting Tools, Dust B…

Sally Hansen Insta-Dri®, Clear Top Coat, Quick Dry, Long Lasting, Streak…
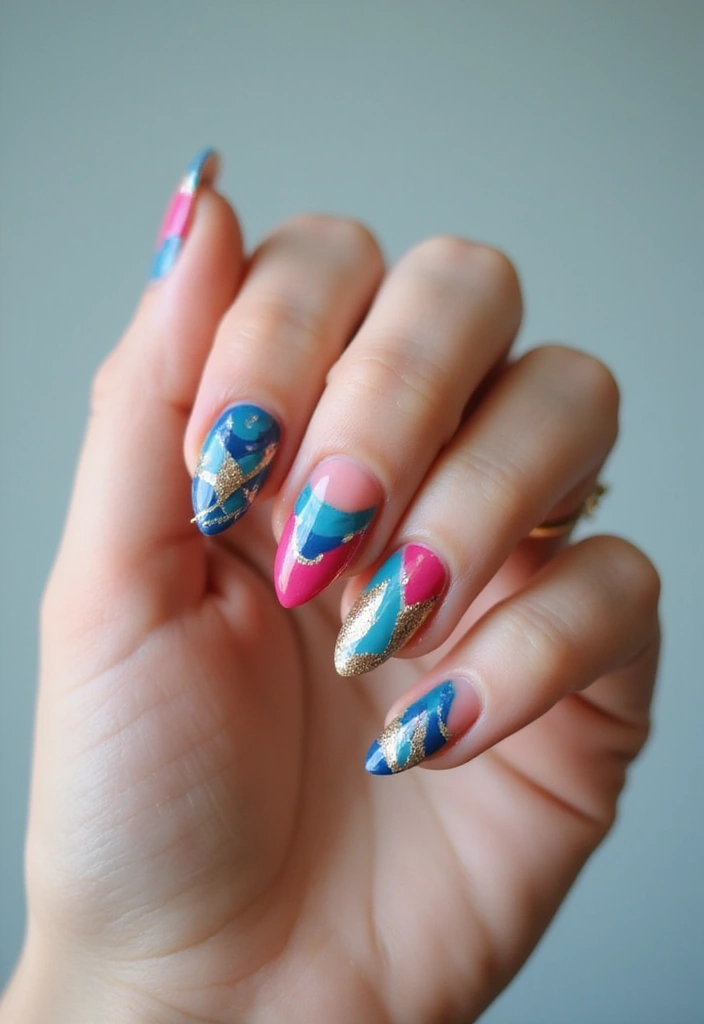
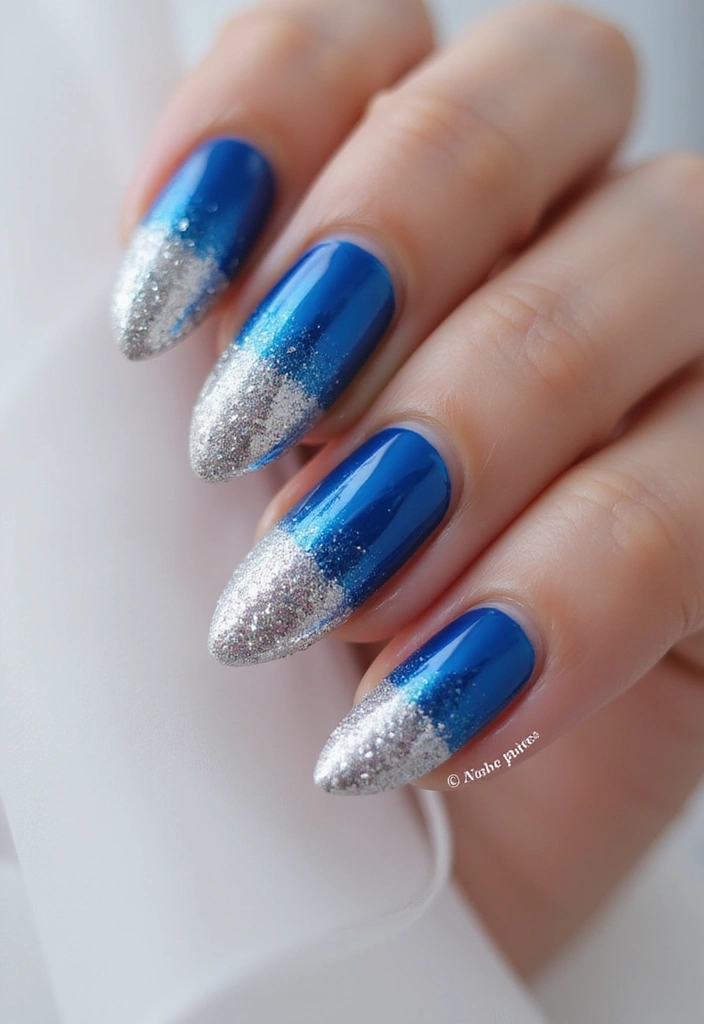
19. Blue & Gold Elegance
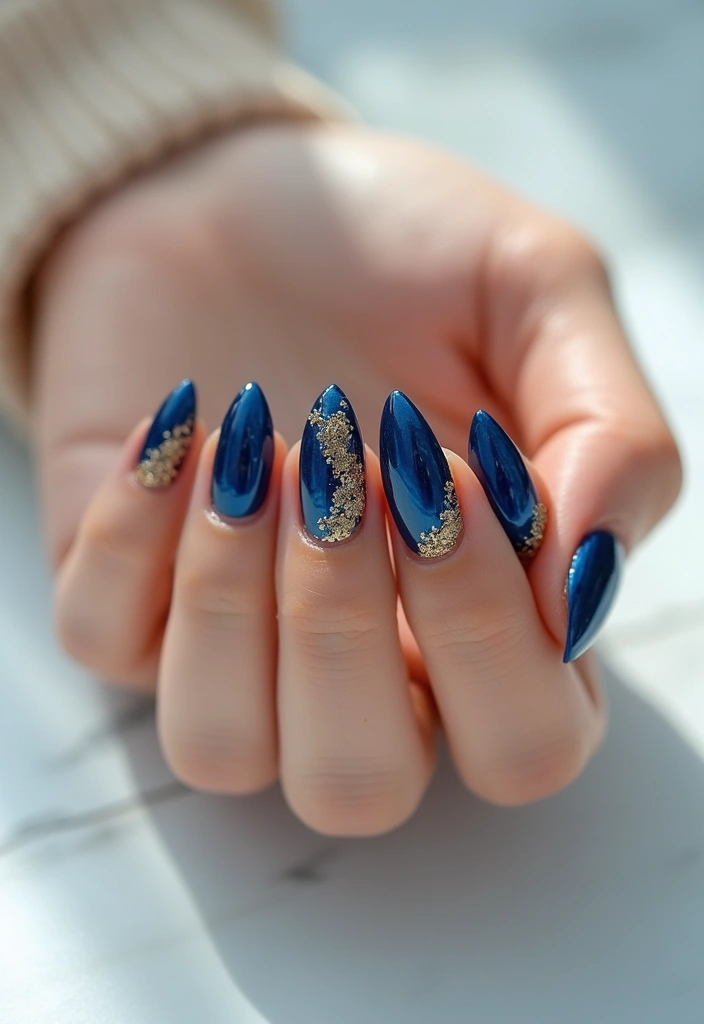
Blue & Gold Elegance is a classic look that never fades. You get a royal vibe with blue and gold that fits any mood, from work to party. Start with a deep royal blue or a bright sky blue as your base. Then add gold elements to steal the show. Gold foil flakes, tiny decals, or thin gold lines work well. If you want extra sparkle, dust a touch of fine glitter on top.
Here is how to do it.
– Prep your nails with a strong base coat to stop staining.
– Paint a solid blue coat and let it dry completely.
– Apply gold foil or decals. Place small pieces to frame each nail or create a bold accent on one finger.
– Add glitter sparingly for just a touch of shine.
– Finish with a shiny top coat to seal the design.
Tips to make it last. Use cuticle oil after the polish dries. For crisper lines, use tape or nail vinyls when you add the gold.
What you gain. A look that feels rich without shouting. It pairs well with metallic jewelry and black outfits, yet it also pops with bright colors. It works for everyday wear and for special events.
Keep expectations real. The gold may wear after a week with heavy chores. A strong top coat helps, and quick touch-ups can fix wear fast.
Elevate your style with Blue & Gold Elegance! A touch of gold on a royal blue base is all you need to turn heads, whether at work or play. Shine bright, and let your nails do the talking!
19. Blue & Gold Elegance
Editor’s Choice

Sally Hansen Double Duty™, Base and Top Coat, Quick Dry, Long Lasting, S…
Holographic Nail Glitter Gold Foils for Kit, 12 Grids Sparkly Ultra-Thin…
3pcs/Set Nail Art Tape Roll Wrap Adhesive Decoration Edge Guide Tips Des…
20. Crystal Nails
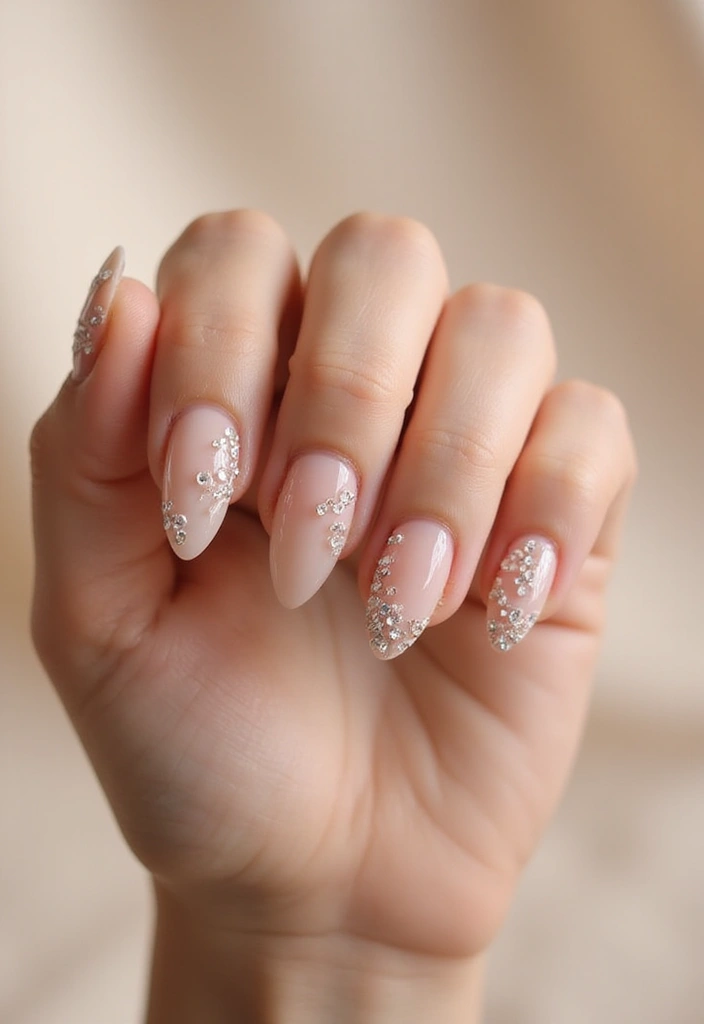
Crystal nails are all about glow. They use small rhinestones or crystals on your nails to catch light. You can add them to one nail or go all out on every finger.
Here is why they work. The gems sparkle in photos and real life. A nude or clear base makes the stones pop. Mix with bold colors for a dramatic finish.
What you need is simple. Crystals, gel glue or nail adhesive, a top coat, and a compatible base color. A small tool to pick up stones, and steady hands.
Next steps:
– Prep nails. File smooth, push back cuticles, clean well.
– Paint a thin base. Let it dry.
– Place glue where stones will sit.
– Pick up crystals and set them carefully.
– Seal with a top coat or gel. Cure if needed.
– Add a final clear coat and cure again.
Care tips. Do not pick at stones. Reapply a light top coat to refresh shine. Remove crystals with foil if you want to switch looks.
Best for weddings, parties, or any event where you want to shine.
20. Crystal Nails
Editor’s Choice

Makartt Nail Rhinestone Glue: Super Strong Gel Glue for Nail Art Decorat…

UNA GELLA Solid Nail Glue Gel 15ml Lamp Curing Needed Solid Soak Off U V…
Sally Hansen Double Duty™, Base and Top Coat, Quick Dry, Long Lasting, S…
21. Space Nails
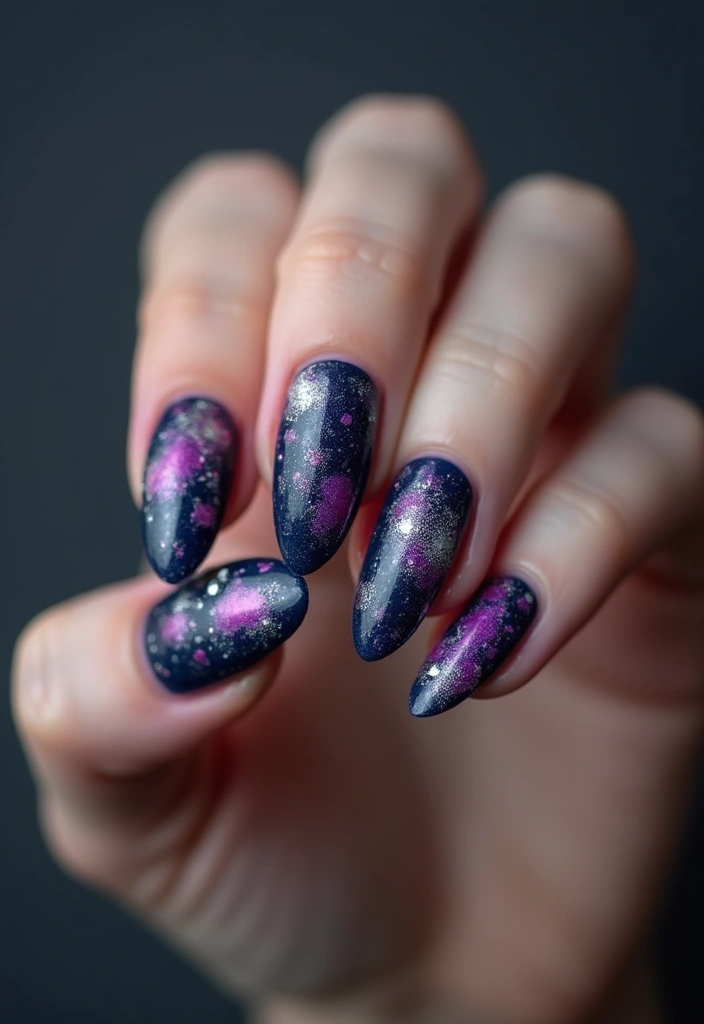
Space nails let you wear a tiny universe on your fingertips. A dark base with bright specks makes stars pop. You can blend colors with a sponge and add white dots for stars. It looks striking and is doable at home.
Here is why space nails work
This style fits many outfits. It photographs well. It can be simple or deep, depending on how you layer colors. It also lets you place tiny planets on one nail for a playful twist.
Steps to get the look
1) Prep your nails by filing smooth and pushing back cuticles.
2) Paint a base in black or deep navy and let it dry completely.
3) Dab color splashes with a sponge on small patches of blue, purple, teal, and pink.
4) Add stars with white polish using a small brush or dotting tool in tiny dots.
5) Add a subtle shimmer or a faint line to hint at distant dust.
6) Seal with a matte or glossy top coat and let it dry thoroughly.
Next steps
Clean edges with a brush dipped in remover. If you want longer wear, add a second coat after a couple days. Try a full galaxy on all nails, or put one space nail as your accent.
21. Space Nails
Editor’s Choice
5PCS Dotting Pens with 3 PCS Nail Painting Brushes, Nail Art Design Tools
50PCS Chrome Nail Powder Applicator Brushes, Disposable Eyeshadow Applic…
Morovan 15 Bright Color 0.27oz Air Quick Dry Nail Polish Gift Set for Women
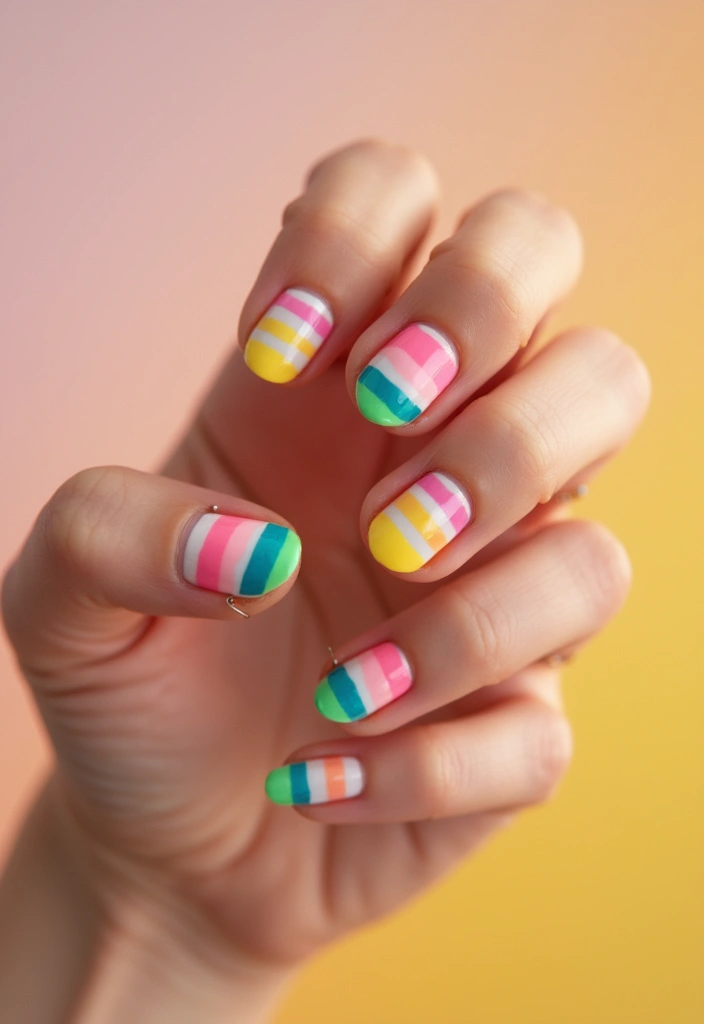
22. Rainbow Nails
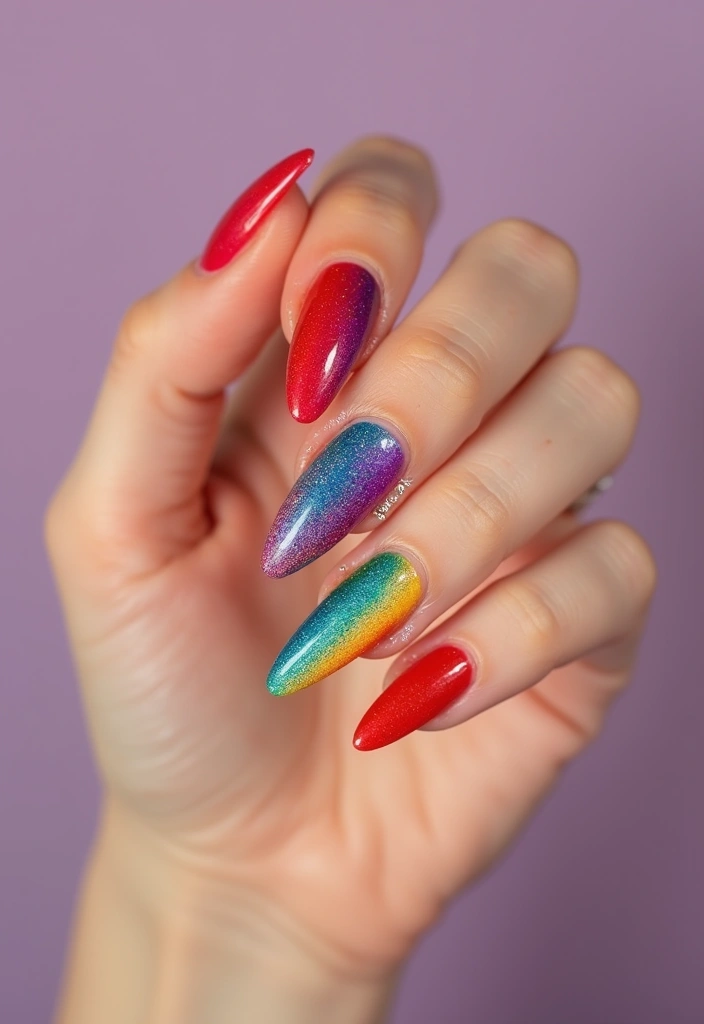
Rainbow Nails
If you want color that pops, rainbow nails are a great pick. You can paint a full rainbow on every nail or mix colors on different nails for a playful look. It’s perfect for summer parties, concerts, or days you want your hands to feel sunny.
Here is how to make it simple and neat:
– Start with clean nails and a clear base coat.
– Pick 4 to 6 colors that go well together.
– Decide your pattern: a full rainbow on each nail or one rainbow arc on an accent nail.
– Apply color with a fine nail brush for crisp lines, or use a small sponge for a soft blend.
– Finish with a clear top coat to seal and shine.
Tips to help it last:
– Let each layer dry before you add the next.
– Cap the tips so colors don’t chip easily.
– If you go outside the line, fix it with a tiny brush dipped in remover.
Next steps: try a gentle gradient rainbow on two nails, or choose bold primaries for a retro vibe. You can add white stripes between colors for a clean, candy look. Have fun and switch up the pattern to match your mood.
22. Rainbow Nails
Editor’s Choice
Artdone 31pcs Nail Art Brushes, Nail Art Tool Set, Dotting Tools, Dust B…

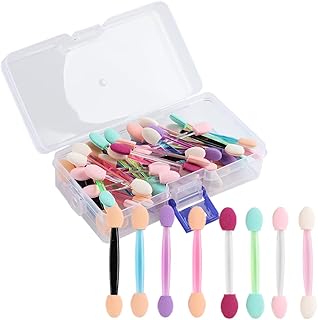
Soft Sponges with Grabbing Pen for Ombre and Aura Nail Art with Brush, P…
Top Coat Nail Polish Clear: Quick Dry Nail Polish No Chip High Shine Lon…
23. Fall Leaves
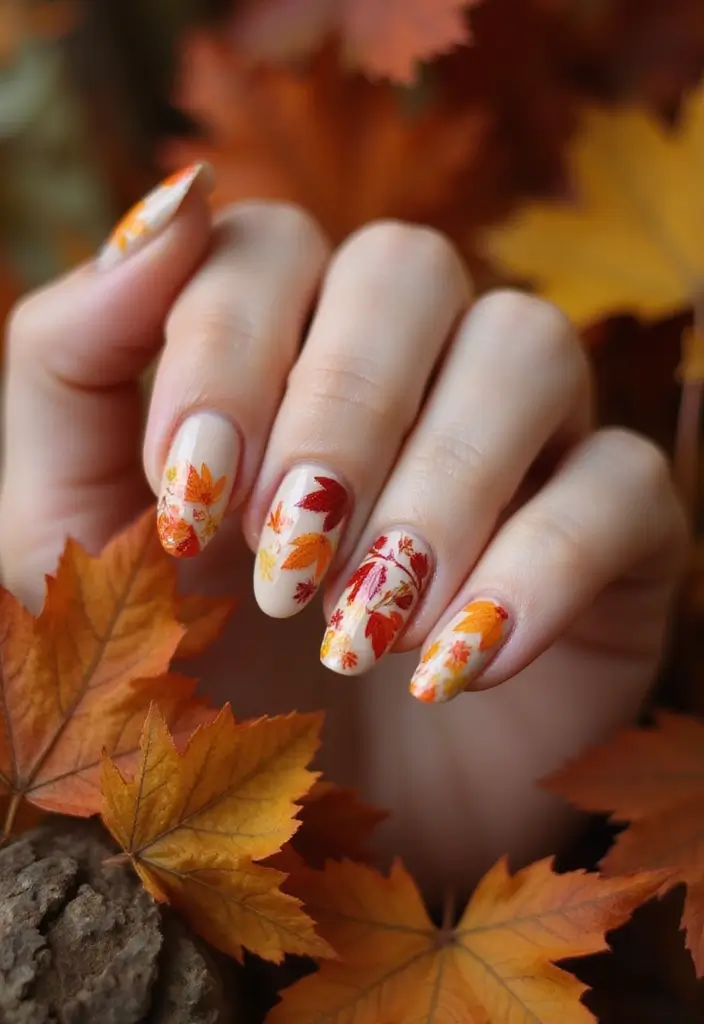
You want nails that fit the season. Fall leaves nail art does that with style. Warm oranges, reds, and yellows bloom on a soft base. It feels cozy and chic at the same time.
What you’ll need
– Neutral base shade (cream, taupe, or pale gray)
– Leaf colors: orange, red, and yellow
– Fine brush or leaf sticker set
– Brown for veins or gold for accents
– Matte or glossy top coat
Step-by-step how to
1. Clean nails and dry them well. Apply two coats of your neutral base and let them dry.
2. Create leaves. Use a fine brush to paint simple leaf shapes, or press on leaf stickers. Start with a curved teardrop shape.
3. Add veins. Use a thin brown line to sketch a light leaf vein.
4. Add accents. A touch of gold near the stem or leaf tips pops nicely.
5. Seal the look. Apply a top coat. Matte finish gives a rustic vibe; glossy finish makes colors brighter.
Tips for longer wear
– Let each layer dry fully.
– Be careful near the cuticle to avoid lifting.
– Use a quick-dry top coat if you’re short on time.
Why this works
Leaf shapes mirror autumn. The warm palette keeps it versatile for day or night. It looks good on short nails and on longer ones too. With proper sealing, the design lasts well and still looks fresh.
23. Fall Leaves
Editor’s Choice
Artdone 31pcs Nail Art Brushes, Nail Art Tool Set, Dotting Tools, Dust B…

8 Sheets Autumn Maple Leaves Nail Stickers for Thanksgiving Pumpkins, Fa…
Sally Hansen Insta-Dri®, Clear Top Coat, Quick Dry, Long Lasting, Streak…
24. Ice Cream Nails
Ice Cream Nails are a playful way to say summer is here. You get soft colors, cute shapes, and a touch of whimsy. This look works on short or medium nails and makes your hands feel sunny.
Here is how to do it:
– Prep nails with a clean base. Push back cuticles, file edges, and apply a base coat.
– Paint each nail with a pastel shade. Try mint, pink, lavender, or baby blue. Apply two thin coats and let them dry.
– Create an ice cream scoop. On a couple of nails, draw a curved half circle near the tip using white or a lighter shade. Fill it in softly so it looks like a scoop.
– Add toppings. Dot tiny colors for sprinkles with a fine brush or use small decals.
– Add a cherry. A small red dot at the tip or top of the scoop gives the finish a fun sweet touch.
– Seal with gloss. A top coat adds shine and helps the design last.
Next steps: reapply top coat every few days, and pair with light outfits for an ice cream vibe. This style is great for summer outings, birthday parties, or when you want a playful touch on your nails.
24. Ice Cream Nails
Editor’s Choice
Beetles Pastel Nail Polish Set -6 Colors Pink Blue Yellow Nude Pink Purp…
Artdone 31pcs Nail Art Brushes, Nail Art Tool Set, Dotting Tools, Dust B…
Teenitor 50 Sheets Nail Stickers for Nail Art, Flower Nail Art Stickers …
25. Metallic Nails
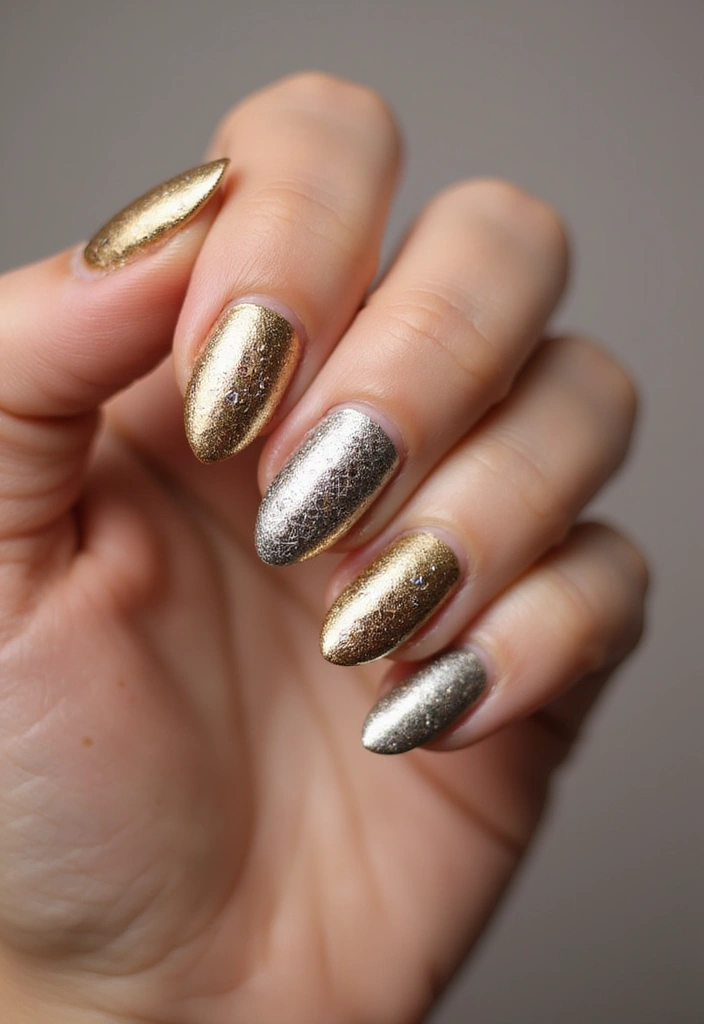
If you want nails that grab attention fast, metallic nails fit the bill. They shine in sun and indoor light. The finishes look bright and glossy. Gold, silver, and rose gold are popular choices.
What metallic nails do They add a glam touch you can see from across the room. Wear them on all nails for a bold look, or on a few for a statement. A full metal mani feels dramatic; a few metallic nails keep it chic.
Ways to wear them For a big glow, go all out with a full metallic manicure. For daily wear, pick one accent nail or a small cluster of chrome tips. You can mix textures too, like mirror metal on a couple nails and plain polish on the rest.
Here is why they work: metallic colors pair with most outfits. They lift neutrals and add sparkle to dark tones. They hide tiny chips better than plain polish.
Next steps, applying at home:
– Prep nails with a clean base coat to block stains.
– Apply thin coats of metallic polish; two or three may be needed.
– Seal with a top coat for shine and protection.
– Let each coat dry fully to avoid fingerprints.
Care and styling Reapply top coat every few days. Wash hands gently. Avoid harsh scrubs that dull shine. For chips, touch up quickly with a small brush and polish.
Outfit ideas Pair with neutrals so nails pop. For a party, black or white outfits work well. Rose gold looks great with creams and beiges.
Now you know how to get metallic nails that turn heads in minutes.
Dare to shine! Metallic nails are your go-to for an instant glam upgrade. Whether you go full-on sparkle or just a hint, these nail art designs will have heads turning in no time!
25. Metallic Nails
Editor’s Choice
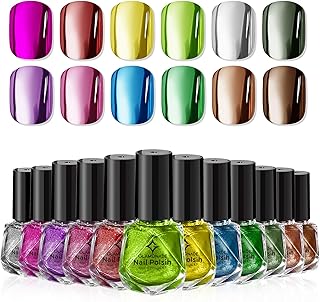
Metallic Nail Polish Set Fingernail: Chrome Mirror Holographic Nail Poli…
Sally Hansen Double Duty™, Base and Top Coat, Quick Dry, Long Lasting, S…
Artdone 31pcs Nail Art Brushes, Nail Art Tool Set, Dotting Tools, Dust B…
Conclusion
Nail art is a fantastic way to showcase your personality and creativity.
With these 25 designs, there’s no shortage of inspiration to keep your nails looking fabulous and trendy! Whether you’re drawn to classic styles or more avant-garde techniques, there’s something for everyone in this list.
So why wait? Grab your favorite nail polishes and get started on your next masterpiece!
Note: We aim to provide accurate product links, but some may occasionally expire or become unavailable. If this happens, please search directly on Amazon for the product or a suitable alternative.
This post contains Amazon affiliate links, meaning I may earn a small commission if you purchase through my links, at no extra cost to you.
Frequently Asked Questions
What are some nail art designs that are trendy right now?
If you’re looking to stay on top of the latest trends, you might want to try designs like Neon Ombre, Marble Effect, or Floral Nail Art. These styles are not only eye-catching but also versatile enough to suit any occasion. Whether you want a bold statement or a subtle touch, these trendy designs are just what you need to make a splash!
How can I create unique nail art designs at home?
Creating unique nail art at home is easier than you think! Start with a basic manicure, then explore techniques like stamping, negative space, or even tie-dye effects with nail polish. YouTube tutorials can be incredibly helpful, and don’t be afraid to experiment with colors and patterns to showcase your personal style!
What materials do I need for nail art designs?
To get started with nail art designs, you’ll need a few essentials: base coat, top coat, and a selection of nail polishes in various colors. Consider adding tools like dotting tools, striping brushes, and nail stamps for more intricate designs. With these materials, you’ll be ready to create stunning nail art that turns heads!
How long do nail art designs typically last?
The longevity of your nail art designs can vary based on a few factors, including the type of polish used and your daily activities. Generally, nail art can last anywhere from 3 to 10 days. To extend the life of your designs, apply a quality top coat and avoid exposing your nails to harsh chemicals. Regular touch-ups can also keep your nails looking fresh and fabulous!
Can I mix different nail art designs on one hand?
Absolutely! Mixing different nail art designs on one hand is a fun way to showcase your creativity. You can choose to do one accent nail with a bold design like glitter glam while keeping the rest simple with matte nails or pastel colors. This playful approach allows you to express your personality and stand out in a crowd!
Related Topics
nail art designs
trendy nails
unique styles
easy nail art
seasonal designs
glitter nails
floral nail art
matte finishes
beginner friendly
bold colors
holiday nails
geometric patterns
")


")

Wow, those nail art designs are incredible! I especially love the floral ones; they remind me of the time I tried to paint my nails like a garden and ended up with a messy rainbow instead. Have you ever tried any of these designs yourself?
These nail art ideas are so fun! I once tried to do a glitter design, but I ended up looking like a disco ball instead. Why did the nail polish break up with its brush? It couldn’t handle the pressure!
I had no idea there were so many nail art styles out there! Did you know that nail art dates back to ancient Egypt? They used to dye their nails with henna and other natural colors. How cool is that?