
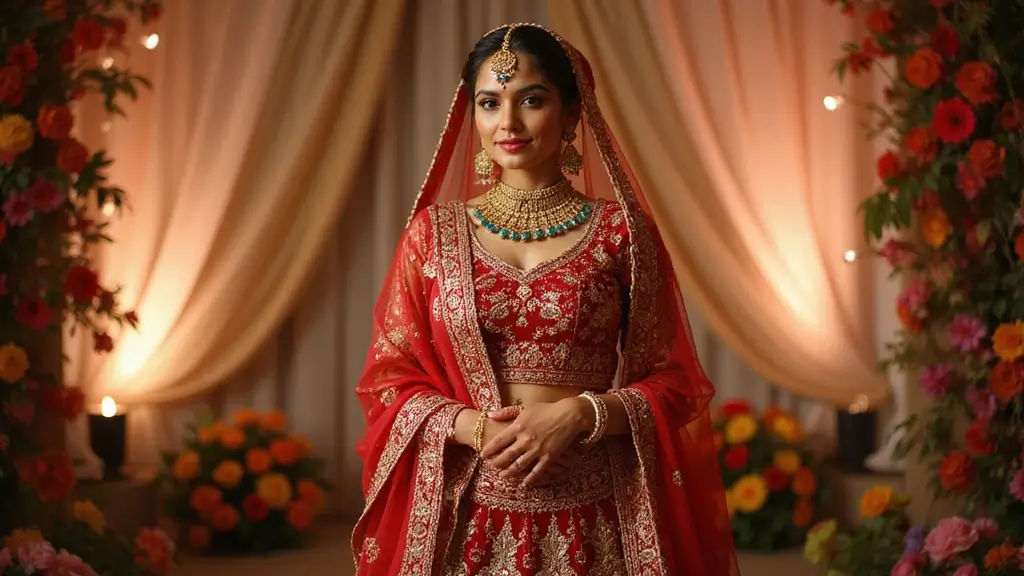
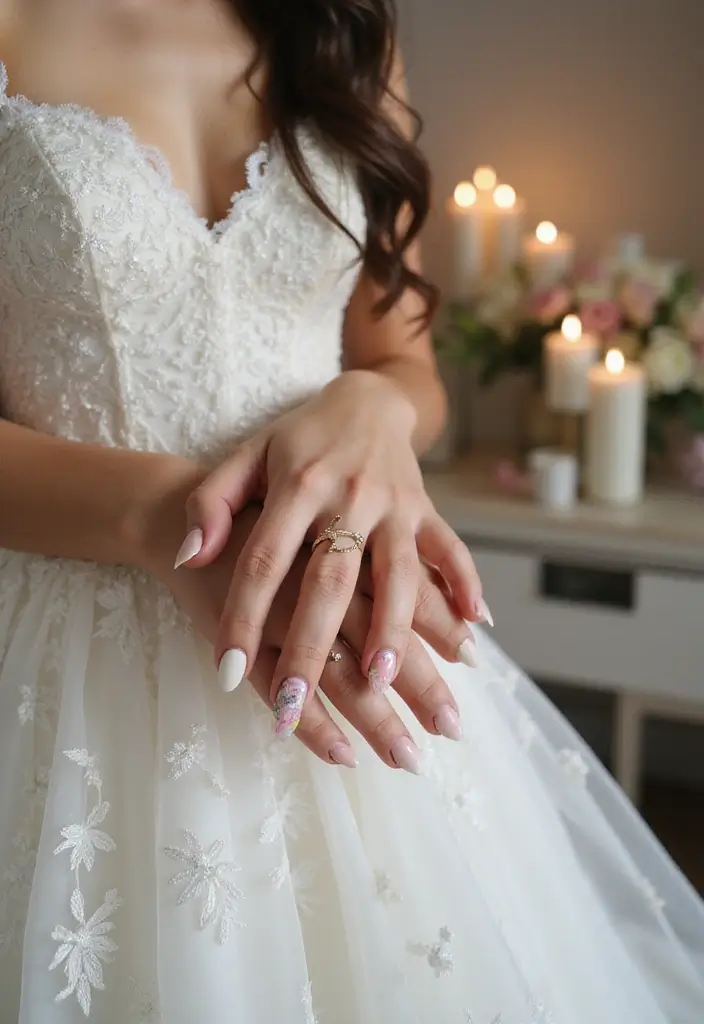
I put this together because brides tell me they want nail art that truly complements their Indian wedding look. They want nails that match the lehenga, the jewelry, and even the mehndi, not just a pretty color. It can feel like a lot to pick the right design.
If you’re a bride-to-be, a bridesmaid, or someone who loves Indian wedding style, this one’s for you. You care about photos that pop, outfits that shine, and nails that stay flawless from mehndi to dancing.
I’ve gathered a curated set of 30 stunning Indian wedding nail art designs you should see. From mehndi-inspired patterns to crystal-dusted accents, these options cover red and gold classics, pastel glam, and luxe metallics.
Here is what you’ll get. Each design comes with tips on color pairings, finishes, and easy ways to recreate at home or with your nail tech. You’ll find ideas that work with both long and short nails, and finishes that range from glossy to soft matte.
Think about your outfit, the time of day, and how long you want your nails to be. I include practical ideas like pairing a deep red with gold foil for a lehenga, or a soft champagne base with tiny pearl accents for a cream sari. You’ll also see how to mix textures, like a smooth gel base with delicate foil or tiny stones for a touch of luxe.
Not every design fits every nail, and some patterns look best on longer nails. The guide includes easy options that work on shorter nails too, so you don’t have to wait for a perfect length to dress up your hands.
Here is why this matters. Your nails catch light in photos and stay in frame from the first mehndi moment to the last dance. Next steps are simple: start by narrowing your outfit color and jewelry so you know which designs to focus on. Then dive in and find your perfect match among these nail ideas.
Contents
- 1. Floral Elegance
- 2. Traditional Mehndi Patterns
- 3. Glitter Glam
- 4. Pastel Dreams
- 5. Artistic Marble Effect
- 6. Bold Geometric Styles
- 7. Jewel-Toned Glam
- 8. Minimalist Chic
- 9. Colorful French Tips
- 10. Artistic Watercolor
- 11. Traditional Red and Gold
- 12. Shimmering Metallics
- 13. Seasonal Inspirations
- 14. Vintage Charm
- 15. Fun and Quirky
- 16. Rhinestone Accents
- 17. Ombre Shades
- 18. Artistic Illustrations
- 19. Nature-Inspired Designs
- 20. Hand-Painted Symbols
- 21. Heartfelt Designs
- 22. Textured Touches
- 23. Artistic Doodles
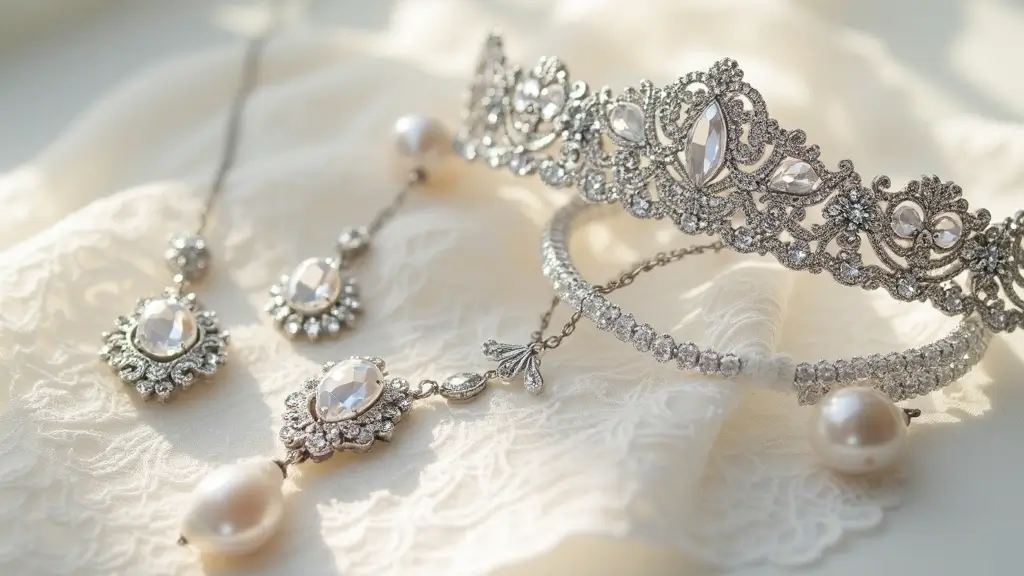
- 24. Lace and Pearls
- 25. Themed Nail Art
- 26. Ethereal Glaze
- 27. Statement Nails
- 28. Subtle Beige and Gold
- 29. Custom Art Designs
- 30. Seasonal Color Play
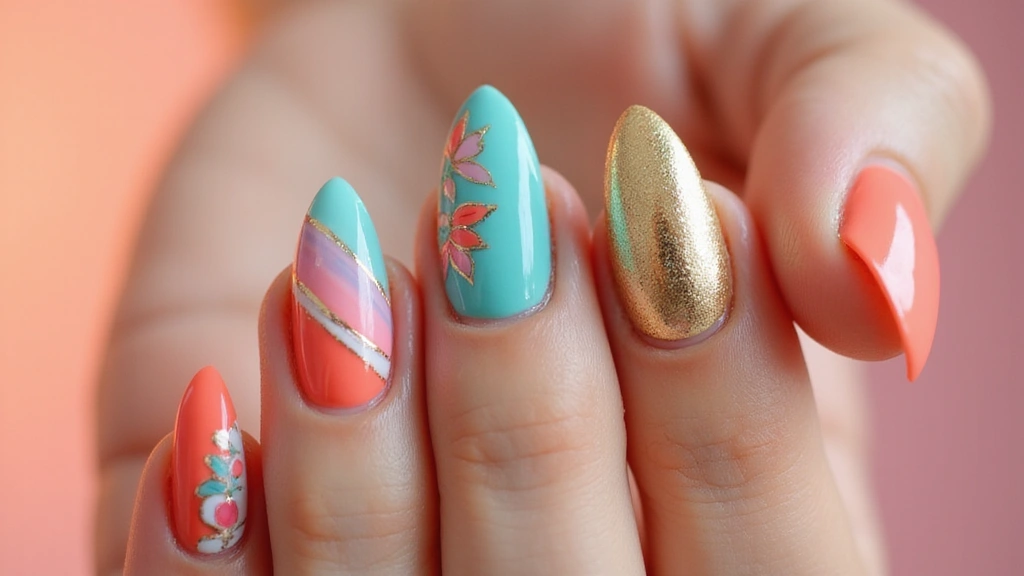
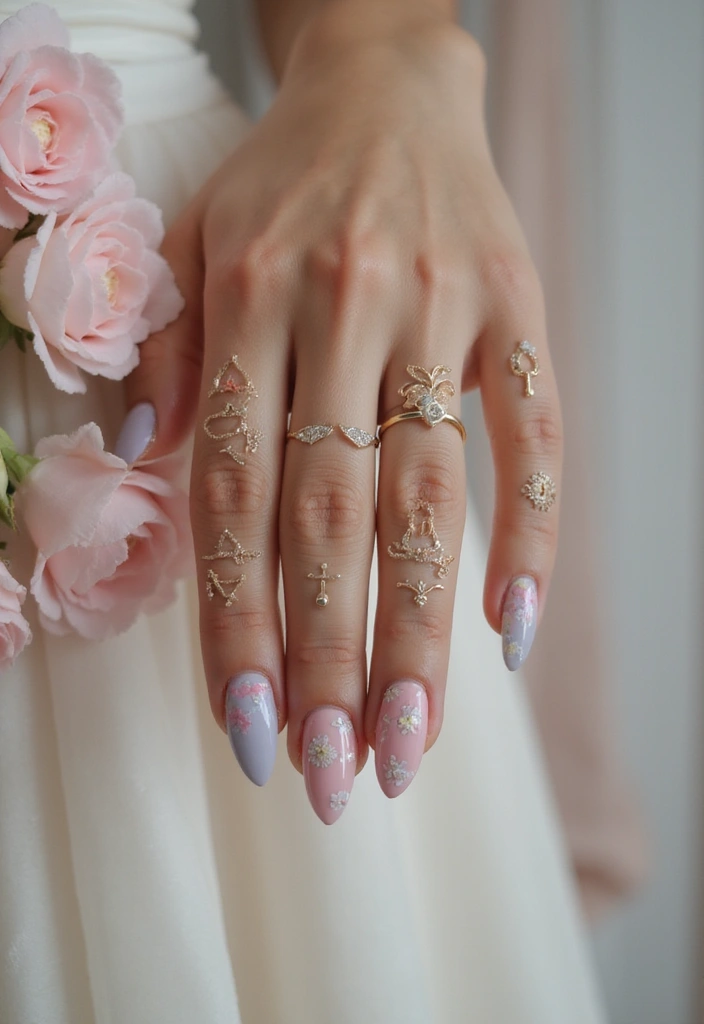
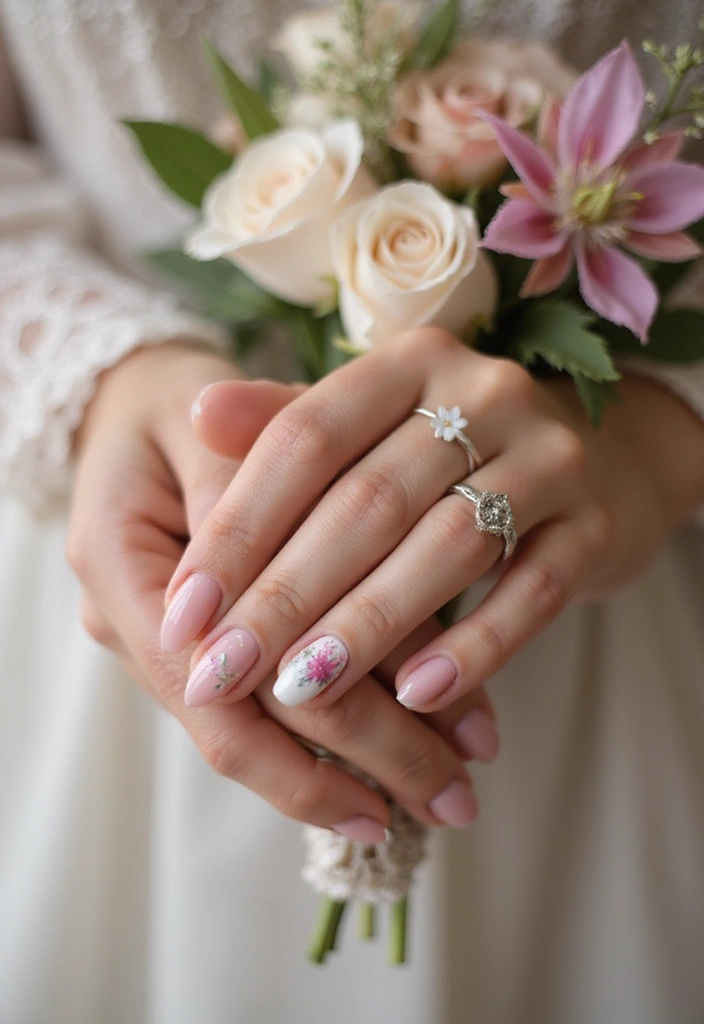
1. Floral Elegance
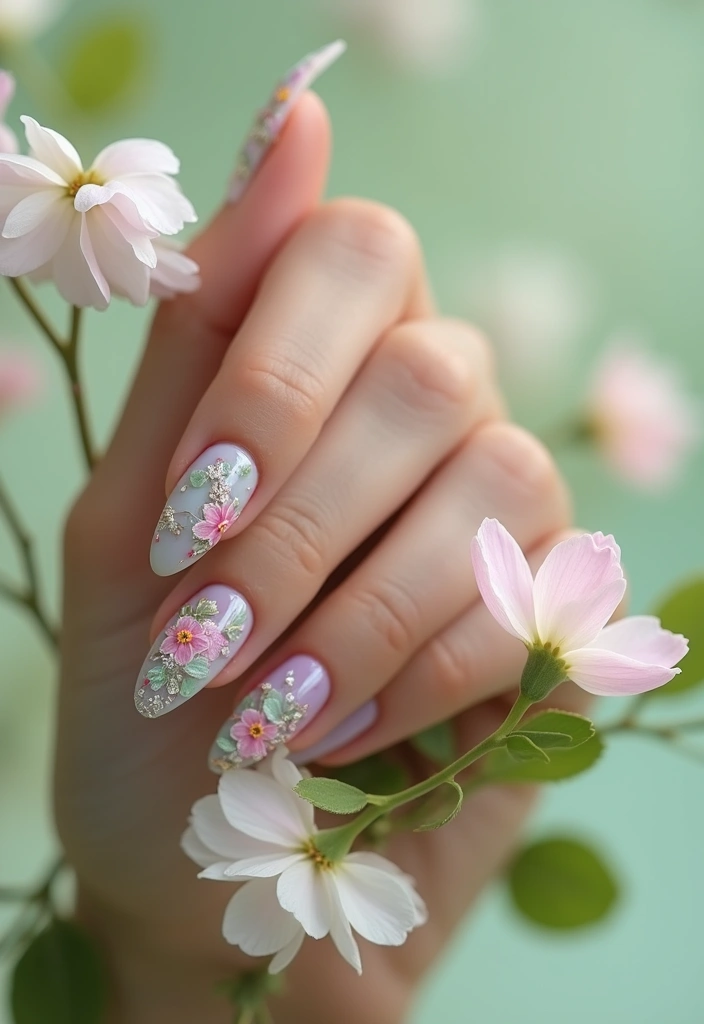
Floral Elegance
You want nails that feel soft and timeless for your wedding. Floral nail art helps you get that look.
Start with a nude or light pink base. It makes tiny blooms pop later. Paint small, delicate flowers in white or gold. Use a fine brush or a dotting tool.
Add a few green leaves to give the design life. Keep the shapes simple and neat. Finish with a glossy top coat to seal in color and shine.
If you love a little drama, add 3D accents. A tiny crystal or charm can sit in the center of a bloom or along a leaf edge.
Here is a quick, handy how-to you can follow:
1. Prep nails: shape, lightly buff, and push back cuticles.
2. Apply a thin base coat and let it dry.
3. Paint flowers with a few strokes. Add leaves.
4. Place any 3D pieces, then seal with top coat.
Tips: match the colors to your wedding palette. Nude, blush, ivory, and gold work well with most gowns.
Care note: avoid long soaking after the ceremony and reapply top coat after a week for best shine.
You can wear this look with any bridal outfit. It photographs beautifully too.
1. Floral Elegance
Editor’s Choice

Artdone 31pcs Nail Art Brushes, Nail Art Tool Set, Dotting Tools, Dust B…

FANDAMEI Nail Charms, Nail Rhinestones Kit with 8 Boxes of Nail Gems, 3D…

beetles Gel Polish No Wipe Gel Top Coat – Clear Color Top Coat Gel Nail …
2. Traditional Mehndi Patterns
Mehndi nails: quick guide
Mehndi patterns, or henna designs, are a big part of Indian weddings. You can bring that art to your nails too. Picture tiny swirls, paisleys, and flowers dancing along your fingertips.
Choose colors that fit the mood. Deep maroon, warm brown, or a hint of gold work best. A nude nail base helps the lines stand out. Metallic accents catch the light and echo the shine of real jewelry.
If freehand feels scary, use nail stencils for clean edges. Stencils help you get complex curves with less fuss. Let each layer dry before you add the next.
Here is how to try it at home:
– Start with a clear base coat, then a nude or sheer pink base.
– Lightly sketch the mehndi shapes in maroon or brown with a thin brush.
– Add delicate paisleys and floral details. Use gold for fine lines or dots.
– Finish with a thin top coat for protection and shine.
Next steps: practice on a nail wheel or swatch before doing your real nails. Clean up mistakes with a tiny brush dipped in remover. You’ll gain grace and precision with time, and your nails will read as chic yet traditional.
Try a small accent on one nail first.
2. Traditional Mehndi Patterns
Editor’s Choice

Halloween Nail Stickers Airbrush Stencils Stickers for Nail Art Self Adh…

Sally Hansen Insta-Dri®, Taupe Priority, Quick Dry, Long Lasting, Streak…

Beetles 31pcs Nail Art Brushes, Dotting Tools, Nail Art Pens, Dust Brush…
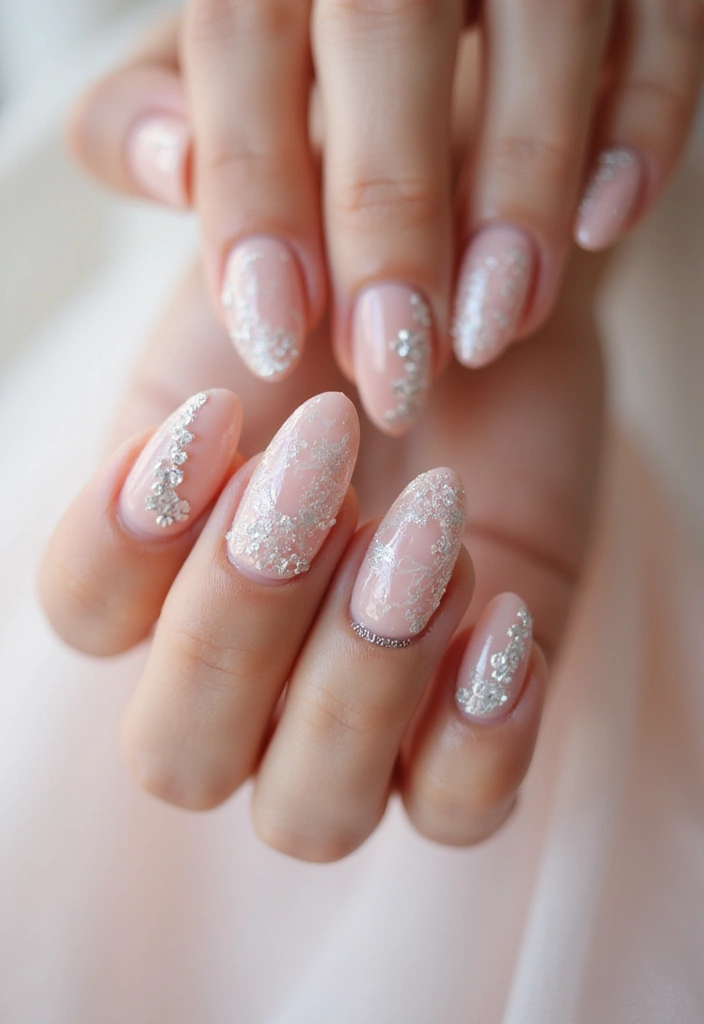
3. Glitter Glam
Glitter Glam for Your Bridal Look
You want sparkle that shines on camera and in person. Glitter nail art can give you that glow without overpowering your dress. Here is how to choose and apply it.
– Styles to try
– Full glitter nails.
– Glitter gradient that fades to clear near the cuticle.
– Glitter tips or an accent nail for a quiet sparkle.
– Color pairings that read wedding-ready
– Gold glitter on a deep red or royal blue base.
– Silver glitter on charcoal or white for a classic feel.
– Rose gold glitter on soft pink for warmth.
– How to apply it cleanly
– Start with a dry, smooth base and a good base coat.
– For full glitter: dab glitter onto the wet polish with a soft brush.
– Press the glitter in and remove the loose pieces.
– For gradient: apply the base color, then dab glitter from the mid to tip with a sponge.
– For tips or accents: paint the nails as usual, then add glitter only on the chosen nails or tips.
– Finishing touches
– Seal with a clear topcoat to smooth the surface.
– Let each layer dry fully before the next.
– Reapply topcoat every 2–3 days to keep the shine.
Next steps: pick your favorite style, gather a glitter mix, and try a single nail first to see how it photographs.
Add a touch of magic to your bridal look with Glitter Glam! Whether you choose full glitter, a subtle gradient, or sparkling tips, your nails will shine as bright as your love on your special day.
3. Glitter Glam
Editor’s Choice
Morovan Nail Polish Set Fingernail: Shimmer Glitter Air Dry 15 Bright Co…
Artdone 31pcs Nail Art Brushes, Nail Art Tool Set, Dotting Tools, Dust B…

Top Coat Nail Polish Clear: Quick Dry Nail Polish No Chip High Shine Lon…
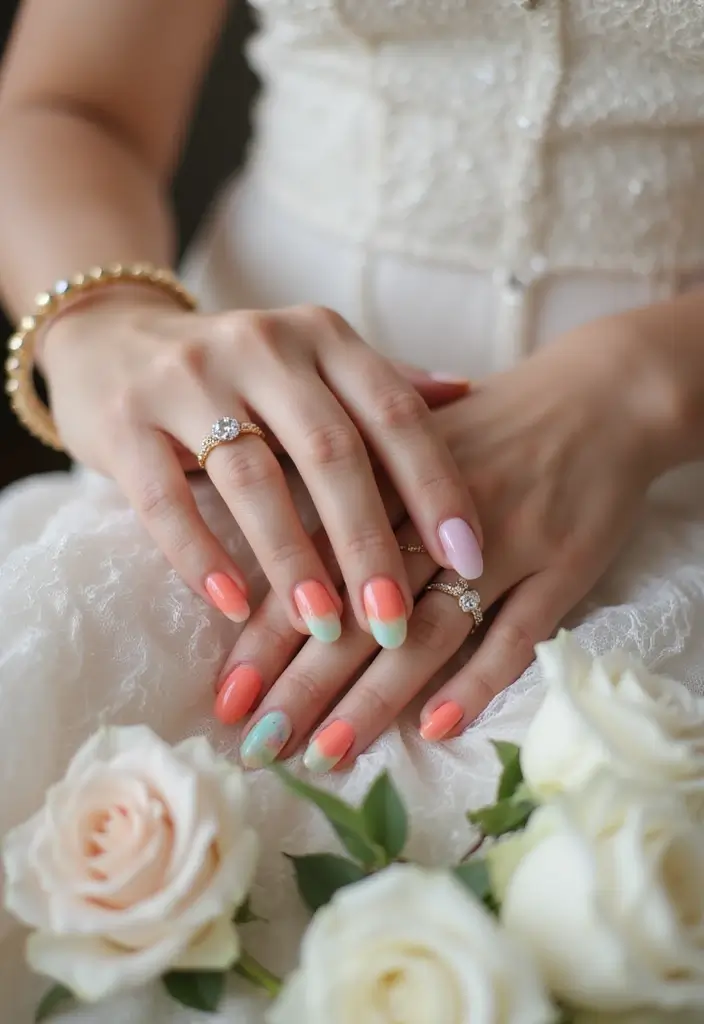
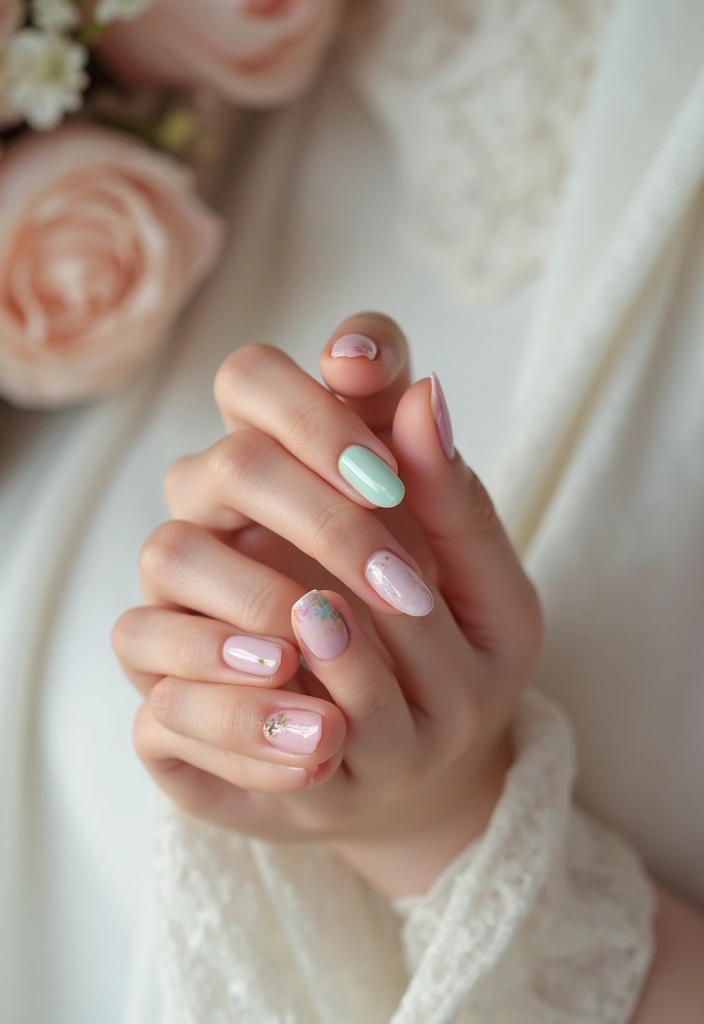
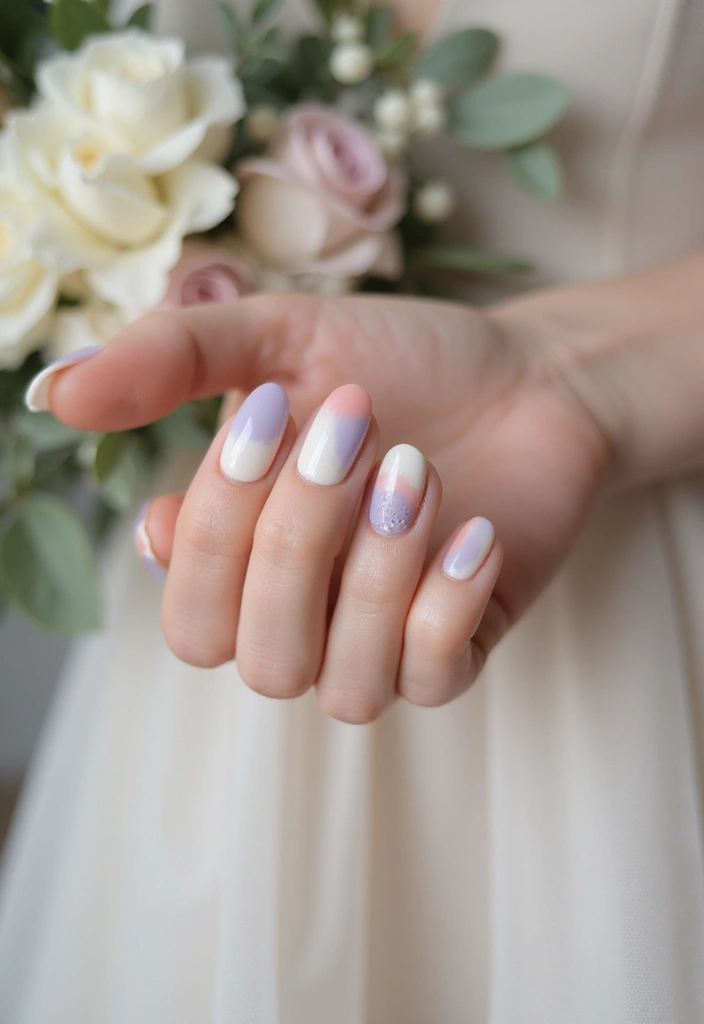
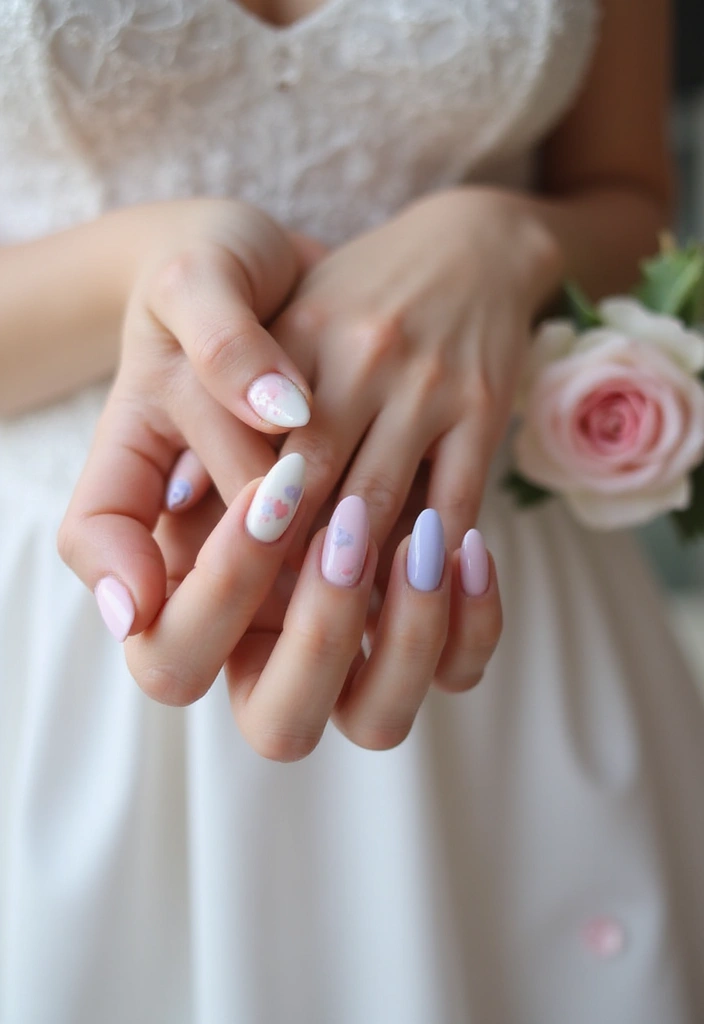
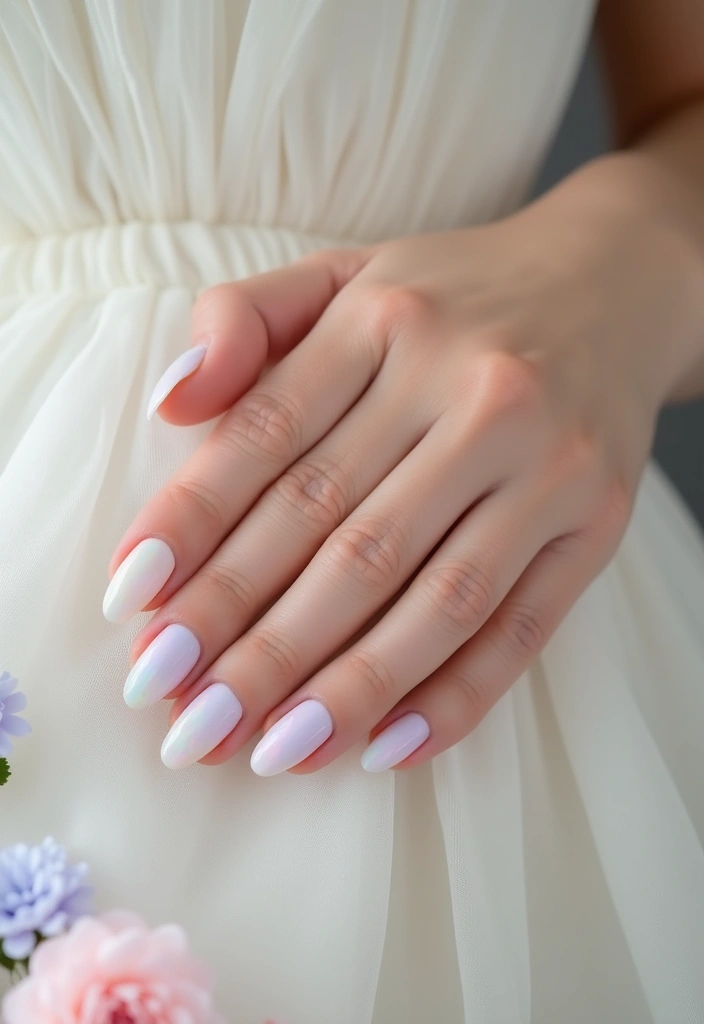
4. Pastel Dreams
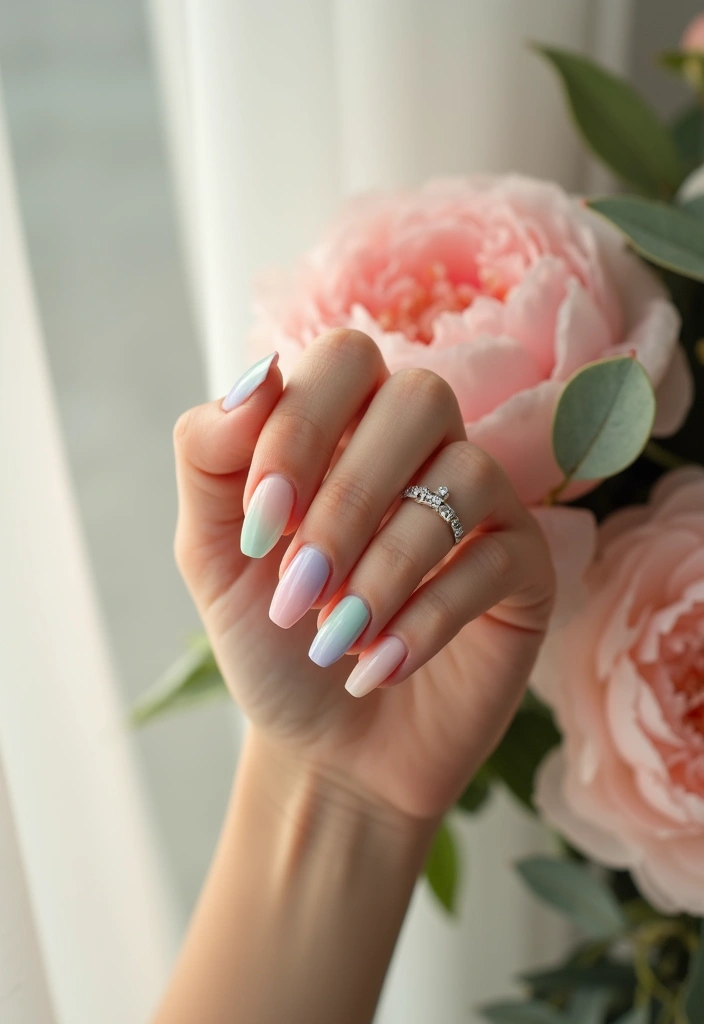
Pastel Dreams
You want a soft, romantic nail look for a spring or summer wedding. Pastel shades do that. Try lavender, mint, baby blue, and pale pink. Mix two colors to get a gentle, magic fade.
A pastel ombre nail is simple and chic. Here is how you do it:
– Prep your nails. Shape them and push back cuticles.
– Pick two or three pastel colors.
– Apply a light base color and let it dry.
– Use a makeup sponge to dab color on the nail. Press gently and build a fade from tip to base.
– Layer until the fade looks smooth. Keep the transition soft.
– Add tiny details. White dots or small flower shapes work well on select nails.
This look fits outdoor or garden weddings. The pale hues echo the greens and blooms around you.
Finish with a matte topcoat for a velvety look, or go glossy if you prefer shine.
Pro tips:
– Use a base coat to protect nails.
– Clean edges with a small brush or remover pen.
– Practice once at home to speed up on the big day.
What you need:
– Pastel polishes in lavender, mint, baby blue, pink
– Base coat and top coat (matte or glossy)
– Makeup sponge, dotting tool or toothpick, fine brush
– White polish for dots or tiny flowers
Next steps: pick your shades and test the ombre at home before the ceremony.
4. Pastel Dreams
Editor’s Choice

Beetles Pastel Nail Polish Set -6 Colors Pink Blue Yellow Nude Pink Purp…

Soft Sponges with Grabbing Pen for Ombre and Aura Nail Art with Brush, P…

Augshy 19pcs Mandala Dotting Tools Set Pen Dotting Tools Mandala Stencil…
5. Artistic Marble Effect

Marble nails fit a bride who loves clean, elegant style. They feel calm and polished on your wedding day. Here is a simple way to get the marble look.
– What you need: a light base color (white, ivory, or soft gray), a thin brush or toothpick, a contrasting vein color (gray, taupe, or blush), a glossy top coat, and optional gold or silver foil.
– Start with a clean base. Apply the base color and let it dry.
– Create the marble veins. Put a thin line of the contrasting color. Drag and swirl it gently with the fine brush. Keep lines thin and loose.
– Soften the look. Lightly blend the veins with a clean brush to blur the edges.
– Add shine. Seal everything with a glossy top coat for a glassy finish.
– Add a luxe touch. Place a few tiny bits of gold or silver foil on the still tacky top layer. Press gently and let it set.
– Color ideas. White base with gray veins stays classic. A blush or nude base with white veins feels romantic. For drama, try a dark base with pale veins.
Next steps. Let each layer dry fully. Try on one nail first, then do the rest.
5. Artistic Marble Effect
Editor’s Choice
Beetles 31pcs Nail Art Brushes, Dotting Tools, Nail Art Pens, Dust Brush…

Beetles Nail Foil Glue Gel 2Pcs 15ml with 20 Pcs Lace Flower Butterfly S…
6. Bold Geometric Styles
You want nails that stand out on your big day. Bold geometric nail art gives you that with clean lines and eye catching shapes. Think sharp triangles, blocks, and grids in colors that match your outfit.
Why this style works for a wedding
It feels modern yet graceful, and the lines can echo your jewelry or the borders of your outfit. You can dress every nail with the look or save it for one accent nail.
How to do it
– Start with clean, dry nails and push back cuticles to shape the tips.
– Pick a color pair that mirrors your outfit, such as royal blue with gold or black and white.
– Map the shapes with nail striping tape, paint in sections, and lift the tape slowly for crisp edges.
– Finish with a clear top coat for shine, or add a matte top coat to some nails for contrast.
Tips and options
– Use thin brushes or a dotting tool to tidy small corners.
– Alternate designs on different nails for a playful vibe while keeping colors consistent.
– If you worry about precision, try nail stickers for the lines and then seal.
Next steps
Practice on a nail wheel first to pick your favorite combos. Do a trial set before the wedding so lines stay sharp all day.
6. Bold Geometric Styles
Editor’s Choice

Artdone 38Pcs Nail Striping Tape Lines Kit With Nail Art Pens Dotting To…
Artdone 31pcs Nail Art Brushes, Nail Art Tool Set, Dotting Tools, Dust B…
Snake Nail Art Stickers Decals Black Skull Goth Nail Decals Nail Art Sup…
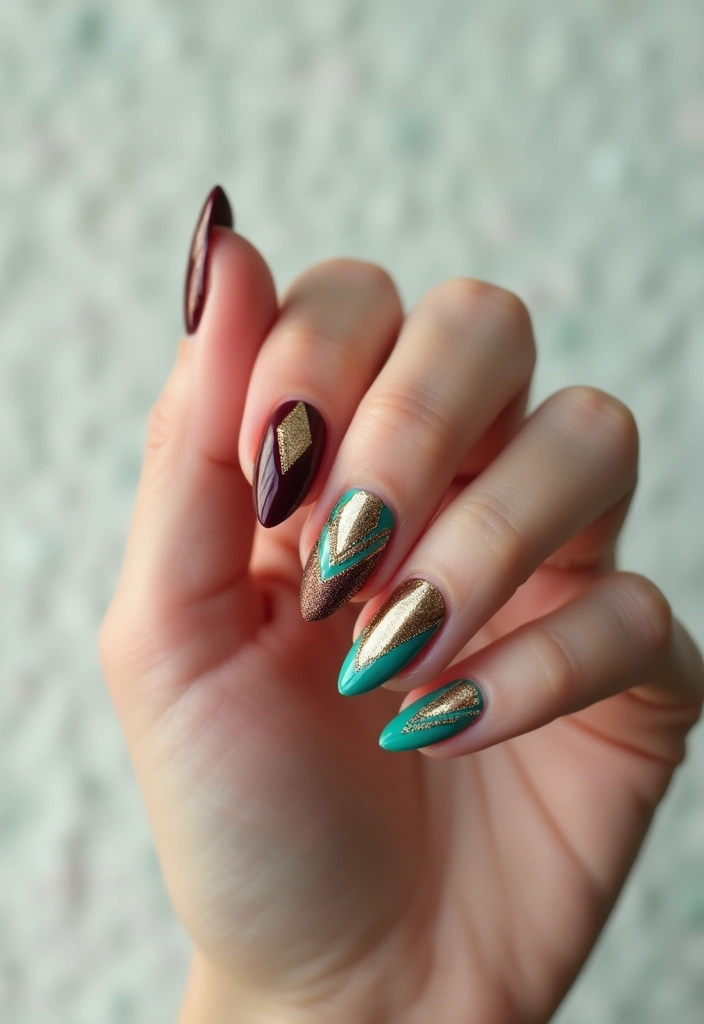
7. Jewel-Toned Glam
Here is why jewel tones fit a bridal mani. They feel rich and timeless on your big day. Emerald green, sapphire blue, and ruby red pop in any light.
– Wear them solo or with gold accents. A pure jewel shade on all nails is bold, especially for evening ceremonies. Add a thin strip of gold foil on one nail or a small gold line near the cuticle for a touch of luxe.
– Build depth with simple texture. Keep the base smooth, or add a whisper of glitter for glow. A delicate sparkle catches candlelight without stealing the show from your dress.
– How to apply well. Prep nails, push back cuticles, and use a quality jewel polish. Apply in thin coats, drying between layers. Two to three coats give rich color. Finish with a high-shine topcoat to seal and deepen the shade.
– Practical tips for fit. This look shines at evening weddings. Warmer skin tones glow with emerald or ruby. Cooler skin pairs nicely with sapphire. Match the metal of your jewelry to the nail accents for cohesion.
Care tips: store polish in a cool place. Keep bottles tightly closed to prevent thickening. Practice at home on a few nails first, and wipe away mistakes with a small brush. This makes the day easier.
7. Jewel-Toned Glam
Editor’s Choice

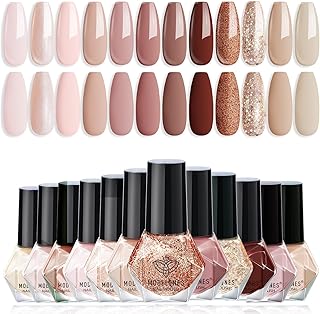
modelones Nail Polish Set, 6 Colors Nude Brown Pink Skin Tones Milky Whi…
Holographic Nail Glitter Gold Foils for Kit, 12 Grids Sparkly Ultra-Thin…
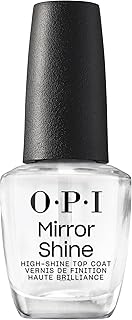
OPI Nail Lacquer Top Coat | Clear Nail Polish Top Coats | Classic, Quick…
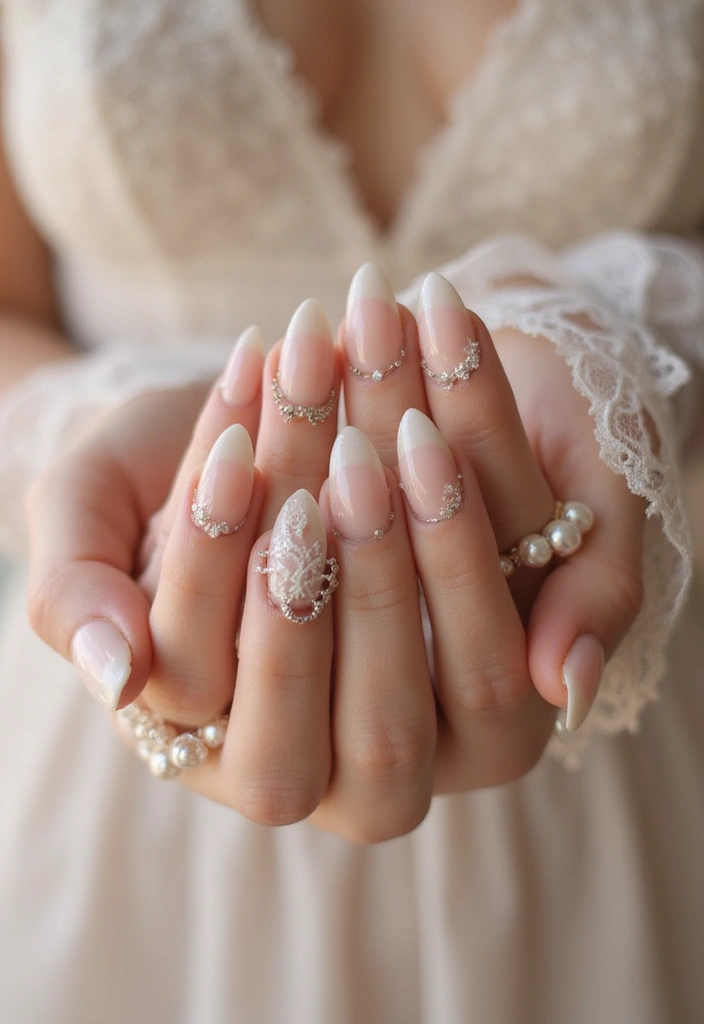
8. Minimalist Chic

You want a look that feels elegant but not loud. Minimalist nail art for brides delivers that quiet chic. It works with lace, pearls, and a flowing gown. It stays fresh from the vows to the last dance.
Here is why this style fits your wedding day.
1) Nude base that flatters Pick a sheer nude or soft pink. It gives a clean canvas that suits every skin tone and reads polished.
2) Negative space for modern appeal Let a portion of the nail show through. A slim curved line or a small gap reads as contemporary and timeless.
3) White or gold tiny accents Add a single white line or a tiny gold dot. Use a fine brush for precise, delicate detail.
4) Accent nails, not overload Choose one or two nails per hand for the feature. Keep the rest in a smooth nude finish.
5) Length play Mix short and long nails to add texture. This variety keeps the look lively without shouting.
Finish with a clear top coat for shine or a soft matte seal. Pair this style with simple jewelry and a light, airy dress to keep balance.
Next steps: choose your nude shade, gather a fine brush or dotter tool, and practice on a nail wheel or a single nail before the big day.
8. Minimalist Chic
Editor’s Choice
modelones Nail Polish Set 12 Colors Nude Brown Fall Nail Polish Set Cham…
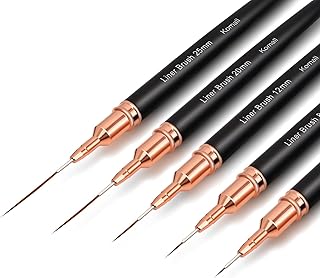
Metallic Nail Art Brushes, 5Pcs Liner Brush Set, UV Gel Polish Painting …
Top Coat Nail Polish Clear: Quick Dry Nail Polish No Chip High Shine Lon…
9. Colorful French Tips
– Start with a soft base You want a French manicure that fits your wedding color plan. A colored tip adds life to the classic look. Choose a sheer nude or pale pink. This gives a calm canvas for bright tips.
– Color the tips Decide tip colors that match your palette. Pink, lavender, or metallic shades pop in photos.
– Shape your tips Try rounded edges for a sweet vibe or sharp angles for a modern edge.
– Define with tape Place thin tape along the edge to keep lines clean.
– Paint with care Use a fine brush and steady strokes for neat tips.
– Seal the look Finish with a glossy topcoat to lock color in and add shine.
– Make it practical Keep nails well shaped to resist chipping during the day.
– Personalize safely If you want extra sparkle, add a light glitter tip at the edge or a soft ombre.
– Camera-ready tips Colored tips read well on camera when the base stays soft.
– Practice and plan Practice once before the big day to get perfect lines. Ask your nail tech to bring color swatches to match your wedding ring.
9. Colorful French Tips
Editor’s Choice
Artdone 31pcs Nail Art Brushes, Nail Art Tool Set, Dotting Tools, Dust B…

Nail Art Striping Tape Lines Kit 36 pcs 1mm 2mm 3mm Nail Tape Strips for…
beetles Gel Polish No Wipe Gel Top Coat – Clear Color Top Coat Gel Nail …
10. Artistic Watercolor
Watercolor nails give your bridal look a soft, artsy glow. You get gentle blends that feel like a painting on your tips. Here is why this style works for a wedding. It pairs well with a neutral base and lets your skin tone sing.
Next, how to do it. Start with a clean, nude base coat. Pick two to three colors that mix nicely with your dress and bouquet. Think pale pink, dusty mauve, and a hint of champagne.
Apply the colors in light, sheer swirls. Use a thin nail brush or a damp sponge to dab the color on. The goal is soft edges and smooth transitions. Let colors meet and melt into each other on the nail. Don’t rush. A little patience makes the blend look dreamy.
Finish with a clear top coat to seal the art. This helps with wear and keeps the watercolor look fresh.
Want a tiny sparkle? Add cameo accents like a faint gold speck or a barely-there glitter near the cuticle. If you dislike fuss, skip this and keep it simply blended.
Tips: clean your brush between colors. Work on one nail at a time if needed. Try it on a test nail.
10. Artistic Watercolor
Editor’s Choice
Artdone 31pcs Nail Art Brushes, Nail Art Tool Set, Dotting Tools, Dust B…
Non Toxic Nail Polish Set, Easy Peel Off and Fast Dry NailPolish Set for…

Sally Hansen Double Duty™, Base and Top Coat, Quick Dry, Long Lasting, S…
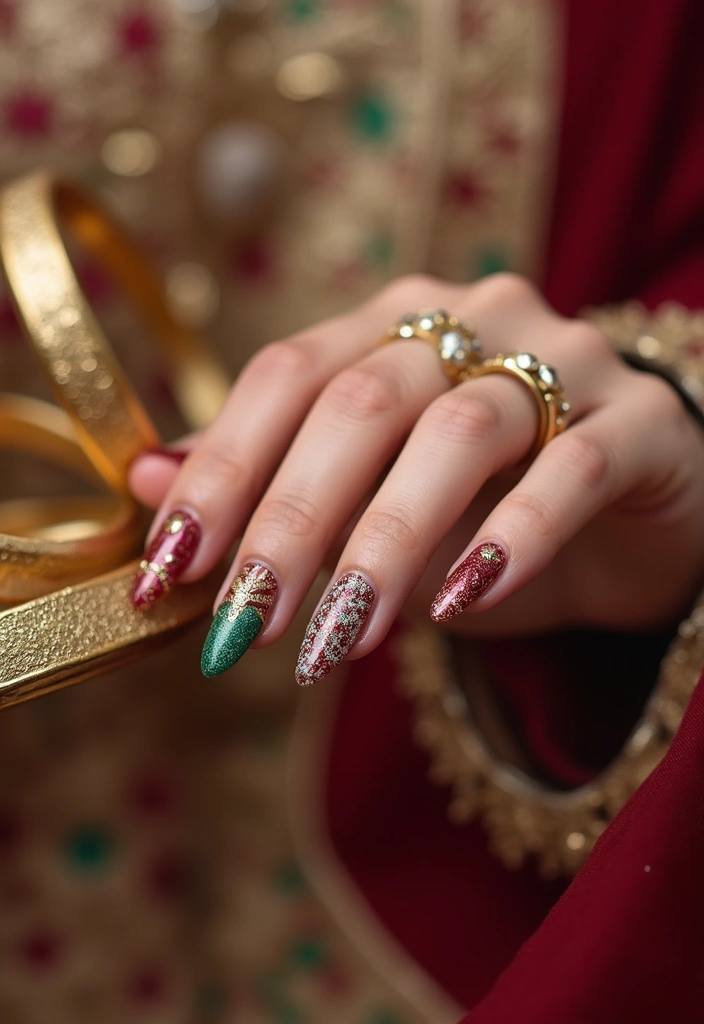
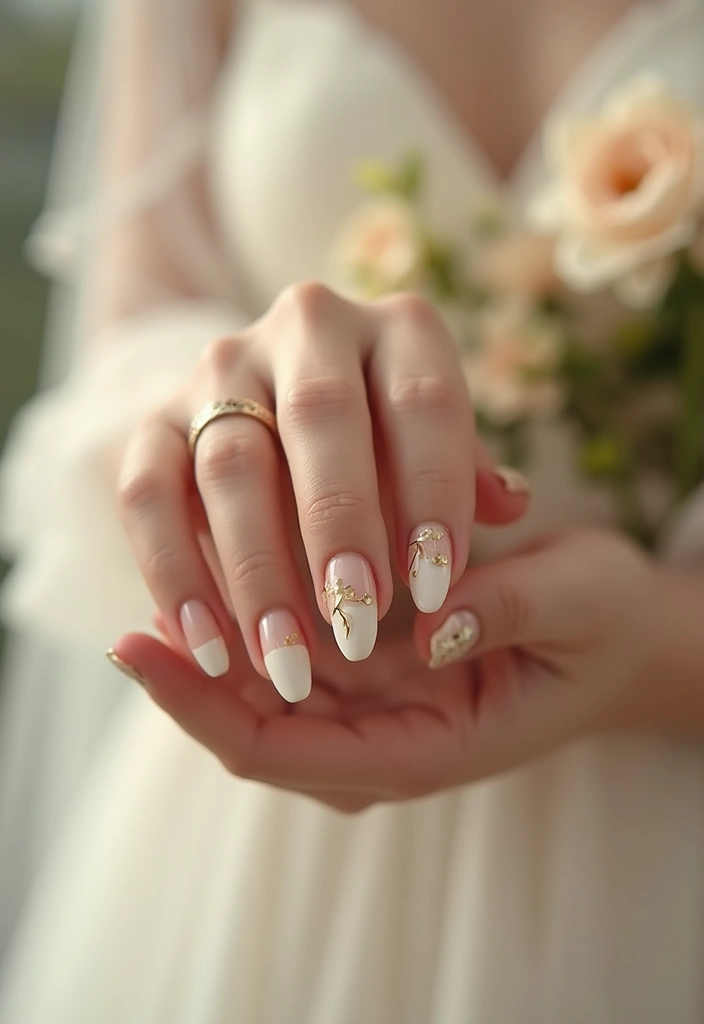
11. Traditional Red and Gold
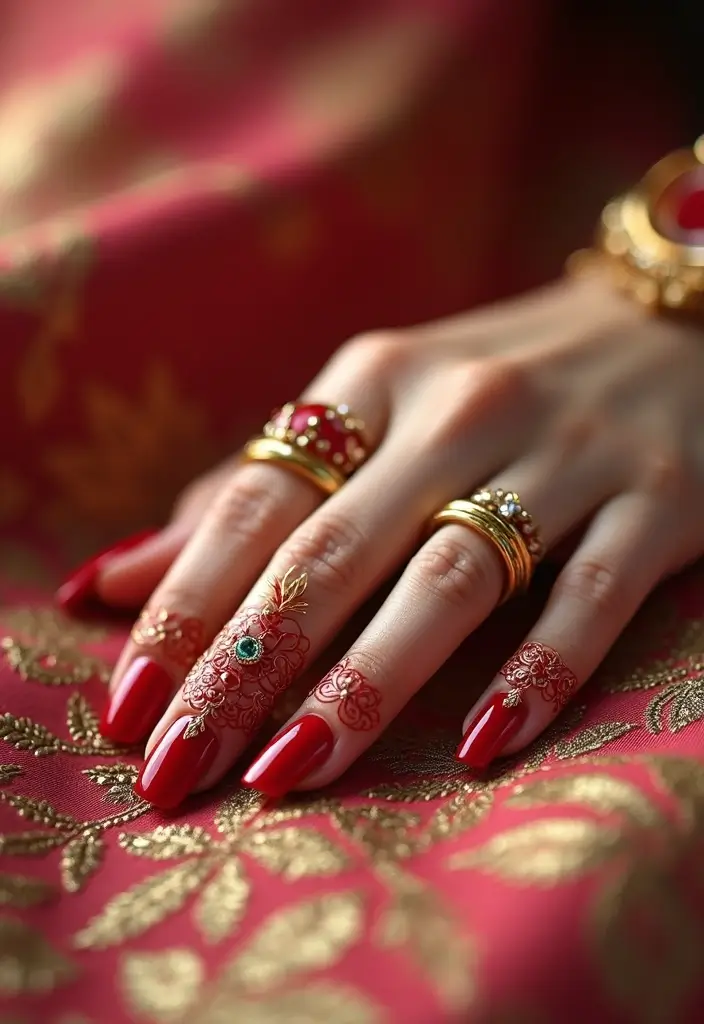
Traditional Red and Gold
You want a bridal nail look that lasts and shines in photos. Red is the color of love and luck in Indian weddings. Gold accents add a regal touch. Together they create a classic, camera-ready vibe for your big day.
– Choose a solid red base with gold accents to start. Pick a rich red like ruby or scarlet.
– Try paisley or filigree patterns with thin gold lines. These designs look like delicate jewelry on your nails.
– Add gold leaf or tiny gems for sparkle. Place them at the cuticle or tip for depth.
– Finish with a glossy top coat to protect the design and make colors pop.
Here is why this look works on wedding day:
– The red base flatters many skin tones and pairs with most sarees and lehengas.
– Gold catches light in photos, adding warmth to every shot.
– The patterns stay clear under flash.
Next, a simple how-to:
1) Prep nails: shape, buff, push back cuticles, and wipe clean.
2) Apply a clear base coat, then two coats of red. Let each dry.
3) Use a fine brush or tape to paint gold paisley or filigree. You can also apply gold foil sheets.
4) Cap the design with a top coat. Add tiny gems if you like extra glam.
Next steps: keep nails strong by moisturizing hands and avoiding harsh chemicals before the wedding. This look pairs well with bold embroidery and mirror-work on your outfit.
11. Traditional Red and Gold
Editor’s Choice
Artdone 31pcs Nail Art Brushes, Nail Art Tool Set, Dotting Tools, Dust B…

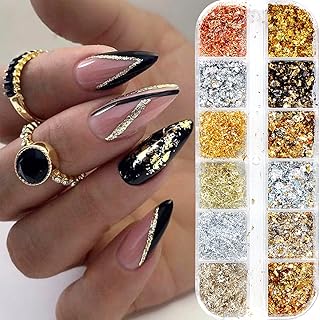
2 Bottles Gold Foil for Nails – Golden Glitter Design, Foil Fragments an…
Top Coat Nail Polish Clear: Quick Dry Nail Polish No Chip High Shine Lon…
12. Shimmering Metallics

Want nails that glow in photos without stealing focus from your dress? Metallic nail art can be your secret. It works with many wedding styles and lighting conditions. A little shine goes a long way on your big day.
Want more ideas? Try a tiny metallic stud on one nail or a delicate line design to add texture. It stays comfortable too.
– Shade choice: Gold warms the look, silver stays cool. Bronze blends with earthy tones. Pick a shade that matches your jewelry and the venue lighting.
– Finish options: Go full metallic for a bold moment. Or pair metal with matte nails for contrast and a polished bridal read.
– Gradient twist: For a modern effect, paint metallic at the tips and fade to a matte nude base. It adds depth and drama.
– Prep and protection: Start with a base coat. This protects your nails and makes colors pop. Apply thin metal coats and dry each layer.
– Seal it well: Finish with a clear top coat to boost shine and wear. A matte top coat softens glare if you want.
– Outfit pairing: Consider your dress and jewelry. Warm metals go with gold embroidery; cool metals pair with silver or champagne tones.
Shimmering metallics can elevate your bridal look! Choose gold for warmth, silver for cool elegance, or bronze to complement earthy tones. A touch of shine on your nails will create stunning photos without stealing the spotlight from your dress.
12. Shimmering Metallics
Editor’s Choice
Metallic Nail Polish Set Fingernail: Chrome Mirror Holographic Nail Poli…

AIBEE Nail Art Brushes, 5pcs Double-Ended Acrylic Nail Brush Set with 5/…
Top Coat Nail Polish Clear: Quick Dry Nail Polish No Chip High Shine Lon…
You might also like
13. Seasonal Inspirations
Your nails should echo the season of your wedding. You want looks that feel true to you and your big day. Here is how to plan seasonal nail art that looks polished on camera and in real life.
– Summer wedding nails Pick bright colors like coral, peach, or fresh pink. Add a tiny floral accent or a delicate leaf on one nail. Keep the shapes short and clean so the art reads well from a distance. A glossy finish makes the colors pop and stay fresh in heat.
– Autumn wedding nails Go with warm tones: terracotta, olive, berry, or bronze. Tiny leaf or acorn motifs work nicely on a single nail. Matte or satin top coats give a cozy, earthy feel that matches autumn gowns and décor.
– Winter wedding nails Try icy blues, silver, and white. Snowflake decals, tiny crystals, or foil specks add sparkle without overpowering the dress. A touch of frost-like texture can come from using a velvet matte finish.
– Texture and finish Decide between matte and gloss to suit the season. Matte nails read as understated in fall or winter. Glossy nails feel bright and fresh for summer. You can mix finishes on different nails for a subtle contrast.
– Practical steps Start with a solid base color. Add seasonal decals with a fine brush or stamping plate. Seal everything with a durable top coat. If you’re unsure, test designs on a swatch nail first and keep a small brush handy for touch-ups.
Seasonal cues tie your look to the day you say “I do.” Use a few thoughtful details to create a cohesive, camera-ready bridal style.
13. Seasonal Inspirations
Editor’s Choice

Beetles Nail Stamp Gel 16Pcs French Tip Nail Stamp Kit with 8 Colors Sta…

ROSALIND 30pcs Gel Nail Polish Set, 26 Colors Gel Polish with 3Pcs Gloss…

Teenitor 50 Sheets Nail Stickers for Nail Art, Flower Nail Art Stickers …
14. Vintage Charm
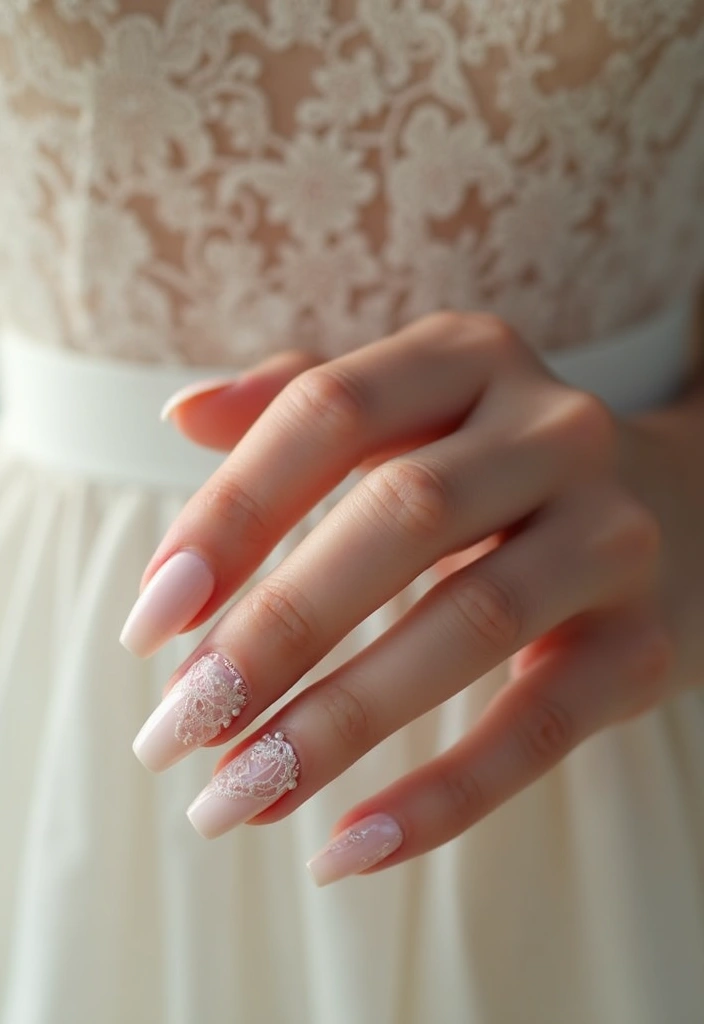
You want nails that feel nostalgic yet fresh on your wedding day. Vintage charm nails deliver that. They blend old-time romance with a clean modern finish.
Soft base colors set the tone. Pick pale pink or creamy ivory. These colors calm the look and make lace pop.
Next come the lace patterns. Use white or gold to add delicate loops and tiny flower shapes. A fine nail brush helps you draw fine lines. Work slowly in light strokes. A steady hand matters more than big swirls.
This design pairs well with vintage-style gowns and antique accessories. You can add a touch of shimmer to catch the light without stealing the spotlight.
Here is a simple how-to:
– Prep nails and push back cuticles for a smooth canvas
– Apply one coat of your base color and let it dry
– With a fine brush, paint lace on one accent nail in white or gold
– Finish by sealing with topcoat and a subtle layer of shimmer
– If you want, add tiny gold dots for texture
Variations to fit your vibe:
– All-nail lace with a single clean accent nail
– Lace tips with a soft French line
– Matte base with glossy lace for contrast
Care tips: reapply a light topcoat every couple of days to prevent chipping.
14. Vintage Charm
Editor’s Choice
Beetles 31pcs Nail Art Brushes, Dotting Tools, Nail Art Pens, Dust Brush…

Sally Hansen Insta-Dri, In a Blush, Quick Dry, Long Lasting, Opaque, Shi…
Top Coat Nail Polish Clear: Quick Dry Nail Polish No Chip High Shine Lon…
15. Fun and Quirky
Want nails that show your playful side and still feel wedding ready? Fun and quirky nail art lets your personality shine without stealing the spotlight from your dress.
Here is why it works: small patterns and bright colors pop in photos and on the dance floor.
How to pull off the look
– Choose a base color that echoes your bouquet or dress for a cohesive start.
– Limit the standout nails to one or two so the look stays chic.
– Add polka dots, tiny cartoons, or cute sayings on one nail for a wink.
– Use decals, stamps, or a fine brush to keep lines clean.
– Finish with a clear top coat to guard against chips during the celebration.
– Mirror a shade from your bouquet or ribbon on one nail to tie the theme together.
Practical ideas to try
– Four nails in pink with white polka dots.
– One nail features a tiny cartoon you love.
– Another nail bears a short saying like “LOVE” or “MRS.”
Durability and aftercare
Next steps to keep it fresh: prep nails, apply a base coat, and seal with a top coat.
Limit exposure to water in the first day after you paint.
If you want longer wear, consider gel polish for your wedding week.
With these tips you get a playful look that stays polished. Ready to try one of these ideas for your bridal nails?
15. Fun and Quirky
Editor’s Choice
Beetles 31pcs Nail Art Brushes, Dotting Tools, Nail Art Pens, Dust Brush…

5D Embossed Autumn Maple Leaves Nail Stickers for Nail Art Thanksgiving …

Beetles Gel Nail Polish Kit with U V Light – 80Pcs Fall Nail Fest Color …
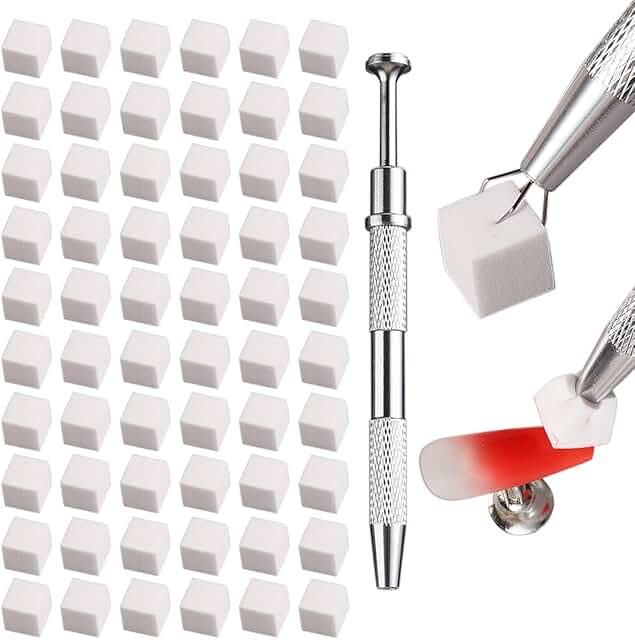
16. Rhinestone Accents
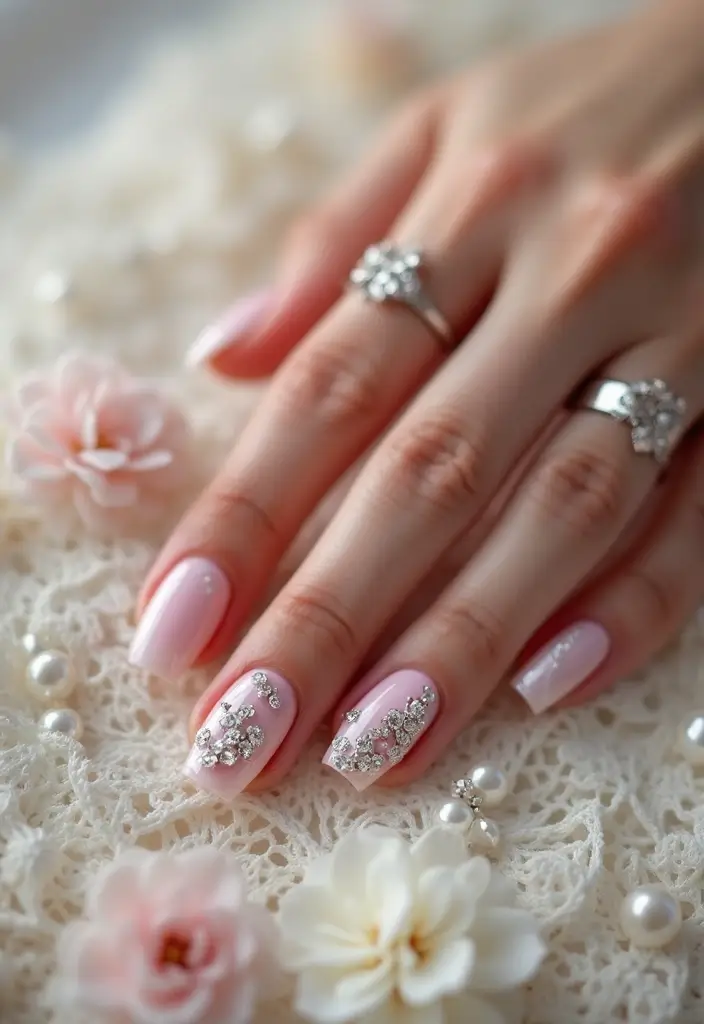
You want nails that sparkle without stealing the show. Rhinestone accents catch the light as you move, making your bridal nails pop in photos and under wedding lights.
Here is why rhinestones fit a bridal look:
– They add a touch of glam without shouting.
– They pair well with pearls, gold, or silver jewelry.
– A clean, simple base helps the stones stand out.
What you’ll need
– Tiny rhinestones in your chosen sizes
– Strong nail glue or crystal adhesive
– A topcoat that grips stones
– Tweezers or a rhinestone picker
– Patience and steady hands
Design ideas
– One accent nail with a small cluster near the cuticle
– A single stone on each nail for a minimalist vibe
– A delicate line of stones along the free edge
Step-by-step guide
1) Prep nails: file smooth, push back cuticles, and wipe clean.
2) Paint a solid base color and let it dry completely.
3) Place stones with glue, starting at the center or near the cuticle. Press gently until set.
4) Seal with a thick topcoat around each stone. Let it dry fully.
Care tips
– Avoid oils around the stones before you apply glue.
– Carry a tiny topcoat for touch-ups on the big day.
End note: with careful placement and a sturdy finish, rhinestones stay sparkling all night.
16. Rhinestone Accents
Editor’s Choice

10000Pcs Small Resin Rhinestones for Nail Art, Colorful 2/3MM Flatback B…

Super Strong Nail Glue for Press On Nails, Nail Tips & Acrylic Fake Nail…
Makartt Gel Top Coat – 2 PCS No Wipe Top Coat Gel Nail Polish High Gloss…
17. Ombre Shades
You want nails that glow softly with your wedding theme. Ombre nails give a smooth gradient you can tailor to fit your palette. It looks modern and elegant, and it works with most bridal outfits and jewelry.
– Choose colors Pick two or three shades that blend well together.
– Prep nails File and buff the surface. Push back cuticles so the gradient sits clean.
– Apply base Swipe on the lightest shade as your base coat.
– Blend with a sponge Use a makeup sponge. Dab colors in a staggered pattern to create a seamless fade from cuticle to tip.
– Clean edges If any color creeps onto the skin, tidy sides with a small brush dipped in remover.
– Top it off Finish with a glossy topcoat for shine and longer wear.
Here is why this method works for many brides. The gradient adds depth without a loud design. It fits a wide range of wedding colors—from blush pinks to champagne gold. It also adapts to both long and short nails.
Tips you can use right away. For a softer fade, go with light to light shades. For a bolder look, increase the contrast between colors. If you want extra sparkle, add a thin layer of shimmer over the topcoat.
Common questions. Can you do this at home? Yes, with patience and a steady hand. Which colors pair well with wedding mood boards? Soft pinks, nudes, and golds are timeless. How long does it last? With a good base and topcoat, you can count on about a week of wear.
Bottom line. Ombre nails give you a romantic, modern vibe without fuss. Practice a little, and you’ll have a flawless gradient that shines in photos and in person.
17. Ombre Shades
Editor’s Choice
Soft Sponges with Grabbing Pen for Ombre and Aura Nail Art with Brush, P…
ROSALIND 30pcs Gel Nail Polish Set, 26 Colors Gel Polish with 3Pcs Gloss…
beetles Gel Polish No Wipe Gel Top Coat – Clear Color Top Coat Gel Nail …
18. Artistic Illustrations

Want nails that feel like you on your wedding day? Hand-painted illustrations on your nails can do that. Here is why this idea shines for a bridal look. Let’s break it down with easy steps.
– Base and theme: Start with a nude or clear base so the art pops.
– Design ideas: Pick small images that hold meaning for you, like flowers, initials, or tiny symbols. Keep the shapes small to fit the nail and feel delicate.
– Tools: Gather a fine brush, a dotting tool, and thin polish in a few colors.
– DIY steps: Prep nails. Lightly sketch a design. Paint clean lines. Add tiny details. Finish with a clear top coat. Work slowly and rest your hand.
– Sticker alternative: If you are not a pro, nail stickers work well. Choose a set that fits your theme. Apply on clean, dry nails. Press to smooth. Top coat to seal.
– Finish and care: Let each layer dry fully. Avoid water for a couple of hours. Moisturize hands after. Use a gentle hand lotion after.
– Ideas to try: Mehndi-inspired patterns, tiny florals, initials, hearts, or lace motifs. Choose designs that match your dress or jewelry.
With a little practice, you’ll have a look that photographs beautifully and lasts through the celebration. Practice a bit ahead of time to boost your confidence.
18. Artistic Illustrations
Editor’s Choice
Artdone 31pcs Nail Art Brushes, Nail Art Tool Set, Dotting Tools, Dust B…

5PCS Dotting Pens with 3 PCS Nail Painting Brushes, Nail Art Design Tools
Teenitor 50 Sheets Nail Stickers for Nail Art, Flower Nail Art Stickers …
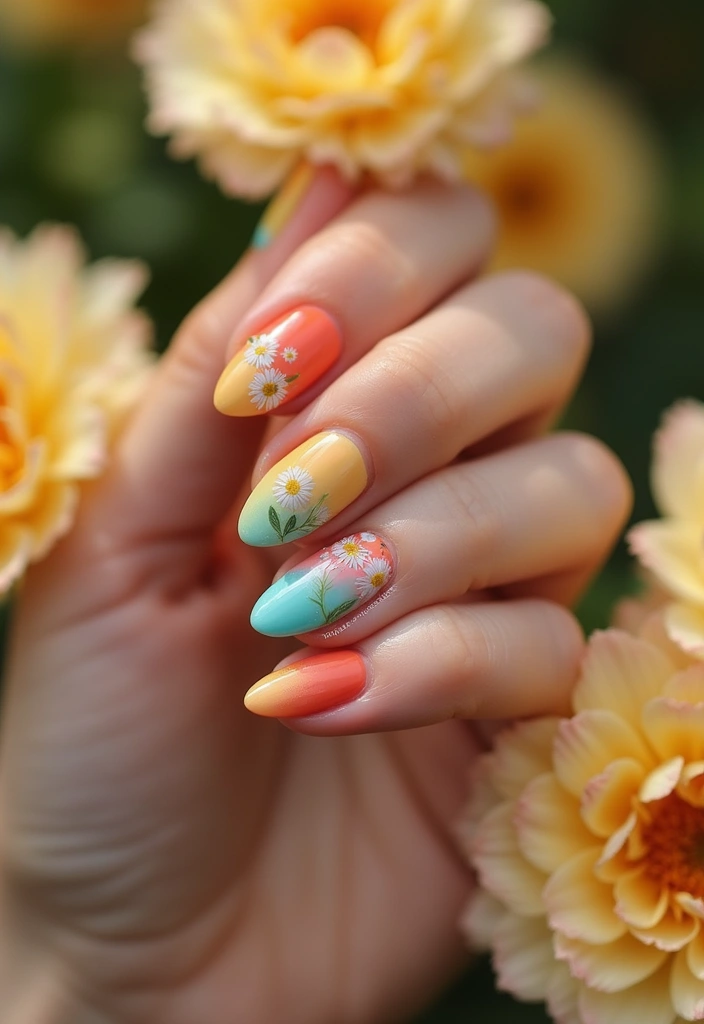
19. Nature-Inspired Designs
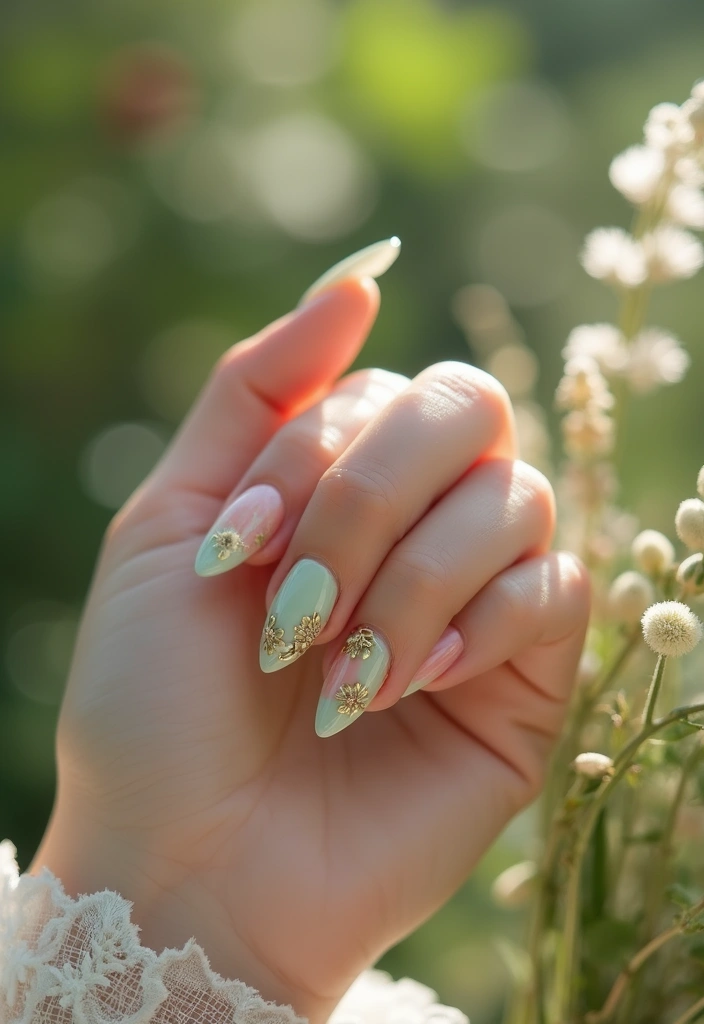
Nature-Inspired Nail Designs
You want nails that echo the outdoors without stealing your spotlight. Nature-inspired nails fit well with outdoor or boho weddings. They stay elegant and calm, with just a hint of shine.
Design ideas
– Leaves and fern trails on a nude or soft sand base create a calm, nature vibe.
– Tiny tree silhouettes near the tip add a forest feel without crowding the nail.
– Soft landscapes show a pale hill or horizon with light color blocks.
– Earthy tones like taupe, sage, or cream keep the look refined and versatile.
– Fine gold or silver lines mimic dew and add a gentle glam.
– Watercolor washes give a dreamy blur you can layer for depth.
– Crisp accents with acrylic paint keep leaf shapes clear for wear.
How to create this look
Here is how you can apply it. Start with clean, shaped nails and a sheer base. Pick your motif. For soft looks, paint with watercolors; for sharp lines, use a fine brush with acrylic paint. Finish with a protective top coat.
Tips for a lasting finish
– If your wedding includes outdoor heat, go with gel top coat for longer wear.
– Practice on a nail wheel first to vibe with your theme.
Next steps: choose motifs, gather colors, and test on a nail wheel before your big day.
19. Nature-Inspired Designs
Editor’s Choice

beetles Gel Polish Set Fall Gel Nail Polish Kit 36 Pcs 32 Colors with Ba…

Saviland 12 Colors Nail Art Pens Set – 3D Nail Polish Pens Acrylic Paint…
160pc Set WHITE FALSE NAIL ART TIPS Display Wheel,Nail Art Polish Palett…
20. Hand-Painted Symbols
You want a personal touch on your wedding nails. Hand-painted symbols make that possible. Small marks can show belief, love, or a date that means every moment to you. Pick symbols that feel natural—hearts, infinity signs, or your wedding date. Keep the base soft so the art shines in contrast.
Symbol ideas
– Hearts for romance
– Infinity for forever
– Your wedding date in tiny digits
– Initials of you and your partner
– Tiny daisies or leaves for a light, fresh look
What you’ll need
– Fine nail-art brush for thin lines
– Nail art pen or a tiny dotting tool
– Base coat and a sheer or nude polish
– Top coat to seal the design
– Optional: nail polish remover pen for tidy edges
Step-by-step guide
– Prep your nails. Push back cuticles and file to shape.
– Apply a sheer base. Let it dry fully.
– Lightly sketch the symbol with a thin brush or pen.
– Build the design with careful, small strokes. Take your time.
– Finish with a thin top coat. Let it cure if you use gel.
– Clean up edges with a remover pen for a clean look.
Tips and cautions
– Practice on a swatch first. This keeps your nails calm on the big day.
– Use a steady hand and slow strokes. Tiny lines look sharp when clean.
– If you slip, let the paint dry, then touch up the area.
– Don’t pile on color. Small symbols look elegant on a soft base.
– Protect the art with top coat; it helps it last through all the celebrations.
Next steps
– Try a simple symbol on one nail first. If you love it, repeat on a couple more nails. This keeps your look balanced and stylish.
20. Hand-Painted Symbols
Editor’s Choice
Artdone 31pcs Nail Art Brushes, Nail Art Tool Set, Dotting Tools, Dust B…

12 Color 3D Nail Art Pens Set, Kalolary Nail Pens Nail Point Graffiti Do…

OPI Correct Clean Up | Refillable Nail Polish Remover Corrector Pen | Ge…
21. Heartfelt Designs
Heartfelt Designs
You want nails that feel soft and wedding-ready. Heart shapes deliver that vibe. Tiny hearts around the edge look sweet. A single large heart on one nail makes a bold statement. Pick a color that fits your theme.
Pastel shades create a dreamy look. Red tones stay classic and bold. Nude or champagne bases let hearts stand out. Add glitter or rhinestones for extra shine.
– Placement ideas: big heart on the ring finger with small hearts on other nails.
– Style options: solid hearts on a light base, or negative-space hearts.
– Finishes: gloss for shine, or satin for a softer feel.
Here is how to do it. Start with a clean base. Apply your base color and let it dry. Draw a heart with a thin brush, or use a heart stamp. Place a larger heart on one nail. Add tiny hearts on a couple of nails. Add glitter or a rhinestone for sparkle. Seal with a clear top coat.
Next steps: keep other nails simple so the hearts stay the focus. If you worry about smudges, use a quick-dry top coat. Practice on a nail wheel first to gain confidence. These ideas stay timeless and fit modern wedding trends.
21. Heartfelt Designs
Editor’s Choice
Artdone 31pcs Nail Art Brushes, Nail Art Tool Set, Dotting Tools, Dust B…
Top Coat Nail Polish Clear: Quick Dry Nail Polish No Chip High Shine Lon…

Makartt Nail Rhinestone Glue: Super Strong Gel Glue for Nail Art Decorat…
22. Textured Touches
Want a bridal nail look that feels rich yet easy to wear? Textured finishes add depth and interest without shouting.
Here is why textures work on a wedding day:
– Matte bases with glossy tips create clean contrast that catches the eye without breaking the look.
– Velvet textures use a soft powder that sticks to a tacky layer, giving a gentle, luxe feel.
– Sand-like finishes use a fine powder to add tiny grains, showing a subtle texture under wedding light.
– Mix textures on different nails to keep the design lively while staying classy on every hand.
Next steps to try
– Prep nails by cleaning, shaping, and pushing back cuticles so textures stick well.
– Choose two nails for texture and pick a base color that fits your wedding palette.
– For a matte base with shiny tips, apply the matte layer first, then dab a small amount of gloss on the tips.
– For velvet, press velvet powder into a tacky layer on the chosen nails and sweep away the excess.
– For sand, sprinkle a fine powder onto a tacky layer, press gently, then brush off extra.
– Seal everything with a topcoat; a matte topcoat keeps the soft finish and helps it last.
– If you can, avoid water contact for 24 hours after the manicure to protect textures.
– Maintain the look by cleaning nails with a soft brush and fixing chips as soon as you see them.
22. Textured Touches
Editor’s Choice

COSMOO Black Matte Nail Polish, Quick Dry Nail Lacquer for Nail Art Varn…
12 Jars Nail Glitter for Nail Art Velvet Powder DIY Manicure Plush Powde…

Black White Nail Glitter Powder, 6 Jars Extra Fine Sugar Glitter for Nai…
You Might Also Like
23. Artistic Doodles

You want nails that feel playful but stay chic for your wedding. Artistic doodles can do that. Here is why this look fits a free‑spirited bride.
– What this look is
Doodles on nails mix abstract shapes, swirls, and tiny lines on a colored base. The result looks fresh and creative, not loud or loud.
– Why it fits you
It lets your personality shine. One nail can tell a small story while others stay simple. A mix of color and line feels lively yet balanced across both hands.
– Color and base ideas
Try a soft base like blush pink, champagne, or ivory. Draw with white, black, or metallics such as gold. Keep a couple nails plain to hold the look together.
– Tools and tips
You’ll need a fine brush, a dotting tool, and a nail art pen or very steady hand. Practice on a swatch sheet first. Ease into thin, clean lines for the best result.
– Step-by-step guide
Paint the base and let it dry. Lightly sketch shapes with a thin brush. Go over with your chosen color, then add a swirl or dot. Finish with a clear top coat.
– Placement ideas
Spread doodles across all nails or focus on one or two nails for a feature. The ring finger can host the main motif while others stay subtle.
– Care tips
Use a solid top coat and recoat every 2–3 days. Wear gloves when cleaning and avoid harsh cleaners to keep designs intact.
– Try these quick variations
Abstract lines on index, soft swirls on middle, tiny doodles on ring. Keep thumbs simple to balance the look.
Next steps: practice your favorite shapes, choose three colors, then test on a nail wheel before your big day. Your wedding nails will feel personal and pretty with minimal fuss.
Embrace your free-spirited side with artistic doodles! These playful yet chic indian wedding nail art designs for brides let your unique personality shine, telling your story one nail at a time.
23. Artistic Doodles
Editor’s Choice
Beetles 31pcs Nail Art Brushes, Dotting Tools, Nail Art Pens, Dust Brush…
5PCS Dotting Pens with 3 PCS Nail Painting Brushes, Nail Art Design Tools

12 Color Acrylic paint pen Set, Kalolary Nail Polish Pens Nail Point Gra…
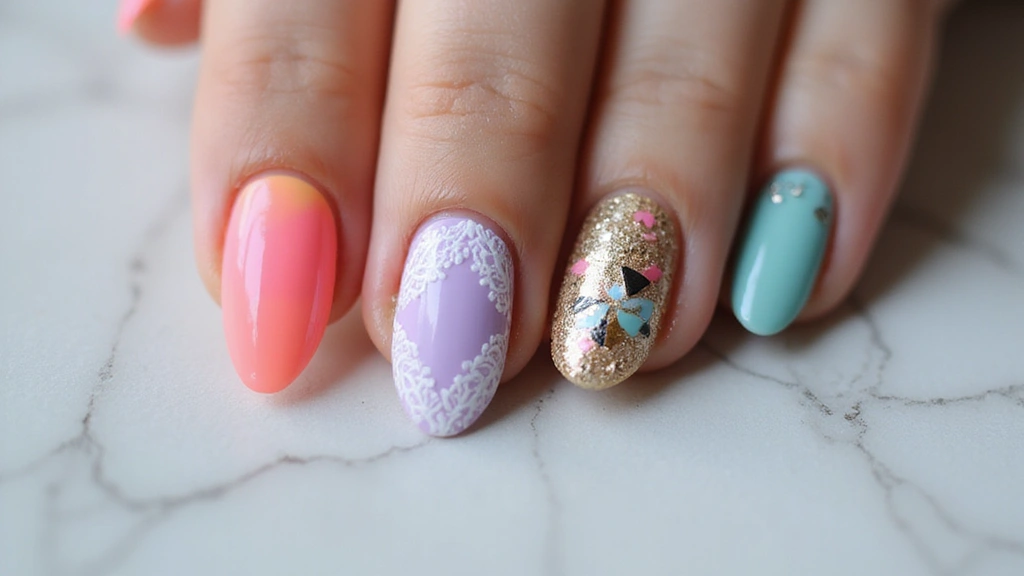
24. Lace and Pearls
Here is why lace and pearls work for wedding nails. They blend soft textures with delicate shine. The look feels romantic yet fresh. It pairs with many gowns, especially lace dresses.
1. Base color
– Choose a soft nude or pastel base.
– A light shade helps lace patterns stand out and keeps the style wearable.
2. Lace pattern
– Use a fine brush to paint tiny lace in white or silver.
– Start simple, with borders or small floral bits for a chic effect.
3. Pearl embellishments
– Place tiny pearl beads along the lace lines.
– Tweeze each pearl into position for clean, delicate layouts.
4. Adhesion and sealing
– Apply a strong nail glue or pearl adhesive to secure every bead.
– Finish with a clear top coat to lock the design in.
5. Matching with outfits
– This look pairs well with lace wedding dresses for romance.
– It also fits other wedding styles without stealing the show.
6. Practical tips
– Practice on a nail wheel first to perfect the pattern.
– Keep beads small and spaced for comfort and long wear.
– Reapply top coat every few days to keep shine.
Next steps
– If you want a milky look, swap base to ivory.
– Ask your artist to add a thin silver thread for texture.
24. Lace and Pearls
Editor’s Choice
Artdone 31pcs Nail Art Brushes, Nail Art Tool Set, Dotting Tools, Dust B…

Luxurious Flatback Pearls (White) & Metal Nail Beads (Silver) with Rhine…
Top Coat Nail Polish Clear: Quick Dry Nail Polish No Chip High Shine Lon…
25. Themed Nail Art
Planning your wedding nails is more fun when the design fits your whole day. Themed nail art makes your look feel put together. It adds a personal touch you and your guests will notice. Here is how to nail it and why it works.
1. Choose a theme that fits your wedding
Pick a vibe that matches your venue. A garden ceremony loves floral motifs. A beach setting works with shells, waves, and soft blues. Pick one motif you truly love, then repeat it in a few nails for balance.
2. Match colors to your palette
Let your nail colors echo your dress and bouquet. Hold swatches up to your fabric and blooms. Use two main colors plus one tiny accent to keep the look clean and wearable all day.
3. Balance bold and simple
If you want a big motif, put it on one or two nails only. Let the rest stay simple with thin lines, tiny dots, or a solid color. This keeps nails elegant and easy to touch up.
4. Coordinate with bouquet and attire
Tie your nails to your wedding pieces. A hint of gold can echo metallic threads in your dress. A ribbon color can appear as a fine line on a nail. Small echoes feel intentional.
5. Practical tips to get it right
Bring photos to your nail tech and test on a nail wheel first. Choose gel for shine and durability. Check the look in daylight and after dancing to be sure it lasts.
Next steps: pick two motifs, sketch quick ideas, and book a trial so you love the finale.
25. Themed Nail Art
Editor’s Choice
Beetles Nail Stamp Gel 16Pcs French Tip Nail Stamp Kit with 8 Colors Sta…

Beetles Gel Nail Polish Kit with U V Light -54 Pcs Gel Nail Kit Four Sea…
Artdone 31pcs Nail Art Brushes, Nail Art Tool Set, Dotting Tools, Dust B…
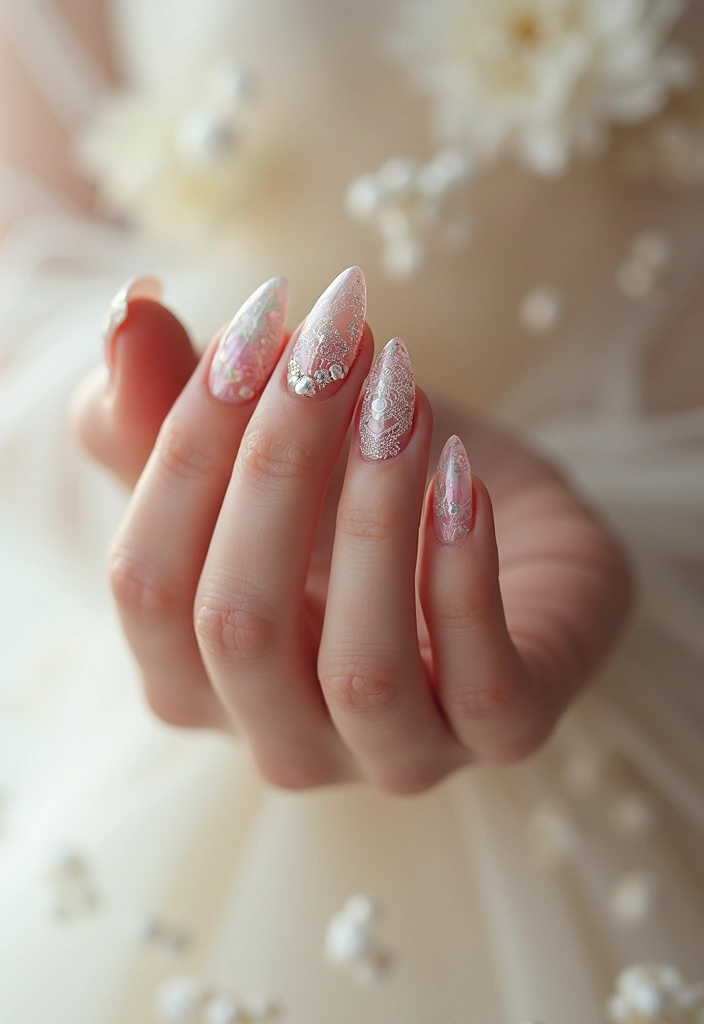
26. Ethereal Glaze
What this look does You want a wedding nail look that feels light and romantic. Ethereal glaze nails give that soft glow. Iridescent polishes catch the light and shift color as you move. This design fits best with gentle base colors like pale pink, champagne, or lavender.
How to apply Start with clean nails and a clear base coat. Paint two thin coats of iridescent polish and let each dry. Apply a third sheer coat only if you need more glow. Keep most of the nail free of heavy color so the glaze stays the star. Let nails rest for a minute after each coat.
Finishing touches Finish with a clear top coat for a glassy shine. Or pick a satin top coat for a soft, misty look. If you want a tiny sparkle, brush a fine line of glitter along the tips. Place glitter with a small brush and keep it at the tips only.
Tips and caveats Check daylight to see how the glow shifts. This look pairs with soft fabrics like lace and silk. The main limit is that shimmer moves with light, which is part of its charm, not a flaw. If the shimmer feels too bold, skip the glitter and go only with the glaze. You can try rose gold glitter for a warm touch.
26. Ethereal Glaze
Editor’s Choice
OPI Nail Lacquer Nail Polish | Opaque Light White & Gray Shimmer Chip Re…
Sally Hansen Double Duty™, Base and Top Coat, Quick Dry, Long Lasting, S…

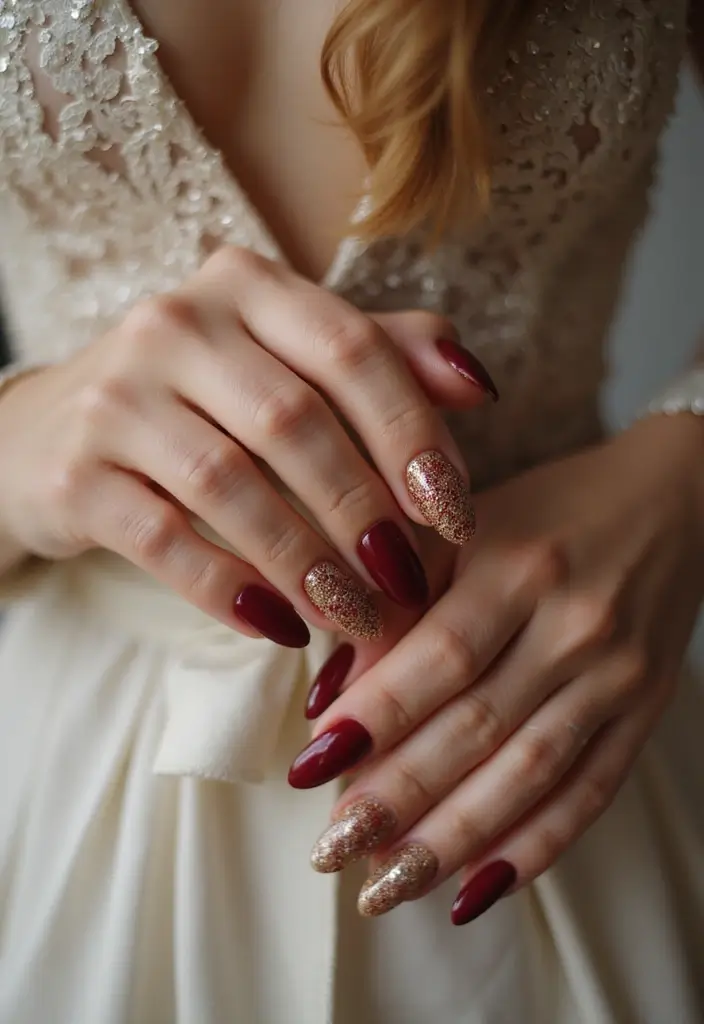
27. Statement Nails

Here is why statement nails fit a bridal look. They give you a bold focal point without shouting. Pick one or two nails per hand for a striking design, and keep the rest calm with a soft color.
Plan smart. Start with your wedding palette. Ivory or nude bases with gold foil work well for classic weddings. If your outfit leans red or pink, try a bold accent nail plus a delicate art piece on another nail.
What you’ll need
– Gel polish for long wear
– Fine brush or stamping plate for tiny details
– Rhinestones or metallic foil for shine
– A sturdy top coat to seal the look
How to apply. Shape nails, then paint the base color. Let it dry completely. Add bold art to 1–2 nails per hand. Finish with top coat. Cure if you use gel.
Maintenance tips. Do a test run weeks before the wedding. If you have short nails, you can still try a tiny accent on one nail for impact. Use a base coat to protect your nails. Keep surfaces smooth to avoid snagging jewelry.
Choosing the right art. Match the design to your jewelry and bouquet. Next steps: talk to your manicurist, book a trial, and lock in the look.
27. Statement Nails
Editor’s Choice

JODSONE 36 PCS Gel Nail Polish Set-32 Colors Gel Polish Kit Base Coat Gl…
Beetles 31pcs Nail Art Brushes, Dotting Tools, Nail Art Pens, Dust Brush…
FANDAMEI Nail Charms, Nail Rhinestones Kit with 8 Boxes of Nail Gems, 3D…
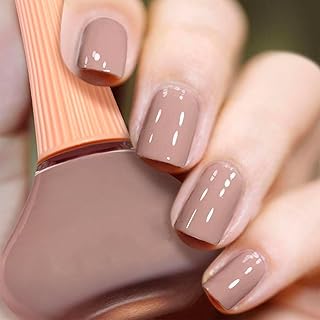
28. Subtle Beige and Gold
You want nails that look polished without stealing the show. A soft beige base with delicate gold accents hits that note. It works with almost any wedding outfit and keeps your hands looking elegant all day.
What makes this look work
– Soft beige acts as a calm canvas that flatters many skin tones.
– Tiny gold lines, dots, or stripes add just a sparkle.
– A light, even finish on every nail keeps the set cohesive.
– Keep the same design on both hands for balance in photos.
How to create it
– Start with a smooth, soft beige polish as the base.
– Use a fine brush to paint a slim gold line near the cuticle or along the free edge.
– Add tiny gold dots at the sides of a few nails for a touch of shimmer.
– Finish with a thin clear top coat to seal shine and extend wear.
Outfit and vibe tweaks
– If your dress has gold embroidery, echo that detail with parallel gold lines.
– For cool undertones, choose beige with a hint of pink.
– For warm lighting, pick a creamy beige with a touch more yellow.
Care and longevity
– Apply a fast-dry top coat to reduce chipping.
– Revisit gold details after a week or two if you want extra polish.
– Trim nails to a neat shape so the lines stay crisp.
Next steps
– Do a quick practice run on a nail wheel or your painting hand. Then test it with your wedding dress swatch.
28. Subtle Beige and Gold
Editor’s Choice
COSMOO Light Coffee Nail Polish, 12ml Elegant Quick Dry Nail Lacquer for…
Beetles 31pcs Nail Art Brushes, Dotting Tools, Nail Art Pens, Dust Brush…
Top Coat Nail Polish Clear: Quick Dry Nail Polish No Chip High Shine Lon…
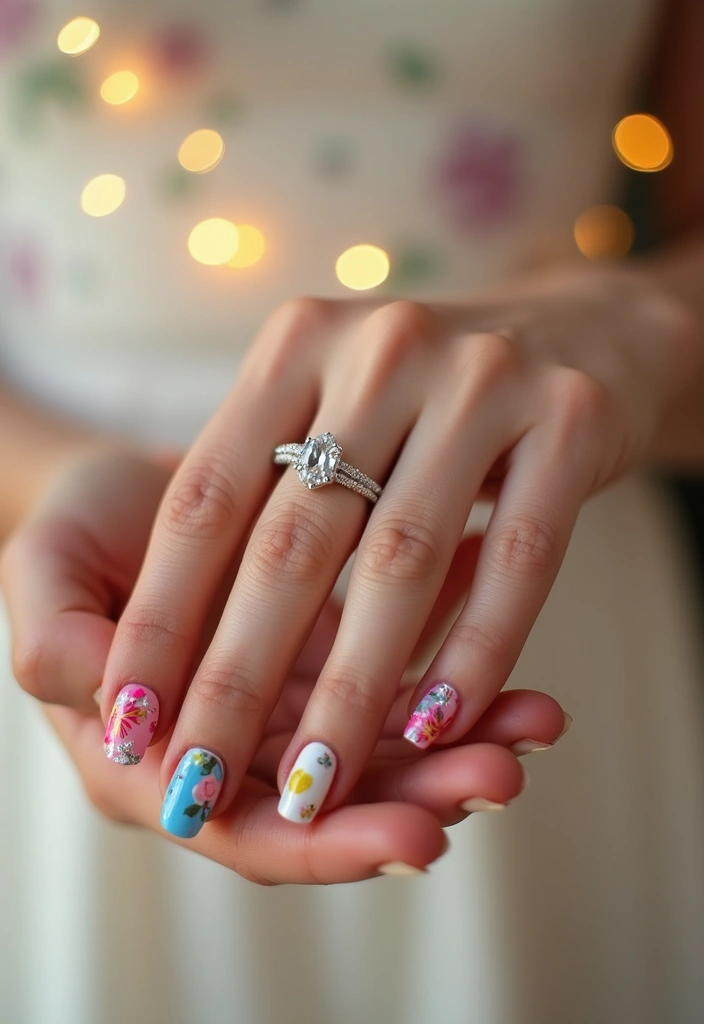
29. Custom Art Designs
Custom Art Designs for Your Wedding Nails
Here is why custom nail art fits a bridal look. It captures your bond in tiny, elegant designs that stay sharp all day.
– Step 1: Gather inspo by saving 5 to 8 images of things you love, like places you visited together, initials, or symbols from your culture.
– Step 2: Pick a plan with one main motif or a few small accents to keep nails balanced for photos.
– Step 3: Choose a style such as hand-painted lines, tiny icons, foil accents, or micro-stamping, and decide between glossy or matte finishes.
– Step 4: Talk with your nail artist and share motifs, color ideas, and nail length, then ask for a rough sketch.
– Step 5: Decide on materials and wear, choosing gel nails or acrylics to hold fine details and a durable top coat for long wear.
– Step 6: Schedule a trial two to three weeks before the wedding and book the final set for the week before.
– Step 7: Keep it practical by limiting glitter, matching colors to your dress and jewelry, and leaving a couple of nails simple.
– Step 8: Price and care, knowing custom nail art varies and asking for a clear quote, then plan aftercare with moisture and gentle removers.
Custom nail art is like wearing your love story on your fingertips—tiny, elegant designs that keep your memories alive all day long. Let your nails tell your unique tale!
29. Custom Art Designs
Editor’s Choice
Beetles Gel Nail Polish Kit with U V Light 68 Pcs Emotional Spectrum 35 …

Artdone Metallic Nail Art Pens, Liner Brushes Set, 5PCS Black Color Nail…
100 Sheets Nail Foil Transfer Sticker Kit, Art Decals Tips Starry Sky La…
30. Seasonal Color Play
You want nails that fit the season and your big day. Seasonal color play helps you match the mood, dress, and flowers without shouting. Here is why it works: it creates a polished look that still feels fresh.
– Step 1: Pick a season base. For a winter wedding choose deep reds, bottle greens, or a wine shade. Spring loves soft pinks, peach, and lavender. Summer shines with bright coral, turquoise, or sunny yellow. Autumn favors burnt orange, olive, or burgundy. Use one base color per hand or rotate two.
– Step 2: Tie nails to your palette. Pick 1-2 anchor colors that appear in your bouquet, embroidery, or dress. Add a neutral shade like nude or pale pink for balance. This keeps nails tied to the whole look.
– Step 3: Choose a simple design plan. Decide if you want all nails the same, or one accent nail per hand. Try stripes, dots, tiny florals, or a delicate foil speckle.
– Step 4: Test and apply. Paint a swatch on a nail wheel or a nail sample to check how it reads in daylight. If you use gel or acrylic, finish with a long-lasting top coat.
– Step 5: Keep it cohesive. Use 2-3 colors max plus neutrals. Too many hues can clash with your dress.
Next steps: compare swatches to fabric samples, plan a quick trial with your nail tech, and let your nails bloom with the season.
30. Seasonal Color Play
Editor’s Choice
Artdone 31pcs Nail Art Brushes, Nail Art Tool Set, Dotting Tools, Dust B…
JODSONE 36 PCS Gel Nail Polish Set-32 Colors Gel Polish Kit Base Coat Gl…
20Pcs False Nail Swatches Wheels Nail Wheel Art Plastic Nail Polish Disp…
Conclusion

Your wedding day is about celebrating love, and every detail counts, right down to your nails. These stunning Indian wedding nail art designs offer a variety of styles, from traditional to modern, ensuring you find the perfect fit for your bridal look.
You can express your personality and make a statement with these creative ideas, ensuring your hands look as beautiful as your heart feels. Don’t forget to choose designs that resonate with you and complement your overall wedding style!
Note: We aim to provide accurate product links, but some may occasionally expire or become unavailable. If this happens, please search directly on Amazon for the product or a suitable alternative.
This post contains Amazon affiliate links, meaning I may earn a small commission if you purchase through my links, at no extra cost to you.
Frequently Asked Questions
What Are Some Popular Indian Wedding Nail Art Designs for Brides?
There are so many stunning options for Indian wedding nail art designs for brides! Some popular choices include floral elegance, which features soft blooms on a nude base, and traditional mehndi patterns that mimic intricate henna designs. You might also love glitter glam for a sparkling touch, and pastel dreams for a soft romantic vibe. Each design can beautifully complement your wedding attire!
How Do I Choose Nail Art That Matches My Wedding Outfit?
Choosing the right nail art to match your wedding outfit is all about coordination! Start by considering the colors and patterns of your lehenga and accessories. For instance, if you’re wearing a richly colored outfit, jewel-toned glam or traditional red and gold nails can enhance your look. Don’t forget to consider the mehndi design as well; you can incorporate similar patterns into your nail art for a cohesive style!
How Long Should I Allow for Nail Art Application Before My Wedding?
It’s a great idea to schedule your nail art appointment at least one to two days before your wedding. This allows the nails to fully dry and ensures that any potential touch-ups can be made. Additionally, if you’re opting for intricate designs, like hand-painted symbols or custom art designs, giving yourself extra time will help ensure everything is perfect for your big day!
Can I Incorporate Seasonal Themes into My Nail Art?
Absolutely! Incorporating seasonal themes into your nail art is a beautiful way to reflect the time of year. For example, if you’re having a spring wedding, consider pastel shades or floral designs. If your wedding is in the fall, warmer tones and leaf patterns could be stunning. Tailoring your nail art designs to the season adds a personal touch that ties everything together!
What Are Some Tips for Maintaining Bridal Nail Art Throughout the Wedding Day?
To keep your bridal nail art looking flawless throughout your wedding day, start with a good quality base coat and finish with a top coat to seal the design. Avoid using your nails as tools to prevent chipping. You can also carry a small bottle of nail polish for touch-ups, and remember to hydrate your hands and nails with a good moisturizer. This way, your nails will shine just as brightly as you do on your special day!
Related Topics
bridal nail art
Indian wedding
nail designs
mehndi patterns
floral elegance
glitter nails
custom art
pastel shades
minimalist chic
seasonal colors
easy nail art
bold styles

")
")


I love all the nail art ideas in this post! I’m getting married next year, and I’m already planning my look. Which design do you think would be best for a summer wedding?
These nail designs are so beautiful! I tried to do my own nail art once, and let’s just say, my cat was not impressed. I think I’ll stick to the professionals! 😂
Did you know that in some parts of India, brides paint their nails with henna? It’s such a cool tradition! I can’t wait to try some of these designs for my cousin’s wedding.