
Seasonal nails have me hooked on small, doable upgrades. Almond shapes look sleek and elegant, but I know you want designs that you can finish fast. Why I made this post is simple: I wanted to share 30 easy nail designs for almond shapes that look chic without taking hours. You can go from bare to wow with a few smart moves and the right tools.
Who it’s for You plan your look and want colors that stay put. If you love nail art but have a busy life, this is for you. If you wear almond nails and dream of salon vibes at home, you’ll find ideas that fit your routine.
What you’ll get is a ready to use set of ideas. 30 designs, each explained in simple steps. You’ll learn at least one easy technique in each design, like a tiny stripe, dot, or negative space accent. The designs cover gloss, matte, soft pastels, and bold pops, all made to work with almond nails whether they’re long or short. Plus you’ll get quick tips on shaping, base coats, top coats, and how to keep edges neat.
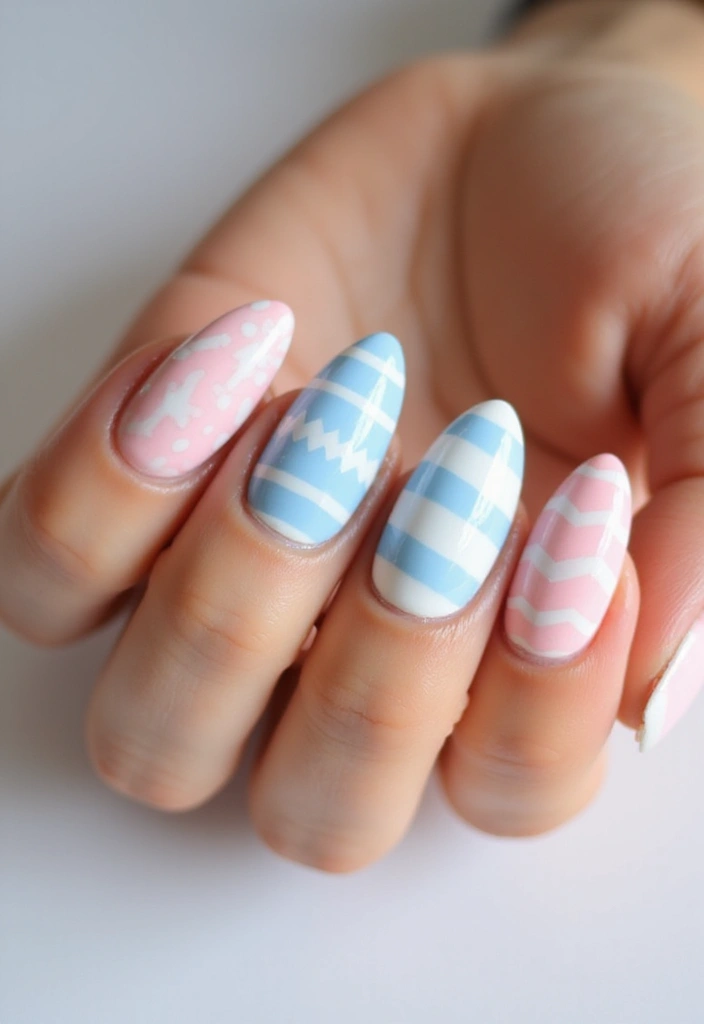
Think of a few options that jump out. A nude base with a slim black line along the free edge. A pink gradient that fades to clear at the tip. A tiny speck of glitter near the cuticle. A pale lavender with white dots in a neat row. A negative space crescent that shows just enough nail bed. Each idea is easy to recreate using common tools like striping tape, a dotting tool, or a thin brush.
To start, pick one design you love and gather your tools. A base coat, the colors you want, a top coat, a striping tape or nail art brush, and a dotting tool work well. File your nails into a soft almond shape, push back cuticles, and clean the surface. Apply base coat, then the color, then the accent elements. Finish with a top coat and a fast dry spray if you have it. Next steps: pick a design and give it a try tonight.
Give one a go and see how it changes your week. If you want more ideas, tell me what vibe you like and I can tailor more designs. This list is all about quick, confident options you can actually finish at home.
Contents
- 1. Classic French Tips with a Twist
- 2. Geometric Patterns
- 3. Ombre Effects
- 4. Floral Accents
- 5. Minimalist Lines
- 6. Abstract Art
- 7. Glitter Gradients
- 8. Animal Prints
- 9. Marble Effect
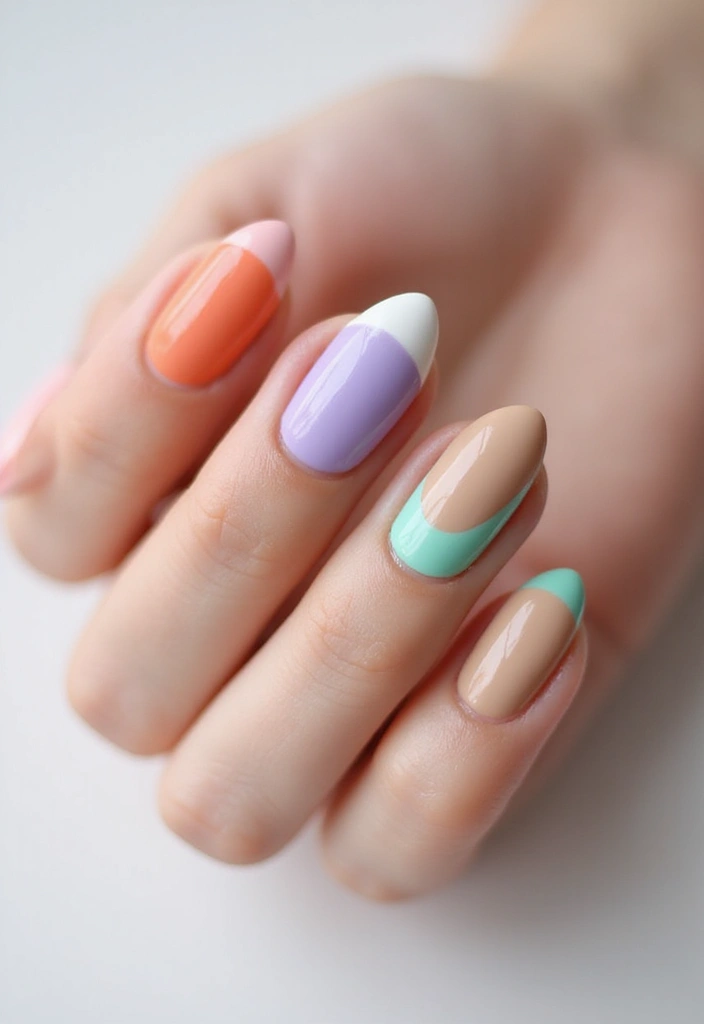
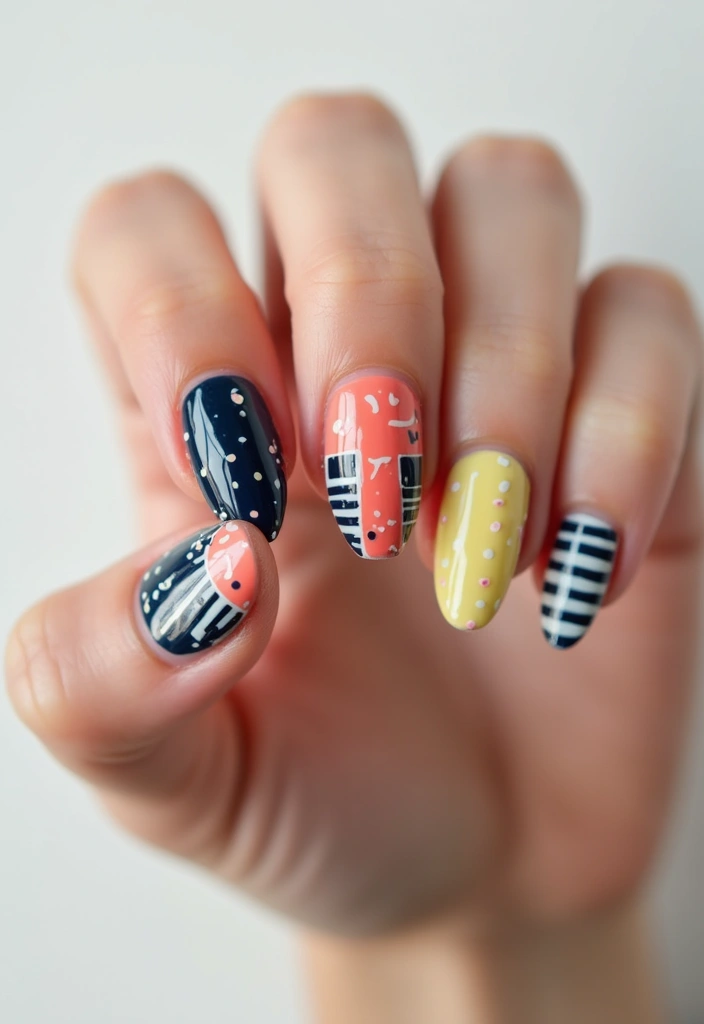
- 10. Color-blocking
- 11. Neon Accents
- 12. Dotted Design
- 13. Seasonal Themes
- 14. Tie-Dye Style
- 15. Crystal Accents
- 16. Metallic Shine
- 17. Watercolor Technique
- 18. Layered Patterns
- 19. Vintage Lace
- 20. Colorful Confetti
- 21. Chic Chevron
- 22. Simple Stripes
- 23. Fun Emoji Nails
- 24. Bold Color Pops
- 25. Edgy Chains
- 26. Sweet Candy Swirls
- 27. Fantasy Galore
- 28. Boho Feathers
- 29. Coffee Stain Effect
- 30. Colorful Raindrops
1. Classic French Tips with a Twist
You want almond nails that look clean yet show your style. Classic French tips meet a pop of color. The secret is a soft base and a bright edge that stands out without shouting. Pick pastels for a gentle vibe or a bold shade for a fashion moment.
What you’ll need
– Base coat for smooth, durable nails
– Nail tape or thin sticker guides
– Neat neutral polish for the base
– Your chosen tip color (pastel or bold)
– A top coat to seal and shine
How to do it
– Start with clean, shaped nails and push back cuticles.
– Apply a thin base coat; let it dry completely.
– Place tape to mark the curved tip line.
– Brush on the tip color, staying inside the guide.
– Remove the tape while the polish is still tacky for a crisp edge.
– Finish with a top coat and let it dry fully.
Next steps
– If the line looks uneven, add a light second coat to the tip.
– For longer wear, cap the free edge with the base color before applying tip color.
– Try a second color on the tips for a two-tone look.
This style stays classic but lets your personality shine through with color. It’s easy to swap shades as your mood changes.
1. Classic French Tips with a Twist
Editor’s Choice

Sally Hansen Double Duty™, Base and Top Coat, Quick Dry, Long Lasting, S…

Nail Art Striping Tape Lines Kit 36 pcs 1mm 2mm 3mm Nail Tape Strips for…
Sally Hansen Double Duty™, Base and Top Coat, Quick Dry, Long Lasting, S…
2. Geometric Patterns
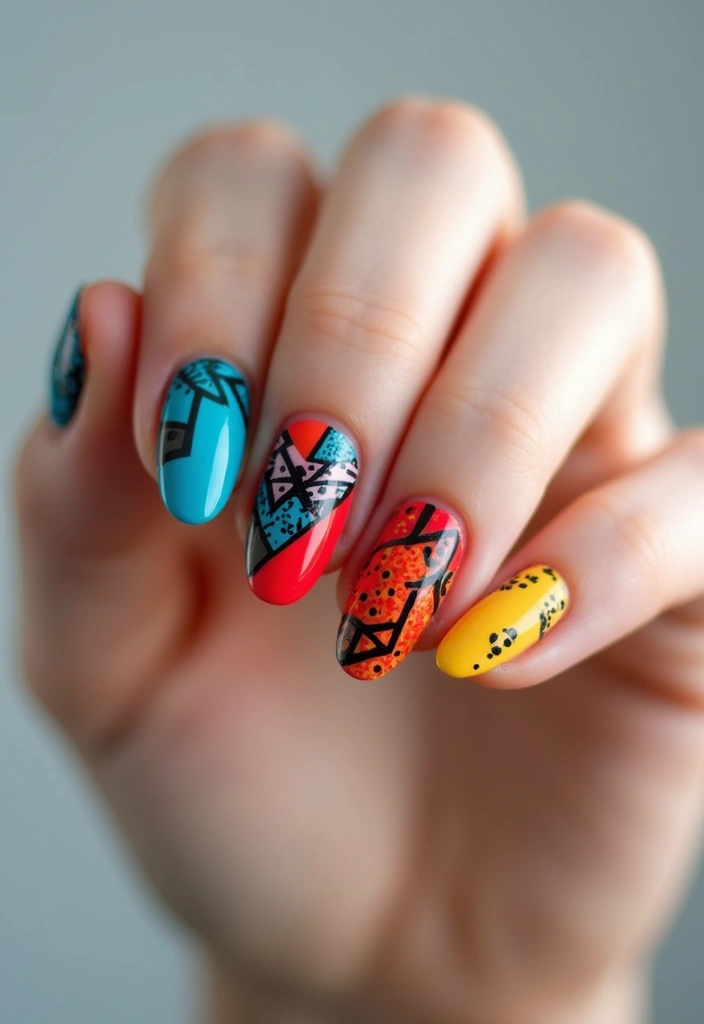
You want almond nails that look sharp and neat. Geometric patterns give a clean, modern look. Here is why geometry shines on almond nails. Let’s get you started today.
Why geometric patterns work on almond nails
Almond nails show lines clearly. Triangles, stripes, and dots read bold yet simple. The look stays polished and easy to wear.
What you’ll need
– Thin brush for fine lines
– Striping tape to map shapes
– Dotting tool or toothpick for dots
– Base color, two accent colors, and a top coat
Easy ideas to try
– Triangles and lines: Paint a base color and map a triangle with tape for a crisp edge.
– Dots and lines: Paint a base color and add a line of small dots along the center with the dotting tool.
– Grid touch: Draw two thin lines across the nail to form a mini grid, then place a dot in a corner.
Color and tool tips
Keep two or three colors. Black with metallic gold or silver looks refined. Or choose bright hues for a bold vibe. Let colors sit well together and avoid crowding.
Practical tips
– Keep a steady hand and a light touch.
– Let each layer dry before you add the next.
– Finish with top coat to seal the design.
Next steps: try one idea on a nail, then apply to all.
2. Geometric Patterns
Editor’s Choice

Artdone 31pcs Nail Art Brushes, Nail Art Tool Set, Dotting Tools, Dust B…
Nail Art Striping Tape Lines Kit 36 pcs 1mm 2mm 3mm Nail Tape Strips for…

5PCS Dotting Pens with 3 PCS Nail Painting Brushes, Nail Art Design Tools
3. Ombre Effects
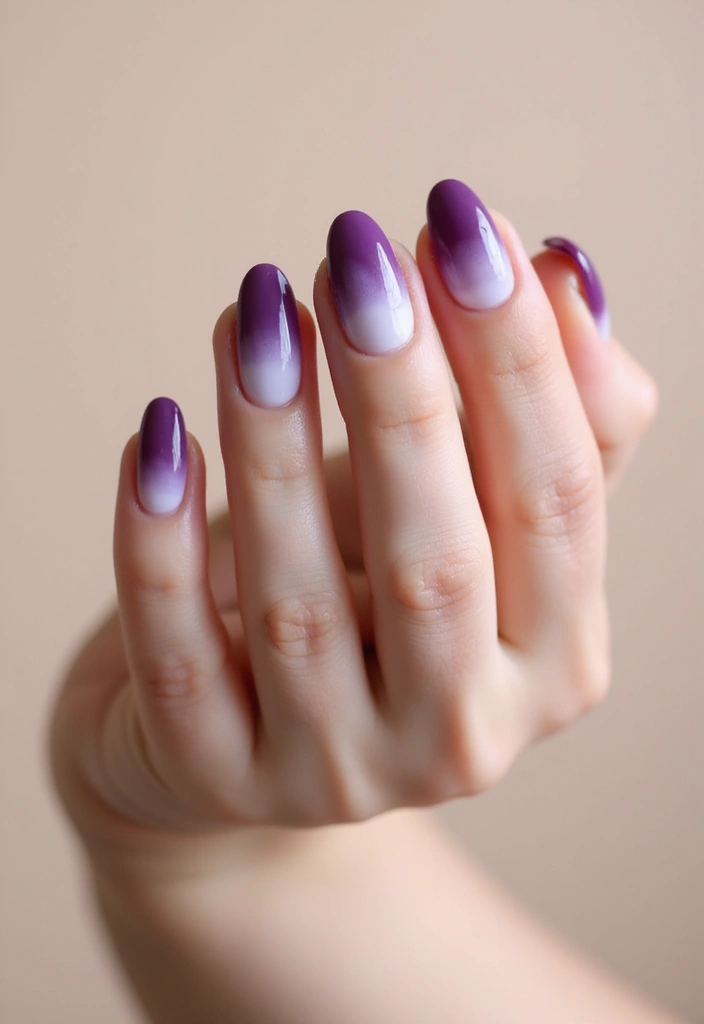
Here is why ombre nails shine on almond shapes. The pointed tip shows the color fade in a smooth line. You get a soft look for casual wear.
Let’s break it down. Pick two or three colors that blend. Try sunset tones like orange to pink. Keep the light shade at the base. The gradient will look balanced.
Next steps. Prep your nails. File to almond shape. Push back cuticles. Wipe with alcohol so the polish sticks.
Apply a thin base coat. Then paint the base color and let it dry.
On a makeup sponge, dab stripes of color side by side. Start with the light shade at the base. Add the darker shade toward the tip. Gently dab to blend from base to tip. Repeat until you see a smooth fade.
Thin layers help the colors stay smooth.
To add glow, dab a tiny shimmer near the tip.
Clean up the edges with a small brush dipped in remover. Finish with a top coat that you like, matte or glossy. Let it dry completely.
Wait a moment between coats.
Tips:
– Use a makeup sponge for a soft fade.
– Finish with a top coat to seal the look.
– If you want more depth, add a third shade.
3. Ombre Effects
Editor’s Choice
6pieces Ombre Nail Brush Wood Nail Pen Ombre Brush for Gel Nails Nail Gr…

modelones Fall Gel Nail Polish Orange Color Changing Glitter Coral Tempe…

Top Coat Nail Polish Clear: Quick Dry Nail Polish No Chip High Shine Lon…
4. Floral Accents
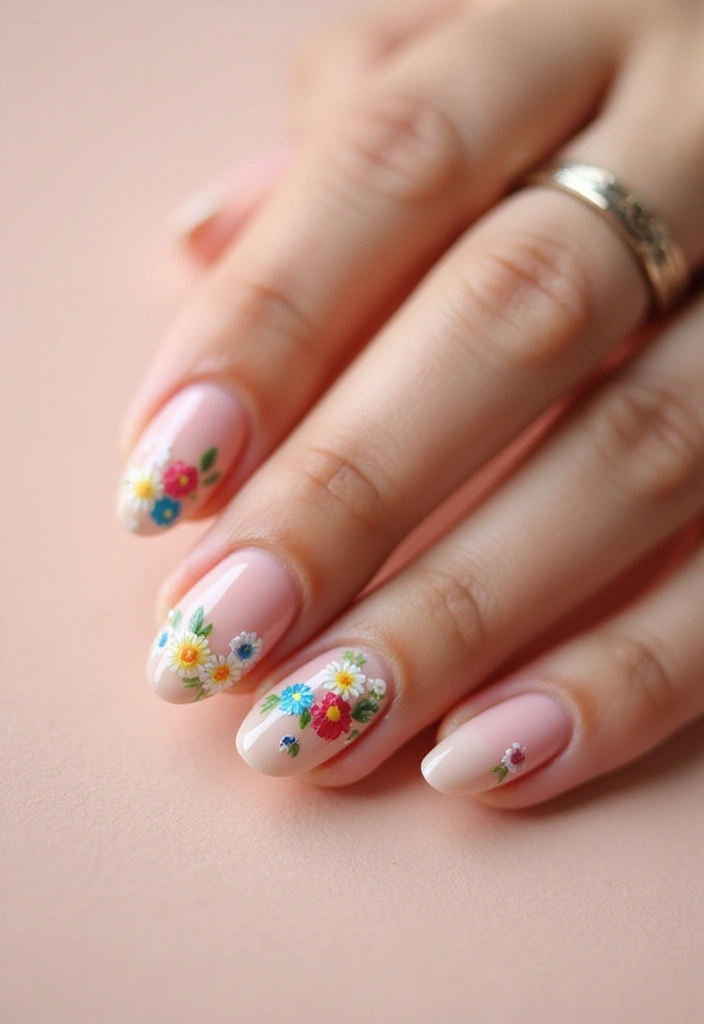
Want almond nails that feel fresh? Floral accents hit the mark. They pair with many colors.
Here is a way to paint flowers you can pull off.
– Materials: base coat, pastel or nude polish, white and a color for petals, a dotting tool or fine brush, a top coat, glitter or a matte top coat.
– Prep: Shape your nails into almond, push back cuticles, and cleanse them. Apply a thin base coat and let it dry.
– Base color: Paint a soft pastel or nude shade. Let it dry completely.
– Flower patterns: For daisies, place a small center dot in yellow. Add white petals around it with short, rounded strokes. For a simple rose, dab tiny pink dots and smooth them with a clean brush to hint petals.
– Leaves: Add green leaves beside the bloom with a thin brush.
– Finish: Add glitter on one nail for pop, or skip glitter and use a matte top coat.
– Seal: Apply a glossy top coat to protect art and add shine.
Tips: choose easy flowers, such as daisies. Use the dotting tool for round petals. Pair with glitter for sparkle or go matte for a calmer look. Floral nails suit spring and summer, giving a cheerful vibe.
4. Floral Accents
Editor’s Choice

Augshy 19pcs Mandala Dotting Tools Set Pen Dotting Tools Mandala Stencil…

Beetles Pastel Nail Polish Set -6 Colors Pink Blue Yellow Nude Pink Purp…

OPI Nail Lacquer Top Coat | Clear Nail Polish Top Coats | Classic, Quick…
5. Minimalist Lines

Are you chasing a clean, chic nail look that works anywhere? Minimalist line designs give you that calm, polished vibe. Simple lines and dots in black or gold stay stylish without shouting. You can wear a single line for elegance, or a crisp grid for a modern twist.
Here is how to nail it.
– Prep and base: Shape nails, push back cuticles, base coat. A smooth surface helps lines stay sharp.
– Theme: Black lines on nude look classic; gold lines on pale polish feel warm.
– Plan the pattern: For a single line, mark a light guide across the nail. For a grid, map tiny squares at the tip. Striping tape keeps lines straight.
– Apply the lines: Use a thin brush or striping pen. Paint along guides; remove tape while the paint is wet for clean edges.
– Dots option: Add dots at intersections for texture.
– Seal the look: Top coat, then let it set under a fan or light.
Tips:
– Keep nails shaped and polished for the best effect.
– Use striping tape to create crisp lines.
– Apply thin coats to avoid bulky edges.
Next steps: practice on a nail wheel or spare nails before you try your hands.
Elevate your style with simple nail designs! Minimalist lines on almond shapes deliver that chic, polished vibe for any occasion. Remember, elegance is in the details.
5. Minimalist Lines
Editor’s Choice

60 Colors Nail Striping Tape Line 2 Pieces Nail Tape Dispensers Free Tap…
Metallic Nail Art Brushes, 5Pcs Liner Brush Set, UV Gel Polish Painting …

Sally Hansen Insta-Dri®, Clear Top Coat, Quick Dry, Long Lasting, Streak…
6. Abstract Art
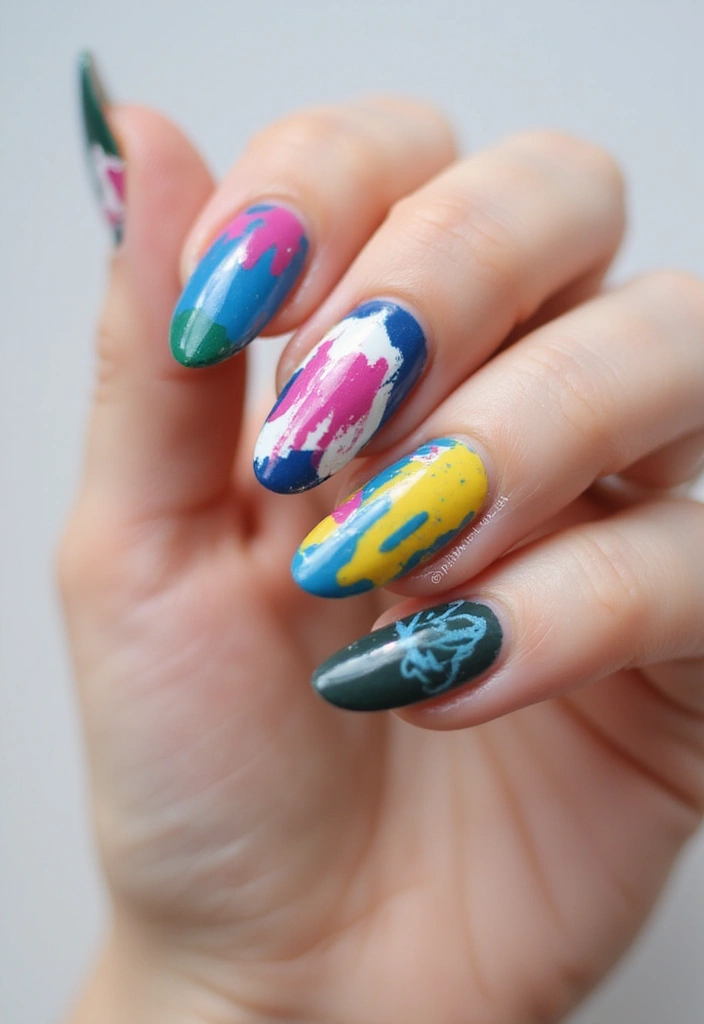
You want nails that grab attention without a long, fussy project. Abstract art gives you a bold look on almond shapes while staying easy to wear. You mix colors and shapes for a fresh look.
Here is how to start:
– Pick a base color and two to three accent shades. Keep the palette small so the design stays clean on almond nails.
– Apply a thin base coat, then build color with light, sheer layers. Let each layer dry before the next.
– Choose a few simple shapes to begin. Try a curved line, a cluster of dots, or a bright splash. Use a fine liner brush for lines and a larger brush or sponge for soft edges.
– Add texture by blending a tiny splash of color into a corner, or place a bold shape on one nail for contrast.
Tips:
– Layer colors to create depth; let each layer dry before adding the next.
– Use a fine brush for details and a broader brush for splashes of color.
– Abstract nail art is about play and discovery, so don’t chase perfection.
Finish with a top coat to seal the look. Clean up edges with a small brush dipped in remover. This fits almond shapes on nails of any length.
Your nails will wow.
Elevate your nail game with simple nail designs for almond shapes! A splash of abstract art can turn heads while keeping your look effortlessly chic.
6. Abstract Art
Editor’s Choice

Beetles 31pcs Nail Art Brushes, Dotting Tools, Nail Art Pens, Dust Brush…

Morovan 15 Bright Color 0.27oz Air Quick Dry Nail Polish Gift Set for Women
Sally Hansen Double Duty™, Base and Top Coat, Quick Dry, Long Lasting, S…
7. Glitter Gradients
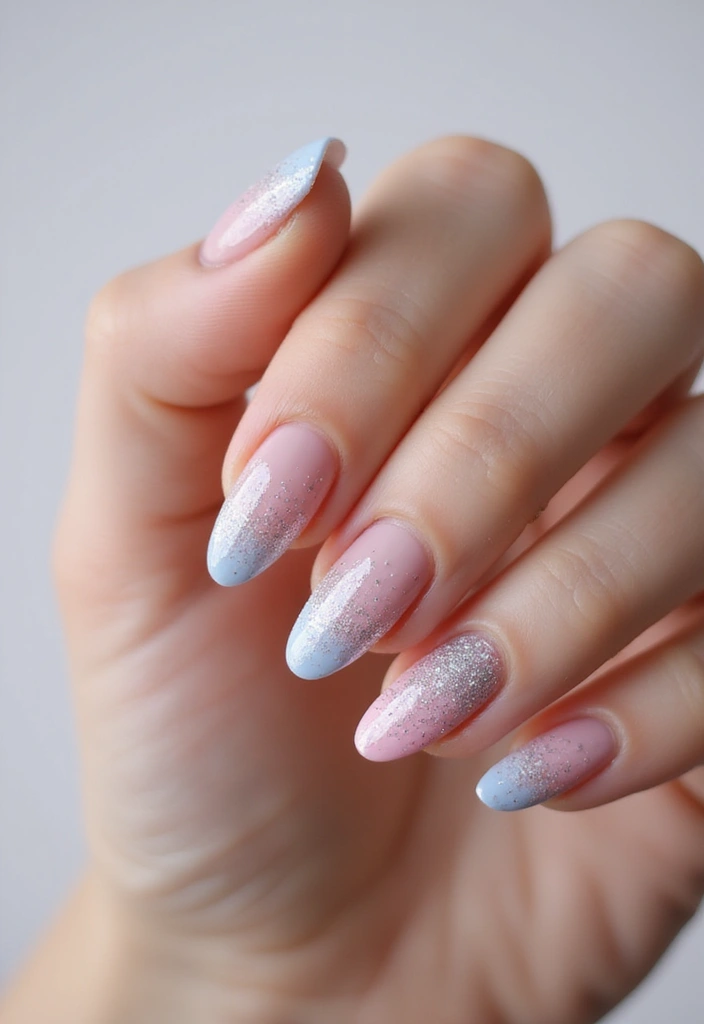
If you want almond nails that shine without oversharing, glitter gradients are your friend. They add a touch of glam, but stay chic. The color starts smooth and fades into glitter at the tips. It looks polished in daylight and playful in the glow of a party.
Here is how to do it
– Step 1: Prep with a clear base coat. This keeps nails even and prevents staining.
– Step 2: Pick a base color that matches your skin tone and outfits. A soft nude or pastel helps the glitter pop.
– Step 3: Paint the base color and let it dry completely. A second thin coat can improve depth.
– Step 4: Create the glitter gradient. Choose fine glitter for a subtle look, or chunky glitter for bold shine. Use a makeup sponge: dab the glitter onto the tips and lightly blend toward the middle. Build up layers until the fade feels smooth.
– Step 5: Seal with a clear top coat. This locks in the sparkle and adds long-lasting shine.
– Step 6: Let everything dry fully. A quick dry spray can help, but don’t rush and smudge the glitter.
Tips: For a delicate vibe, go with fine glitter on a light base. For a party or photo night, pick chunky glitter in a bold color. If edges look rough, pat them gently with the sponge again and recoat.
Next steps: check your lighting in a mirror. You want the glitter to catch the light, not feel heavy. With a little practice, your almond nails will glow just right in every setting.
7. Glitter Gradients
Editor’s Choice
Sally Hansen Double Duty™, Base and Top Coat, Quick Dry, Long Lasting, S…

Ultra Fine Glitter for Nails, Set of 45 Colors, Extra Fine Resin Glitter…
Top Coat Nail Polish Clear: Quick Dry Nail Polish No Chip High Shine Lon…
8. Animal Prints
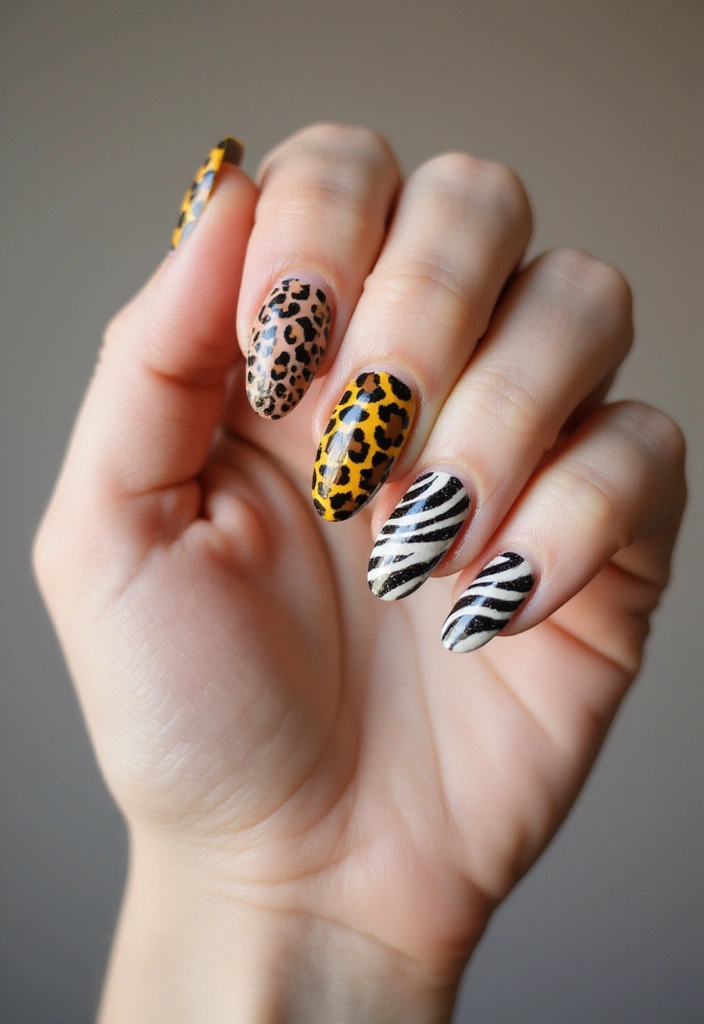
Your almond nails deserve a look that grabs attention. Animal prints add texture and style. On almond nails, prints follow the curve and make the shape look longer. Here is a simple way to pull it off.
Print options
– Leopard spots work in big or small patches.
– Zebra stripes give a bold black-on-light contrast.
– Cheetah patches mix irregular shapes for a modern vibe.
– Snake skin patterns add texture without overdoing it.
Color ideas
– Black on nude or metallic bases stays classy.
– White on black or tan pops and stays clean.
– Gold or bronze accents bring warmth to the look.
– One printed nail with solid nails keeps balance.
How to apply
– Prep nails with a file, buffer, and cuticle care.
– Paint a base color and let it dry fully.
– Create the print with a fine brush or a stamping kit.
– Clean up any edges with a small brush dipped in remover.
– Finish with a quick top coat for shine and protection.
Next steps
– Practice on a practice sheet or a disposable nail.
– Start with one nail, then add more when you feel steady.
– Take your time and clean your edges.
– You will get crisp prints with patience.
– With practice you can switch prints fast and keep your look really fresh.
8. Animal Prints
Editor’s Choice
Artdone 31pcs Nail Art Brushes, Nail Art Tool Set, Dotting Tools, Dust B…

Beetles Nail Stamp Gel 16Pcs French Tip Nail Stamp Kit with 8 Colors Sta…
Sally Hansen Insta-Dri®, Clear Top Coat, Quick Dry, Long Lasting, Streak…
9. Marble Effect
If you want almond nails that look luxe, try the marble effect. It uses a couple of colors to make soft veining across each nail. The result is a refined, classy vibe that fits special occasions or when you want your nails to speak for you. On almond shapes, the swirls catch light and add depth. This quick design can feel gallery-worthy with the right finish.
Tips:
– Use a small brush to swirl colors on the nail while the polish is still wet.
– Pair black and white for a chic look, or pink and white for something softer.
– Finish with a shiny top coat to seal the design and make the marble pop.
If you mess up, practice on a spare nail first. Let each layer dry before you add the next swirl. This keeps the lines clean and the pattern true to marble.
Mix it up with variations. Gray and white create a cool vibe, while a touch of gold fleck adds a luxe touch. Marble nail art works on natural nails or with extensions, and the top coat helps it last. Next steps: try a single accent nail to build confidence and then widen the design to all ten nails.
9. Marble Effect
Editor’s Choice
Artdone 31pcs Nail Art Brushes, Nail Art Tool Set, Dotting Tools, Dust B…

JODSONE 23 PCS Gel Nail Polish Set with Base Glossy and Matte Top Coat M…
Sally Hansen Double Duty™, Base and Top Coat, Quick Dry, Long Lasting, S…
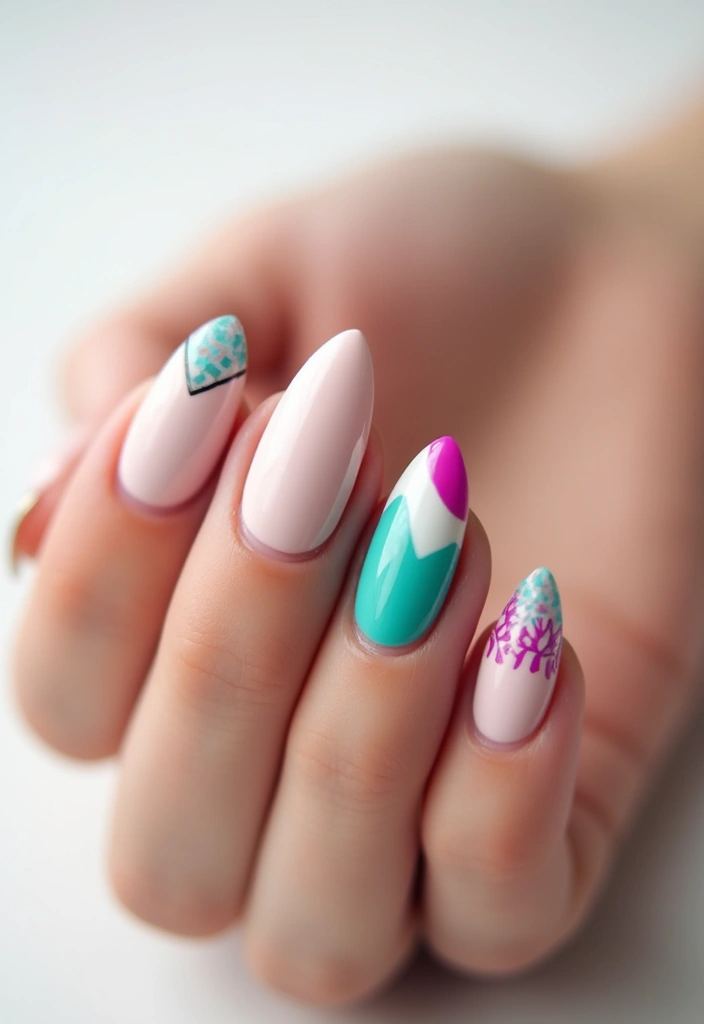
10. Color-blocking
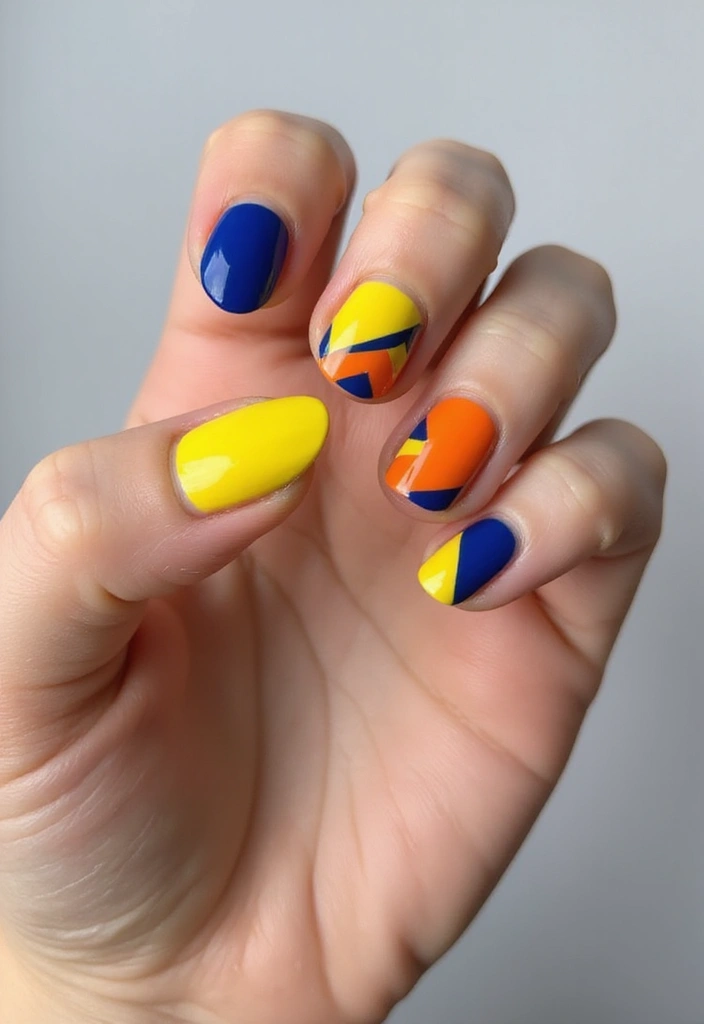
Color-blocking on almond nails gives you a chic way to mix color and shape. You get clean lines and a bold mood in one look.
What you need
– Base coat, two or three nail polishes that fit your skin tone, nail tape or thin strips, top coat.
– Small cleanup brush and nail polish remover for tidy edges.
Here is why this works. The almond shape shows off the color blocks, especially when blocks sit side by side with a sharp edge.
Steps to do it
– Prep your nails.
– Push back cuticles, file to almond shape, and apply base coat.
– Plan your blocks. Pick one light shade and one darker shade, or a third color for a pop.
– Tape the edges. Put thin tape on the nail to mark the blocks. Press it down so the edge is crisp.
– Paint the first block. Apply in a thin coat and let it dry.
– Add the next color. Place tape where you want the next block, then paint.
– Remove tape carefully while the polish is still a bit wet to keep lines clean.
– Finish with top coat. Let it dry fully.
Tips
– Sticking with 2 colors is best for a clean look.
– Match your palette to your skin tone for a natural glow.
– If lines blur, re-tape and repaint the edge.
– Give it a try.
You will love the look.
10. Color-blocking
Editor’s Choice
Sally Hansen Double Duty™, Base and Top Coat, Quick Dry, Long Lasting, S…
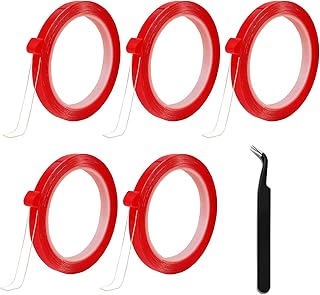
5 Rolls Double Sided Tape Nail Tape for Press On Nails Double Sided Nail…
Sally Hansen Double Duty™, Base and Top Coat, Quick Dry, Long Lasting, S…
11. Neon Accents
Here is why neon accents look great on almond nails. They add brightness without wrapping your whole hand in color. The almond shape helps the neon pop in a clean line. You can wear them anywhere from daily errands to a summer festival. If you want a quick wow, neon nails are a smart pick.
Tips:
– Always apply a white base coat for neon colors so they pop on almond nails and in photos.
– Balance the bright hues with a neutral shade on the other nails so the look stays chic.
– Keep designs simple. Thin lines, tiny dots, or one small shape work best.
– Choose one neon shade as the star and keep the rest softer.
– Seal with a fast-drying top coat to protect color and prevent chipping.
– For festivals or sunny days, try neon tips or a single neon stripe on one nail.
Neon designs can brighten your whole style. They catch light and draw attention to your manicure. With a few clean lines and a steady hand, you create a lasting statement.
11. Neon Accents
Editor’s Choice

LiME LiNE Automotive Basecoats, 1k Urethane Base Coat Color (White Basec…
Morovan 15 Bright Color 0.27oz Air Quick Dry Nail Polish Gift Set for Women

Seche Vite Dry Fast Top Coat Nail Polish – Quick Dry, Long Lasting, Clea…
12. Dotted Design
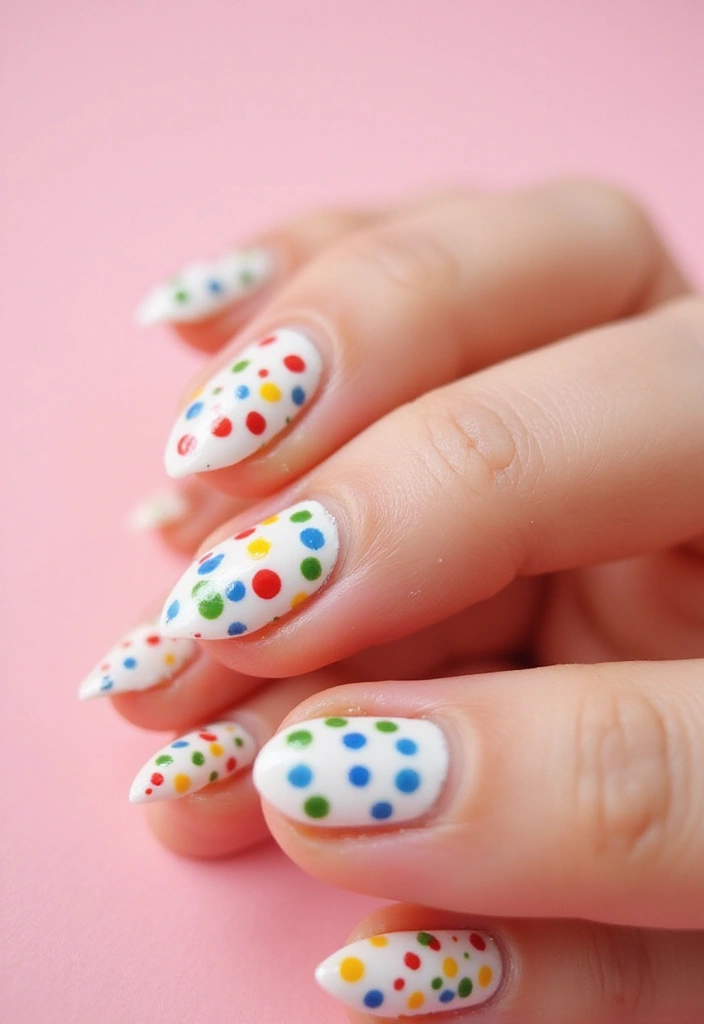
You want a nail look that feels chic yet easy on almond shapes. The dotted design fits. It adds a soft whimsy you can control. You can go subtle with tiny dots or bold with big spots. It works for work, for parties, for everyday wear.
Here is why dotted nails work on almond shapes. The rounded tip keeps the dots balanced. Small dots near the cuticle create a gentle bouquet. Larger spots in the middle draw the eye and add playful flair.
Here is how to do it.
– Step 1. Prep nails: clean, shape to almond, and apply a thin base coat.
– Step 2. Pick colors: choose two to three shades. A neutral base helps the dots pop.
– Step 3. Make the dots: load a dotting tool or a bobby pin. Press gently to form circles. Use grid, a curved line, or random placement for variety.
– Step 4. Seal: let the design dry a moment, then finish with a top coat. Choose glossy or matte for a different mood.
Try simple ideas you can copy tonight: a line of dots along the tip, a diagonal row, or a cluster near the cuticle. Metalic or pastel shades add easy style, while a black dot on nude nails makes a bold statement.
Next steps: pick your two or three colors and practice on one accent nail first.
12. Dotted Design
Editor’s Choice
Augshy 19pcs Mandala Dotting Tools Set Pen Dotting Tools Mandala Stencil…

Nicole Miller Mini Nail Polish Set – Glossy, Vibrant Colors for Fingerna…

beetles Gel Polish No Wipe Gel Top Coat – Clear Color Top Coat Gel Nail …
13. Seasonal Themes
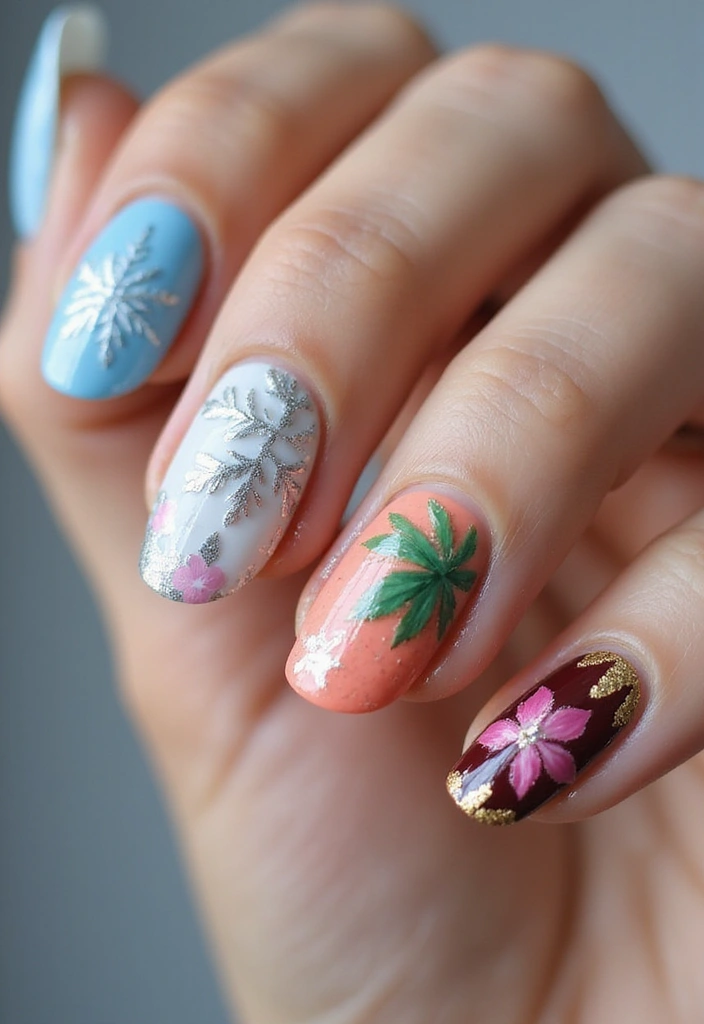
Seasonal themes give almond nails a living, easy way to match the year. You get style that feels fresh without a long prep. Almond shapes stay neat and modern as you dive into color and tiny drawings.
– Winter: icy blues, white, and silver. A small snowflake on one nail reads the season fast.
– Spring: soft pastels—pink, mint, lilac. Tiny flowers or dots evoke new growth.
– Summer: bright brights—coral, turquoise. A fruit slice adds a fun pop.
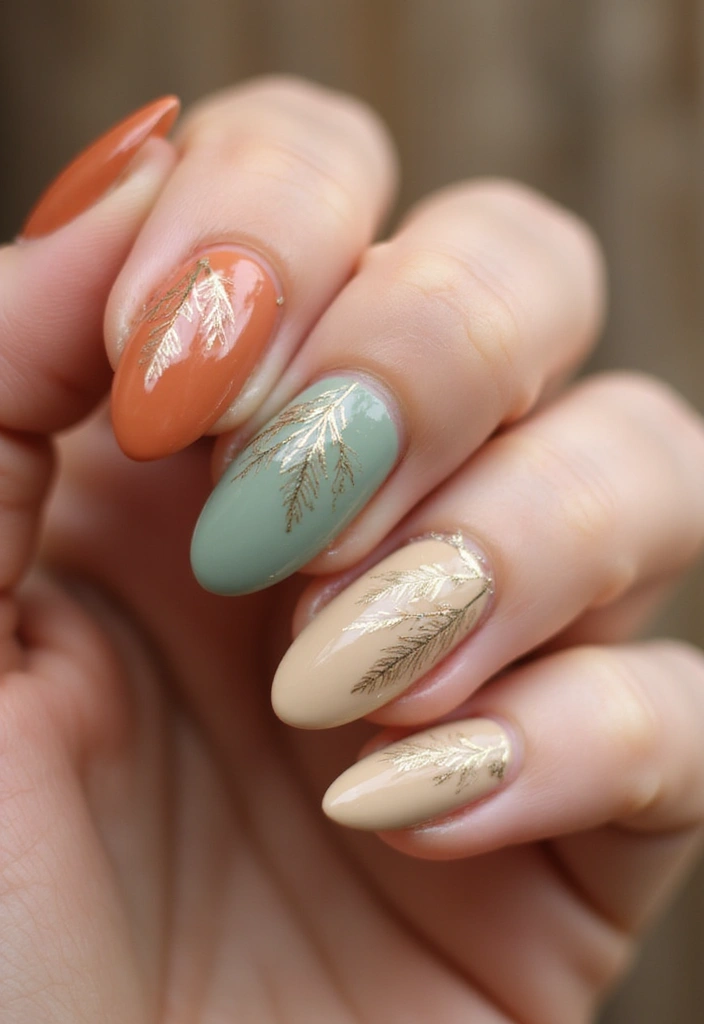
– Fall: warm tones—amber, rust, chocolate. Leaf tips suit the mood.
Tips:
– Decide on 1-2 motifs to keep nails readable.
– Use nail stickers for detailed work if you’re in a rush.
– Start with a solid base, then add accents with a thin brush or stamping plate.
– Seal designs with a top coat in gloss or a matte finish.
Seasonal themes keep your almond nails current with the calendar. They’re simple to switch as the seasons change and easy to maintain with basic tools.
Next steps: plan your palette, test on a swatch nail, and practice the design on one nail before you apply it to all.
13. Seasonal Themes
Editor’s Choice

Teenitor 50 Sheets Nail Stickers for Nail Art, Flower Nail Art Stickers …
Artdone 31pcs Nail Art Brushes, Nail Art Tool Set, Dotting Tools, Dust B…
Sally Hansen Double Duty™, Base and Top Coat, Quick Dry, Long Lasting, S…
14. Tie-Dye Style
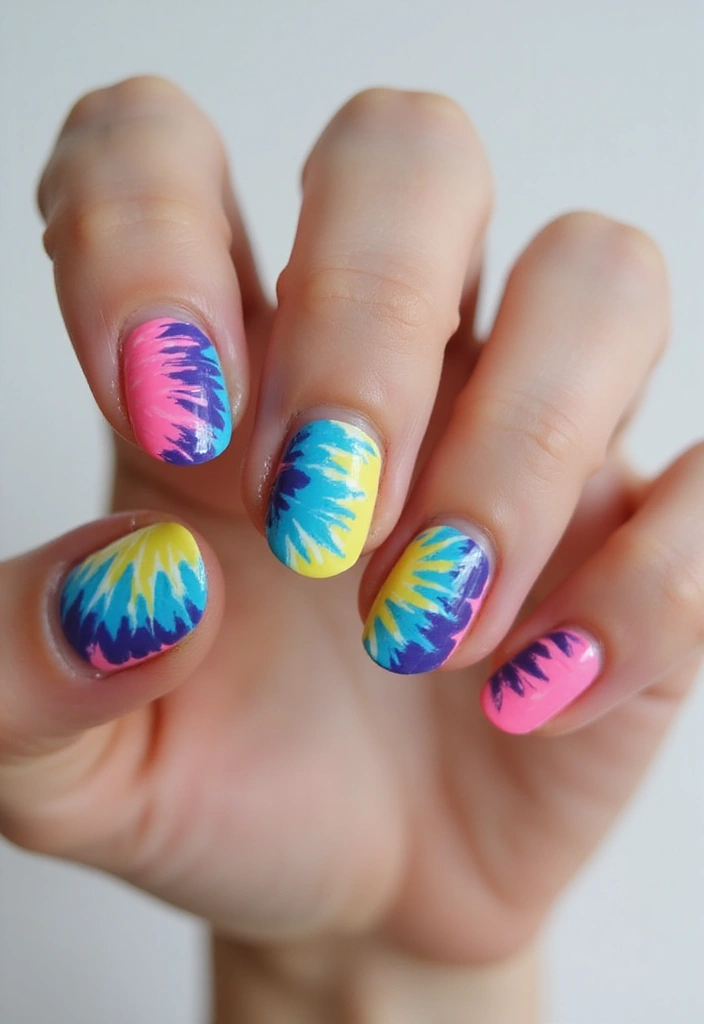
You want a nail look that pops on almond shapes. Tie-dye nails fit that vibe. They blend several colors into soft swirls that feel playful and fresh. Here is why it fits almond nails. The rounded tip makes swirls pop and the colors blend softly.
What you’ll need
– Clear base coat and top coat
– A pale base polish like sheer white or nude
– 4 colors in light to bold shades
– A small brush or toothpick for swirls
– A makeup sponge for easy color dots
Steps
– Prep your nails and push back cuticles.
– Apply the base coat.
– Apply two thin coats of the pale base. Let each coat dry.
– Let your palette hold small blobs of your colors.
– Dab a makeup sponge onto the colors and press it onto the nail.
– While still wet, swirl colors with a fine brush.
– Add more colors if you want a bolder mix.
– Let it dry, then seal with the top coat.
– Clean edges with a small brush.
Tips
– Use a tiny brush to refine swirls.
– Don’t drown the nail with too many colors.
– Finish with a fast-drying top coat so you won’t smudge wet patterns.
Tie-dye nails work well for casual days or a party. You can tone it down by using fewer colors or a lighter base. Or customize the look with your favorite shades to match your outfit.
14. Tie-Dye Style
Editor’s Choice
Sally Hansen Double Duty™, Base and Top Coat, Quick Dry, Long Lasting, S…
Beetles 31pcs Nail Art Brushes, Dotting Tools, Nail Art Pens, Dust Brush…
15. Crystal Accents

Crystal accents add a clean flicker to almond nails. They shine for a party or a simple night out. You get a wow moment without a long art session. You can keep it minimal or rack up a subtle sparkle.
Placement ideas
– A single gem on one nail makes a quiet statement.
– A slim line of stones along the free edge adds glow without clutter.
– A curved row near the cuticle follows your nail’s shape.
– A small cluster in the center gives a focal point.
– A full line across the nail delivers bold shine.
What you need
– Flat-backed crystals or rhinestones
– Nail glue or a gel top coat
– Fine tweezers and a small dotting tool
– Your favorite base color and a clear top coat
How to apply
1) Prep the nail: shape almond, buff lightly, and clean with alcohol.
2) Paint a smooth base color and let it dry.
3) Put a tiny dab of glue where you want the first stone.
4) Pick up a crystal with tweezers and place it carefully.
5) Add more stones to create your pattern.
6) Seal with a clear top coat. Smooth the edges and avoid dripping onto the stones.
Care and wear tips
– Press the stones gently after placing them to set them well.
– For longer wear, use a gel top coat and cure as directed.
– If a stone lifts, press it back and touch up with glue.
– Keep nails safe by avoiding rough fabrics that snag the crystals.
Next steps: practice on a single nail first, then expand your pattern as you gain confidence. Enjoy the glow, and let your almond nails shine.
15. Crystal Accents
Editor’s Choice

Makartt Nail Rhinestone Glue: Super Strong Gel Glue for Nail Art Decorat…

Super Strong Nail Glue for Press On Nails, Nail Tips & Acrylic Fake Nail…

3PCS Precision Tweezers Set, Upgraded Anti-Static Stainless Steel of Twe…
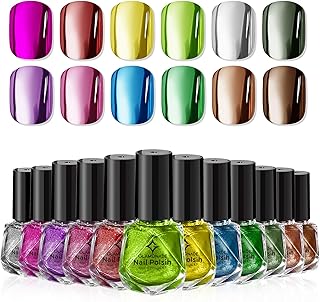
16. Metallic Shine
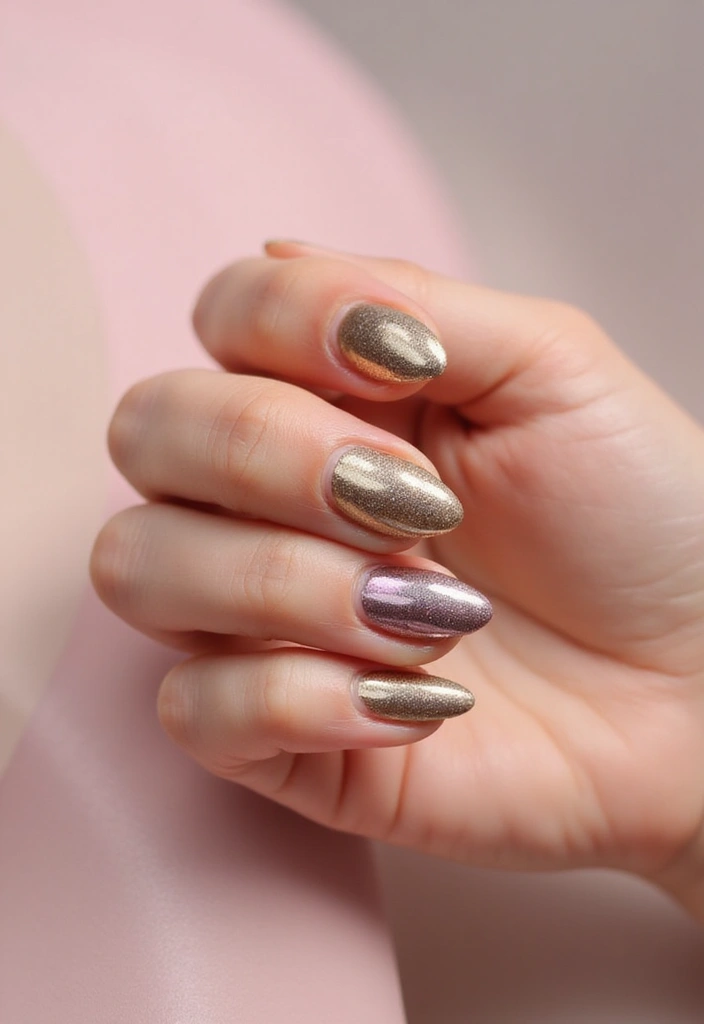
You want nails that grab attention and last. Metallic nail polish gives almond nails a bright, reflective glow. Gold, silver, and copper shades catch the eye and fit many outfits. Wear it alone or layer it with textures for depth.
Almond nails help the shine reach the tip. A touch of length makes the light trace the curve. If you prefer short nails, use a light first coat and a second for smooth coverage.
Tips:
– Start with a smooth base. File to an almond shape, push back cuticles, and wipe away dust.
– Apply thin coats. Let each layer dry before the next to keep the finish even.
– Seal with a top coat. This locks in shine and helps resist chips.
– Be careful around the skin. Use gentle removers and avoid rubbing.
Metallic nails can feel bold yet classy, letting you switch moods with your design.
Next steps:
– Work in good light so you see streaks.
– Layer metallic over a cream shade for depth, or add a tiny foil accent on one nail.
– Match shades to your outfit: gold with warm tones, silver or copper with cool tones.
Care tips: wear gloves for chores, and reapply top coat every few days to keep the shine.
16. Metallic Shine
Editor’s Choice
Metallic Nail Polish Set Fingernail: Chrome Mirror Holographic Nail Poli…

Nail File and Buffer (10 Pcs), Buffer Block Nail Files Double Sided 100/…
Sally Hansen Double Duty™, Base and Top Coat, Quick Dry, Long Lasting, S…
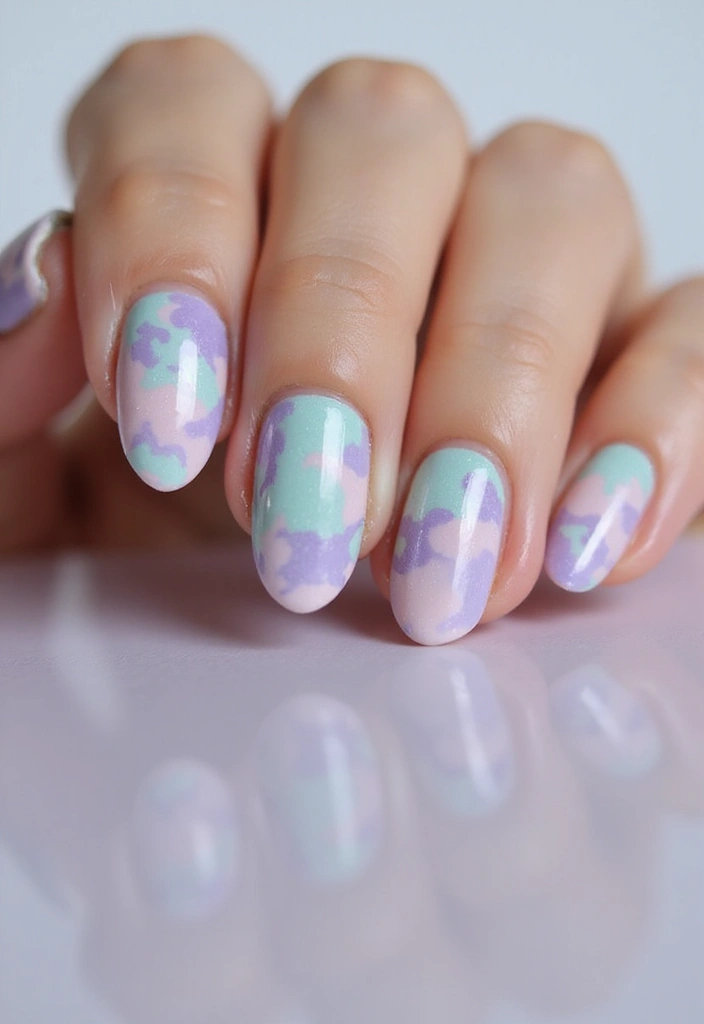
17. Watercolor Technique
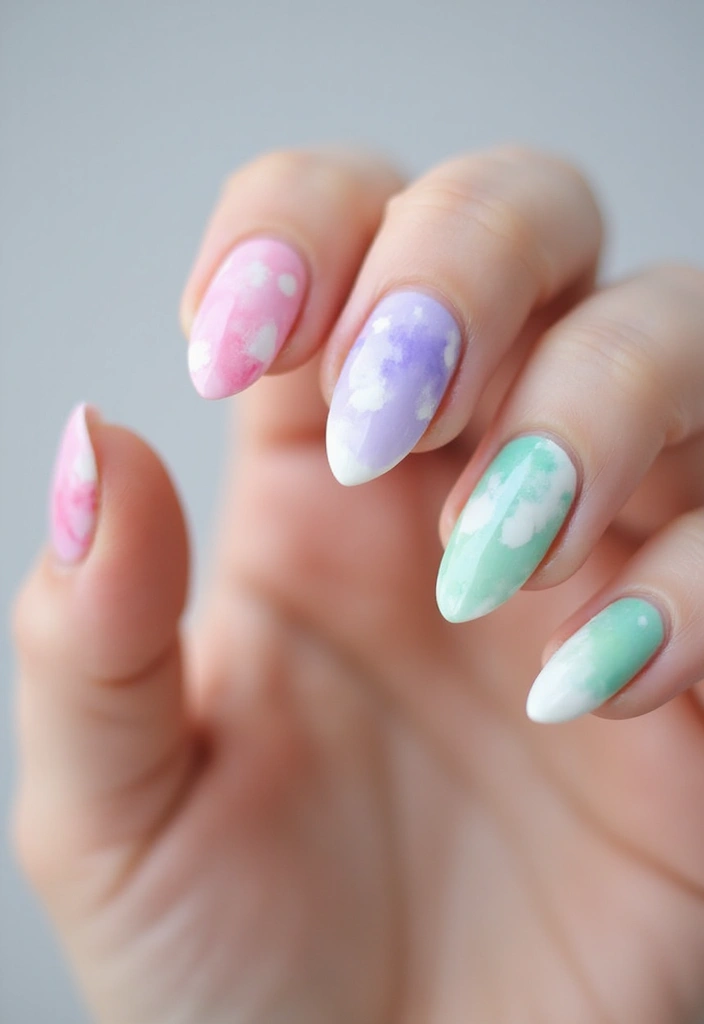
Are you after a soft, artsy look for almond nails? Watercolor nails give a dreamy blend that fits almond shapes. The colors melt into each other, like ink on paper. You get a calm finish you can wear every day.
What you need
– Sheer base coat
– 2–3 pastel or soft shades
– A small flat brush or clean nail art brush
– A dotter or sponge for dabbling
– Clear top coat
– Clean-up brush or cotton swab
Steps
1) Prep your nails. File to an almond shape. Push back cuticles. Wipe with a quick layer of alcohol to remove oils.
2) Paint a sheer base. Let it dry a minute.
3) Create the watercolor blobs. Put a dot of color on the nail. Gently dab and swirl to blend.
4) Add depth with a tiny extra color. Add small swirls for depth. Keep it light, not a solid block.
5) Seal with a clear top coat. Dry time is longer than solid color, so go slow at first.
Tips
– Use a sheer base for a ghostly, airy look.
– Mix colors directly on the nail for a spontaneous feel.
– Clean the brush between colors for clean edges.
– For almond shapes, keep the light tones toward the tip to enhance the curve.
Next steps
– Try new color pairs for seasons.
– Add a matte top coat for a softer look.
17. Watercolor Technique
Editor’s Choice

GELLEN Clear Nail Polish Base Coat Sheer Tinted Milky White, Natural Col…

Artdone 31pcs Nail Art Brushes, Nail Art Tool Set, Dotting Tools, Dust B…
18. Layered Patterns
Layered patterns on almond nails add depth without crowding the look. You start with a solid base, then build with stripes, dots, or tiny symbols on top. The result feels custom and eye catching.
What you’ll do
– Pick a base shade for your almond shape and let it dry completely.
– Add a second layer with lines, dots, or small shapes on a dry surface.
– Choose a color that contrasts or harmonizes with the base for impact.
Practical steps
– Use striping tape to guide clean lines for stripes.
– A dotting tool or the end of a pin makes perfect dots.
– Apply each layer in thin coats. Dry fully before the next one.
– Clean up mistakes with a small brush dipped in remover.
– Finish with a shiny top coat to seal and add gloss.
Why it works
Layering gives depth without needing complex art. You can mix two or three elements, stripes over dots, or tiny icons over a solid field, to fit your mood. It’s easy to swap colors for seasonal looks and still keep the almond tip flattering.
Next steps
– Try diagonal or stacked stripes for variety.
– Experiment with metallics, pastels, or black on nude bases.
– Keep sessions short by drying hands between steps.
Start small, build up slowly, and have fun with your almond nails.
18. Layered Patterns
Editor’s Choice
Nail Art Striping Tape Lines Kit 36 pcs 1mm 2mm 3mm Nail Tape Strips for…
5PCS Dotting Pens with 3 PCS Nail Painting Brushes, Nail Art Design Tools
beetles Gel Polish No Wipe Gel Top Coat – Clear Color Top Coat Gel Nail …
19. Vintage Lace
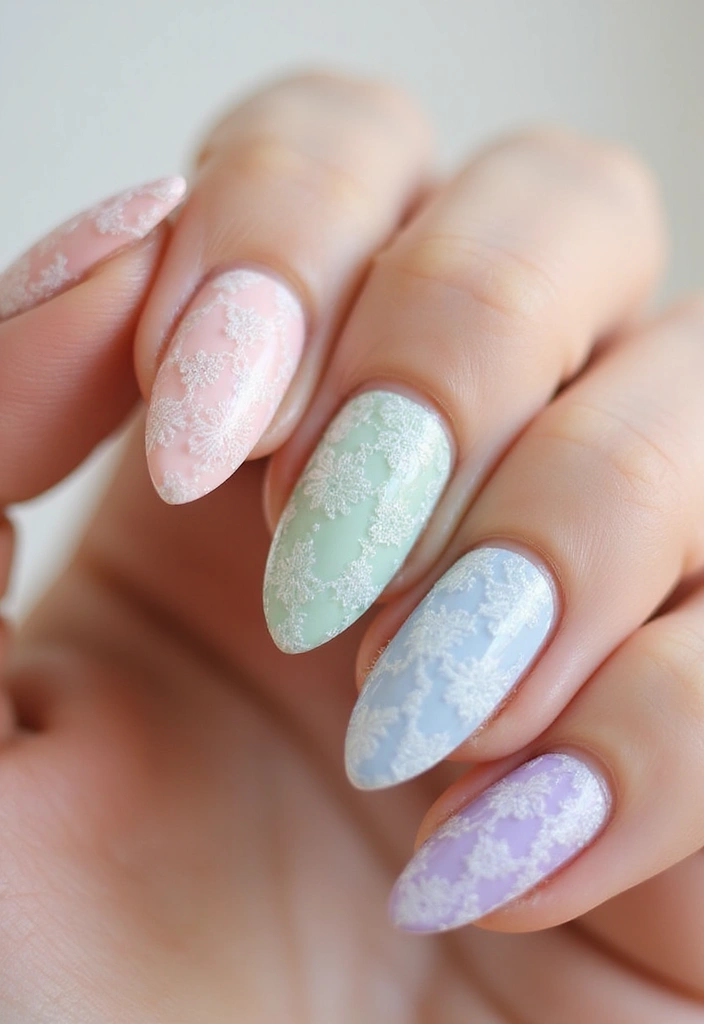
You want a nail look that feels romantic but is easy to wear on almond shapes. Vintage lace nails give you both charm and polish. Soft ivory or pale pink makes the lace pop without shouting. The result is timeless yet modern.
What you need
– Base coat, top coat, and a base color in ivory or pale pink
– Lace pattern plate or a fine nail-art brush
– White or soft nude stamping polish
– Stamper and scraper, plus clean-up tools
– Quick-dry top coat for a glassy finish
Here is how to do it
– Prep your nails: shape, push back cuticles, and clean the surface.
– Paint a smooth base: apply two thin coats and let them dry.
– Lay down the lace: if you have a lace stamping plate, press and lift the pattern onto the nail, then tidy the edges. If you don’t have plates, use a fine brush to sketch a lace motif near the cuticle or along the nail bed.
– Check edges: wipe away any excess and fix smudges while the polish is tacky.
– Seal the look: finish with a glossy top coat to lock in the lace and add shine.
Tips:
– Use stamping plates for precision if hand-painting feels hard.
– Pair this design with a glossy finish to elevate the lace.
– Layer thin lines and repeat patterns to keep the look fresh.
Notes and limits
Lace detailing can be tricky on small almond nails. Practice helps. If you’re new, start with one accent nail and keep the rest simple.
19. Vintage Lace
Editor’s Choice

Biutee Nail Stamping Plates Set 15PCS Nail Art Stamper Scraper Nail Stam…
Sally Hansen Insta-Dri®, Clear Top Coat, Quick Dry, Long Lasting, Streak…
Artdone 31pcs Nail Art Brushes, Nail Art Tool Set, Dotting Tools, Dust B…
20. Colorful Confetti
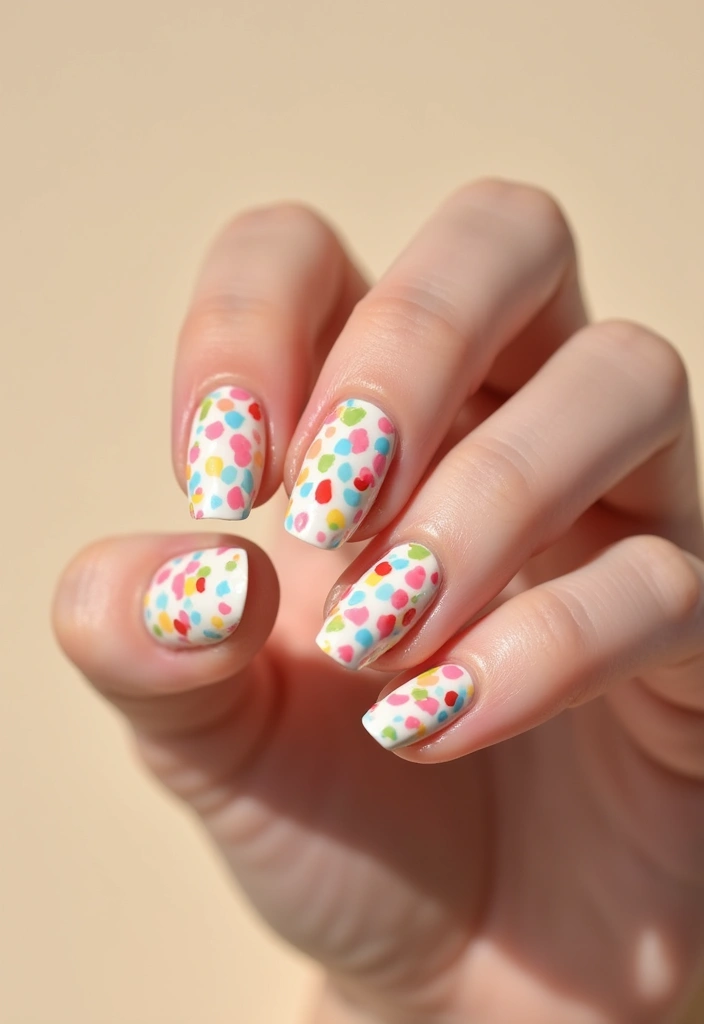
Colorful confetti nails bring a party vibe to almond shapes without shouting. You get a bright, playful look that still feels clean and polished.
Why it works
Here is why: Tiny color specks add life. An almond tip keeps nails elegant while the dots stay visible.
What you need
– Neutral base color (beige, taupe, or soft gray)
– Clear top coat
– Confetti shapes or glitter in mixed colors and sizes
– Nail file, tweezers, small brush
How to do it
1) Shape nails into a smooth almond tip. File lightly to keep edges rounded.
2) Apply base coat, then your neutral polish. Let it dry fully.
3) Place confetti pieces with tweezers. Scatter them across the nail or cluster at the tip for a confetti fade.
4) Seal with a clear top coat. Let it dry completely.
Tips
– Use a clear base coat or top coat to help confetti stick.
– Mix different shapes and colors for a fun look, but keep the base calm so specks pop.
– Press pieces flat and avoid thick layers to prevent lumps.
Variations
– All nails with light confetti or just one accent nail.
– Try a gradient confetti fade from cuticle to tip.
– Finish with matte top coat for a chic twist.
Colorful confetti nails fit parties or everyday style and pair with simple outfits.
20. Colorful Confetti
Editor’s Choice

AddFavor 4 Boxes Holographic Nail Sequins Shapes Mixed Iridescent Nail G…
essie Nail Polish, Glossy Shine Finish, Wild Nude, Light Tan, 0.46 Ounce
Top Coat Nail Polish Clear: Quick Dry Nail Polish No Chip High Shine Lon…
21. Chic Chevron
You want a nail design that looks polished and fresh. Chic chevron on almond nails gives that zigzag edge you crave. It fits any mood and outfit, year round. You can switch colors to match your style.
What you need
– Tape or striping tape for clean lines
– Two nail colors plus a base coat
– Top coat for shine and hold
– A small brush or dotting tool for touch ups
– Scissors or nail scissors to cut tape
How to do it
Here is how to get crisp chevrons on almond nails.
1. Prep your nails. Shape them into a soft almond, push back cuticles, and wash hands.
2. Apply a thin base coat and let it dry.
3. Mark the zigzag. Place tape in a chevron pattern from one side to the other.
4. Paint the exposed area with your second color.
5. Peel away the tape slowly to reveal clean lines.
6. Add a top coat and let it cure.
Style ideas
– Bold contrast: black and white chevrons for a sharp look.
– Soft duo: blush and taupe for a quiet, chic vibe.
– Metallic edge: gold with nude for party nights.
Tips
– Use tape for precise chevrons.
– Press tape down to avoid raised edges.
– For tiny nails, keep the chevron wide enough to see the shape.
Give it a try this week. See which color combo you love most.
Play around with width and color to make it yours.
Life isn’t perfect, but your nails can be! Try the chic chevron for a polished look that matches any mood or outfit – effortlessly stylish and always on-trend.
21. Chic Chevron
Editor’s Choice
Nail Art Striping Tape Lines Kit 36 pcs 1mm 2mm 3mm Nail Tape Strips for…
Beetles 31pcs Nail Art Brushes, Dotting Tools, Nail Art Pens, Dust Brush…
Sally Hansen Double Duty™, Base and Top Coat, Quick Dry, Long Lasting, S…
22. Simple Stripes
You want nail art that looks great but is easy to do. Simple stripes on almond nails hit that mark. Stripes work in any direction, from bold to subtle. Here is how to nail it.
– What you’ll need
Base color you love, striping tape, a thin brush or dotting tool, and a clear top coat. Have a nail file and cleanser handy for clean edges.
– Steps
1. Start with clean, dry nails. Lightly file to smooth the edge.
2. Paint a solid base. Let it dry fully before you go further.
3. Place striping tape to create vertical, horizontal, or diagonal lines. Press the edges down so they won’t lift.
4. Paint stripes in a contrasting color. Use a steady hand and small strokes.
5. Peel the tape away while the polish is still just a bit tacky. This gives clean, even lines.
6. Seal everything with a clear top coat. A second layer gives extra shine and protection.
– Tips
Use striping tape for straight lines every time. Mix stripe widths to add depth. Try bold colors on nude bases or classic black and white for a chic look. For a subtle daytime vibe, go monochrome with thin lines. Finish with either a glossy shine or a soft matte.
Next steps: clean up any stray edges with a small brush dipped in remover, and let nails dry completely before you type or wash hands.
22. Simple Stripes
Editor’s Choice
Nail Art Striping Tape Lines Kit 36 pcs 1mm 2mm 3mm Nail Tape Strips for…
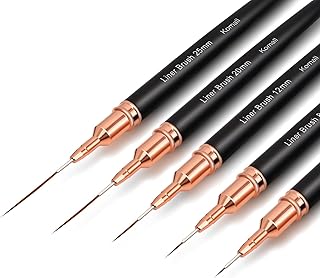
TEOYALL Nail Art Liner Brushes, Fine Line Nail Brush 7/9/11/15/20mm Thin…
Top Coat Nail Polish Clear: Quick Dry Nail Polish No Chip High Shine Lon…
23. Fun Emoji Nails
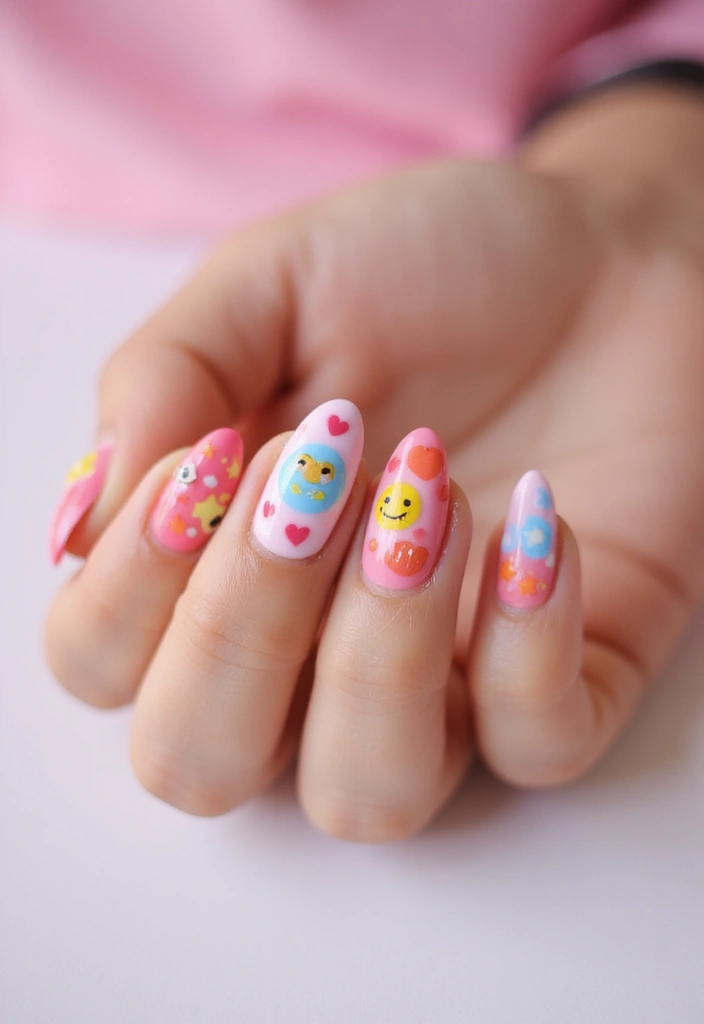
Want a playful nail look that fits your mood? Emoji nails work great on almond shapes. They’re quick to do and can’t miss.
Here’s how to get it.
What you’ll need
– Base color that’s light or solid to let the icons pop
– Emoji stickers or a fine nail brush for tiny details
– Clear top coat to protect the design
Steps
– Start with clean almond nails. Gently push back cuticles and file to shape.
– Apply one thin coat of base color. Let it dry completely.
– Choose 2 or 3 emojis that fit your vibe. From happy faces to hearts, pick small icons.
– Apply using stickers or a fine brush. If you use stickers, smooth out any air and press the edges.
– Seal with a top coat. Let it dry fully.
Why this design works
– Emojis are small and fast to paint. They fit the almond shape and stay clear of the cuticle line.
– A simple base color keeps the nails looking neat while the emojis add charm.
– You can swap emojis for holidays, sports, or moods without a full redo.
Pro tips
– For extra durability, cap the tips with the top coat.
– Try one focal emoji on the ring finger for balance.
– You can use matte top coat for a soft finish or glossy for shine.
23. Fun Emoji Nails
Editor’s Choice

3D Nail Art Stickers Small Expressions Nail Decals Self-Adhesive Nail St…

Artdone Metallic Nail Art Pens, Liner Brushes Set, 5PCS Black Color Nail…
Sally Hansen Double Duty™, Base and Top Coat, Quick Dry, Long Lasting, S…
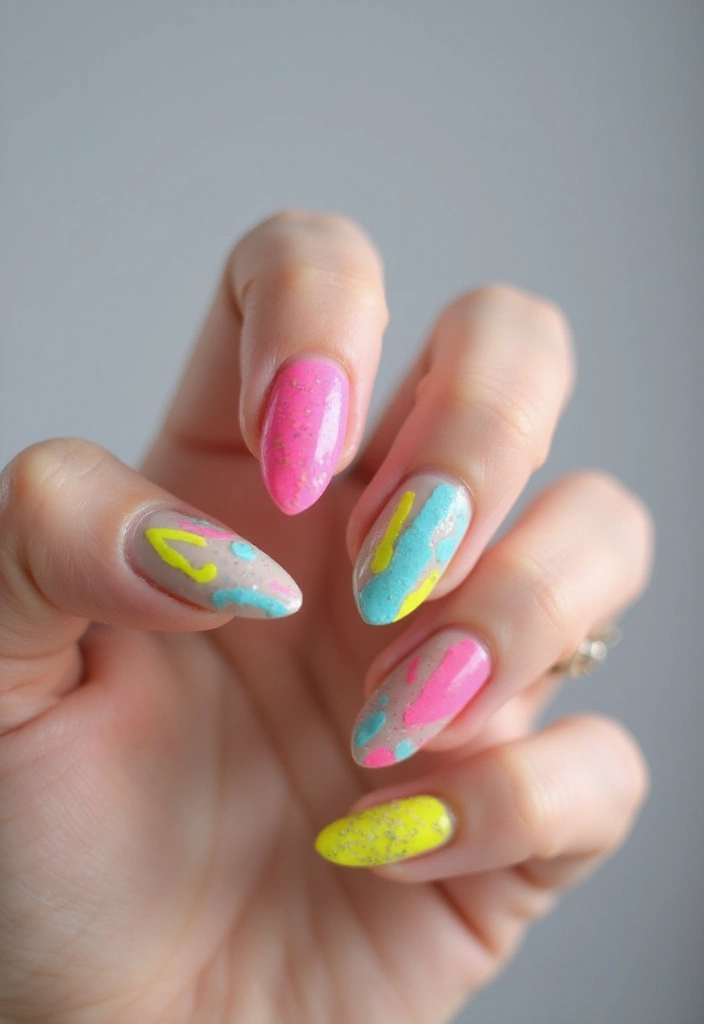
24. Bold Color Pops
Here is why bold color pops work so well on almond nails. A soft base makes the bright shade stand out without shouting. This approach keeps your nails looking polished and modern.
Let’s break it down
– Pick a clean base. Go for a sheer nude, pale pink, or a light taupe. The idea is to let the color do the talking.
– Choose 1 or 2 bold shades that play well together. Think a rich red with a deep blue, or emerald with coral. You want colors that feel like a good pair, not competing tones.
– Apply with care. Paint the base on all nails and let it dry. Then add the bold color to just one or two accent nails per hand. On almond nails, a single tip of color can create a striking line without crowding the shape.
– Decide on a finish. A glossy top coat makes colors pop and adds shine. If you prefer a more contemporary look, try a matte top coat for a softer contrast between base and accent.
– Keep edges tidy. Use a thin brush or a cotton swab to clean any mistakes around the cuticle.
Next steps
– Try it with gel polish for longer wear. Cure each layer as directed and seal with a strong top coat.
– Experiment with color placement. On one hand, paint the ring finger in bold color; on the other hand, keep the accent nails on the index or pinky for balance.
– Maintain the design. Reapply a clear top coat every 3–4 days to prevent chipping and keep the color looking fresh.
Bold color pops give you a chic, modern manicure that stays easy to wear. Your almond shapes stay the star while the color adds just the right twist.
Bold color pops on almond nails are all about balance. A soft base invites the vibrant hues to shine, keeping your style polished and fresh. Remember, it’s the pairing of colors that creates magic!
24. Bold Color Pops
Editor’s Choice

beetles Gel Polish Urban Rhythm – Fall Winter Gel Nail Polish Set Burgun…
Beetles 31pcs Nail Art Brushes, Dotting Tools, Nail Art Pens, Dust Brush…
OPI Nail Lacquer Top Coat | Clear Nail Polish Top Coats | Classic, Quick…
25. Edgy Chains
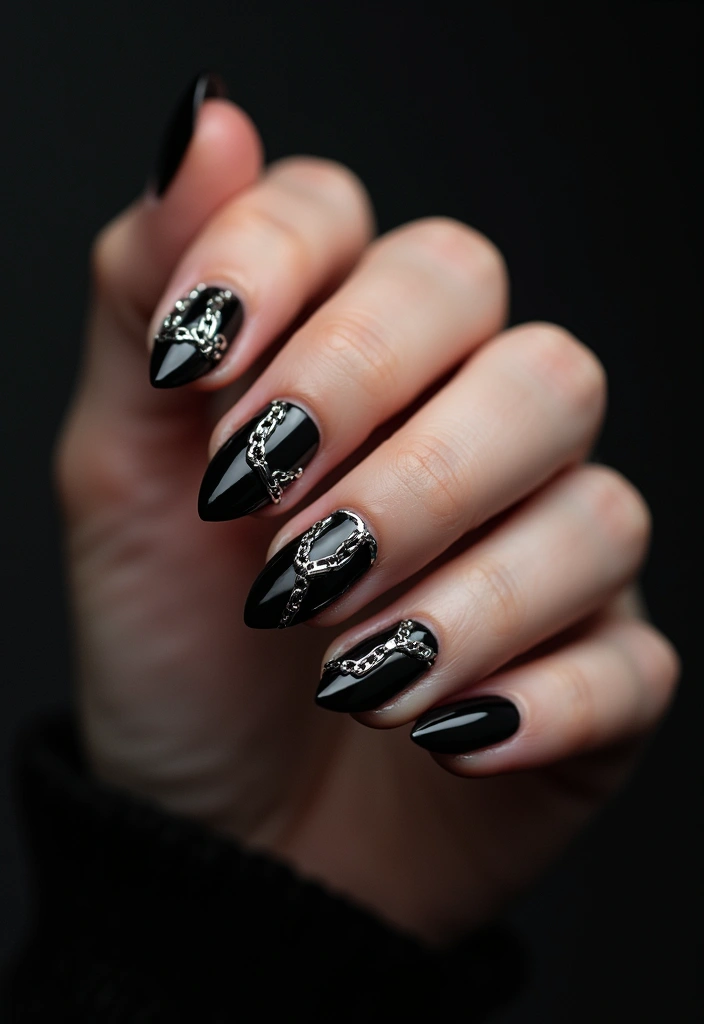
Want to turn heads with almond nails? Edgy chain designs bring a tough, chic vibe to your look. The metal glint against smooth almond shapes catches light as you move. It’s a small twist that makes a big impression.
Here is why this works. Chains add texture and interest without shouting. You can paint tiny chain links with a thin brush or use chain-link charms that hug the nail. Either way, the result is a modern contrast that feels sleek, not messy.
– How to wear it: choose your method. Paint fine chain links with a steady hand or pick nail charms that look like real links.
– Place it for impact. A single band across the tip works well, or run a slim line down the center for a bold stripe.
– Pick your color. Metallic silver, gunmetal, or gold pop on nude or black bases.
– Add a finish. Matte bases make the chains stand out. Seal with a clear top coat so they last.
– Care and upkeep. Avoid harsh solvents, keep nails clean, and touch up the top coat every few days.
Here is what to know before you try. This style can chip if you use your hands rough a lot. Practice on one nail first. Use tape as a guide, then apply the final top coat. Next steps are simple: pick a base, place the chain, and enjoy the edgy shine.
25. Edgy Chains
Editor’s Choice
Artdone 31pcs Nail Art Brushes, Nail Art Tool Set, Dotting Tools, Dust B…
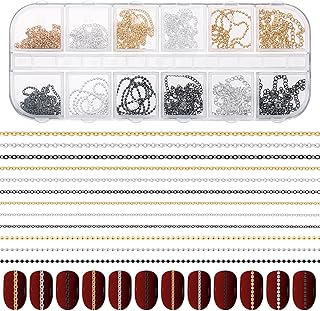
12 Strips Nail Chain Charms, Metal Nail Art Chains, 3D Gold Silver Dark …

OPI Nail Lacquer Top Coat | Clear Nail Polish Top Coats | Classic, Quick…
26. Sweet Candy Swirls
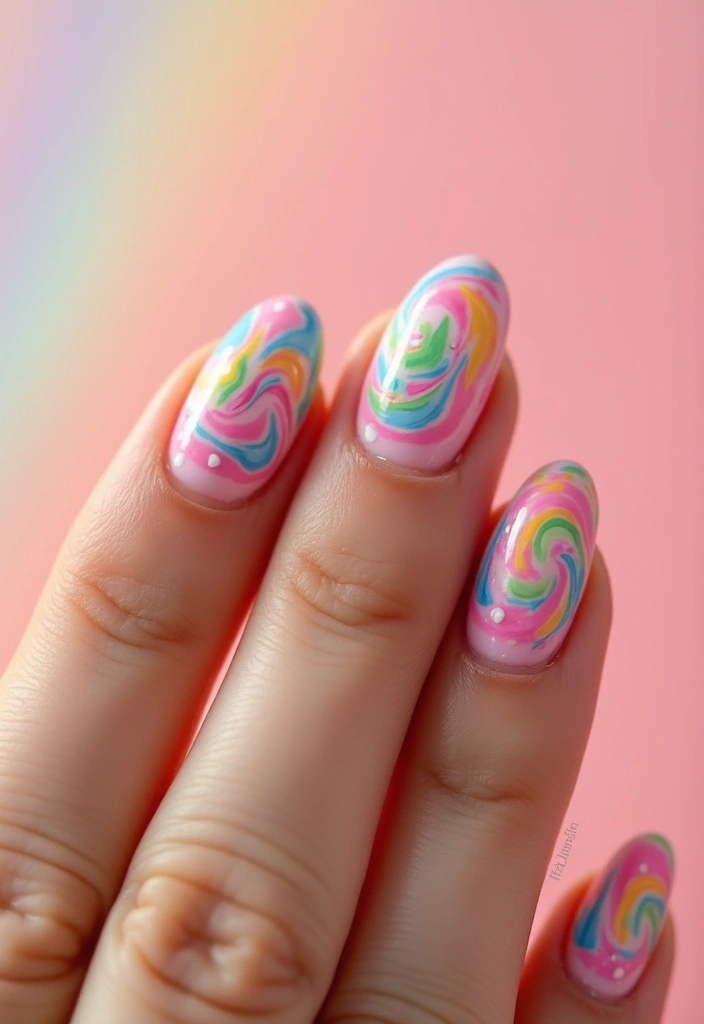
Want nails that grab attention without a long setup? Sweet Candy Swirls give you a playful pop on almond nails. They mirror bright candy colors swirled together for a tasty, cheerful look. Here is why this style works on almond shapes: the curved edges help the swirls flow and stay visible from close or far.
– What you’ll need
– Base coat and top coat
– 2–4 candy colors plus a white or pale base
– A small fan brush and a fine liner brush
– How to apply
– Paint a clean base with your chosen base color
– Dot small circles of the other colors on the nail
– Use the fan brush to draw curved lines that swirl the colors into soft, looping patterns
– Clean up edges and seal with top coat
– Color ideas
– Pink, turquoise and white
– Lemon yellow with peach
– Mint green with lavender
– Red and white for a bold candy stripe
– Quick pro tips
– Let each layer dry a bit to avoid color bleed
– Keep swirls loose for a playful look
– Finish with a glossy top coat to lock in shine
Next steps: try one accent nail first, then switch to full nails. This is a fun, easy design that fits casual days and adds charm to your almond nails.
26. Sweet Candy Swirls
Editor’s Choice

Beetles 2 Pcs 15ml No Wipe Gel Top Coat and Base Coat Set – Shine Finish…
Artdone 31pcs Nail Art Brushes, Nail Art Tool Set, Dotting Tools, Dust B…

L.A. COLORS Color Craze Nail Polish, Candy Sprinkles CNP541
27. Fantasy Galore
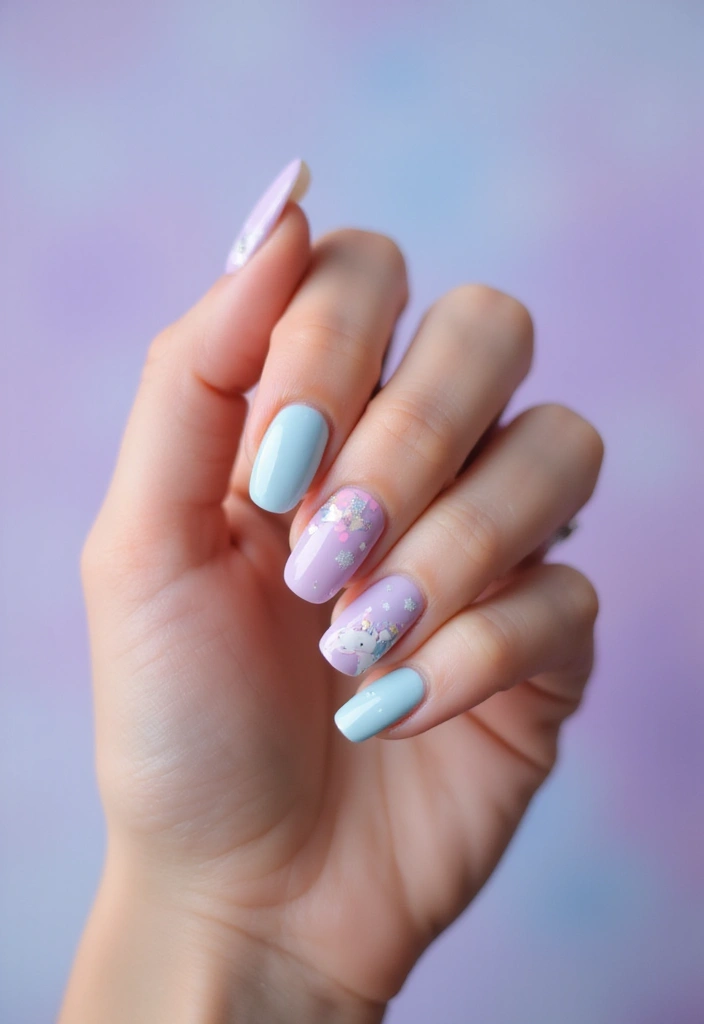
Do you want nails that feel magical on almond shapes? Fantasy nail art can transform your hands in minutes. It looks playful, clean, and chic when done the right way. Let’s break down a simple plan you can follow. You’ll get a look that reads as thoughtful, not loud. This style works for daily wear or special events.
– Tools – Fine nail art brushes, a dotting tool, tiny stickers, and a sturdy top coat.
– Palette – Start with pastel base colors like lilac, baby blue, soft pink, or mint. Add a hint of white or silver for a glow that catches light.
– Design ideas – A delicate unicorn, a sprinkle of stars, or a faint fairy dust sweep. You can mix a tiny moon with dots for depth.
– How to apply – Clean nails and apply base coat. Paint the almond nails with your chosen pastel base. Use a fine brush or stickers to place your unicorn, stars, or dust. Finish with a thin layer of top coat.
– Tips – Let each layer dry before the next. Use light strokes for neat lines. If you’re short on time, stickers are a quick win. A focused, gentle hand helps almond shapes stay elegant.
Next steps: practice on a couple of nails first, then try a full set. With patience, your fantasy look will feel easy and chic.
27. Fantasy Galore
Editor’s Choice
Metallic Nail Art Brushes, 5Pcs Liner Brush Set, UV Gel Polish Painting …
5PCS Dotting Pens with 3 PCS Nail Painting Brushes, Nail Art Design Tools
Teenitor 50 Sheets Nail Stickers for Nail Art, Flower Nail Art Stickers …
28. Boho Feathers
You want nail art that fits your almond shape and your free spirit. Boho feathers nail art does just that. It looks airy and artistic, yet simple enough for daily wear.
A feather design on one or two nails brings a soft, bohemian vibe. Use earthy tones like taupe and sage and add a tiny sparkle to catch the light. The result feels natural and unique, not loud.
Here is why it works: the feather lines are delicate. They move with your nails and stay comfy to wear.
Tips:
– Use a fine brush for delicate feather strokes.
– Pair with neutral or soft colors for an effortless look.
For an easy setup, try these steps:
1) Prep nails well and apply a clear base coat.
2) Paint a sheer nude or soft pink as the base.
3) With a brown, gray, or taupe brush, draw a small curved line for the quill.
4) Add light, wispy strokes to resemble feather barbs.
5) Dot a touch of sparkle along the edges or tip for glow.
6) Finish with a quick top coat to seal and smooth.
This boho feather nail design suits almond nails. It’s easy to touch up and grows out well. Great for beginners.
28. Boho Feathers
Editor’s Choice
Beetles 31pcs Nail Art Brushes, Dotting Tools, Nail Art Pens, Dust Brush…
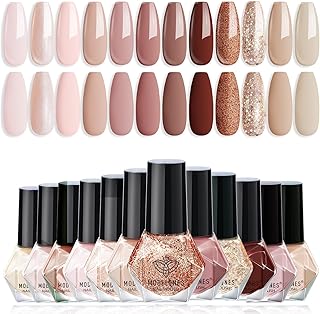
modelones Nail Polish Set 12 Colors Nude Brown Fall Nail Polish Set Cham…

Holographic Nail Art Kits 6 Boxes 3D Glitter Metallic Shining Flakes Acr…
29. Coffee Stain Effect
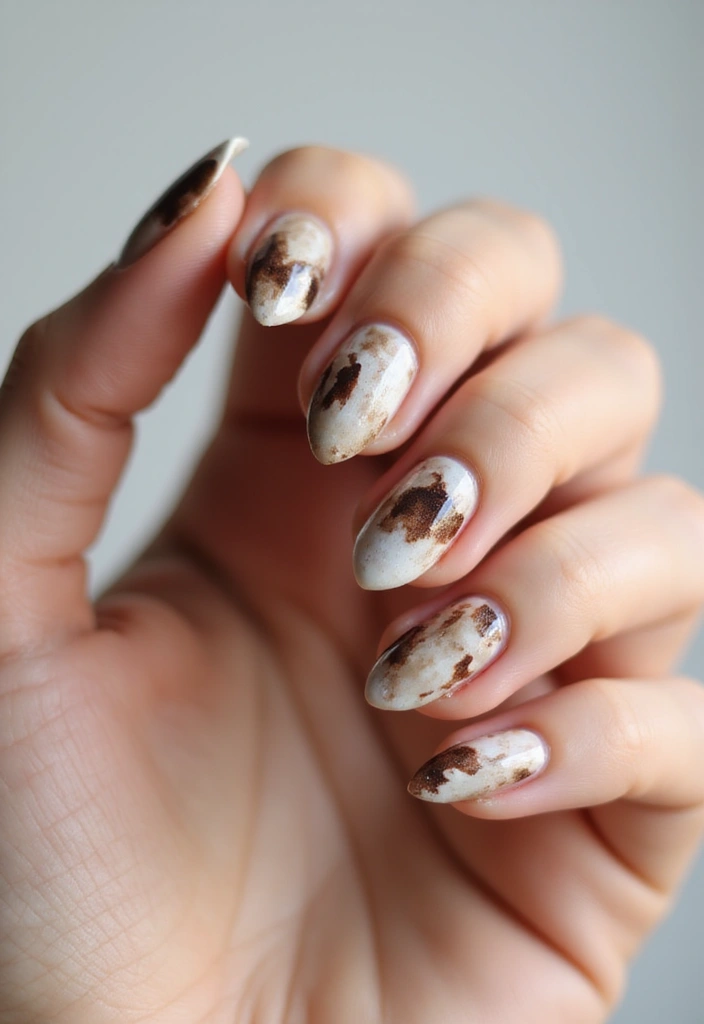
Love coffee? This coffee stain nail design lets you wear that vibe on your almond nails. It mimics coffee rings resting on cream. You get soft browns layered over a pale base. It looks casual, yet chic.
Materials
– Base coat
– Sheer white or cream polish
– Light cappuccino and dark espresso browns
– Thin nail art brush or striping brush
– Dotting tool or a clean wooden stick
– Clear top coat (glossy) or matte top coat
Steps
– Prep your nails and push back cuticles. Keep the canvas smooth.
– Apply a base coat. Let it dry.
– Paint a sheer white or cream base. This shows through the rings.
– Create stain rings. Dip the brush in brown polish and draw light, irregular circles. Vary the opacity by layering gently.
– Add depth. Put a darker ring or two and small splatters near the edges to mimic coffee spots.
– Dry between layers. You want clean rings, not a muddy mess.
– Seal the look. Use a glossy top coat for a wet coffee feel or a matte coat for a calmer vibe.
Tips
– Use a soft brush and light strokes for natural rings.
– Clean up edges with a fine brush dipped in remover.
– Practice on a nail wheel or scrap paper before your nails.
– Space rings unevenly; a little negative space makes it read as real.
Next steps: experiment with different browns, adjust ring size, and layer for a richer coffee-stain effect.
29. Coffee Stain Effect
Editor’s Choice
Artdone 31pcs Nail Art Brushes, Nail Art Tool Set, Dotting Tools, Dust B…
5PCS Dotting Pens with 3 PCS Nail Painting Brushes, Nail Art Design Tools
beetles Gel Polish No Wipe Gel Top Coat – Clear Color Top Coat Gel Nail …
30. Colorful Raindrops
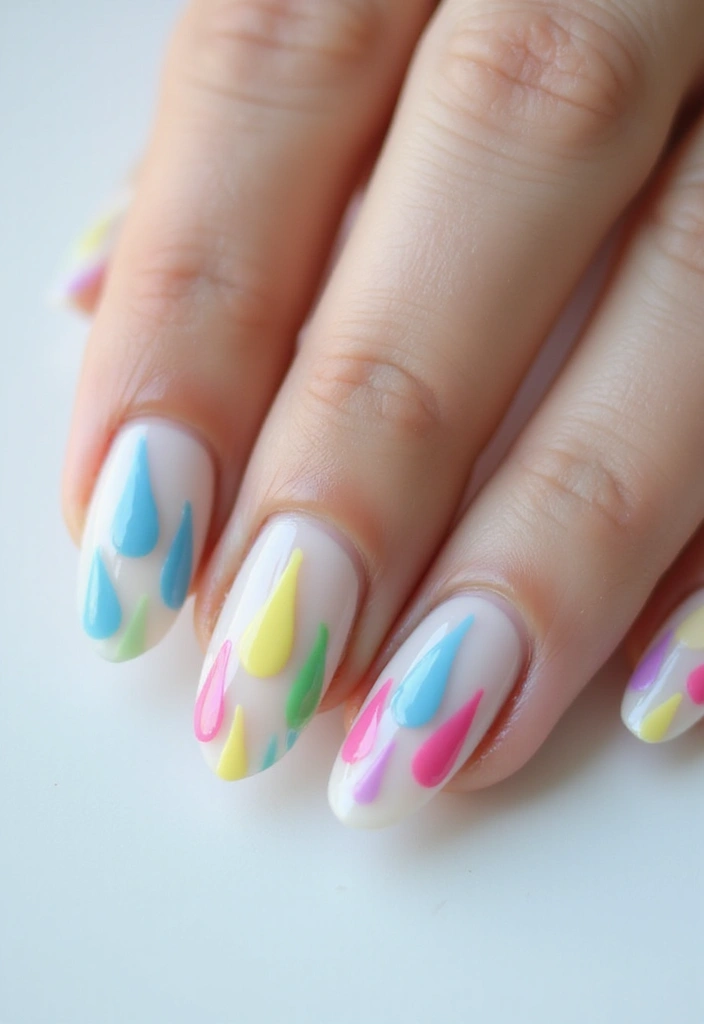
Rainy days can feel cozy, and your nails can match that mood. Colorful raindrops on almond nails add a playful yet chic touch. It’s easy, non-busy, and great with any outfit. Here is why this look works: small drops read as art, not clutter.
What you’ll need
– clear or light nail base coat
– dotting tool or a thin brush
– several nail colors
– top coat for shine
How to create the look
1) Shape your nails into a neat almond tip. Clean edges help raindrops sit evenly.
2) Paint a clear or pale base. Let it dry fully before you add color.
3) Use the dotting tool to form tiny teardrop shapes. Point them downward for a true raindrop feel. Vary the size for a more natural rain effect.
4) Add color with different shades. Try blue, pink, lemon, and mint on a few drops. Space the drops irregularly for a playful vibe.
5) Finish with a fast-dry top coat. This locks in color and adds a glossy finish.
Tips
– Apply thin layers to prevent flooding the edges.
– Practice on a nail wheel or plastic sheet first.
– If a drop isn’t right, wipe and redo. Clean lines come with a little practice.
Next steps: experiment with fewer nails at first or try one accent nail to keep the look fresh and easy to wear.
30. Colorful Raindrops
Editor’s Choice
Augshy 19pcs Mandala Dotting Tools Set Pen Dotting Tools Mandala Stencil…
Morovan 15 Bright Color 0.27oz Air Quick Dry Nail Polish Gift Set for Women
Top Coat Nail Polish Clear: Quick Dry Nail Polish No Chip High Shine Lon…
Conclusion
Whether you’re a nail art expert or just starting out, these simple nail designs for almond shapes will inspire your next manicure session. Each style offers a unique way to express yourself and elevate your look.
Don’t forget to mix and match ideas to create something uniquely yours! So grab your nail polish and get ready to say ‘wow’ at your stunning new nails.
Note: We aim to provide accurate product links, but some may occasionally expire or become unavailable. If this happens, please search directly on Amazon for the product or a suitable alternative.
This post contains Amazon affiliate links, meaning I may earn a small commission if you purchase through my links, at no extra cost to you.
Frequently Asked Questions
What Are Some Easy Nail Art Techniques for Almond Shapes?
If you’re looking for easy nail art techniques for almond shapes, you’re in luck! Simple designs like classic French tips with a twist or minimalist lines are perfect for beginners. You can also try dotted designs or geometric patterns, which are visually striking yet don’t require advanced skills.
These styles are not only chic but also quick to achieve, making them ideal for a busy lifestyle.
How Can I Choose the Right Colors for My Almond-Shaped Nails?
Choosing the right colors for your almond-shaped nails can elevate your nail art game! Stick to a soft base color if you want to make bold colors pop, especially with designs like neon accents or ombre effects. Pastels work beautifully for a subtle look, while vibrant hues can create eye-catching designs. Don’t hesitate to mix and match colors based on your mood or the season to keep things fresh!
Experimentation is key, so have fun with it!
Are There Any Seasonal Nail Designs for Almond Shapes?
Absolutely! Seasonal nail designs are a fantastic way to keep your almond nails looking trendy all year round. For example, you can try floral accents in spring, glitter gradients for the festive season, or cozy coffee stain effects in autumn. Each design can give you a fresh vibe that matches the season, making your nails a fun canvas for your creativity!
For a seasonal touch, consider using colors and patterns that reflect the time of year.
How Do I Maintain My Almond-Shaped Nails After Applying Nail Art?
Maintaining your almond-shaped nails after applying nail art is crucial for keeping them looking fabulous! Start with a good base coat to provide a smooth foundation and protect your nails. After your nail art is applied, seal it with a top coat to enhance shine and longevity. Regularly moisturize your cuticles and avoid exposing your nails to harsh chemicals to prevent chipping. Lastly, consider a quick touch-up every week to keep your designs fresh and vibrant!
With a little care, your nails will stay stunning!
What Materials Do I Need for Simple Nail Designs on Almond Shapes?
To create simple nail designs on almond shapes, you’ll need a few essential materials. Start with a good base coat, your chosen nail polish colors, and a top coat for a glossy finish. You may also want to have nail art brushes or dotting tools for more intricate designs, along with nail tape for clean lines. Don’t forget to have some remover handy for any mistakes!
With these materials, you’re all set to unleash your creativity!
Related Topics
nail art
simple nail designs
almond shape
easy nail art
minimalist design
seasonal nails
quick tips
glitter nails
geometric patterns
floral accents
beginner friendly
trendy nail styles
")


")


I love almond-shaped nails! They always seem so classy. Have you tried any of these designs yourself? Which one is your favorite?
These nail designs are so cute! I once tried to paint my nails while watching a movie, and I ended up with popcorn on my fingers instead of polish! Haha!
Did you know that almond-shaped nails can actually make your fingers look longer? I didn’t realize that until I started trying them out myself!