
Nail art has me absolutely obsessed! There’s something so satisfying about watching your nails transform from plain to stunning with just a few strokes of polish. Whether you’re preparing for a special occasion or just want to pamper yourself at home, the right nail techniques can make all the difference. That’s why I created this guide to help you master 21 different nail art techniques that will elevate your nail fashion game to the next level.
If you’re someone who loves expressing yourself through your nails, you’re in the right place. This post is especially for those who enjoy trying out fresh styles, from beginners to seasoned nail enthusiasts. You’ll discover easy-to-follow tips, tricks, and techniques that will make you feel like a pro in no time. I promise that by the time you finish, you’ll be armed with creative ideas and practical skills to make your nails the talk of the town.
So, whether you’re aiming to impress at your next event or simply want to enjoy some self-care, get ready! Each technique in this list is designed to be fun, accessible, and oh-so-satisfying. You’ll find new favorites, as well as a special game-changing tip that you won’t want to miss!
Key Takeaways
– Diverse Techniques: Explore 21 unique nail art techniques that cater to different styles and skill levels.
– Step-by-Step Instructions: Each technique comes with clear, actionable steps to ensure you can easily follow along.
– Exciting Styles: Discover trendy styles like ombre, marbled, textured, and more that will keep your nails looking fresh and fashionable.
– Tools and Materials: Learn about the essential tools you’ll need for each technique, making your nail art efforts straightforward and enjoyable.
– Creative Expression: Unleash your creativity and discover how simple nail art can boost your confidence and brighten your day.
Contents
- 1. Ombre Magic
- 2. Geometric Shapes
- 3. Marbled Delight (Game Changer!)
- 4. Floral Fantasy
- 5. Glitter Glam
- 6. Watercolor Wonder
- 7. Negative Space
- 8. Foil Accent
- 9. Stamping Simplified
- 10. Animal Prints
- 11. French Twist
- 12. Jewel Tones
- 13. Seasonal Vibes
- 14. Textured Nails
- 15. Galaxy Nails
- 16. Nail Tapes
- 17. Gradient Glitter
- 18. Candy Stripes
- 19. Dot Art
- 20. 3D Nail Art
- 21. Color Blocking
1. Ombre Magic
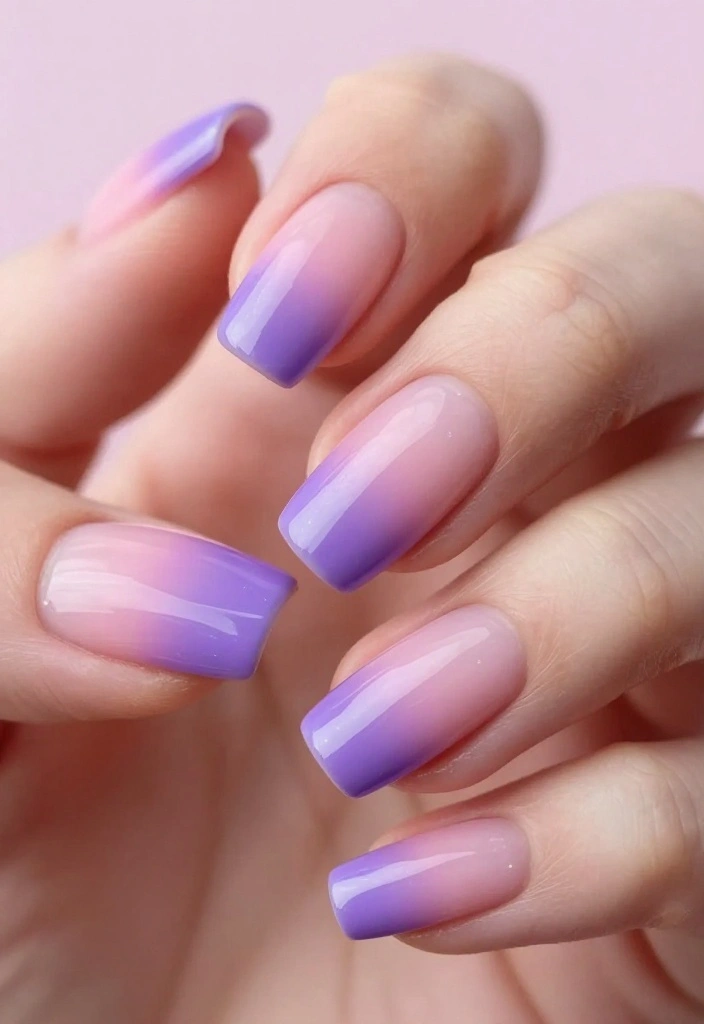
Ombre nails create a beautiful gradient that flows from one color to another, making your fingertips truly eye-catching. This technique shines when using two or three shades that harmonize well together. Starting with a lighter shade at the base and blending in darker tones toward the tips gives a stunning effect that’s both chic and modern.
To achieve this look, gather a makeup sponge, your favorite nail polishes, and a clear topcoat. First, apply your base color and let it dry. Then, dampen the sponge with the darker polish and gently dab it onto your nails, blending until you achieve the desired gradient. Seal everything with a topcoat for that glossy finish.
Tips for perfecting your ombre:
– Select colors that blend seamlessly.
– Experiment with blending on paper to master the technique.
– Take your time for the smoothest gradient possible.
Embrace the ombre magic and let your nails blend beautifully for any occasion!
2. Geometric Shapes
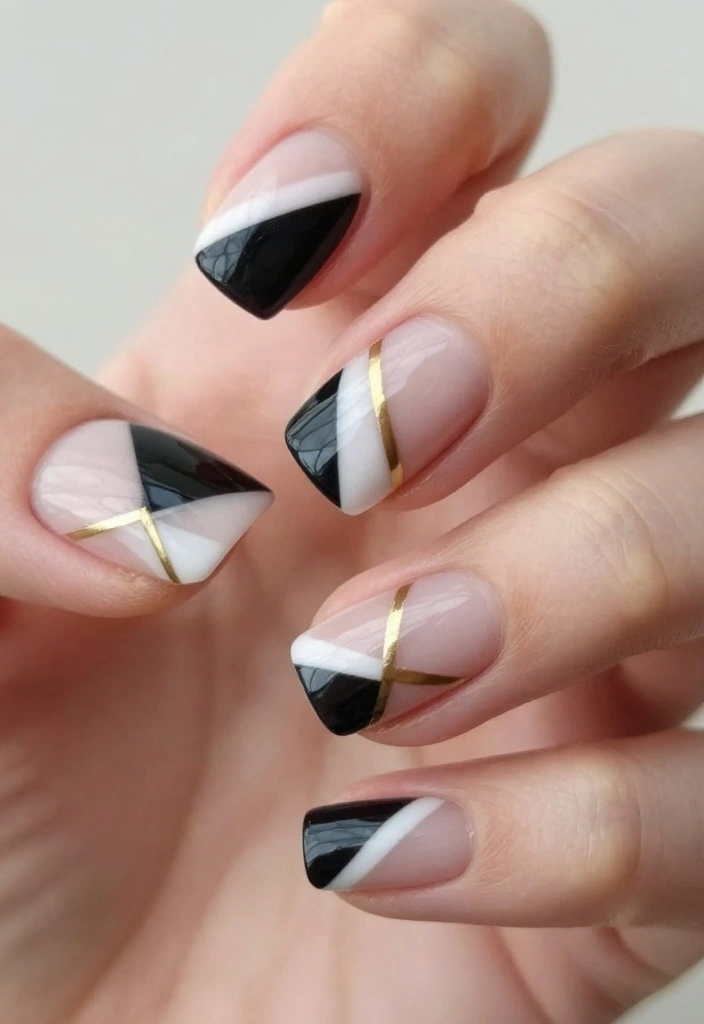
Geometric nail art is all about sharp lines and bold patterns, making it a trendy choice for those who love modern aesthetics. This style allows you to mix and match colors and shapes, creating a unique look that stands out. Using tape helps to achieve clean and professional-looking designs effortlessly.
Begin by applying a solid base color. Once it’s dry, use striping tape to form various geometric shapes, then fill in those shapes with contrasting polishes. Carefully remove the tape to reveal crisp lines, and finish with a shiny topcoat.
Here are some ideas to explore:
– Try shapes like triangles and squares for a striking look.
– Utilize a dotting tool for intricate detailing.
– Mix different colors and finishes, such as matte with glossy, for added flair.
This technique is perfect for making a bold statement with your nails!
3. Marbled Delight (Game Changer!)
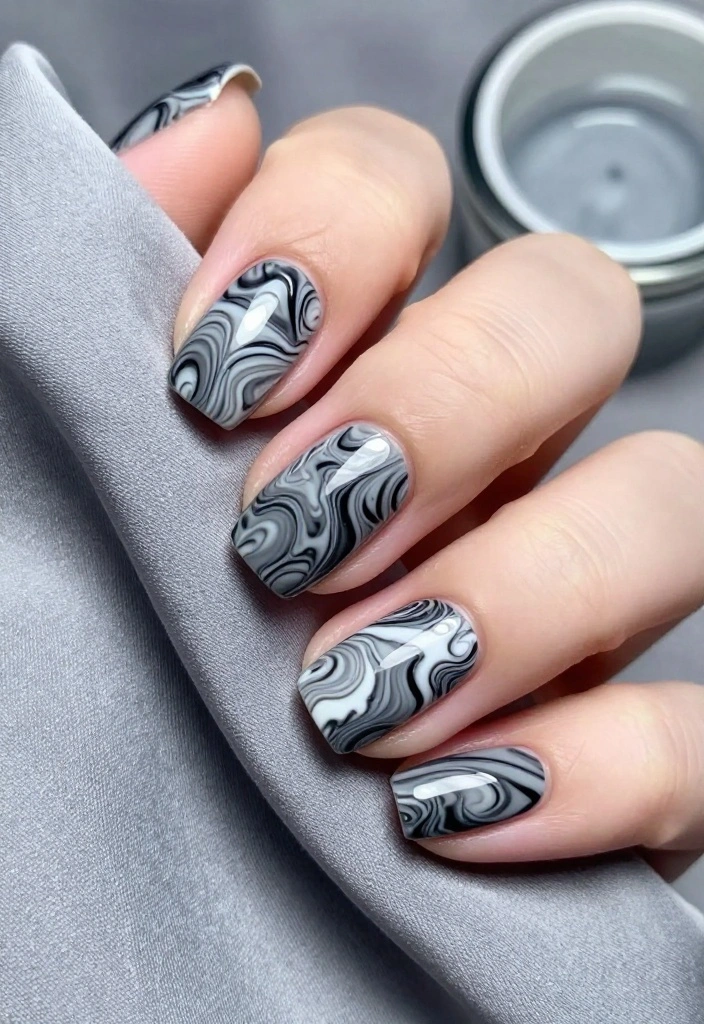
Marble nail art offers an elegant and sophisticated touch that mimics the look of marble stone on your nails. Surprisingly simple, this technique requires just a few shades of polish to create a luxurious effect. It begins with a light base coat, which makes the marbling truly pop.
Start by applying a base coat in white or a light gray. In a small bowl, mix black and gray nail polishes with water, then use a toothpick to swirl them together. Dip your nails into this mixture for a stunning marble effect, and don’t forget to seal it with a topcoat to protect your design.
What makes this a game changer:
– Each nail can be uniquely designed for a one-of-a-kind look.
– The style suits any season or occasion effortlessly.
– Achieve a high-end appearance without the salon cost.
With this technique, your nails will look like they’re straight from a designer’s collection!
Fun fact: Nail Arts lovers can master marble nails with just white and charcoal polish. A light base coat makes the swirls pop, then a thin brush or toothpick creates the marble veins—faster, easier, and perfectly chic for any look.
How To Choose Nail Art Techniques
Choosing the right nail art techniques can elevate your style and boost your confidence. With so many options, it can be overwhelming to decide which techniques to try. Here are some key factors to consider when selecting your nail art techniques.
1. Skill Level
Before diving into complex designs, assess your skill level. If you’re a beginner, start with simpler techniques like dot art or basic French tips. As you gain confidence, you can explore more advanced methods such as marbled designs or 3D nail art. Remember, practice makes perfect!
2. Occasion
Think about the occasion for which you’re doing your nails. Are you preparing for a casual day out, a formal event, or a festive celebration? For everyday wear, consider subtle techniques like ombre or watercolor. For special occasions, go for glam looks with glitter or intricate floral designs.
3. Nail Shape
Your nail shape plays a crucial role in how designs will look. Square nails often complement geometric patterns, while oval or almond shapes can enhance floral and swirling designs. Choose techniques that highlight and fit well with your natural nail shape for the best results.
4. Color Palette
The colors you choose will significantly impact the overall look of your nail art. Consider current trends, your wardrobe, and your personal style when selecting colors. Bright, bold colors can make a statement, while pastel shades offer a softer appearance. Mixing and matching colors can also create unique effects, especially in gradient or ombre techniques.
5. Time and Commitment
Different techniques require varying amounts of time and effort. If you’re short on time, opt for quick techniques like negative space or nail tapes. More elaborate designs, like marbling or stamping, may take longer but can result in stunning results. Be realistic about how much time you can dedicate to your nail art.
6. Tools and Materials
Finally, consider the tools and materials you have at your disposal. Some techniques may require specialized tools, like stamping plates or nail tape. If you’re just starting, stick to techniques that utilize basic supplies like nail polish and dotting tools. As you expand your collection, you can experiment with various methods that require different tools.
Pro Tip: Don’t be afraid to mix techniques! Combining simple designs with more intricate ones can give your nails a unique flair. For example, you can use a floral design as the focal point and add subtle glitter accents to enhance the overall look.
By considering these factors, you can confidently choose nail art techniques that suit your style and skill level. Happy nail painting!
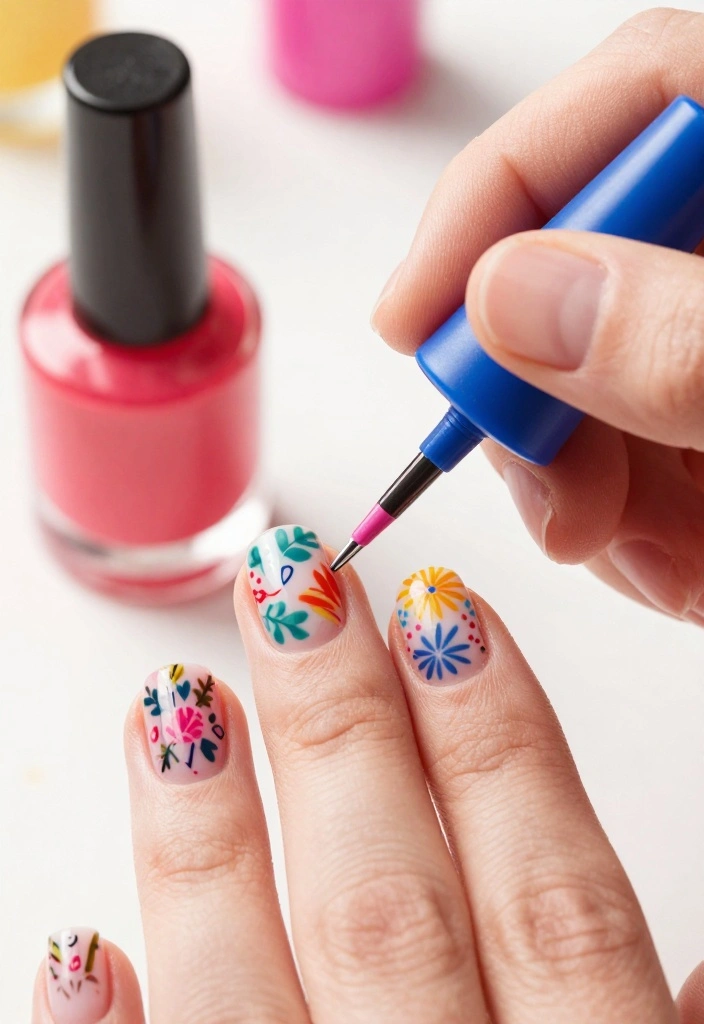
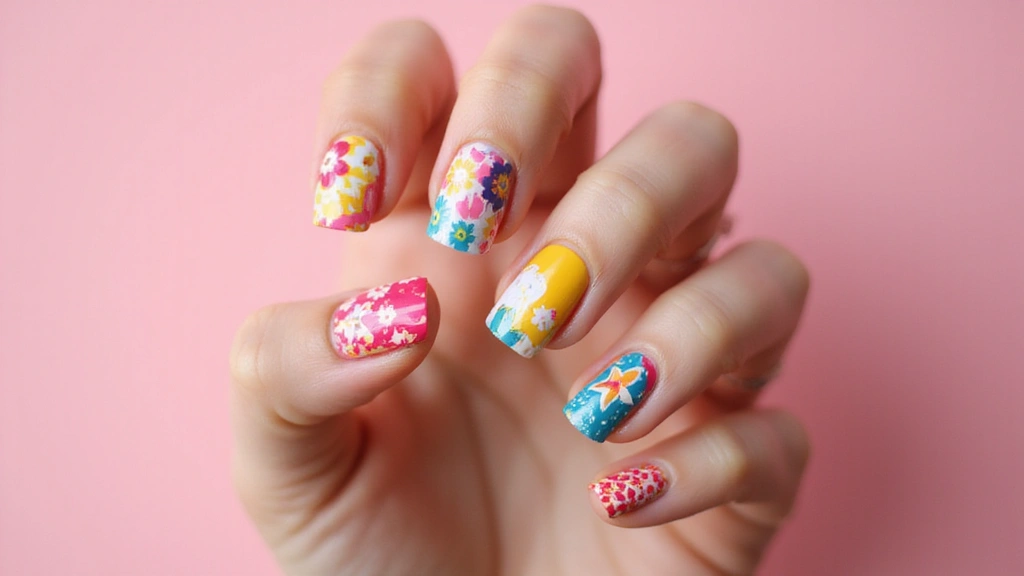
4. Floral Fantasy
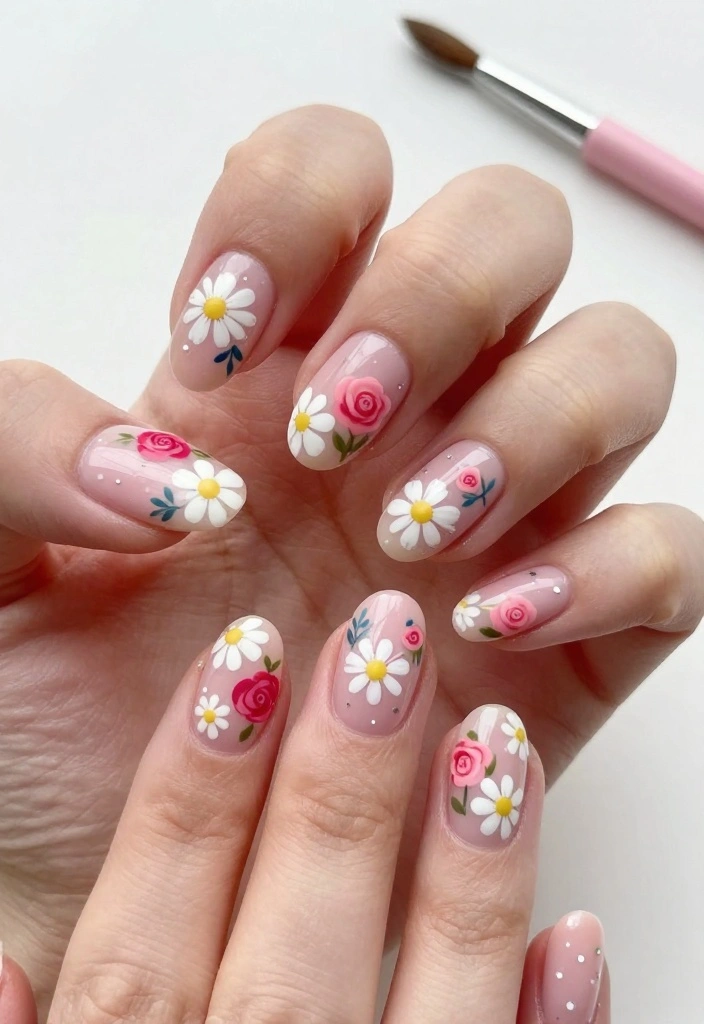
Floral designs add a joyful and vibrant touch to your nails, making them a perennial favorite. You can opt for delicate tiny flowers or go big with bold, elaborate designs. The choice is yours, and either way, your nails will bloom beautifully!
Begin by painting your nails with a light base color. Once dry, use a dotting tool to create flower shapes using bright, cheerful colors. Adding small leaves can enhance the overall design! Finish with a topcoat for a polished look.
Tips for your floral nail art:
– Mix and match different flower styles for a unique appearance.
– Use a fine brush for intricate detailing.
– Allow each layer to dry properly for the best results.
Unleash your creativity and let flowers flourish on your fingertips!
📹 Related Video: Easy Purple Flower Nails Art For Beginner 💖Vẽ Hoa💅 New Nails Design 💝 New Nails
5. Glitter Glam
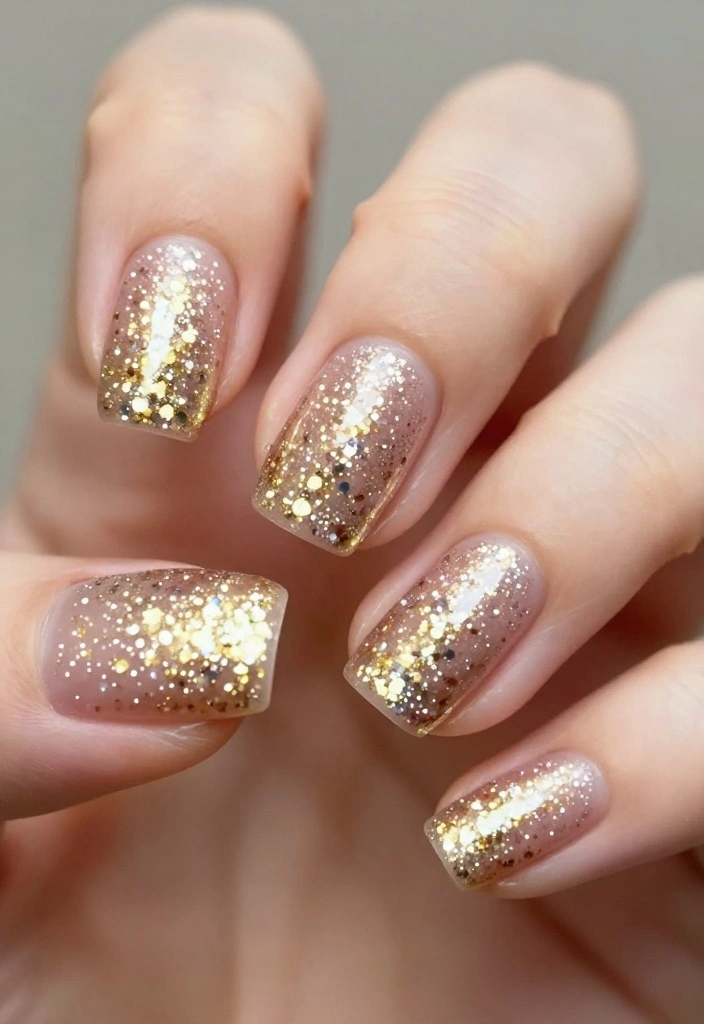
Glitter nails are the perfect way to bring sparkle and shine into your life. Whether you prefer a subtle shimmer or an all-out glitter explosion, this technique is both fun and versatile. It’s a great way to elevate any look, especially for special occasions.
Start with your base color and let it dry completely. Apply a layer of glitter polish either over the entire nail or just at the tips for a dazzling gradient effect. The secret to great glitter nails is the topcoat—apply generously to smooth out the texture and amplify the shine.
For a show-stopping glitter effect:
– Combine different glitter sizes for added depth.
– Consider using glitter on just one accent nail for a chic twist.
– Match glitter colors to your outfit for a cohesive look.
Let your nails sparkle and shine with glamorous glitter!
6. Watercolor Wonder
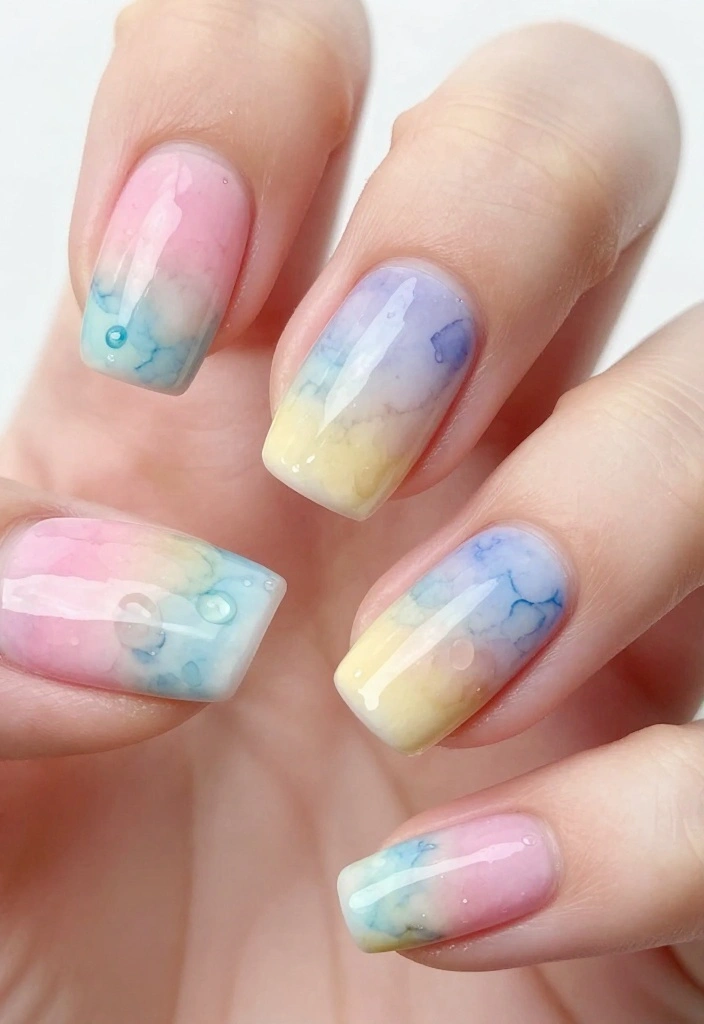
Watercolor nails embody a soft and dreamy aesthetic, reminiscent of a beautiful painting. This playful technique allows for customization using any color palette you desire and can create a stunning effect.
Start with a white or light base coat to make the colors stand out. Use a fan brush or sponge to apply a few drops of nail polish, dabbing lightly onto your nails to achieve that soft watercolor look. Layering different colors creates a blended masterpiece, and finish with a topcoat to seal the design.
Here are some fun tips:
– Opt for pastel shades for a delicate vibe.
– Use a gentle hand to keep the effect light and airy.
– Add small accents like dots or stripes for extra detail.
This technique lets your creativity flow freely, turning each nail into a tiny work of art!
7. Negative Space
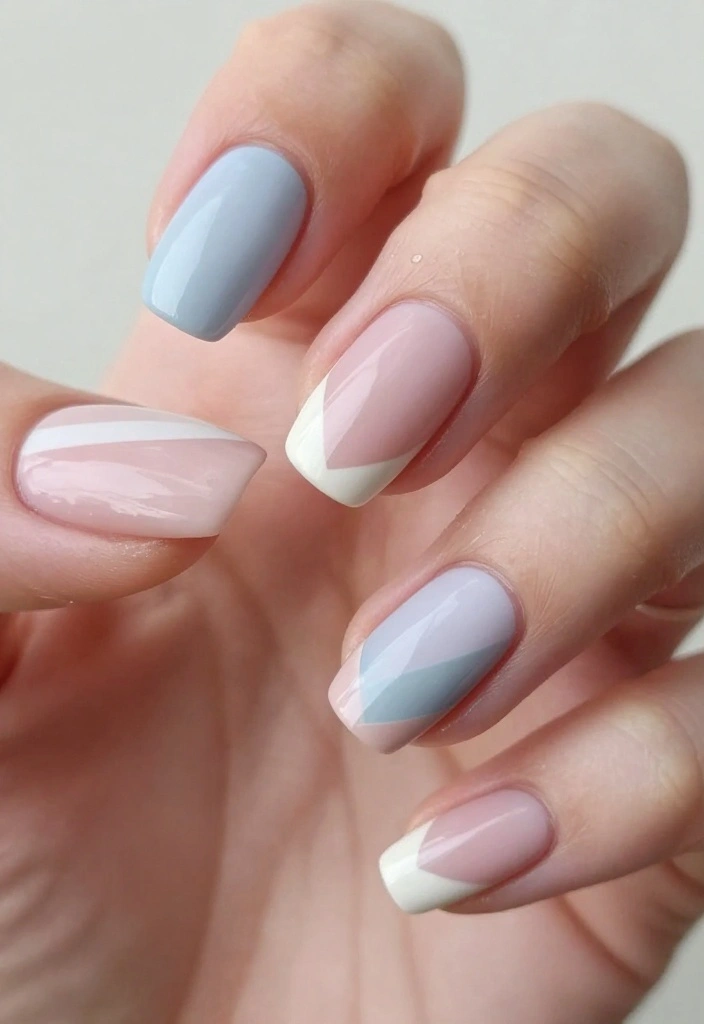
Negative space nail art is a fresh and modern approach that highlights your natural nail while creating stunning designs. This minimalist style is perfect for those who want to make a bold statement without overwhelming details.
Begin by applying a base color to your nails. Use tape or a thin brush to create designs that leave parts of the nail bare, showcasing your natural beauty. Seal your design with a topcoat for a clean finish.
Reasons to love negative space:
– It’s chic yet bold, making it suitable for any occasion.
– Highly customizable; create stripes, zigzags, or florals with ease.
– Simple to do at home, no fancy tools needed!
Let your creativity shine through with this chic trend!
8. Foil Accent
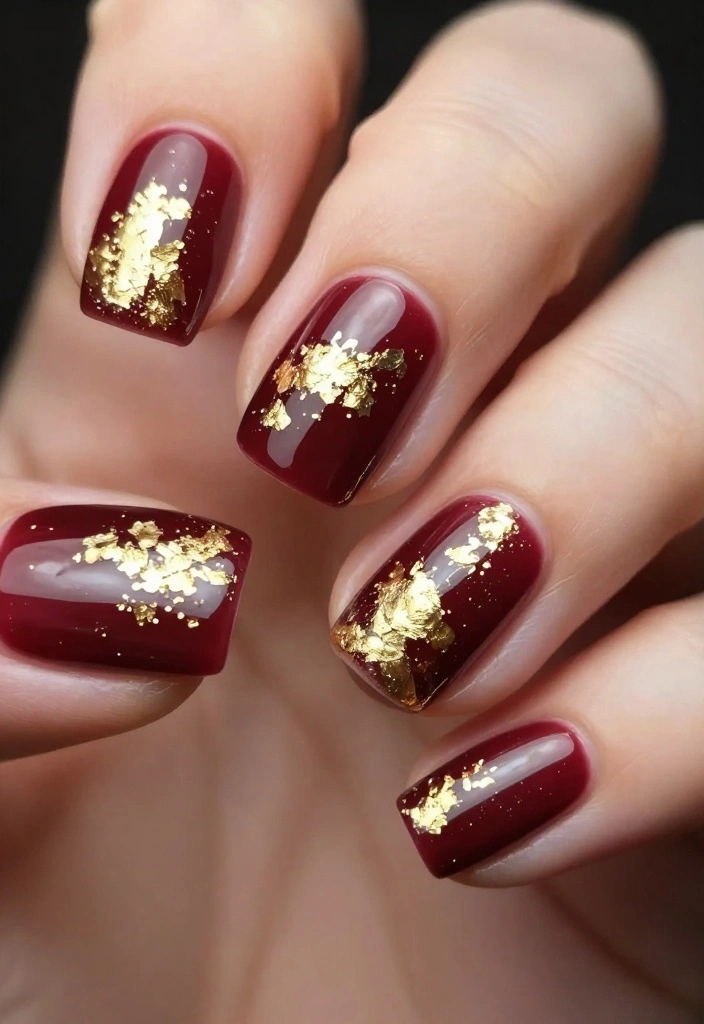
Nail foil adds an extravagant touch to any manicure, resulting in a dazzling finish that’s hard to resist. This technique is straightforward and can elevate even the simplest designs with a touch of glamour.
Start with your chosen base color and let it dry completely. Apply nail glue or topcoat in the areas where you want the foil to adhere. Gently press pieces of foil onto your nails, and seal everything with a topcoat to ensure longevity.
Pro tips for foil accents:
– Mix metallic and colored foils for unique effects.
– Use foil on an accent nail for a stylish twist.
– Explore different foil patterns; the possibilities are endless!
Prepare to shine with this fashionable foil accent technique!
9. Stamping Simplified
Nail stamping is a fantastic way to achieve intricate designs quickly! It involves using a stamped image from a plate, making it perfect for detailed patterns without the fuss.
First, apply a base coat and let it dry completely. Select a design from a stamping plate, applying polish over it, and use a scraper to remove excess. Press a stamper onto the design and roll it onto your nail to transfer the image. Finish with a topcoat for a polished look.
Advantages of stamping:
– Quick and easy, ideal for beginners!
– A vast variety of designs to suit any occasion.
– No artistic skill required, making it accessible for everyone!
Stamp your way to beautiful nails effortlessly!
You might also like


10. Animal Prints
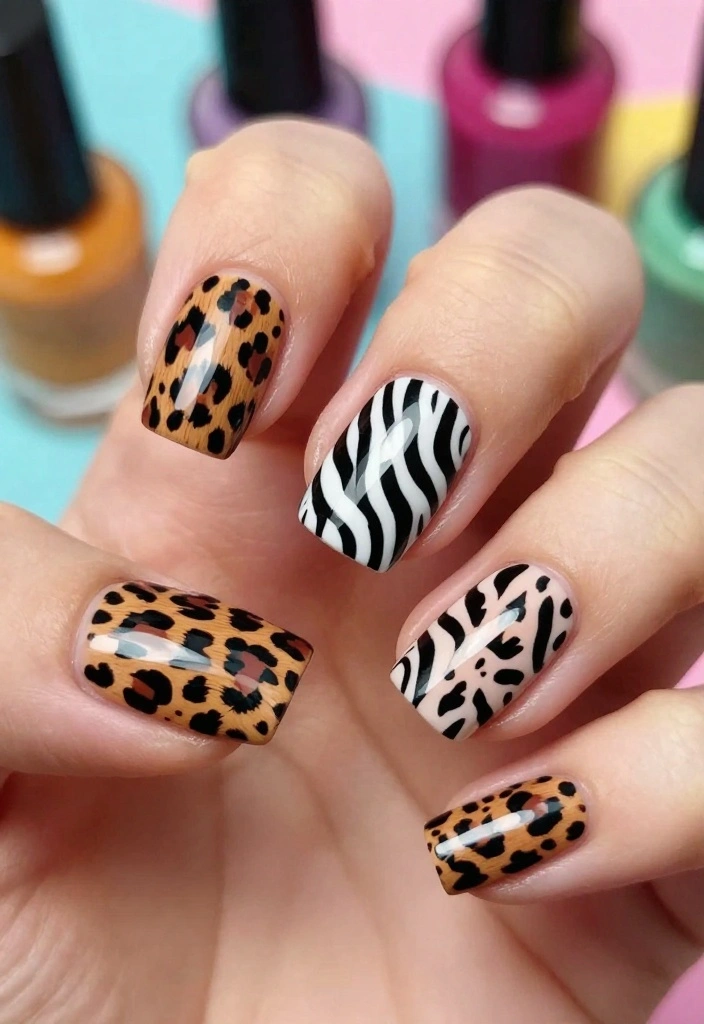
Animal prints bring a bold and trendy flair to nail art, allowing you to showcase your wild side! From classic leopard spots to funky zebra stripes, this style can be adapted for any season.
Begin with a base color that complements your animal print. Once dry, use a fine brush or nail art pen to create your desired print pattern. Enhance the look by layering different prints on different nails or adding sparkles for a glam touch.
For animal print enthusiasts:
– Choose contrasting colors for a classic wild look.
– Mix different prints for a fun, playful vibe.
– Seal with a topcoat to ensure your designs last longer.
Unleash your wild side with these fun and fierce animal prints!
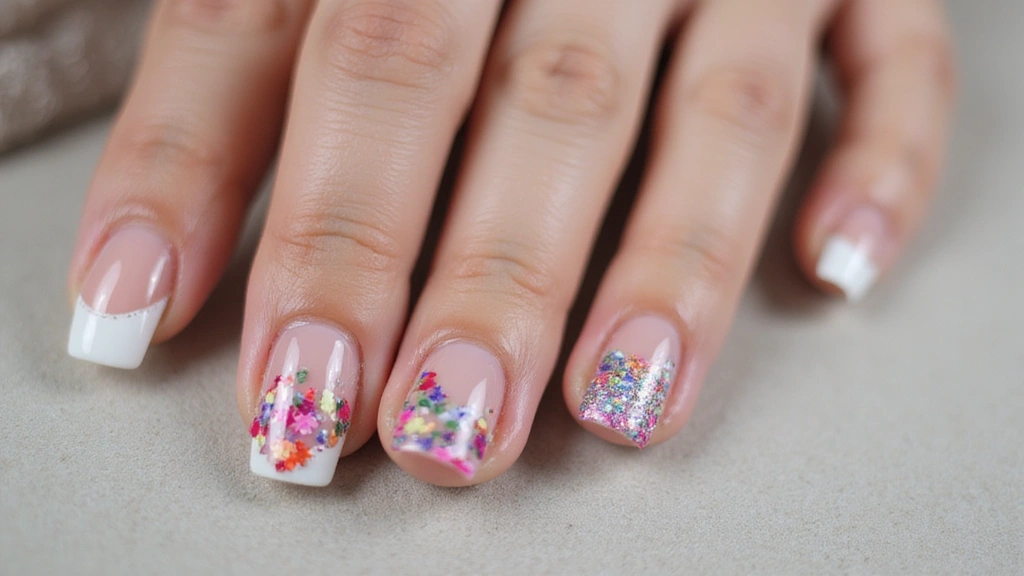
11. French Twist
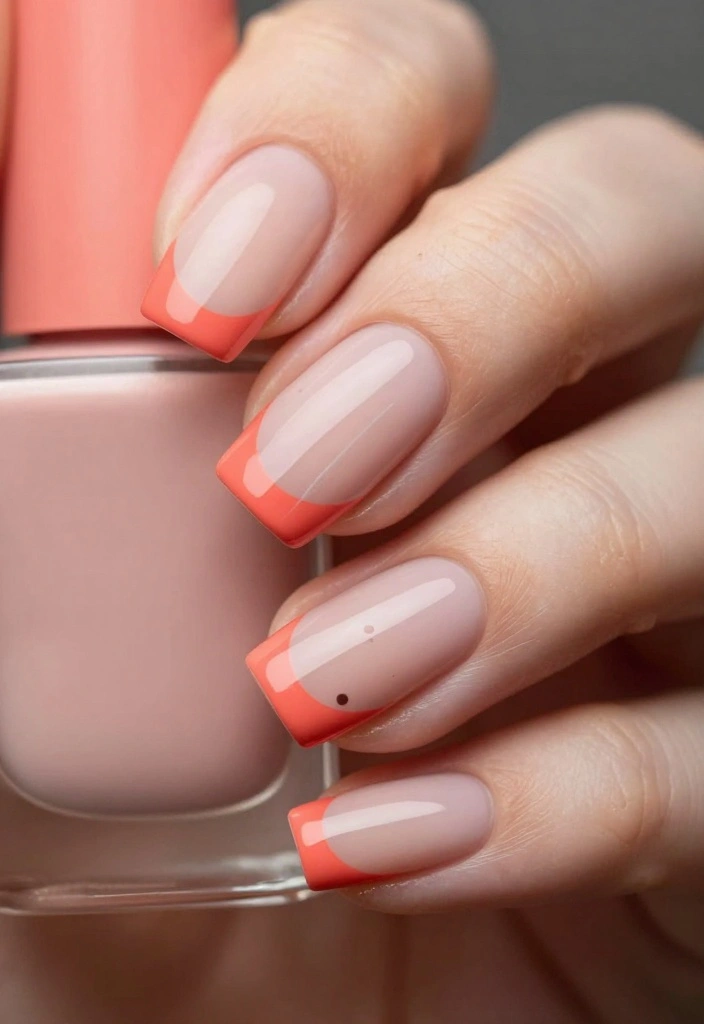
The classic French manicure gets a modern twist with playful designs and colors! Instead of the traditional white tips, you can experiment with various colors, shapes, and textures to express your personality.
Start with a neutral base coat and choose a vibrant color for the tips. Try diagonal tips, rounded edges, or even glittery finishes for a fresh take. Adding small designs like dots or lines can further elevate the look.
Why you’ll love it:
– It’s adaptable for any occasion, from casual to formal.
– Customize to match your outfit or mood!
– A timeless style that remains in fashion.
Elevate your French manicure with a personal twist that is oh-so-chic!
12. Jewel Tones
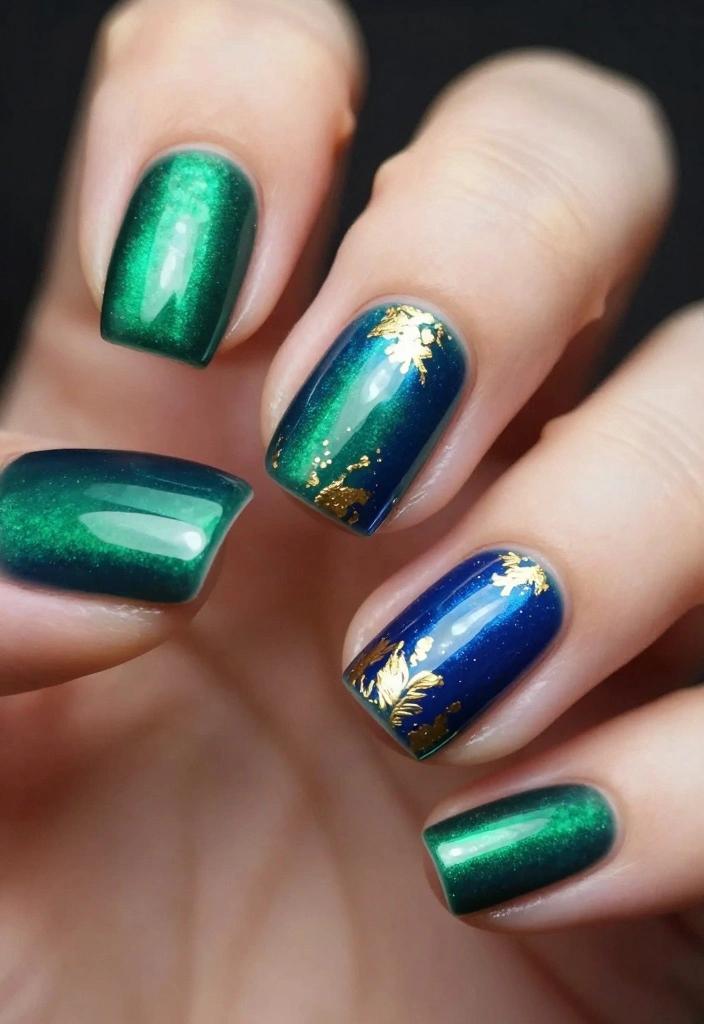
Jewel tones bring luxurious, vibrant hues to your nails, making them perfect for a bold statement. Shades like emerald green, sapphire blue, and ruby red add depth and sophistication to your style.
Start by applying a base coat in your chosen jewel tone and allow it to dry. For added flair, consider incorporating nail art elements like gold leaf, studs, or rhinestones. The blend of colors and textures creates a rich, upscale finish.
For jewel tones:
– Pair with gold or silver accents for extra glamour.
– Mix various jewel tones for a playful gradient effect.
– Don’t forget to finish with a topcoat for an enhanced shine.
Indulge in the richness of jewel tones and elevate your nail fashion game!
13. Seasonal Vibes
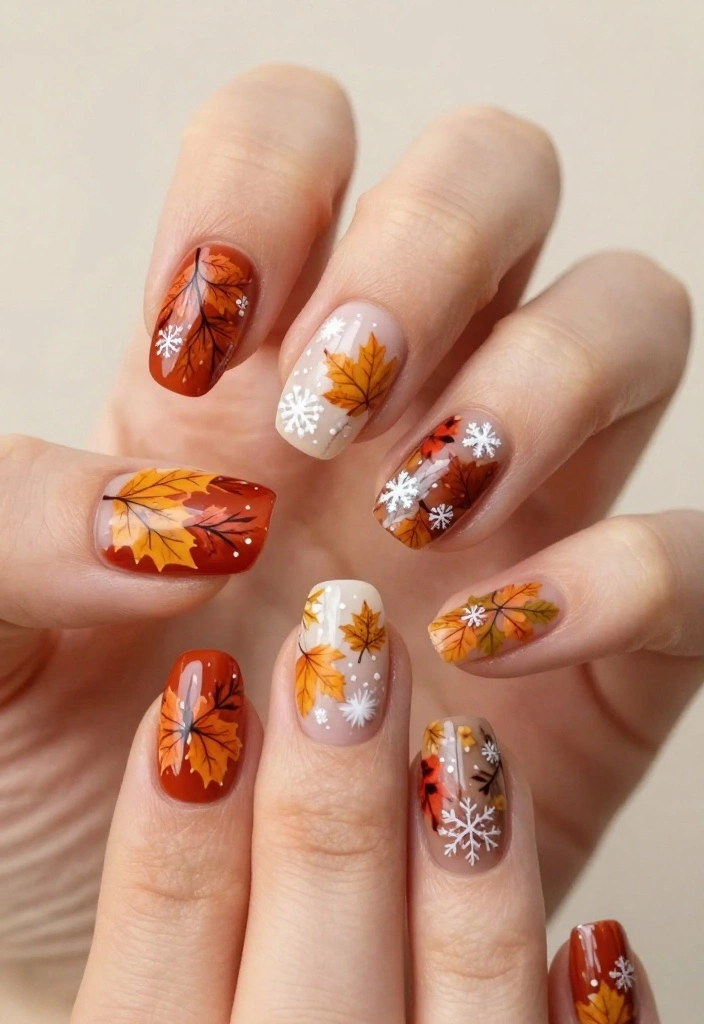
Celebrate the beauty of the changing seasons with nail art that reflects each time of year! From autumn leaves to winter snowflakes, seasonal designs let you express your creativity throughout the year.
Begin with a base color that resonates with the current season, like warm red for fall or icy blue for winter. Use nail art brushes or dotting tools to add seasonal elements like snowflakes, flowers, or pumpkins. Finish off with a topcoat to keep your designs intact.
Why it’s enjoyable:
– A great way to refresh your style with the seasons.
– Get as creative as you want with your designs.
– Show off your festive spirit all year round!
Bring the beauty of the seasons to your nails and enjoy endless creative possibilities!
14. Textured Nails
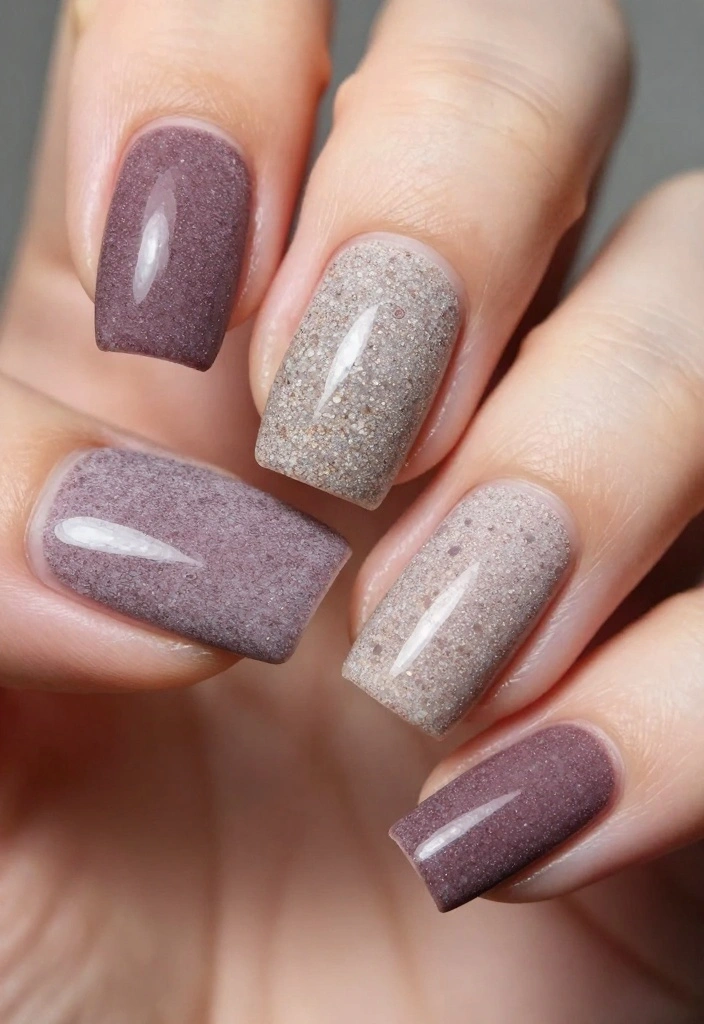
Textured nails add a tactile dimension to your manicure, making them truly eye-catching! Incorporating materials like sand, velvet, or beads creates unique designs that catch the light beautifully.
Start with a base color and while the polish is still wet, sprinkle your desired texture over your nails. Allow them to dry completely, then apply a topcoat to seal the design and give it a glossy finish.
Reasons to love textured nails:
– They catch light uniquely, providing an interesting look.
– Experiment with different textures on various nails for a mixed effect.
– A fun way to showcase your individuality and creativity.
Get ready to feel fabulous with a manicure that’s visually stunning and interesting to touch!
15. Galaxy Nails
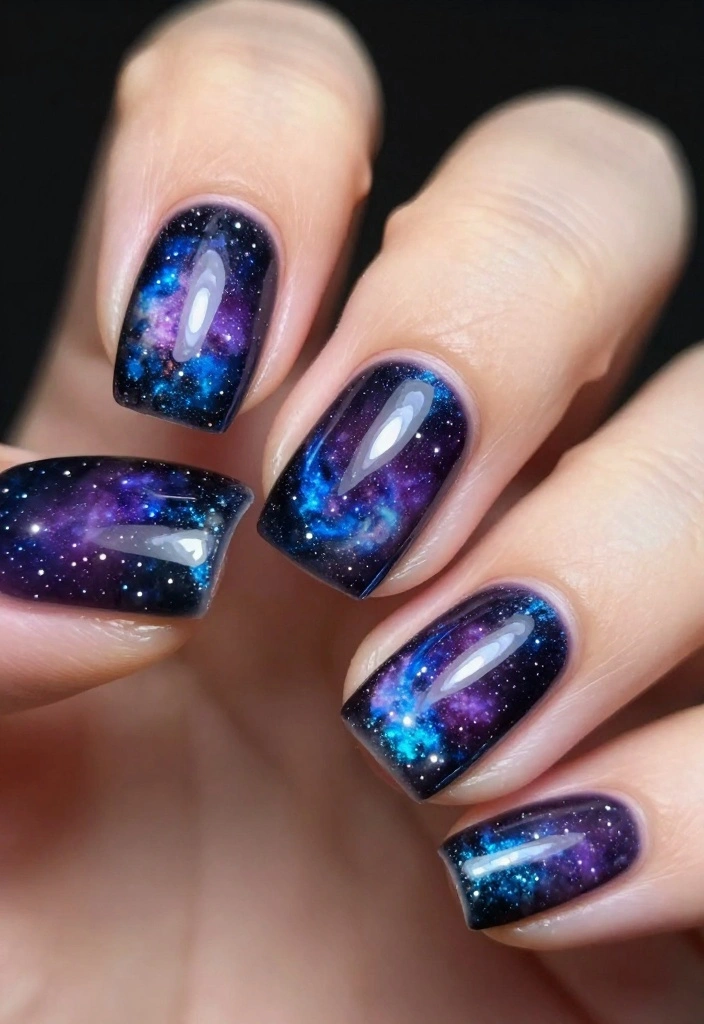
Galaxy nails bring the wonders of the universe right to your fingertips! This whimsical look combines dark colors and shimmery accents to create a stellar effect that’s out of this world.
Begin with a deep black or blue base coat. Using a sponge, dab on purples, blues, and glitter to mimic stars and planets. Seal the look with a topcoat to ensure it lasts.
Why this style is celestial:
– Each design is unique and sure to turn heads.
– Customize colors to match your personality and style.
– A fun way to experiment with different color combinations.
Embrace the stars and let your nails shine like a galaxy!
16. Nail Tapes
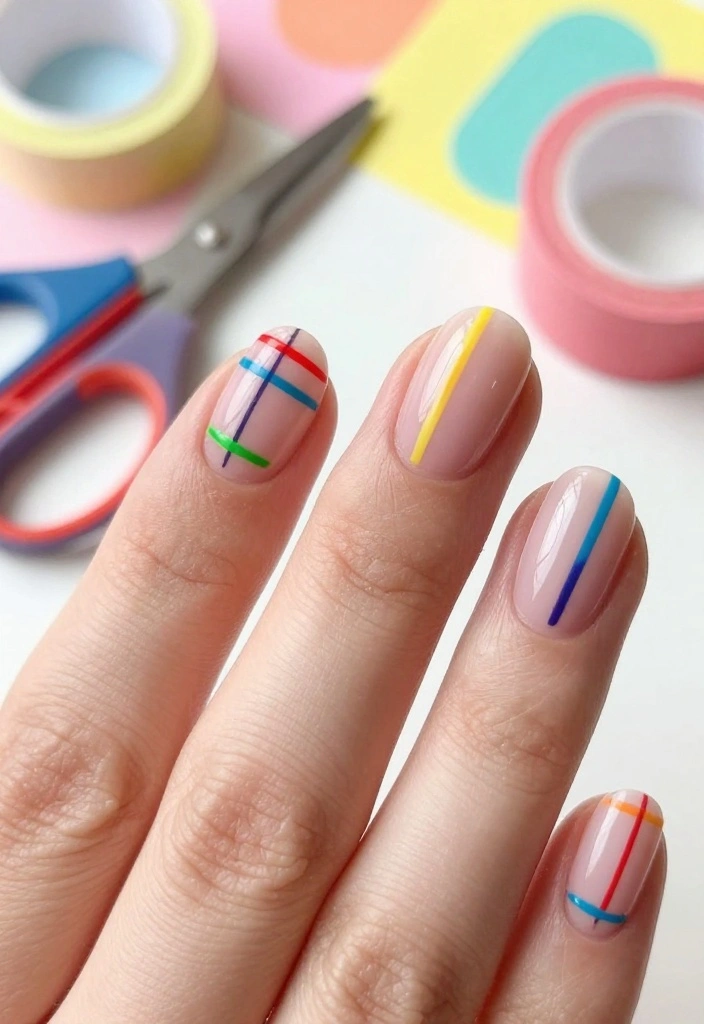
Nail tapes are a fantastic way to enhance your designs, allowing you to create sharp, clean lines effortlessly! Available in various colors and widths, they’re perfect for experimenting with different styles.
Start with a base color and let it dry completely. Use the tape to form stripes or patterns by sticking it onto your nails and painting over it. Once the polish is dry, carefully remove the tape for a crisp design.
Tips for using nail tapes:
– Ensure your base coat is fully dry before applying tape to avoid smudging.
– Opt for contrasting colors for the best visual impact.
– Experiment with angles and shapes to create unique designs.
Using nail tapes will elevate your nail art to a whole new level of precision and flair!
Fun fact: Nail tapes boost your Nail Arts game by delivering sharp lines in under 2 minutes—perfect for busy mornings. Start with a fully dry base and peel away the tape for a pro look every time.
You Might Also Like
17. Gradient Glitter

Gradient glitter is a fun and glamorous way to add a touch of sparkle to your nails! This technique combines a gradient effect with glitter, creating a beautiful sparkly fade.
Start with a solid base color, applying it completely to your nails. Then, use a makeup sponge to dab on glitter, beginning at the tips and blending downwards. This creates a stunning blended glitter effect that’s sure to impress.
For a gorgeous finish:
– Use fine glitter for a delicate touch.
– Seal with a topcoat for durability and shine.
– Play around with color combinations that reflect your style!
Get ready to dazzle with your sparkling gradient nails!
18. Candy Stripes
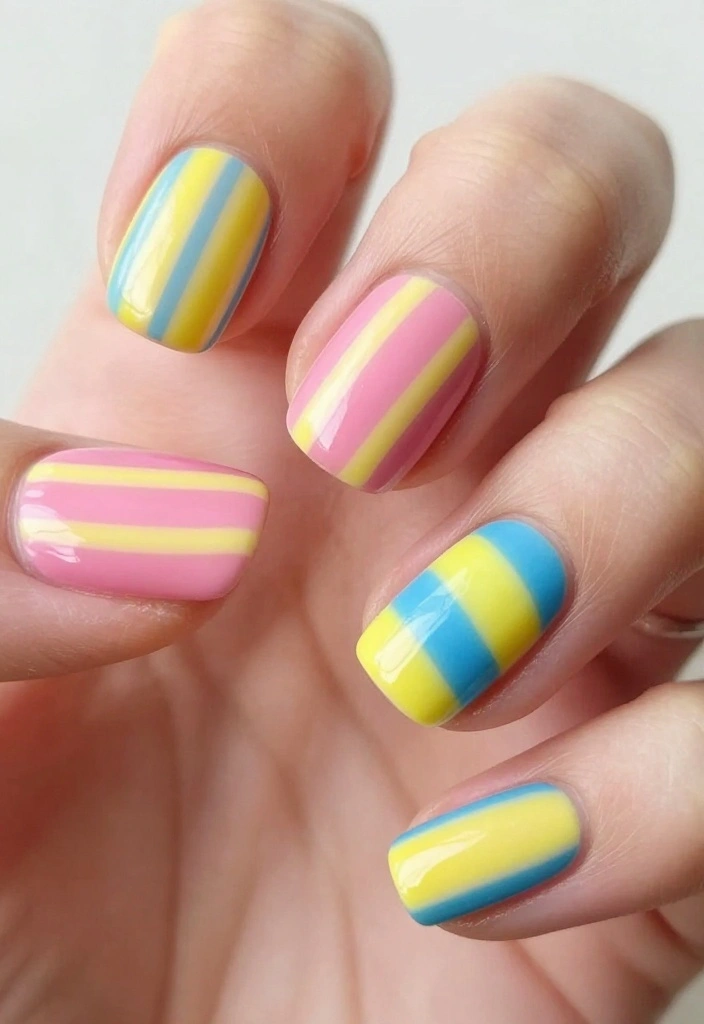
Candy stripes bring a playful and sweet vibe to your nails! This fun design can be created using various colors and widths to create a festive look you’ll love.
Start with a base coat of your choice and let it dry. Use a striping brush to paint colorful stripes across your nails, or use nail tape for a clean finish. Mixing different stripe widths can add visual interest and fun.
Fun tips:
– Select colors that complement each other for a cohesive design.
– Bright colors work well for a summer vibe, while softer shades can create a more subtle touch.
– Remember to seal your design with a topcoat for longevity!
Add a cheerful touch to your manicure with delightful candy stripes!
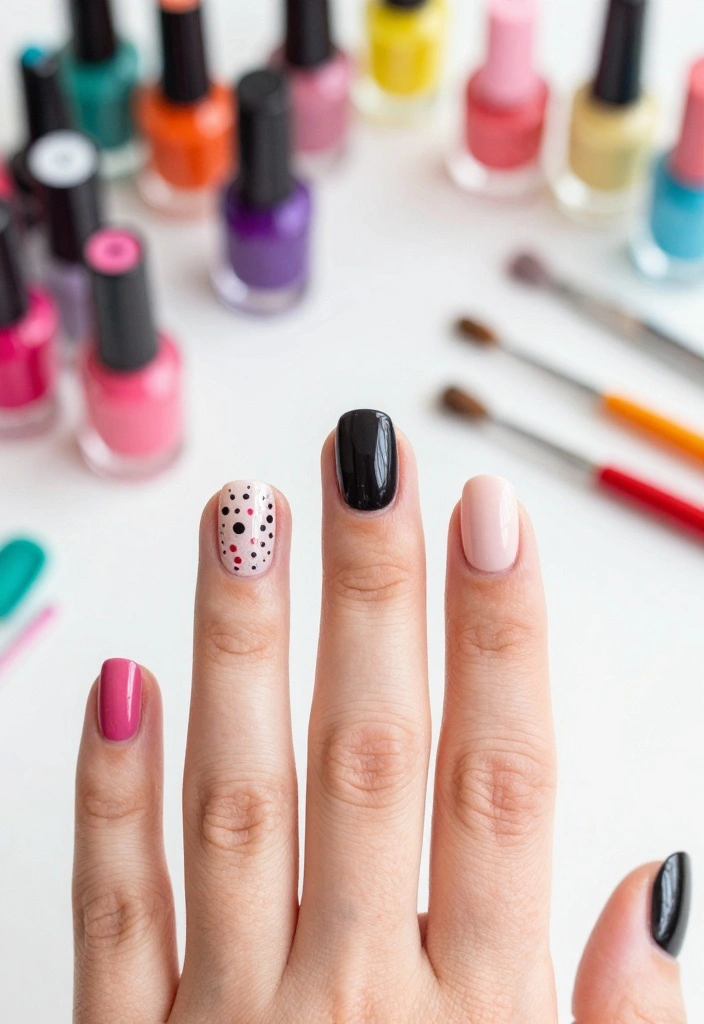
19. Dot Art
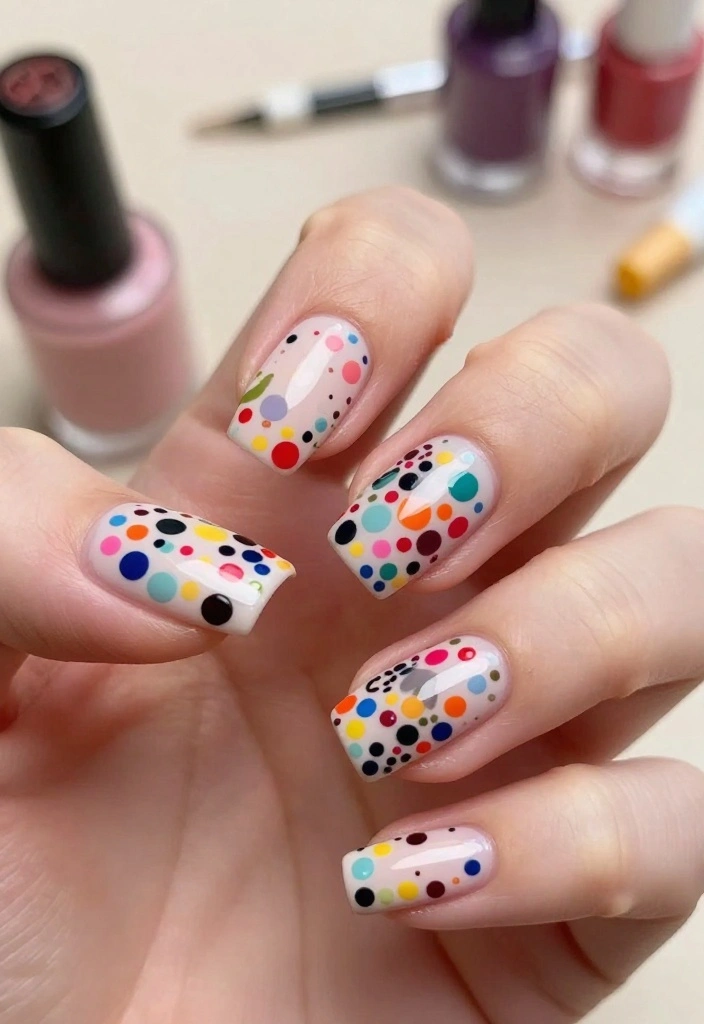
Dot art is a simple yet effective way to create stunning patterns using just a dotting tool. This technique is ideal for beginners and allows you to craft beautiful designs easily.
Start with a base coat color and let it dry. Using a dotting tool, create dots of various sizes and colors to form designs like flowers, mandalas, or abstract patterns. You can layer the dots for a fun 3D effect!
Why dot art is fantastic:
– It’s extremely versatile and customizable.
– Perfect for beginners; you can create beautiful designs with minimal skill.
– Suitable for every season—use autumn colors in the fall, bright pastels in the spring, and so on!
Let your creativity shine with beautiful dot art that stands out!
20. 3D Nail Art
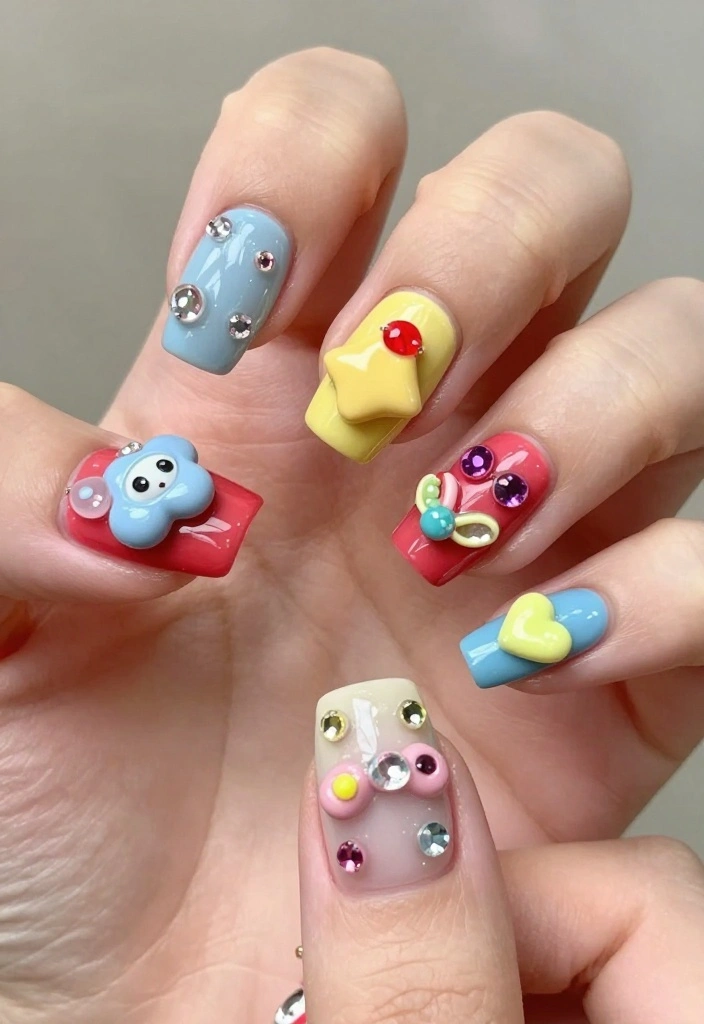
3D nail art offers a fun and textured finish for your manicure! This playful technique allows you to incorporate elements like rhinestones, studs, or small charms into your design.
Start by applying a base coat and your main color. Once dry, carefully place your 3D elements using nail glue. Finish with a topcoat to ensure everything stays in place.
Why 3D nail art is a hit:
– It adds unique features to your nails that stand out.
– Mix and match different elements for a personalized look.
– Ideal for events, parties, or whenever you want to shine!
Get creative and express yourself with these fun 3D accents!
Fun fact: 3D nail art with rhinestones or charms adds texture and personality in under 20 minutes—perfect for busy Nail Arts lovers. Seal with topcoat, and your details stay put while your nails dazzle in every selfie.
21. Color Blocking

Color blocking is a trendy nail art technique that pairs bold colors in striking combinations! This style emphasizes simplicity and elegance, allowing you to make a fashionable statement effortlessly.
Start with a base coat, letting it dry completely. Use nail tape to create sections, applying your chosen colors in those areas. Remove the tape before the polish dries for crisp lines and finish with a topcoat.
Why you’ll love color blocking:
– It’s perfect for expressing your personal style with vibrant hues.
– Chic designs make them suitable for any occasion.
– Customize shapes and colors to match your outfits perfectly.
Embrace the boldness of color blocking and elevate your nail fashion game!
Conclusion
With these 21 nail art techniques at your disposal, you’re ready to unleash your creativity and become your own nail artist! Each technique offers a unique way to express your personality and style, ensuring your nails are always on point.
Experiment with different designs and color combinations, and don’t hesitate to mix and match the techniques for endless possibilities. Nail art is not just about looking good; it’s about having fun and feeling fabulous!
So grab your nail supplies and let your imagination run wild—your next masterpiece is just a paint stroke away!
Frequently Asked Questions
What are the essential nail art techniques every beginner should learn first?
Starting with Nail Arts means building a solid foundation. Begin with base coat and top coat for longevity, practice freehand painting to control lines, and master easy nail techniques like dotting, striping, and simple gradient blends. Use swatches to practice before applying designs to your nails, and choose beginner-friendly tools to build confidence in nail fashion.
What is Tip #3 from the article and how can it change my nail art game?
Tip #3 is a game changer because it streamlines your process and helps you achieve crisper, longer-lasting designs. It often boils down to a simple one-step adjustment—like layering a strategic coat or using decals for clean lines—that saves time and raises the quality of your nail arts without overcomplicating your routine. To use it: prep nails well, practice on swatches, apply your chosen technique, then seal with a top coat for a pro finish.
What supplies do I need to start practicing these nail art techniques on a budget?
You can dive in without breaking the bank. Essentials include base coat, top coat, a small selection of polishes, a basic brush set, dotting tools, striping tape, and lint-free wipes for clean lines. As you grow, add stamping plates or decals to expand your repertoire in nail fashion.
How can I make Nail Arts last longer and stay pristine through daily wear?
Treat your nail art like a mini manicure. Prep with cuticle care, apply a base coat, build color in thin layers, and seal with a durable top coat. Reapply the top coat every few days, avoid harsh solvents, wear gloves for chores, and keep nails hydrated to protect your nail techniques and overall nail fashion.
Which nail techniques work best for different nail shapes and lengths?
Short nails shine with clean lines, negative space, and simple dotting patterns. Medium to long nails offer room for gradients, stamping, and intricate decals. For almond or coffin shapes, follow the nail’s natural line with your design and use color blocking to enhance the shape, keeping your nail arts aligned with current nail fashion trends.
Related Topics
nail art
nail techniques
fashion tips
beginner friendly
easy designs
gel nails
minimalist nail
trendy styles
quick nail art
advanced techniques
seasonal designs
diy nail art


")
")
")
I loved this post! I’ve been trying to learn nail art, and your tips are super helpful. Which technique do you think is the easiest to start with?
This is a great list! I once tried nail art for a party, and I ended up with glitter everywhere. My dog was sparkling for weeks! What’s your funniest nail art fail?