
This season has me craving fresh nail shapes that fit every mood. I want nails that look chic but stay comfy for long days. So I pulled together 20 stunning nail shapes you need to try this season. And yes, you have to wait until you see #5, it really stands out.
Here is why I made this post. Trying new nail shapes can change how your hands look and feel. A small change in shape can refresh your whole style and mood. It gives you a new way to express yourself with less effort than a full manicure.
Who this is for? If you love DIY nails, care about nail health, or want a fresh twist on a familiar look, this is for you. If you want nails that photograph well or stay strong through a busy week, you belong here.
What you’ll get. Twenty shapes described in simple words. Each one comes with a quick vibe check and practical tips on shaping, filing, and wear. You’ll find options from subtle to bold and advice on wearing gel, acrylic, or press-ons without losing comfort.
Here’s a peek at the kind of shapes you’ll find. Soft rounds for everyday ease, sharp stiletto edges for drama, square edges that stay neat, and many in between. The star is #5, a look that proves you can be bold without losing wearability.
Next steps are simple. Try one shape this week and see how it fits your routine. Start with clean nails, pick your length, and file in one direction for a smooth edge. Finish with a solid top coat to lock in shine. If you try it, drop a photo or question in the comments and we’ll chat about what works best for you.
Contents
- 1. Almond Nails
- 2. Coffin Nails
- 3. Stiletto Nails
- 4. Square Nails
- 5. Ballerina Nails
- 6. Round Nails
- 7. Squoval Nails
- 8. Lipstick Nails
- 9. Tapered Nails
- 10. Reverse French Tips
- 11. Ombré Nails
- 12. Pearlescent Nails
- 13. Glitter Nails
- 14. Neon Nails
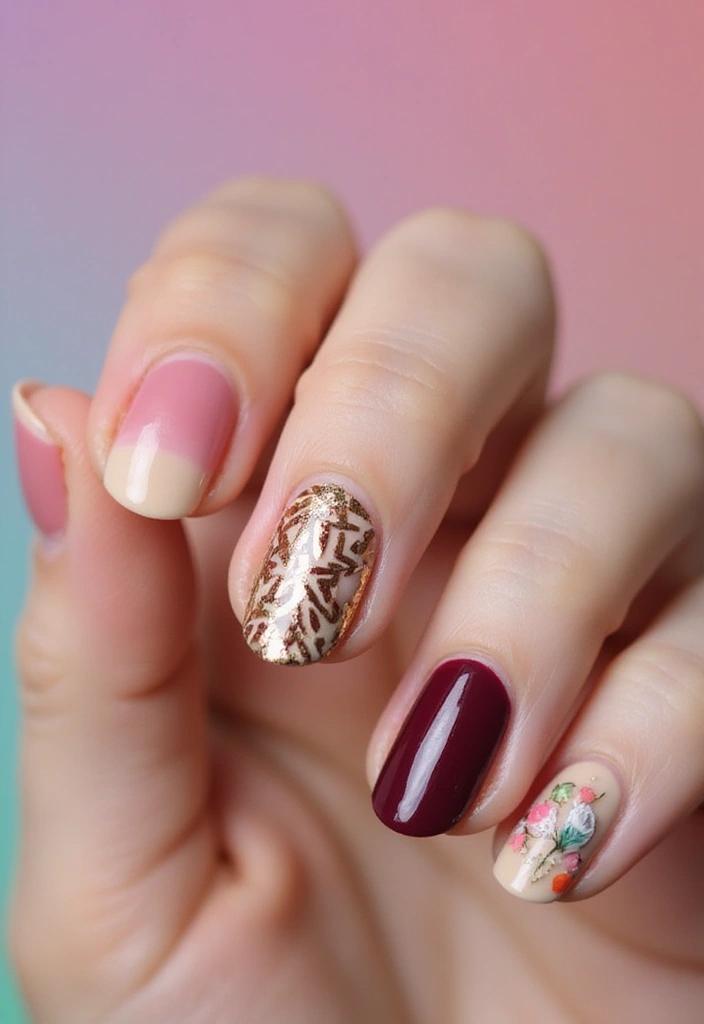
- 15. Floral Nail Art
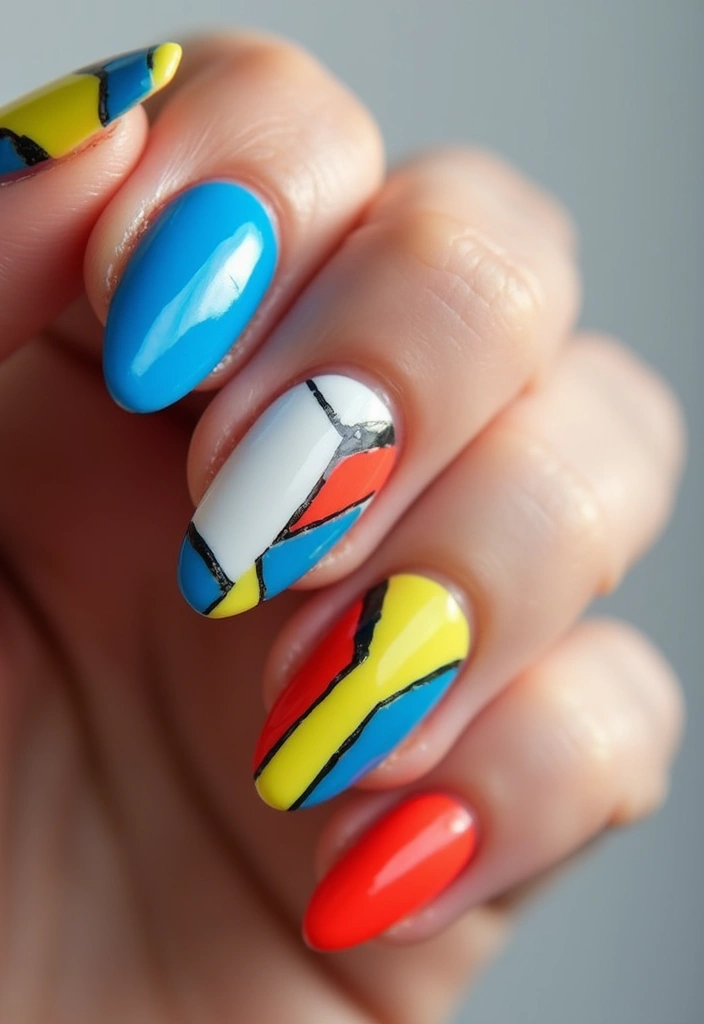
- 16. Geometric Nail Designs
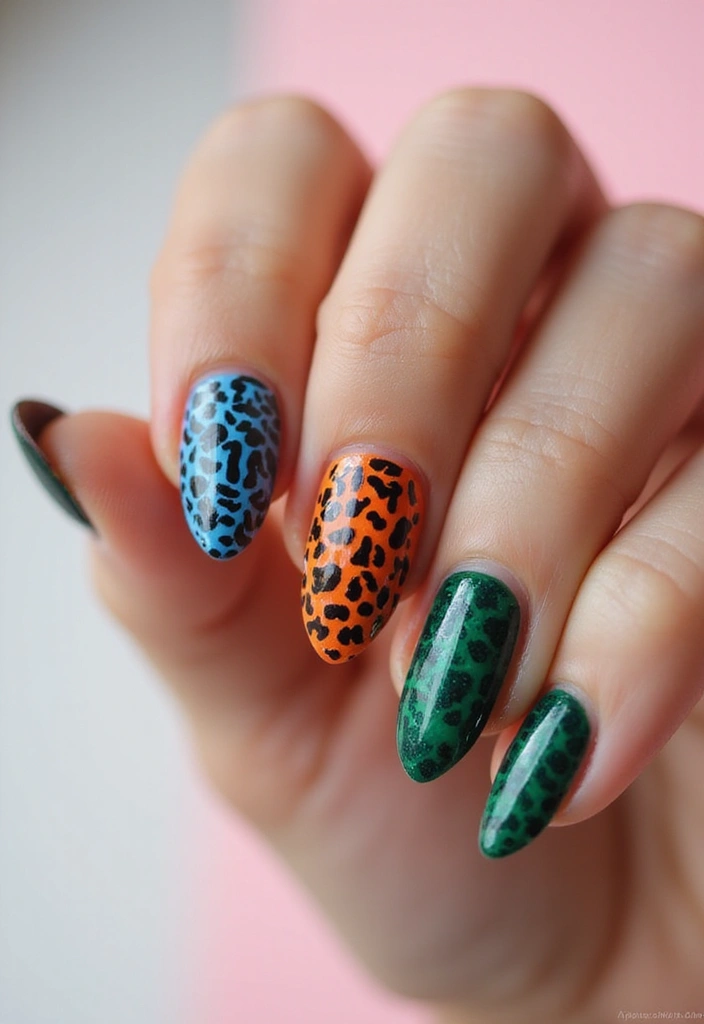
- 17. Animal Print Nails
- 18. Matte Nails
- 19. Metallic Nails
- 20. Gradient Nail Art
1. Almond Nails
Almond nails
If you want a shape that makes fingers look longer and adds a touch of class, almond nails fit the bill. They copy the curve of an almond with a gentle taper to a soft point. This look flatters many hands and can handle daily wear.
Here is how to get the look right:
– Begin with a square or round base.
– File the sides evenly to create a taper.
– Keep the base wide enough to support length.
– Avoid taking too much off the tip.
– Smooth the edges with a fine file or buffer.
Color and design ideas:
– You can try soft pastels like blush pink, baby blue, or lavender so the almond line stays clear.
– Floral designs pair well with the almond silhouette.
– For texture, go matte or add a subtle ombre that fades toward the tip.
Practical tips:
– Use a glass or crystal file for smooth shaping.
– Apply a base coat to protect the nail bed.
– Finish with a top coat to seal color and add shine.
Care and long wear:
– Moisturize cuticles to keep nails flexible.
– Keep nails clean and dry to avoid peeling.
Common questions:
– Can almond nails work on short nails? Yes.
– Do almond nails break easily? They can peel if you are rough with them.
Next steps:
– Try almond nails on your next manicure.
– Pair them with a soft pastel palette or a matte finish for a fresh look.
1. Almond Nails
Editor’s Choice

Bona Fide Beauty Czech Glass Nail Files for Natural Nails (Clear) – 1Pc …

Beetles 2 Pcs 15ml No Wipe Gel Top Coat and Base Coat Set – Shine Finish…

Sally Hansen Double Duty™, Base and Top Coat, Quick Dry, Long Lasting, S…
2. Coffin Nails
Coffin nails bring drama to your look. They stay long and end in a flat edge, like a coffin or a ballerina toe. You get a bold surface that loves color and art.
What coffin nails look like
These nails are built for impact. The long shape with a square, flat tip creates a wide canvas. It’s easy to see patterns, glitter, and tiny jewels clearly.
How to shape them at home
– Start with enough length or build tip length so the flat edge can sit evenly.
– File the sides straight with a sturdy, fine-grit file. Use long, steady strokes.
– Shape the tip flat by smoothing the very edge until it sits level with the sides.
– Check both hands for balance as you go. A quick look in a mirror helps.
– Lightly buff the edges so nothing catches on fabric or skin.
Color and finishes this season
– Deep tones like burgundy, plum, navy, or black make the shape pop.
– Metallics in gold, copper, or chrome catch the light from every angle.
– A glossy top coat keeps the look sharp; a matte top coat softens the edge for day wear.
Design ideas to try
– Clean geometric lines over the nail bed for a modern touch.
– Tiny jewel accents on the center nail add a hint of sparkle.
– Glitter tips or partial glitter create a bold focal point.
– Negative space at the base or sides gives a chic twist.
Care tips for long lasting wear
– Use a base coat to protect nails and prevent staining.
– Reapply top coat every few days to extend wear.
– Keep cuticles healthy with lightweight oil and a gentle massage.
2. Coffin Nails
Editor’s Choice
Empyrean Premium Nail Files | Made in USA | Fine 280/320 Extra Fine | Di…
Sally Hansen Double Duty™, Base and Top Coat, Quick Dry, Long Lasting, S…

Top Coat Nail Polish Clear: Quick Dry Nail Polish No Chip High Shine Lon…
3. Stiletto Nails
Stiletto nails give a bold, stylish look with sharp tips. They lengthen the hand and make nails stand out. Here is why you may want them: the silhouette is striking and it invites big nail art.
Next steps to shape them at home:
– Tools you’ll need: a fine nail file, a buffer, clippers, a nail dehydrator, and a top coat. Optional wraps or decals add flair.
1) Prep your nails. Clean and dry them. If you wear tips or gel, follow your kit’s guide.
2) Shape the sides to a pointed edge. Keep lines smooth so edges won’t snag.
3) If you want a milder edge, round the tip slightly.
4) Buff lightly and seal with a strong top coat for shine and durability.
Ways to style: nail art ideas
– Gems or rhinestones near the base.
– Thin stripes that run the length of the nail.
– A single animal print accent on one nail.
Color ideas for the season: bold red, electric blue, or sleek black.
Care tips: wear gloves when cleaning. Avoid using nails as tools. If a tip chips, file gently and recoat.
Maintenance: refile lightly every week and refresh the top coat every few days.
3. Stiletto Nails
Editor’s Choice
Empyrean Premium Nail Files | Made in USA | Fine 280/320 Extra Fine | Di…

Morovan Professional Natural Nail Prep Dehydrate and Acid-Free Primer, D…
Top Coat Nail Polish Clear: Quick Dry Nail Polish No Chip High Shine Lon…
4. Square Nails
You want a nail shape that stays neat in real life. Square nails give you a clean, modern look that works day in and day out.
This shape fits both short and long nails. The straight edges create a sturdy base that holds up to busy days and bold designs.
Pair square nails with classic colors like red or nude. This season, add a matte topcoat for a refined finish that looks chic and effortless.
Keep the edges sharp. If you like art, try minimalist designs or simple stripes to keep things fresh without crowding the look.
Square nails work for errands and for special nights out. They’re versatile enough for any mood or event.
How to get the look at home:
– File straight across the edge to form a true square tip.
– Don’t round the corners too much.
– Use a fine file for the cleanest edge.
Practical tips to make them last:
– Finish with a matte or gloss topcoat to reduce chipping.
– Apply thin layers of polish and let each dry fully.
– Hydrate your cuticles for a neat, polished finish.
If you want variety, switch colors or finishes. A bold red, a soft nude, or a pale pink still reads square on the nails.
4. Square Nails
Editor’s Choice

Teenitor Nail File Nail Buffer, 6 pcs Nail Files and Buffers for Natural…
VENALISA Matte Gel Top Coat- No Wipe Long Lasting Matte Top Coat Clear G…

Cuccio Naturale Revitalizing- Hydrating Oil For Repaired Cuticles Overni…
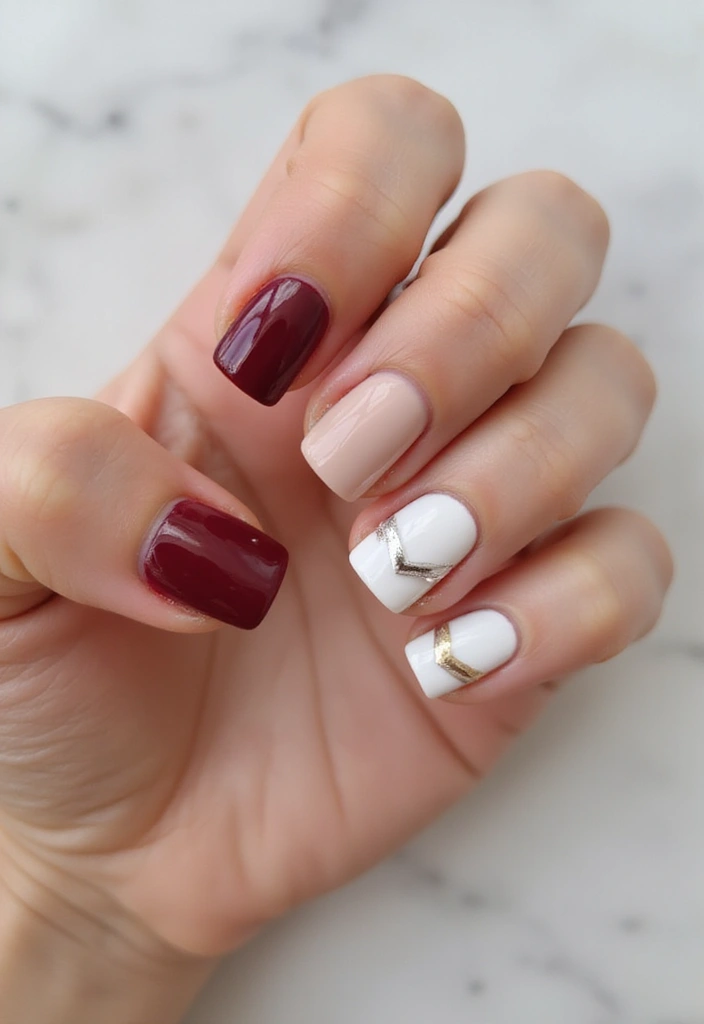
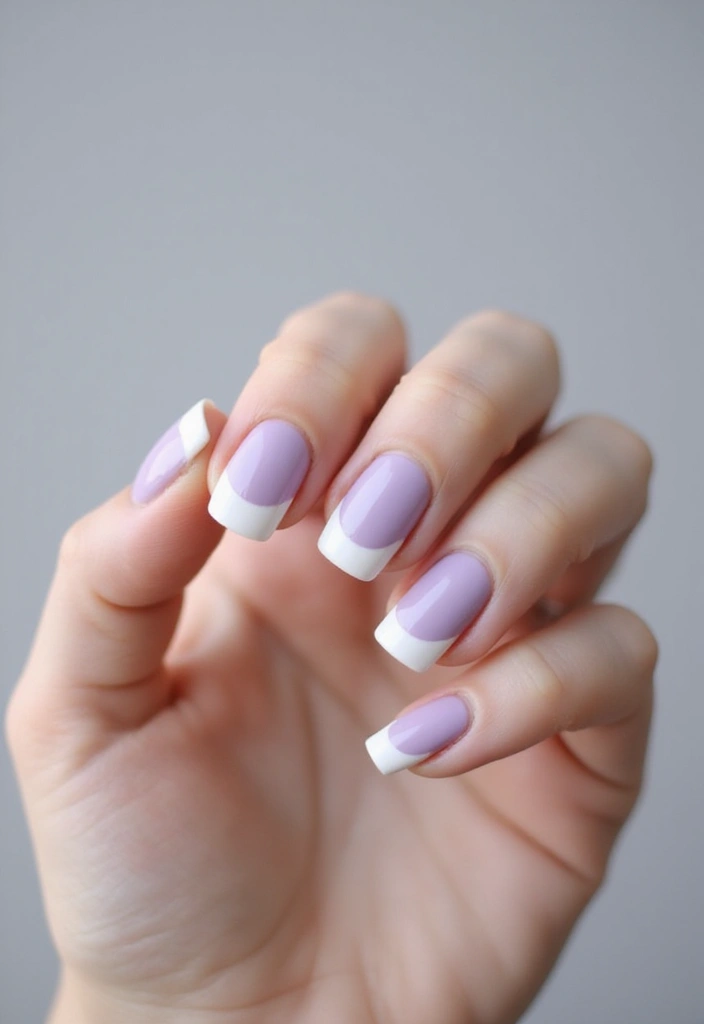
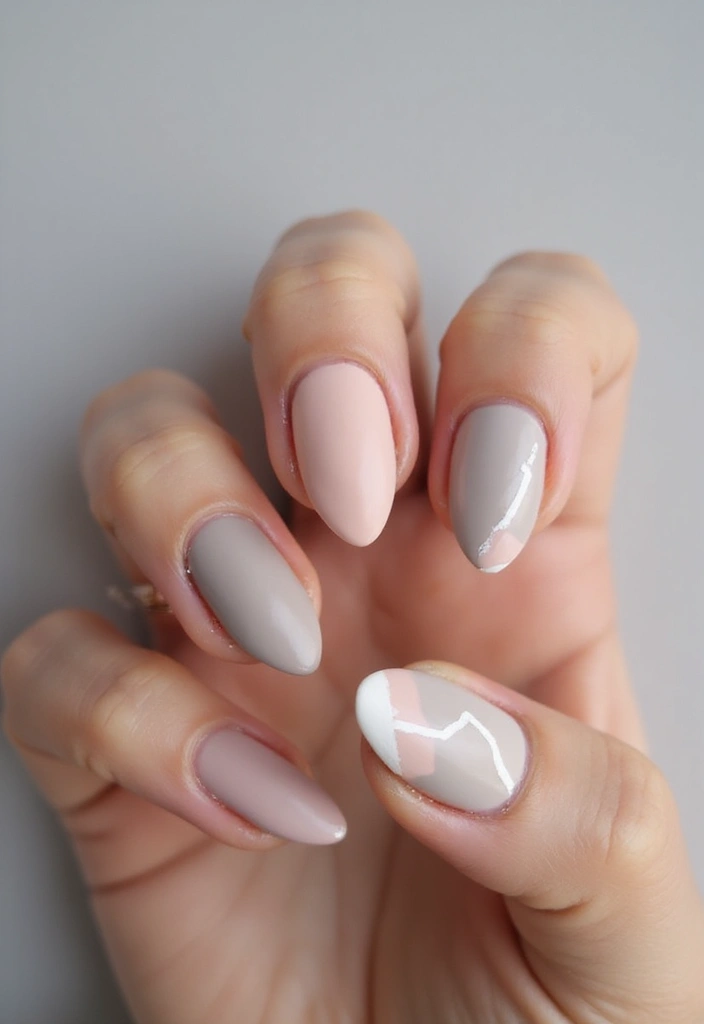
5. Ballerina Nails
Ballerina nails give you a chic look that fits long nails. The sides taper like an almond nail, but the tip stays flat. That flat end makes space for art while keeping a sleek silhouette. If you love designs, this shape is a perfect canvas.
– Shape and filing: Keep the sides clean and narrow. File gently to meet the flat tip. Avoid deep cuts that ruin the edge.
– Design ideas: Soft pinks, creams, or ivory feel romantic. For a bold vibe, try black lace patterns or bright florals. The broad tip helps sharp lines and tiny details stay neat.
– How to apply color and art: Start with a thin base. Layer your color in light coats. Use a fine brush or stamp for delicate designs. Let the art flow with the length of the nail.
– Care and maintenance: Long nails need care. Dry hands, moisturize cuticles, and wear gloves for cleaning to prevent chips. If a crack appears, book a fill early.
– Finishing touch: A glossy topcoat adds shine and makes designs pop.
– Next steps: Tell your nail tech you want a ballerina shape with a flat tip and tapered sides. Start with a length you can manage, then adjust as you grow comfortable. Try one nail first if you’re unsure.
5. Ballerina Nails
Editor’s Choice
Teenitor Nail File Nail Buffer, 6 pcs Nail Files and Buffers for Natural…

Artdone 31pcs Nail Art Brushes, Nail Art Tool Set, Dotting Tools, Dust B…

beetles Gel Polish No Wipe Gel Top Coat – Clear Color Top Coat Gel Nail …
6. Round Nails
Round nails
Round nails keep your manicure easy and clean. They look soft on any hand and suit many styles. This shape fits busy days and simple fashion alike.
Here is why you should try round nails. They resist chips better and stay tidy as you use your hands. They pair with any color or design, from clear pinks to bold blues.
How to shape them
– Start with clean, dry nails. Push back cuticles.
– Use a fine file. Move in gentle, curved strokes to form a smooth arc along the edge.
– Keep length short or medium. The rounded edge stays neat and strong.
Color and design ideas
– Try bright shades like coral or lime. They pop with the rounded edge.
– Add a small accent on one finger. A touch of glitter, a stripe, or a single dot looks stylish.
– Finish with a gloss for a clean everyday look or go matte for a cool, modern feel.
Care and maintenance
– Apply base coat, color, and top coat to help it last longer.
– Reapply top coat every few days to keep shine and prevent chips.
– If the edge wears, file gently and smooth it back to the curve.
Next steps
– Pick a color you love and test a rounded shape this week.
6. Round Nails
Editor’s Choice
Teenitor Nail File Nail Buffer, 6 pcs Nail Files and Buffers for Natural…
OPI Nail Lacquer Base Coat | Clear Nail Polish Base Coat |Chip Resistant…

Teenitor Nail Art Kit with 15 Sheets Gold Stickers, 6 Boxes of Gems, Too…
7. Squoval Nails
Squoval nails blend square edges with a soft oval tip. The result is a look that feels clean, modern, and easy to wear every day.
This shape is a workhorse. It fits busy schedules, short meetings, and weekend plans. It wears well with natural nails or after a gel fill. You get a tidy line that reads polished without shouting for attention. For this season, keep things calm with light neutral tones and a shiny top coat. Bold colors aren’t always needed to look chic. If you want more texture, try a gentle marbling pattern or tiny nail art that follows the curve of the nail.
How to shape squoval nails:
– File the sides straight to form a square base.
– Round the corners slowly to create the oval feel.
– Change how rounded the tip is to match your style.
– If you grow length, keep the rounding mild to keep the tips strong.
Finish ideas:
– Glossy top coat for brightness and a clean look.
– Matte finish for a soft, modern vibe that hides tiny flaws.
Practical tips for quick results:
– Keep length short to medium for a neat squoval.
– Use soft pinks, beige, or mushroom tones for everyday wear.
– If you like nail art, try a subtle marble design or a thin line near the edge.
Next steps: grab a file, pick a color you love, and practice shaping a couple of nails. You’ll see what you prefer with a little time.
7. Squoval Nails
Editor’s Choice
Teenitor Nail File Nail Buffer, 6 pcs Nail Files and Buffers for Natural…

JODSONE Gel Nail Polish Kit with U V Light 32 Colors Gel Polish Nail + 4…
beetles Gel Polish No Wipe Gel Top Coat – Clear Color Top Coat Gel Nail …
8. Lipstick Nails
– Lipstick nails are a bold nail shape that mirrors a lipstick bullet.
– The tip forms a gentle point, not razor sharp.
– Color options pop, from neon hues to glitter.
– Here is why you’ll want this look: it adds fun and drama to your hands.
– What you need: a fine nail file, a buffer, base coat, top coat, and your polish.
– Shaping steps:
– Start with clean nails.
– File the tips into a tapered point. Keep the point soft and rounded at the edges.
– Smooth the surface with a light buff.
– Apply a base coat.
– Color ideas: bold neon or sparkling glitter.
– Nail art is optional but fun: abstract shapes or tiny dots look cute.
– Finish options: seal with a glossy top coat or a matte top coat. Let dry fully.
– Care tips: keep nails at a comfortable length. Hydrate cuticles and file to fix chips.
– Styling tips: let the nails stand out with simple outfits. For a chic vibe, pair with a glossy finish; for a modern twist, go matte.
– FAQ: this shape lasts well with careful wear. If a tip chips, fix it with a quick touch-up and a fresh top coat.
– Keep a fresh coat on weekly to keep shape and shine.
– Now you can try lipstick nails this season.
8. Lipstick Nails
Editor’s Choice

File Fine Extra Fine – 400-600 Pink by Tropical Shine for Women – 1 Pc File

4 Way Nail Buffer Block (4 Pcs), Nail Shine Buffers Blocks Files for Nat…
Seche Clear and Seche Vite, Base Coat and Top Coat for Nail Polish
You might also like

9. Tapered Nails
What tapered nails look like
Want a nail shape that feels chic and easy to wear? Tapered nails fit the bill. They narrow toward the tip, creating a clean, modern line. This shape works with many colors and styles. Go soft with pastels or bold with bright hues. For punch, add geometric designs or metallic accents.
Shaping tips
Shape starts with the base. Keep the base wider for strength. Then file the sides evenly to form a gentle taper. Use a medium grit file first, then finish with a fine file. Be careful not to thin the tip. A matte topcoat adds a sophisticated finish.
Design ideas for impact
Try designs that move with the shape. A straight line or tiny dots along the taper catch the eye. Metallic foil or a thin stripe on the tip pops without overpowering. For a calmer look, choose a muted palette with a satin matte coat.
Care and upkeep
Care tips to last. Keep nails shaped by quick touch-ups. File once a week, and moisturize the cuticles. Hydration helps the taper hold its form.
Next steps
– Decide a length you can keep during busy weeks.
– Start at the base wider, then taper toward the tip.
– Add simple art along the taper: lines, dots, or a stripe.
– Seal with a matte topcoat for a refined finish.
Tapered nails are the perfect blend of chic and modern! Narrow towards the tip for a sleek look that effortlessly elevates any nail color or design. Go bold or soft; the choice is yours!
9. Tapered Nails
Editor’s Choice
Nail File and Buffer Set, 6 Pcs Professional Nail File Kit for Acrylic a…
Cuccio Naturale Revitalizing- Hydrating Oil For Repaired Cuticles Overni…
Beetles Matte Gel Top Coat for Gel Nail Polish,15ML Chrome Proof Matte T…
10. Reverse French Tips
Reverse French Tips
You want a nail look that feels fresh but is easy to wear. Reverse French tips put color at the base and keep the tips light or contrasting.
It fits many nail shapes and seasons. Try a soft pastel base with white tips, or a bold base with nude tips.
How to do it at home:
– Prep nails with a clean base and one clear coat.
– Paint the whole nail with your base color and let it dry.
– For a sharp line, place striping tape near the cuticle and paint only the base area. Remove tape gently.
– Leave tips nude, or paint them in a contrasting shade for impact.
Pro tips:
– Use a fine brush for clean lines.
– Finish with top coat to lock color and resist chips.
Extra tip: this style pops in photos.
A shiny top coat helps colors stay bright in daylight and indoors.
FAQ:
– Will it last like a regular manicure? Yes, with a good top coat.
– Can I do this at home? Yes, it is easy with common polishes.
Bottom line: reverse French tips swap the usual tip color for a bold base, giving you a chic manicure you can change up easily.
Give it a try on your next manicure and switch up your look.
10. Reverse French Tips
Editor’s Choice

Nail Art Striping Tape Lines Kit 36 pcs 1mm 2mm 3mm Nail Tape Strips for…

Artdone Metallic Nail Art Pens, Liner Brushes Set, 5PCS Black Color Nail…
Sally Hansen Color Therapy™, High Gloss Top Coat, Argan Oil, Long Lastin…
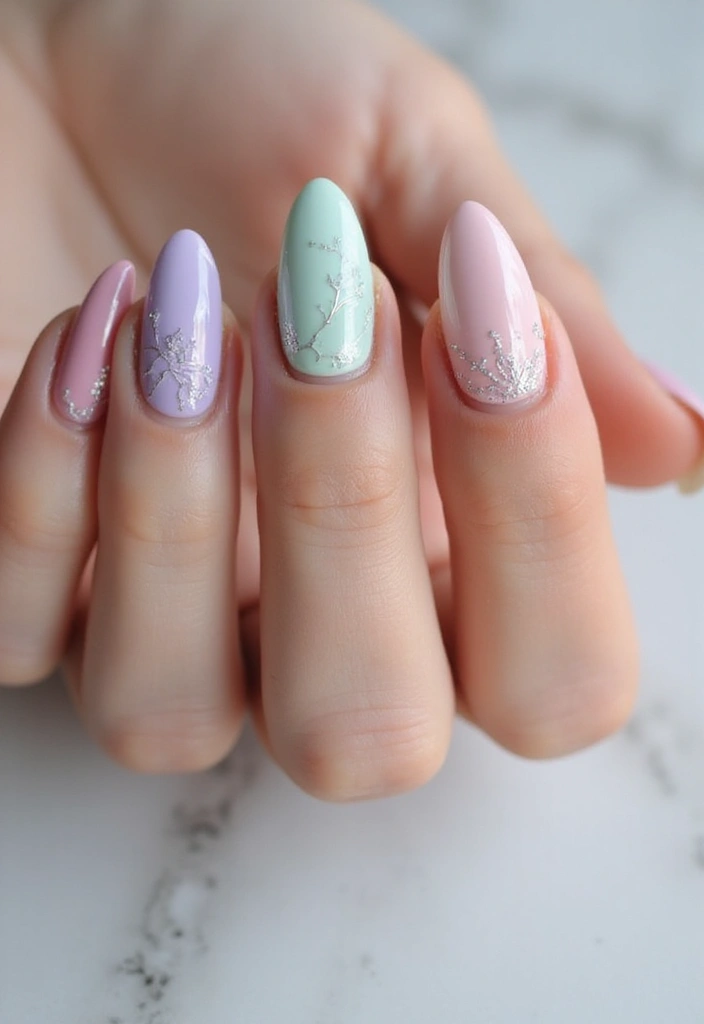
11. Ombré Nails
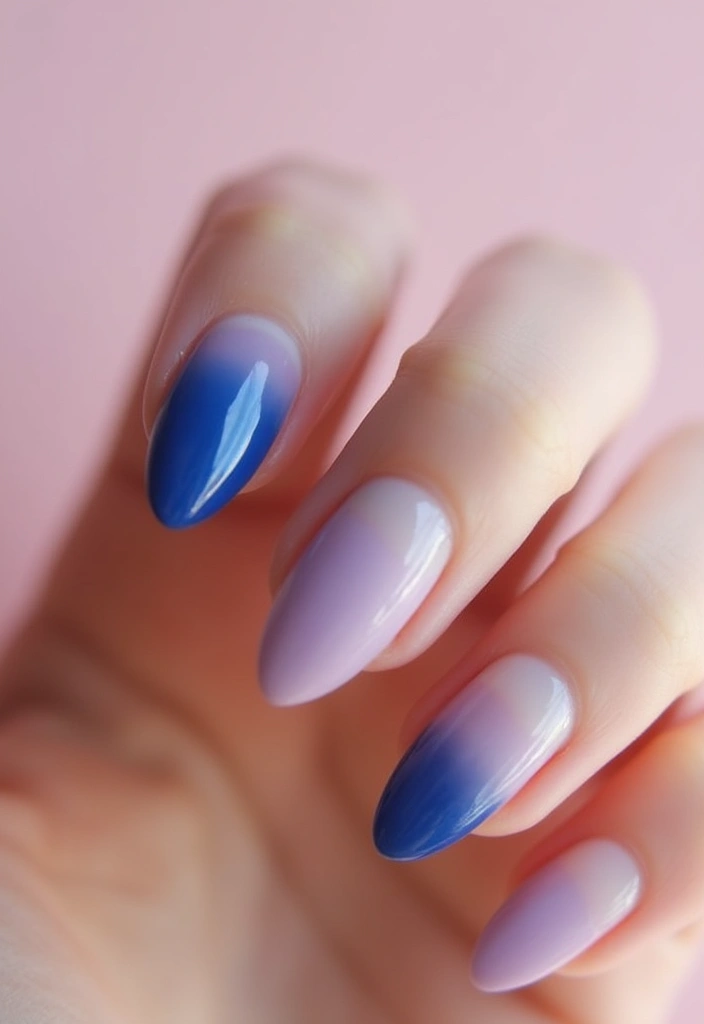
Ombré nails
Want a smooth color fade on your nails? Ombré nails blend two or more shades into one seamless look. You can keep it soft with pastels or go bold with autumn tones or summer brights. The blend makes nails look polished yet fun.
Here is how to nail the ombré at home:
– Choose two or more shades that flow together. A light base with a darker tip works well.
– Prep nails. File, push back cuticles, and apply a thin base coat.
– Paint the base color and let it dry completely.
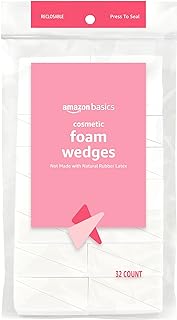
– Make the gradient with a makeup sponge. Dab the colors onto the sponge, then gently press onto the nail. Lightly twist the sponge to blur the edge between colors.
– Add more layers if you want a stronger fade. Let each layer dry before repeating.
– Clean the edges with a small brush dipped in polish remover. Finish with a glossy top coat.
Practical tips to try:
– A sponge with fine texture gives a softer blend.
– Add glitter at the tip or switch to a matte top coat for a different vibe.
– On short nails, keep the fade short for a chic, subtle look.
Common questions:
– Do I need a fancy sponge? No. A clean makeup sponge cut into wedges works fine.
– Can I mix different colors? Yes. Try rose with beige or navy with gray for a modern touch.
Next steps: pick your shades, practice on a nail wheel, and perfect your fade.
11. Ombré Nails
Editor’s Choice
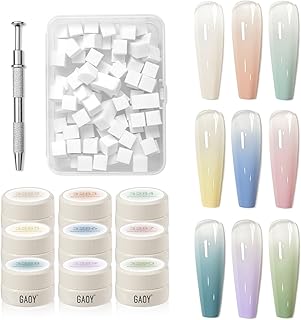
GAOY Ombre Gel Nail Polish Kit, 9 Colors UV LED Painting Gel with Sponge…
beetles Gel Polish No Wipe Gel Top Coat – Clear Color Top Coat Gel Nail …
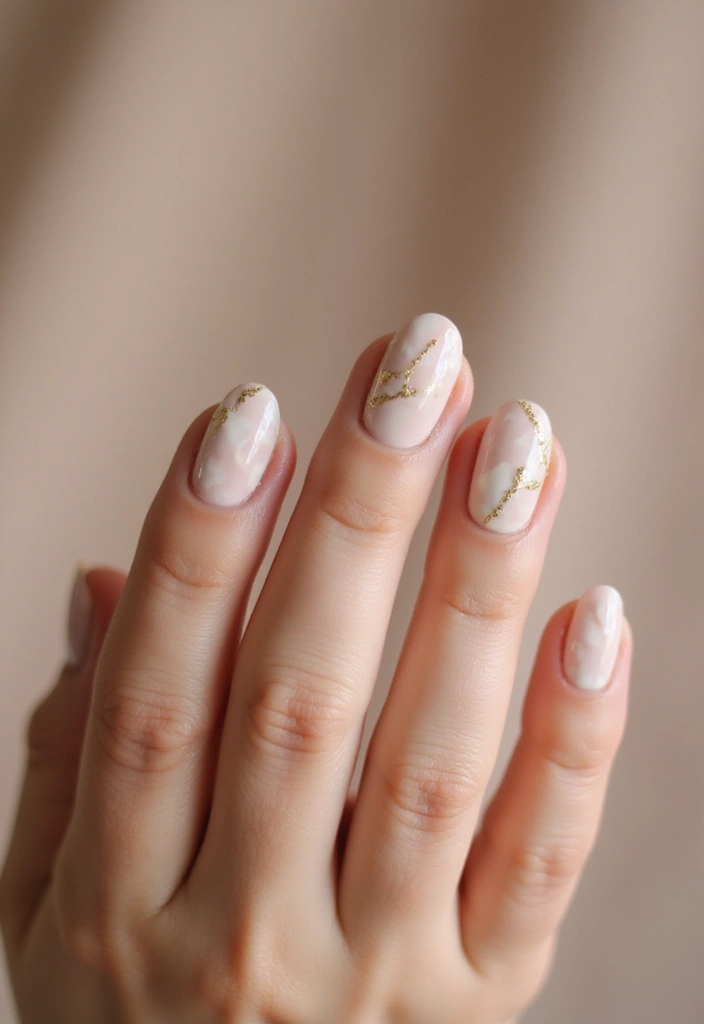
12. Pearlescent Nails
Pearlescent Nails
You want a nail look that shines without shouting. Pearlescent nails give a soft, iridescent glow that shifts with light. It looks chic on many skin tones and fits a lot of outfits.
Here is why it works now:
– A subtle shimmer that works with most outfits
– Easy to wear at work or school
– A simple take on plain polish
Color ideas you can try:
– Soft pinks and lavenders for a dreamy vibe
– Pearl white or champagne for a clean finish
– A touch of icy blue for a cool twist
How to get the look:
– Prep nails: trim, file, and push back cuticles
– Apply a thin base coat
– Add one or two light coats of pearlescent polish. Let each coat dry
– Finish with a shiny top coat for glow, or a matte top coat for a velvety feel
Tips for wear:
– Lightly seal the tips to reduce chipping
– For more depth, apply a sheer color first, then the pearlescent layer
– Keep hands moisturized to avoid rough edges
Removal:
– Soak off gently or use a foil method
Next steps:
– Pick a color idea and try it this week
– Share your look and note how the light changes
12. Pearlescent Nails
Editor’s Choice

Beetles Pearl Nail Polish Set Mermaid Glow, 6 Colors Shimmer Pearl Pink …

modelones Gel Top Coat, 15 ml 2025 Upgrade Super Shiny Base and Top Coat…

Nail Clippers Set Fingernail and Toenail Clipper Cutters, Manicure Pedic…
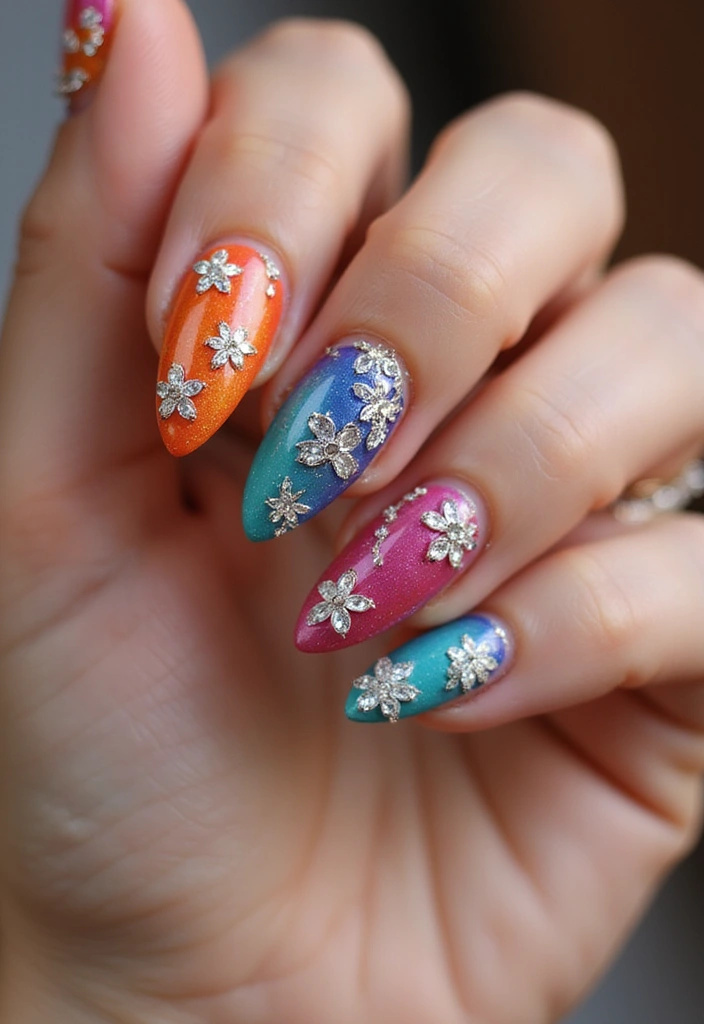
13. Glitter Nails
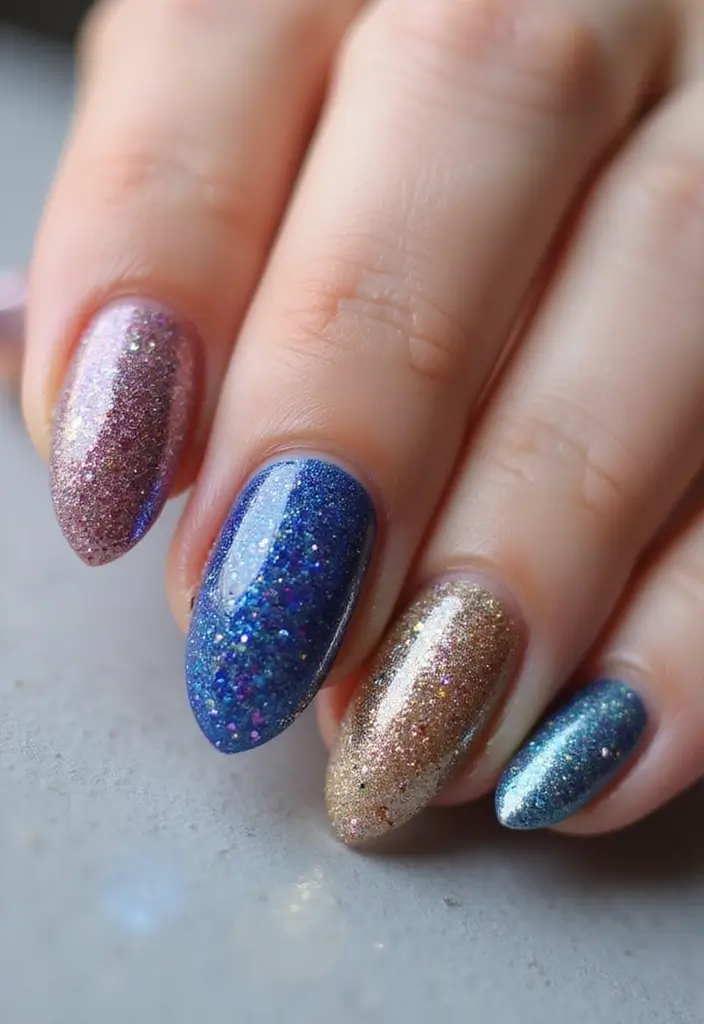
Here is why glitter nails work for this season. You get instant sparkle that matches any outfit. You can go bold or keep it simple.
– Choose your glitter type. Chunky glitter gives a party vibe. Fine glitter lends a soft shine. You can mix two colors for more depth.
– Prep your nails. Start with clean, dry nails. Push back cuticles and shape them. A smooth surface helps glitter stick.
– Base and layer. Apply a solid base coat. Then brush on glitter polish. For full coverage, add a second coat. If you use chunky pieces, dab gently to place them.
– Seal the shine. Finish with a clear top coat. Let it dry completely. Reapply top coat every few days to keep the sparkle smooth.
– Different looks. Glitter on one accent nail creates focus. Cover all nails for a full glam. A matte top coat can tone it down if you want a softer vibe.
– Care tips. Wear gloves when cleaning. Rub cuticle oil into your nails to keep them healthy and flexible.
– Removal. Soak off with foil or a gentle remover. Be kind to your nails to avoid lifting.
Next steps: choose your glitter, try one look this week, and adjust for next time.
Add a little sparkle to your style! Glitter nails are the perfect way to elevate any outfit—be bold with chunky glitter, or keep it chic with a fine shine. Shine on!
13. Glitter Nails
Editor’s Choice

modelones Nail Polish Set 6 Colors Red Nude Gold Glitter Min Nail Polish…
Beetles 2 Pcs 15ml No Wipe Gel Top Coat and Base Coat Set – Shine Finish…
Cuccio Naturale Revitalizing- Hydrating Oil For Repaired Cuticles Overni…
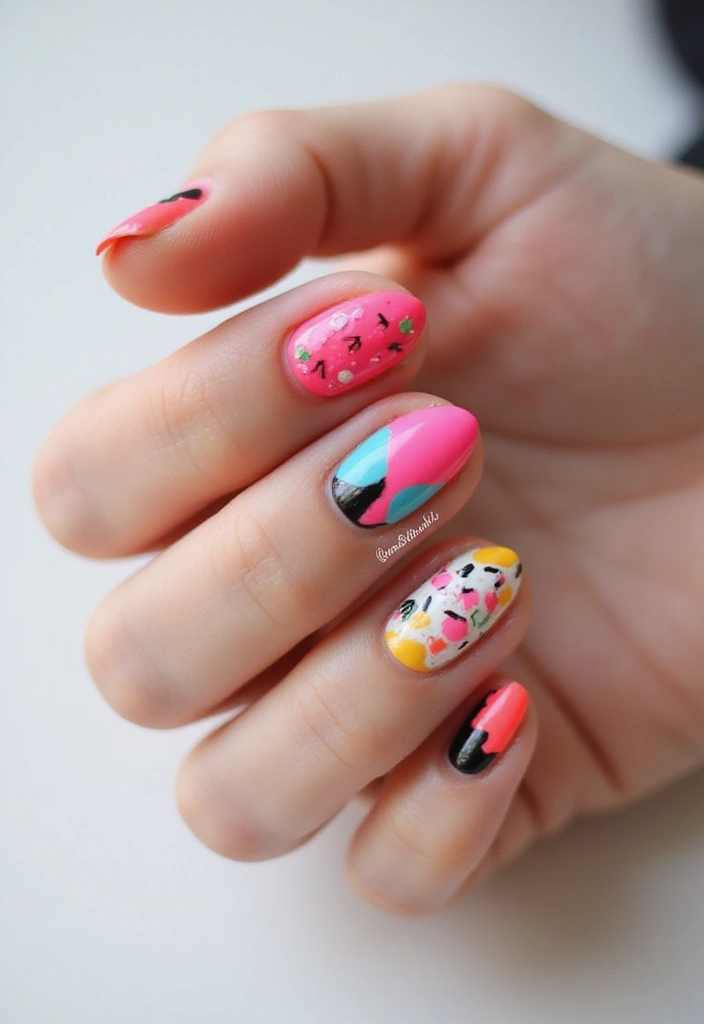
14. Neon Nails
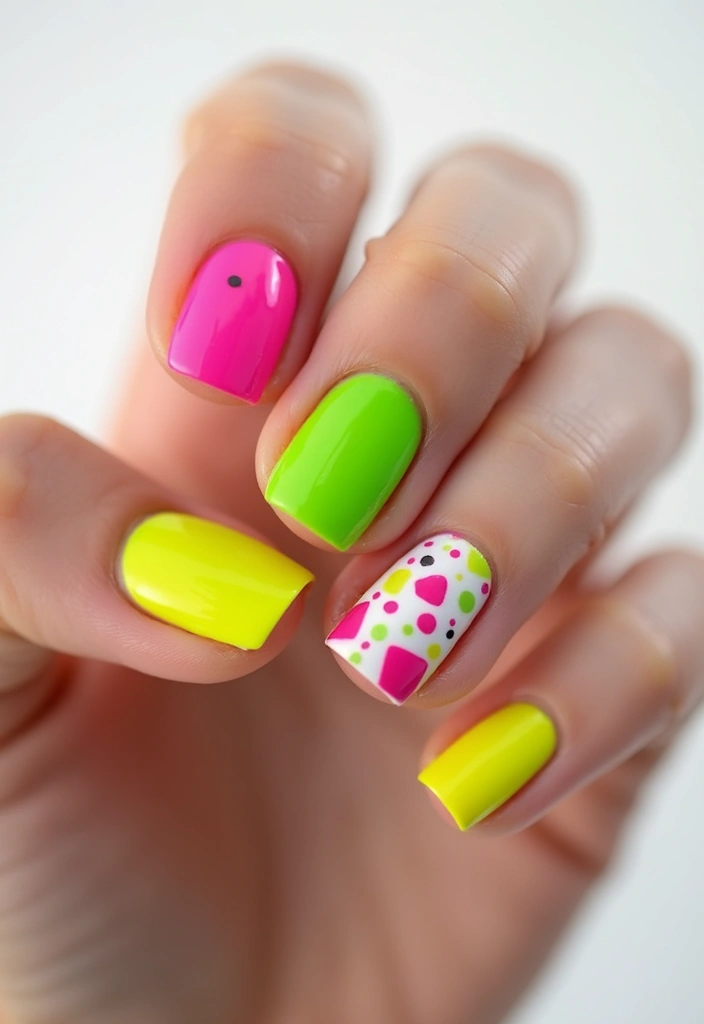
Neon nails grab attention and light up your look. They suit summer and party seasons and are easy to switch up. They brighten outfits and look great in photos. They glow under UV light for night events. They can be simple or bold with a color mix.
What you need
– A white base coat to make neon pop.
– Two to four neon shades.
– A clear top coat to seal and shine.
– Optional tools for stripes or dots.
How to get the look
– 1) Start with clean nails and push back cuticles.
– 2) Paint a white base and let it dry.
– 3) Apply neon shades in thin layers.
– 4) Finish with top coat and let it cure.
Make neon pop
– Add stripes or dots in a second neon color.
– Try a neon stripe on a nude base.
– Choose a small decal that glows under light.
Care and wear
– Reapply top coat every other day.
– Moisturize hands and avoid harsh cleaners.
FAQ
– Do neon nails need a white base? Yes, it makes colors pop.
– How long do they last with regular polish? They chip faster without gel; top coat helps.
– Give neon nails a try and watch the compliments roll in.
14. Neon Nails
Editor’s Choice

Beetles 3Pcs 15ml White Gel Nail Polish and No Wipe Gel Top Coat & Base …

Morovan 15 Bright Color 0.27oz Air Quick Dry Nail Polish Gift Set for Women
Top Coat Nail Polish Clear: Quick Dry Nail Polish No Chip High Shine Lon…
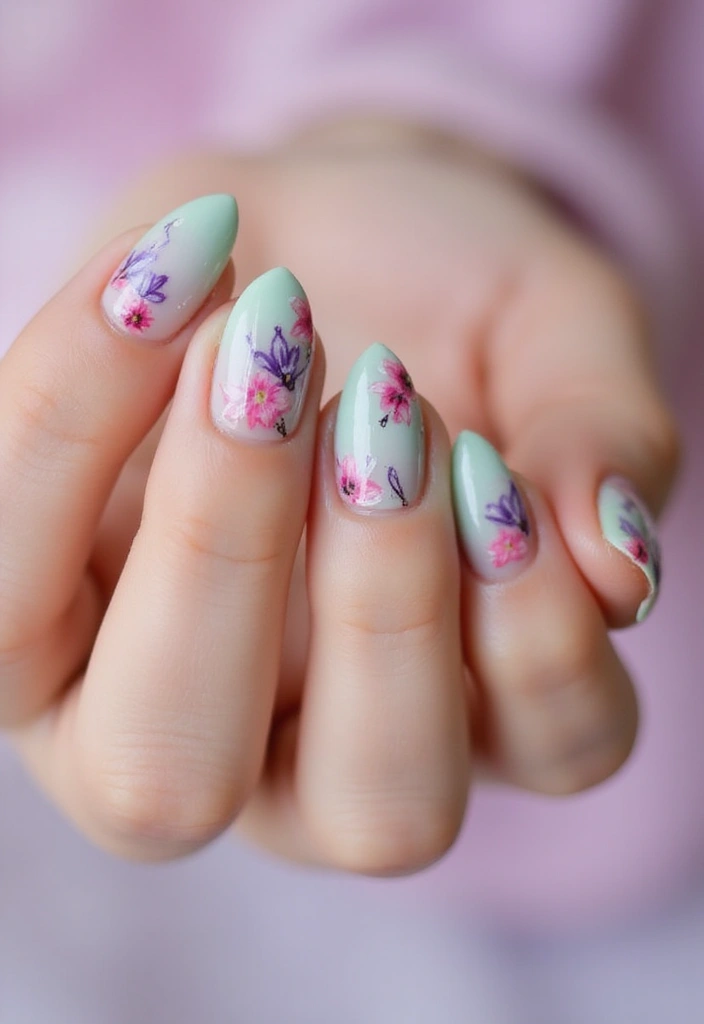
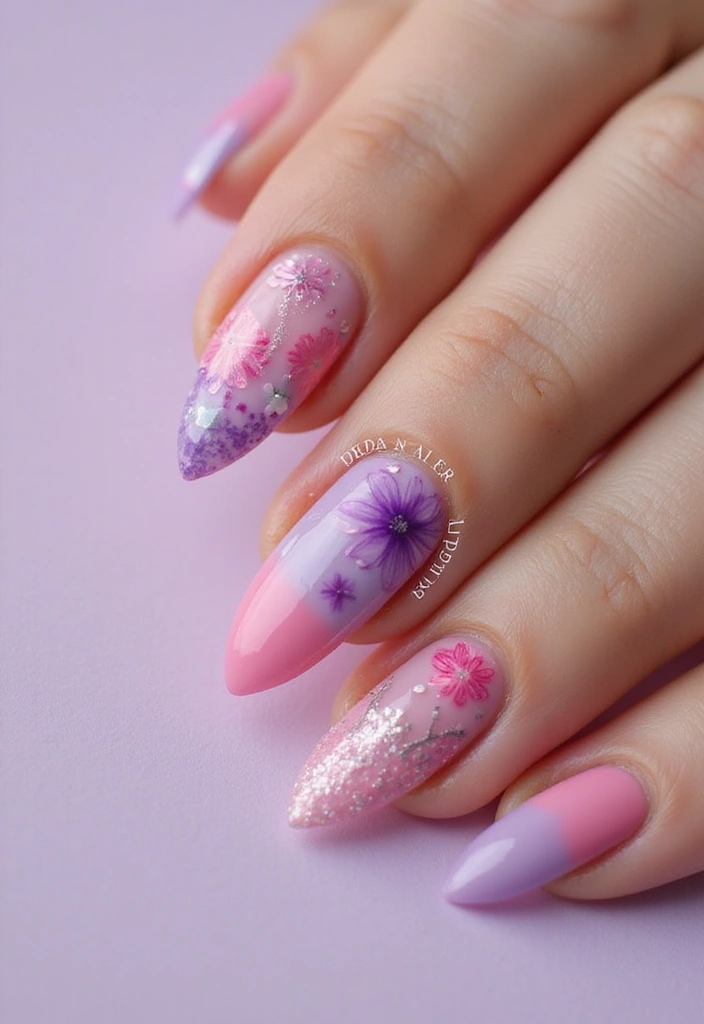
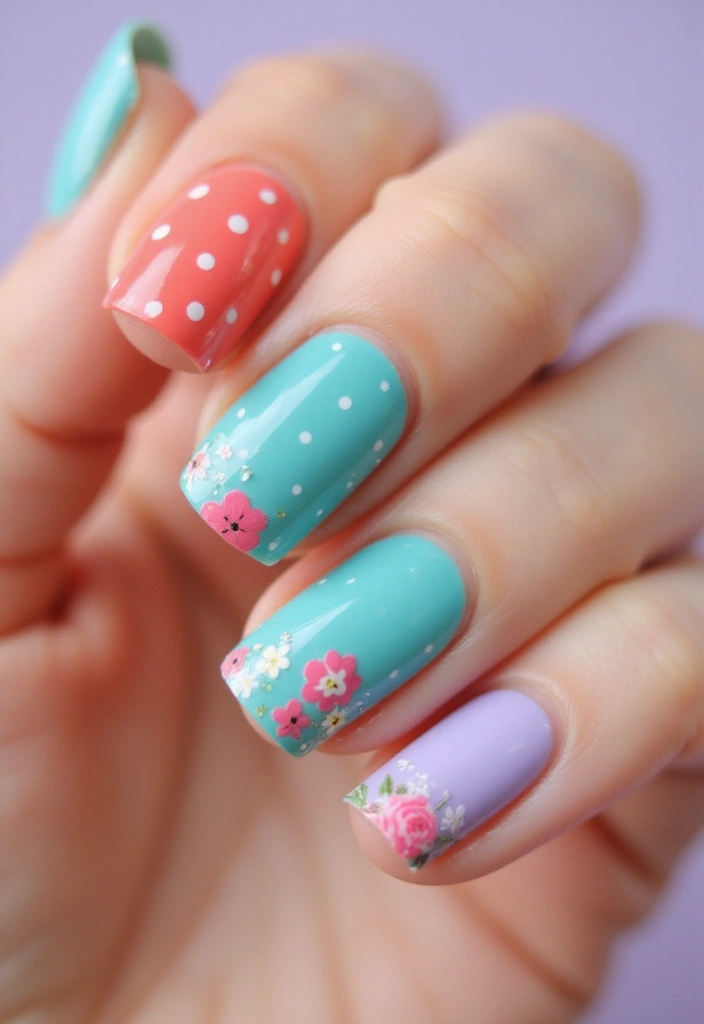
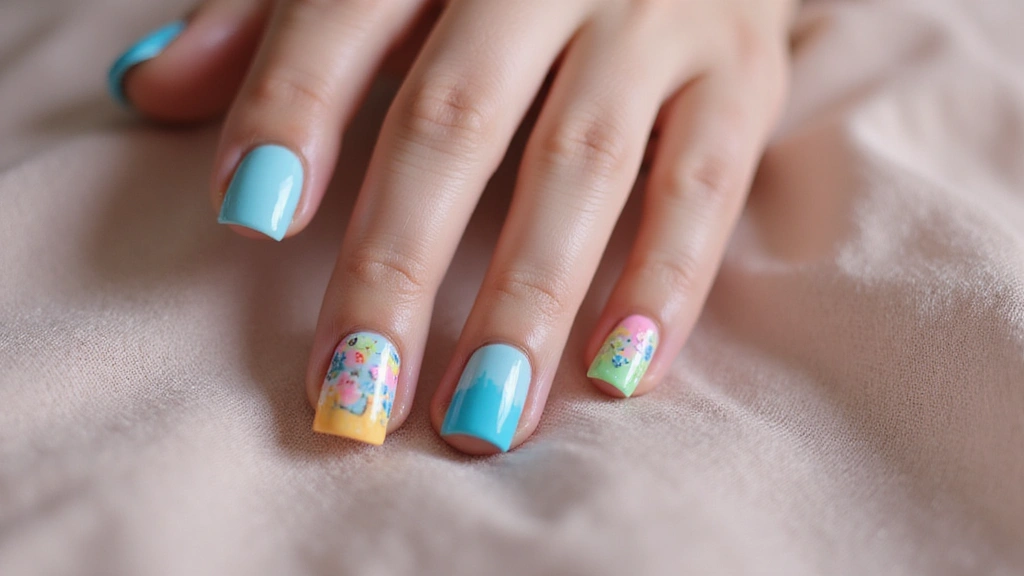
15. Floral Nail Art
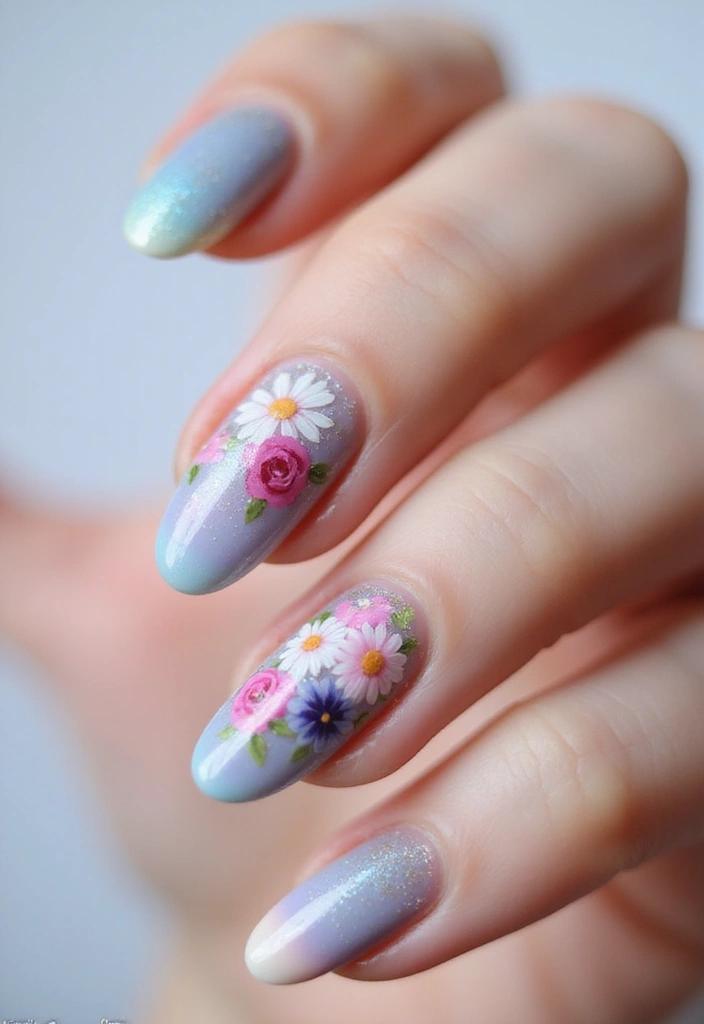
Floral Nail Art
You want nails that feel pretty without a lot of work. Floral nail art gives you that. This season you can keep things soft with pastel blooms or go bold with vivid petals. You can paint flowers directly on your nails or use stickers for a quick, clean finish. Here is how you do it.
– Base color first. Choose nude, blush, or a light pink.
– Create the flowers. Use a fine brush or a dotting tool to form simple petals.
– Pick petal colors. White, pale pink, or lavender work well. Add a tiny center dot for life.
– Add variety. Paint flowers on a couple of nails or make one big bloom as a focal point.
– If time is short, place stickers first and paint around them.
– Finish with a clear top coat. It adds shine and helps wear stay even.
Next steps:
– Let each layer dry to avoid smears.
– Clean edges with a small brush dipped in remover.
– Try negative space by leaving part of the nail bare for a modern touch.
Care tips:
– Hydrate cuticles with oil after washing hands.
– Use a gentle soap and pat dry to keep the look fresh longer.
15. Floral Nail Art
Editor’s Choice
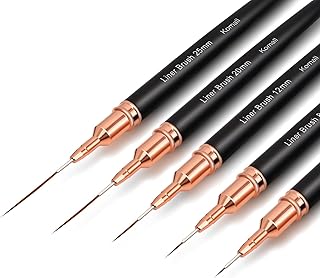
Metallic Nail Art Brushes, 5Pcs Liner Brush Set, UV Gel Polish Painting …

Flower Nail Stickers for Nail Art – Flowers Nail Art Stickers Summer Flo…
Cuccio Naturale Revitalizing- Hydrating Oil For Repaired Cuticles Overni…
You Might Also Like
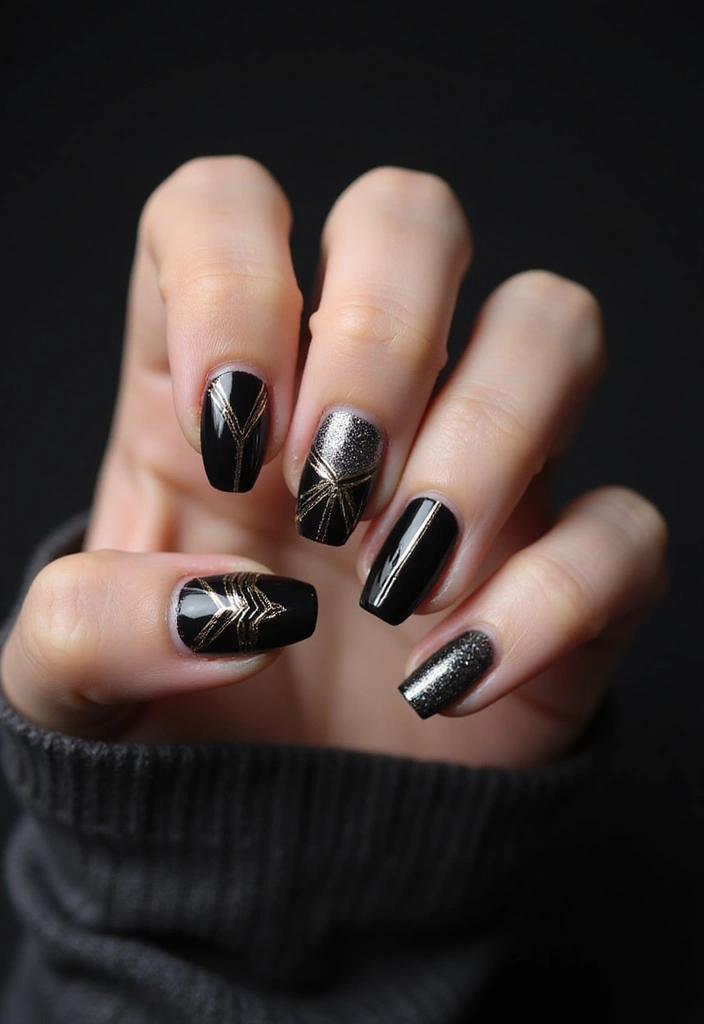
16. Geometric Nail Designs
Geometric nail designs that make a statement
Geometric nail designs give you a clean, modern look. Sharp lines meet bold blocks to create art you can wear every day. You can mix triangles, squares, and lines or keep one shape per nail for a calmer feel. This season, color blocking helps your nails pop in photos and in real life.
Here is how to get it right.
– Gather nail tape or striping tape to map clean lines. The tape helps you keep edges sharp and colors neat.
– Choose two strong colors for contrast. Black with white, navy with gold, or hot pink with black work great.
– Decide on a pattern. Mix shapes on some nails or repeat the same shape on all nails for a steady vibe.
– Add a matte top coat if you want a sleek, ultra modern finish. A glossy top coat works too if you prefer shine.
– Finish with a clear top coat to seal color and give longer wear.
What you should know before you start
– Prep is key. File nails, push back cuticles, and buff a smooth surface so lines stay crisp.
– Practice makes perfect. Start with a single nail design before tackling all ten.
Next steps you can try
– For a softer look, use thin lines and light colors.
– For a bold vibe, stack color blocks and use a dark base.
16. Geometric Nail Designs
Editor’s Choice

Nail Art Striping Tape Lines Kit 36 pcs 1mm 2mm 3mm Nail Tape Strips for…
GAOY Matte Gel Top Coat, 16ml Powder-Resist Matte Finish for Detail Chro…
FANDAMEI Nail Buffer Block, 10 PCS Buffers for Nails with Different Grit…
17. Animal Print Nails
Animal print nails let you show your style without saying a word. You can try leopard spots, snakeskin, or zebra stripes. Use bold colors or keep it grounded with neutrals. The look stays fresh and stylish.
What you need A clean base color. A fine brush or nail art pen for tiny lines. A dotting tool for spots. Two to three colors that pop. A good top coat.
How to do it Start with clean, dry nails. Paint the base color and let it dry. Draw the pattern with a thin tool. Leopard spots appear as irregular blobs outlined in a darker shade. Zebra stripes are quick parallel lines. Snakeskin is a patchwork of tiny scales. Build slowly, then add a final coat.
Tips Pick one nail as the main motif. Repeat similar shapes on the other nails. On short nails, keep the pattern small. If you make a mistake, fix it with a tiny brush. Finish with a clear top coat for shine.
Here is why this works: bold prints grab attention and show personality. Practice on a nail wheel before trying it on nails.
Next steps: play with color choices to find your signature look.
18. Matte Nails
Matte nails
If you want a polished look that feels calm and chic, matte nails fit. Here is why: the velvety finish hides tiny flaws and stays elegant for days.
This season leans toward subtle color. Try taupe, dusty rose, or deep burgundy for a refined vibe. Matte nails work well with almost any wardrobe, from workwear to weekend fits. You can also mix in a glossy nail art accent for contrast and a little surprise.
To get matte nails, you have two easy options. Use a matte topcoat over your favorite color, or choose a matte nail polish from the start. Either way, the finish is soft and smooth to the touch.
Here are practical steps:
– Paint two coats of your chosen color.
– Seal with a matte topcoat for that satin finish.
– If you want a quick change, apply matte topcoat over a regular polish for an instant shift.
– Let it dry fully to avoid smudges.
Next steps: care tips keep the look lasting. Apply cuticle oil to keep skin around nails healthy, and avoid harsh acetone when you remove polish. Matte finishes resist shine but can dull with scrapes, so handle tasks gently.
With the right care, matte nails stay chic longer.
18. Matte Nails
Editor’s Choice
VENALISA Matte Gel Top Coat- No Wipe Long Lasting Matte Top Coat Clear G…

COSMOO Black Matte Nail Polish, Quick Dry Nail Lacquer for Nail Art Varn…
Cuccio Naturale Revitalizing- Hydrating Oil For Repaired Cuticles Overni…
19. Metallic Nails
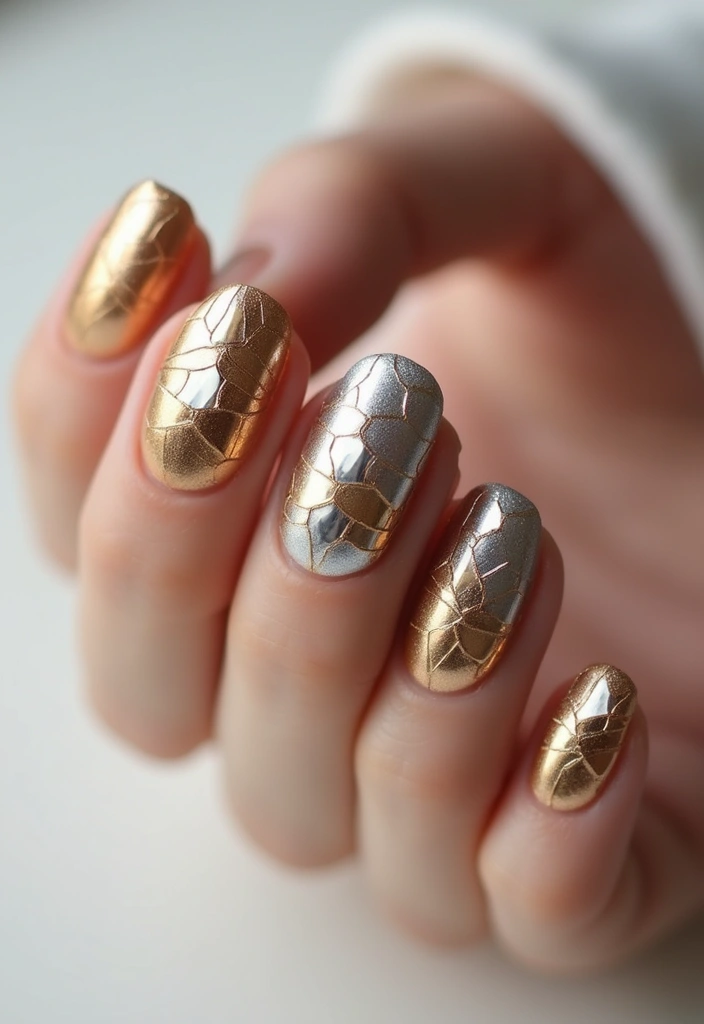
Metallic nails grab attention with a shiny vibe. If you want a look that pops, this is your go-to. Gold, silver, and chrome shades catch light from every angle. They suit parties, dates, or everyday shines.
Here’s how to get it right. Steps: 1) Start with clean nails and a solid base. 2) Apply two thin coats of metallic polish, letting each dry. 3) Finish with a top coat and seal the edges.
Want variety? Try a soft metallic ombre by blending two shades. Tap lighter and darker colors on a sponge and dab from cuticle to tip. A hint of glitter near the tip adds a festive touch.
For a mirror finish, use chrome powder over a base polish. Buff gently with a soft brush until the surface shines. It can show fingerprints, so seal with a clear coat.
Care matters. Metallic polishes can chip sooner than plain creams. Reapply top coat every couple days. Wear gloves for chores to protect the shine. If you want a different vibe, try a matte top coat.
Practice first on a nail wheel. Then pick shades, follow the two-coat rule, and test metallic accents. Have fun with it today. Share your looks with friends.
Shine bright with metallic nails this season! Whether you choose gold, silver, or chrome, these eye-catching shades are perfect for any occasion. Get ready to turn heads and let your nails do the talking!
19. Metallic Nails
Editor’s Choice
Metallic Nail Polish Set Fingernail: Chrome Mirror Holographic Nail Poli…

Artdone 16Jars Chrome Nail Powder Magic White Pearl Kit Mirror Effect Si…
Sally Hansen Double Duty™, Base and Top Coat, Quick Dry, Long Lasting, S…
20. Gradient Nail Art
Gradient Nail Art: Subtle Color Shifts You Can Master
You want nails that look polished without shouting. Gradient nail art gives a soft color shift from one shade to another. This season, mix bold and pastel hues to create a smooth ombre. You can adjust the look to fit your style.
Here is how to make it work.
– Step 1: Prep nails with a clean base coat.
– Step 2: Pick two colors that blend well.
– Step 3: Put small blobs of each color on a makeup sponge.
– Step 4: Gently dab the sponge onto the nail, moving a bit to blend the edges.
– Step 5: Repeat until the fade between colors feels seamless.
Finish with a clear top coat. It adds shine and helps the design last.
Tips to nail the look
– Apply thin coats for a smoother blend.
– Start with the lighter color as your base.
– Clean edges with a small brush dipped in remover for neat lines.
Common questions, quick answers
– Can I use three colors? Yes, just use a larger sponge section and blend gradually.
With a little practice, you’ll achieve a chic gradient that looks like you spent more time than you did.
Elevate your nail game with gradient art! A subtle blend of colors not only looks chic but also lets you express your unique style effortlessly. Who knew all types of nail shapes could be so versatile?
20. Gradient Nail Art
Editor’s Choice

Soft Sponges with Grabbing Pen for Ombre and Aura Nail Art with Brush, P…
Sally Hansen Double Duty™, Base and Top Coat, Quick Dry, Long Lasting, S…
Artdone 31pcs Nail Art Brushes, Nail Art Tool Set, Dotting Tools, Dust B…
Conclusion
Nail art shapes and designs are endless, offering opportunities to express your style and creativity.
This season’s trends showcase a mix of classic and innovative styles that appeal to everyone. Whether you experiment with bold colors, intricate designs, or stick to timeless shapes, there’s something for every nail enthusiast. Dive into these nail trends and find the shape that resonates with your unique personality!
Note: We aim to provide accurate product links, but some may occasionally expire or become unavailable. If this happens, please search directly on Amazon for the product or a suitable alternative.
This post contains Amazon affiliate links, meaning I may earn a small commission if you purchase through my links, at no extra cost to you.
Frequently Asked Questions
What Are Some Trendy Nail Shapes for This Season?
This season, you can explore a variety of trendy nail shapes! From the elegant almond nails that elongate your fingers to the bold coffin nails perfect for a dramatic look, there’s a shape for every mood. Don’t forget about ballerina nails for a chic style or the classic square nails for a clean and modern appearance!
How Do I Choose the Right Nail Shape for My Lifestyle?
Choosing the right nail shape depends on your personal style and daily activities. If you’re always on the go, round nails or squoval nails are practical and easy to maintain. For those looking to make a statement, stiletto nails or lipstick nails can add flair, but keep in mind they require more upkeep. Consider what fits your lifestyle best!
Can Nail Shapes Influence the Look of My Hands?
Absolutely! Different nail shapes can dramatically influence the appearance of your hands. For instance, almond nails tend to make fingers look longer, while square nails offer a more grounded, modern look. The right shape can enhance your overall style and even complement your outfits beautifully!
What Nail Art Designs Pair Well with Different Shapes?
The beauty of nail art is that it can be tailored to any shape! For coffin nails, consider bold colors and intricate designs that pop. Ombre nails can beautifully transition on ballerina nails, while geometric designs look stunning on square nails. Explore different combinations to express your unique style!
How Can I Maintain My Nail Shapes and Designs?
Maintaining your nail shapes and designs is key to keeping them looking fresh! Regular visits to your nail technician for fills and shaping are essential, especially for longer styles like stiletto or coffin nails. Additionally, using a good quality top coat can help protect your designs and keep your nails looking polished between appointments!
Related Topics
nail shapes
trendy designs
nail art
almond nails
coffin nails
ombre nails
seasonal trends
nail design tips
beginner friendly
fashion nails
glitter nails
matte nails
")
")


These nail shapes are so fun! I never thought about trying a stiletto until now. What’s your favorite shape to wear?
I tried the almond shape last week, and I swear I felt like a superhero! Why do nails make us feel so powerful? 😂
Did you know that some nail shapes can actually make your fingers look longer? I had no idea until I read this!
I once tried to do square nails at home, and let’s just say, I ended up with more polish on my fingers than the nails! Have you ever had a nail mishap like that?