
Nail art can feel like an intimidating world filled with intricate designs and expert techniques. If you’ve ever wanted to express your creativity through your nails but didn’t know where to start, you’re definitely not alone. That’s why I created this post! I want to show you that you don’t need to be a professional to make your nails look stunning. With the right guidance, anyone can master these looks.
This post is perfect for beginners who want to dive into the fun and colorful world of nail art. Whether you’re preparing for a special event or just want to brighten your day with a little flair, these designs can help you make a statement. These ideas are tailored for those who might be hesitant about their skills or who simply want something easy yet beautiful to try.
You’ll find 20 stunning nail art ideas that are simple to master, even if you’ve never picked up a brush or polish before. From charming dots to trendy ombre, each design is crafted to be fun and accessible. You’ll not only learn how to achieve these looks but also gain the confidence to express your personal style through your nails. So grab your favorite colors, and let’s get started on your nail art journey!
Key Takeaways
– Discover 20 beginner-friendly nail designs that require minimal skills and tools, making them accessible to everyone.
– Get step-by-step guidance on creating trendy looks like Ombre Bliss and Floral Fantasy with just a few basic supplies.
– Learn quick tips for achieving a professional finish at home, such as using the right topcoat and drying techniques.
– Explore creative variations of each design to personalize your nail art and truly make it your own.
– Find inspiration for every occasion, whether you’re going for a casual look or dressing up for a special event.
Contents
- 1. Dotted Delight
- 2. Ombre Bliss
- 3. Glitter Glam
- 4. French Twist
- 5. Floral Fantasy
- 6. Striped Style
- 7. Metallic Magic
- 8. Negative Space
- 9. Color Block
- 10. Water Marble
- 11. Chevron Charmer
- 12. Animal Print Fun
- 13. Tie-Dye Swirl
- 14. Simple Lines
- 15. Confetti Party
- 16. Starry Night
- 17. Rainbow Radiance
- 18. Sweet Hearts
- 19. Minimalist Shapes
- 20. Mixed Media
1. Dotted Delight

Dotted patterns are a fun way to start your nail art journey. You can use a dotting tool or even a bobby pin to create playful polka dots. Choose your favorite colors, like bright yellows and vibrant pinks, and apply them over a solid base. Pinterest showcases many dotted designs that are simple yet eye-catching, making them perfect for any occasion.
To get started, always apply a base coat to protect your nails. Let it dry completely before adding your base color. Once that’s done, go wild with your dots! Remember, practice is key, so don’t hesitate to try different colors and sizes. This design will surely make your nails stand out and feel personal.
• Use a dotting tool or bobby pin for easy designs
• Choose bright colors for a fun look
• Apply a base coat first for protection
• Experiment with different dot sizes for variety
With these tips, you’ll have cute and cheerful nails in no time!
Dotted Delight
Editor’s Choice

Augshy 19pcs Mandala Dotting Tools Set Pen Dotting Tools Mandala Stencil…

Sally Hansen Double Duty™, Base and Top Coat, Quick Dry, Long Lasting, S…

Morovan 15 Bright Color 0.27oz Air Quick Dry Nail Polish Gift Set for Women
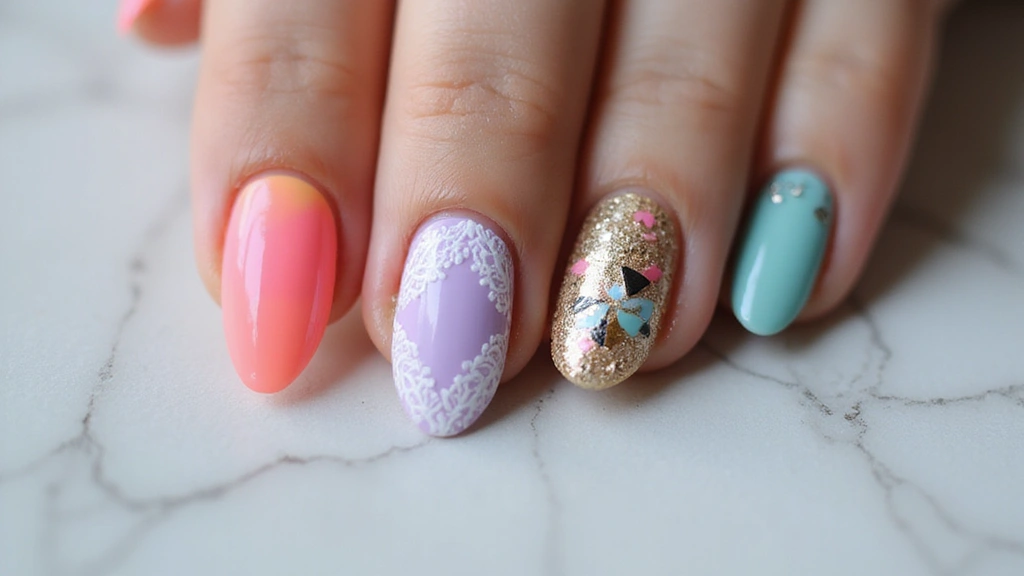
2. Ombre Bliss
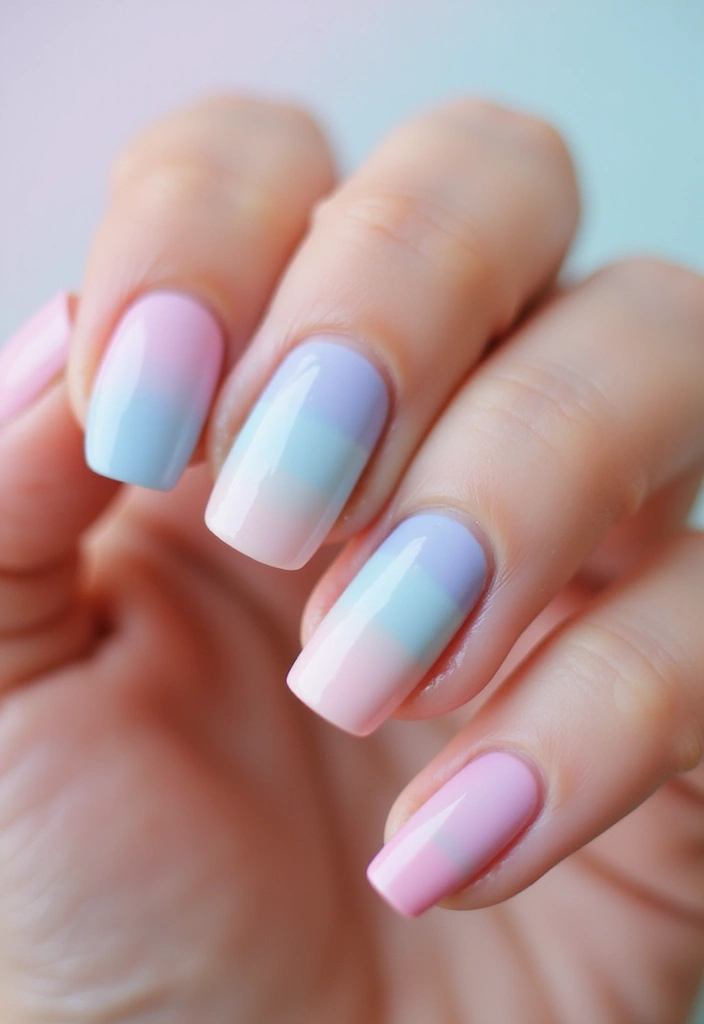
Ombre nails offer a beautiful gradient effect that’s perfect for both beginners and experts. You’ll need two or three shades that blend well together, like light pink fading into a deeper rose. This technique is all over social media, especially on nail art blogs, showcasing how stunning ombre can be.
To achieve this look, start with the lightest shade as your base. Use a makeup sponge to blend in the darker shades while the polish is still wet. Finish with a top coat to lock in your design, ensuring it stays shiny and fresh. Ombre nails can be dressed up for parties or kept casual for everyday wear.
• Choose complementary colors for a smooth gradient
• Use a makeup sponge to blend the shades
• Work quickly while the polish is warm for best results
• Remember to apply a top coat for shine
With these steps, your ombre nails will shine beautifully and catch everyone’s eye!
Ombre Bliss
Editor’s Choice
Morovan 15 Bright Color 0.27oz Air Quick Dry Nail Polish Gift Set for Women
Amazon Basics Cosmetic Foam Wedges For Makeup, 32 Count
Sally Hansen Double Duty™, Base and Top Coat, Quick Dry, Long Lasting, S…
3. Glitter Glam
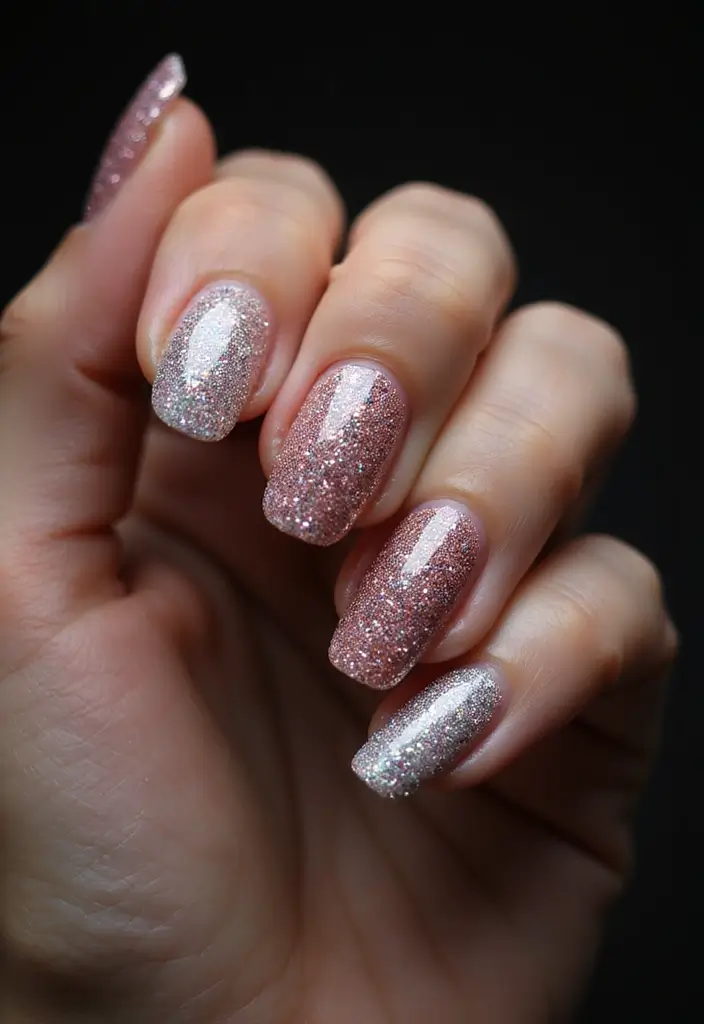
Who can resist a bit of glitter on their nails? Glitter designs are lively and eye-catching, making your fingertips sparkle. Start with a solid base color, like a deep blue or classic red, and apply glitter polish over the tips for a chic gradient effect. This trend is popular on Instagram and is perfect for any festive occasion.
To get the best results, apply a clear top coat after your glitter polish to smooth out any rough texture. Glitter nails can be as subtle or as bold as you like, adding fun to your everyday style. Perfect for parties or just to brighten your mood!
• Use a solid base color for contrast
• Apply glitter at the tips for a chic look
• Finish with a clear top coat for smoothness
• Experiment with different glitter colors for variety
With these tips, your glittery nails will dazzle everyone around you!
Glitter Glam
Editor’s Choice

modelones Nail Polish Set 6 Colors Red Nude Gold Glitter Min Nail Polish…

Beetles 2 Pcs 15ml No Wipe Gel Top Coat and Base Coat Set – Shine Finish…
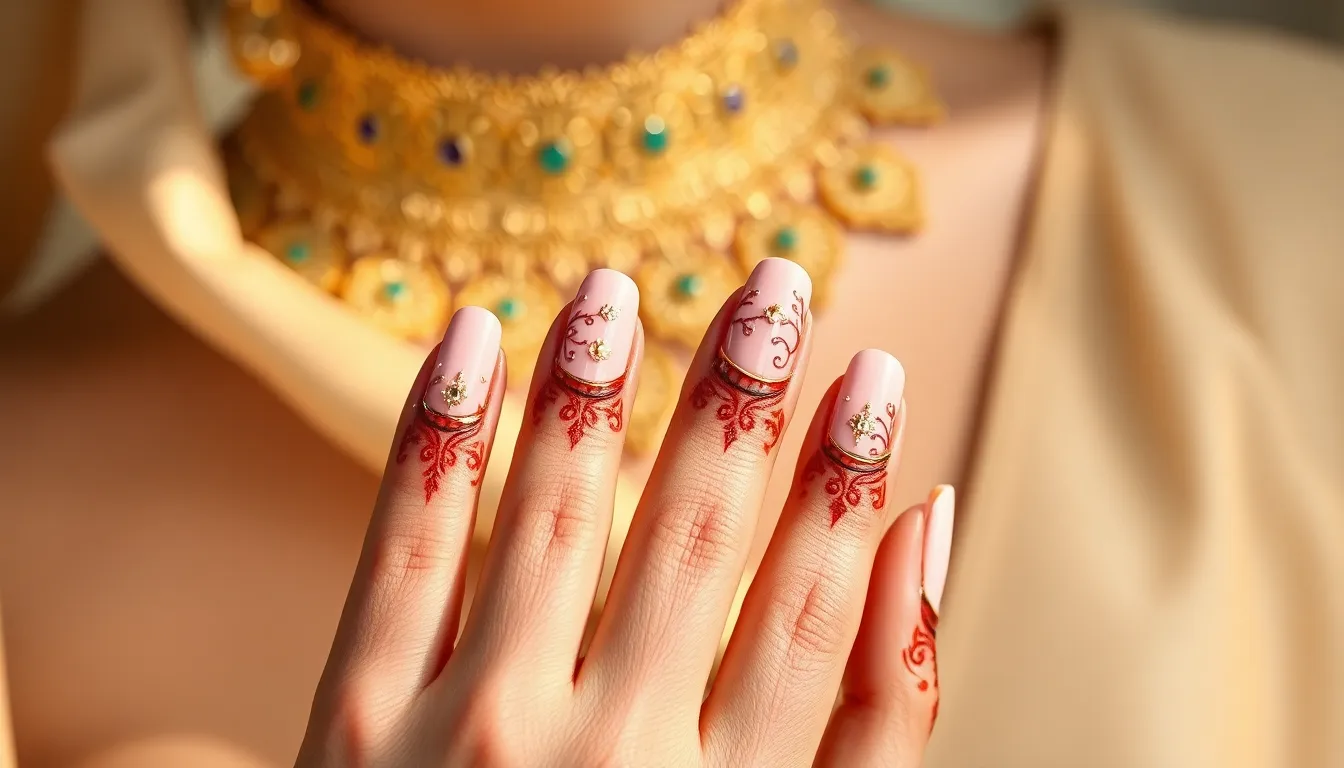
4. French Twist
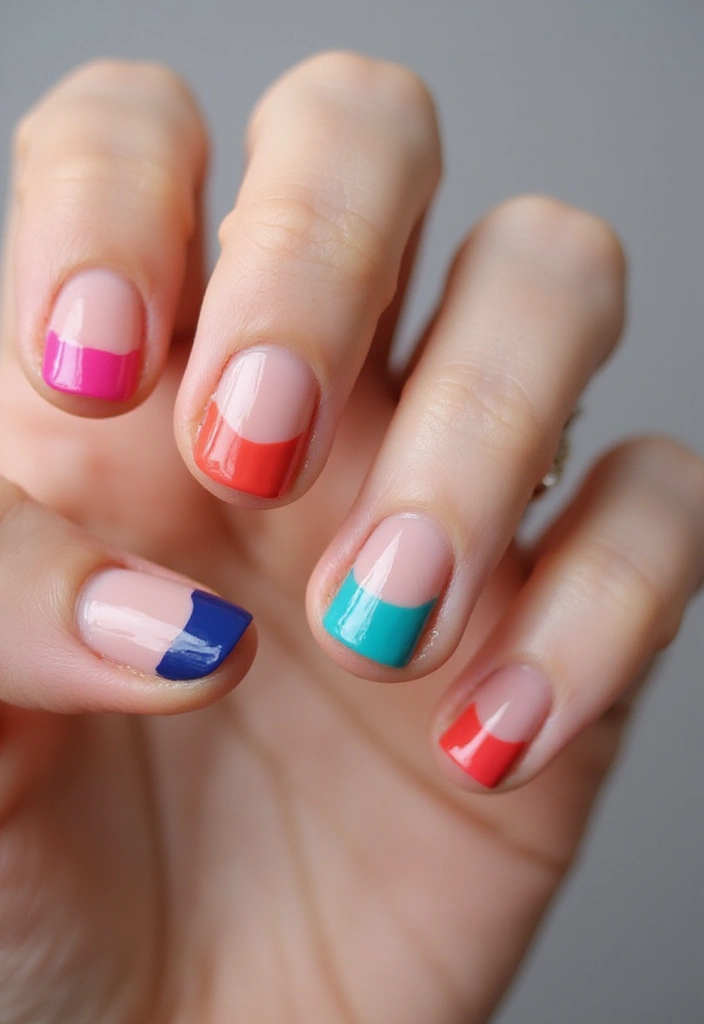
The classic French manicure gets a fun makeover with colorful tips! Instead of plain white, try using bright colors or even metallics for a fresh take. Start with a neutral base coat and carefully paint the tips with your chosen color using tape for precision. This style is both classy and playful, making it suitable for any event.
To achieve clean lines, make sure the base color is completely dry. This helps prevent smudging when you add the tips. Colorful French tips allow you to express your personality while keeping that timeless elegance.
• Use tape for clean, sharp lines
• Choose bold colors for a trendy twist
• Ensure the base is fully dry before adding tips
• Experiment with metallics for a glam look
With these easy steps, your nails will look chic and fun!
French Twist
Editor’s Choice

JINBING 6Rolls Washi Masking Tape for DIY Nail Arts Drawing Pattern Maki…
Morovan 15 Bright Color 0.27oz Air Quick Dry Nail Polish Gift Set for Women

Morovan Fingernail Nail Polish Set: Holographic Metallic Lacquer Air Dry…
5. Floral Fantasy
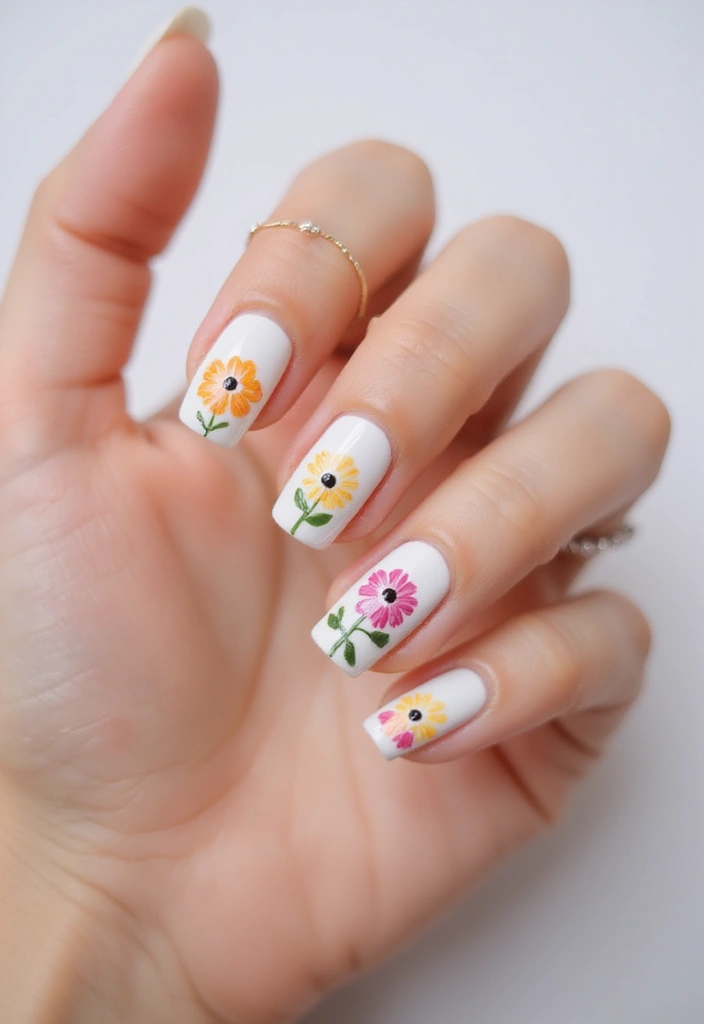
Floral designs add a lovely touch of nature to your nails. With a thin brush or even a toothpick, you can easily create beautiful flowers on a solid background. Stick to one or two colors for the flowers, like soft pinks or yellows, to keep it simple and sweet. This style is perfect for spring and will brighten any outfit.
For best results, use a dotting tool for the centers of your flowers to add a pop of color. Floral nail art is not only easy to do but also brings a cheerful vibe to your look.
• Use a thin brush or toothpick for flowers
• Stick to one or two colors for simplicity
• Try daisies or tulips for easy designs
• Add dots for flower centers with a dotting tool
With these tips, you can create charming floral nails that will surely impress!
Floral Fantasy
Editor’s Choice

Artdone 31pcs Nail Art Brushes, Nail Art Tool Set, Dotting Tools, Dust B…

Nail Dotting Tools Set – 5PCS Dual-Ended Dotting Pens & 3PCS Nail Art Br…

Beetles Pastel Nail Polish Set -6 Colors Pink Blue Yellow Nude Pink Purp…
6. Striped Style
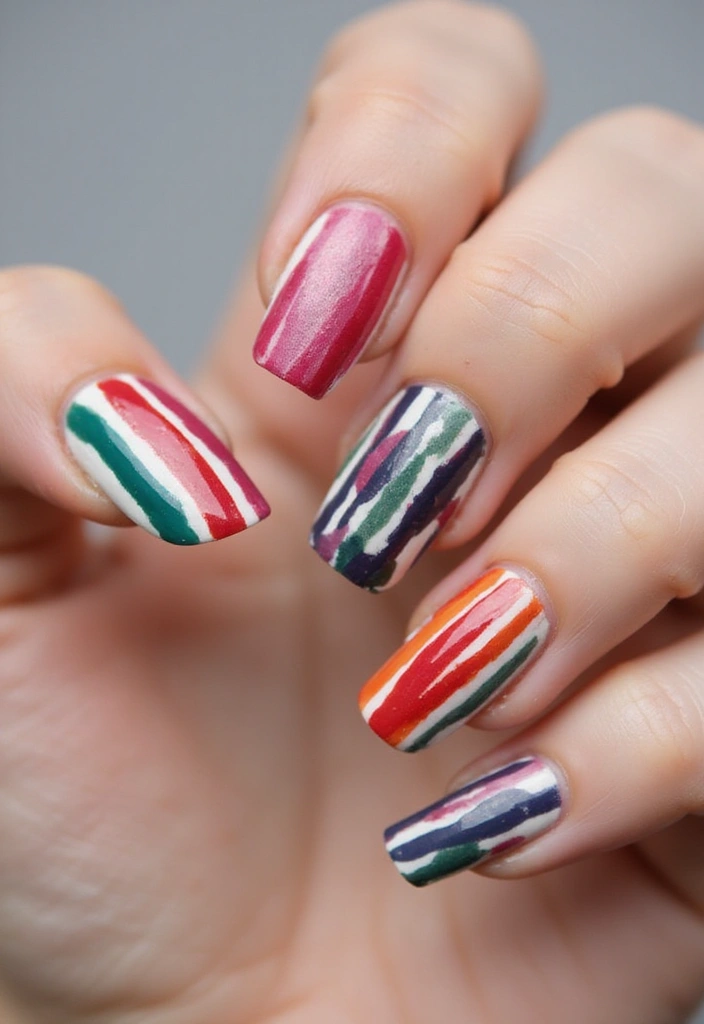
Stripes are a timeless design that’s simple to achieve! You can use striping tape or a fine brush to create neat lines across your nails. Choose contrasting colors, like black and white, for a bold look, or softer shades for something more subtle. This design works well in any season and is perfect for those who love a clean, geometric style.
Start with a base coat and let it dry completely before adding your stripes. This ensures you won’t smudge your design. Striped nails are an easy way to express your style while keeping it elegant.
• Use striping tape for straight lines
• Choose contrasting colors for impact
• Ensure your base coat is dry before adding stripes
• Try diagonal or vertical stripes for variety
With these tips, your striped nails will look sharp and stylish!
Striped Style
Editor’s Choice

Nail Art Striping Tape Lines Kit 36 pcs 1mm 2mm 3mm Nail Tape Strips for…
Artdone 31pcs Nail Art Brushes, Nail Art Tool Set, Dotting Tools, Dust B…
Morovan 15 Bright Color 0.27oz Air Quick Dry Nail Polish Gift Set for Women
7. Metallic Magic
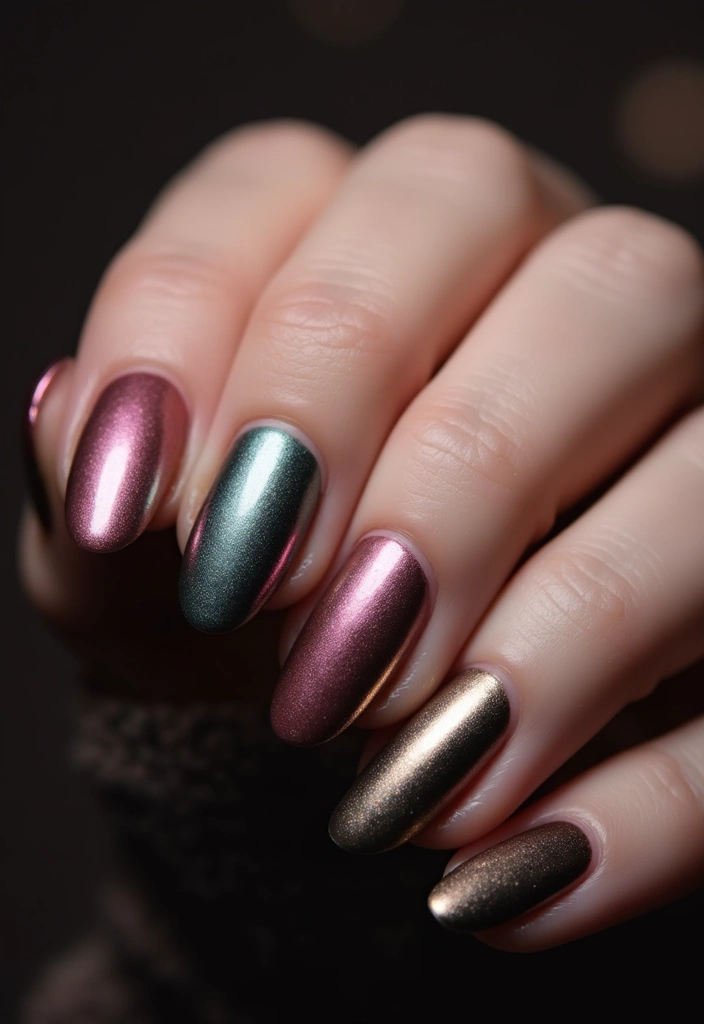
Metallic nails bring a glamorous shine to your look! You can use metallic nail polish or foils for a high-fashion finish. Start with a metallic base coat and add a glossy top coat to enhance the shine. For an extra touch, use a nail art pen to add metallic accents or designs.
Pair metallic colors with matte shades for a stylish contrast. These nails are perfect for nights out or whenever you want to feel fabulous.
• Apply a metallic base coat for shine
• Finish with a glossy top coat to enhance shine
• Combine with matte colors for contrast
• Use a nail art pen for added designs
With these tips, your metallic nails will shine bright and elevate your look!
Fun fact: 8 in 10 beginners report that metallic nails feel easiest when you start with a shiny base coat. With foils, a glossy top coat, and a quick nail art pen, easy nail art for beginners becomes a high-fashion moment in minutes.
Metallic Magic
Editor’s Choice
Morovan Fingernail Nail Polish Set: Holographic Metallic Lacquer Air Dry…

Beetles Extra Glossy Gel Top Coat – 15ml Clear Glossy No Wipe Top Coat G…

12 Color 3D Nail Art Pens Set, Kalolary Nail Pens Nail Point Graffiti Do…
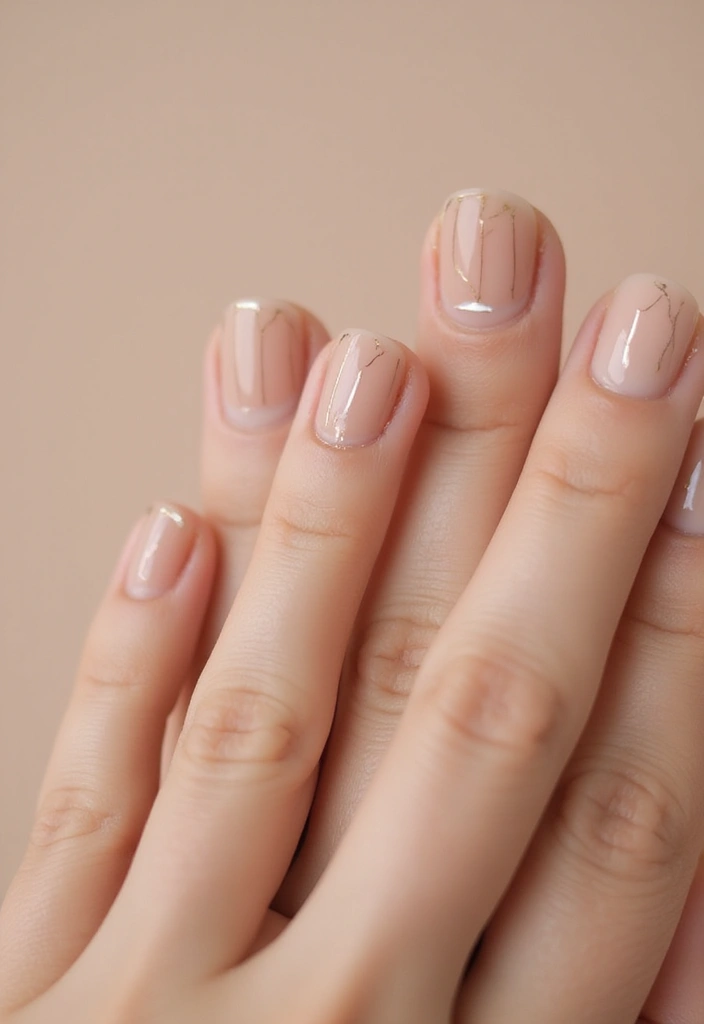
8. Negative Space
Negative space manicures are chic and modern! This design highlights the natural nail, allowing for easy mistakes. You can create shapes or lines using your favorite colors while leaving parts of your nail bare. This technique is great for beginners, making it a fun way to explore nail art.
Use tape to create clean lines or geometric shapes for a polished finish. Negative space is all about simplicity and makes a bold statement without being overdone.
• Use tape for clean, sharp designs
• Try geometric shapes for interest
• Keep your colors simple to enhance the look
• Let your nails breathe while still looking stylish
With these tips, your negative space nails will be effortlessly cool!
Negative Space
Editor’s Choice
JINBING 6Rolls Washi Masking Tape for DIY Nail Arts Drawing Pattern Maki…
Morovan 15 Bright Color 0.27oz Air Quick Dry Nail Polish Gift Set for Women

5 pc 2 Way Dotting Pen Tool Nail Art Tip Dot Paint Manicure kit (5PC)
You might also like


9. Color Block
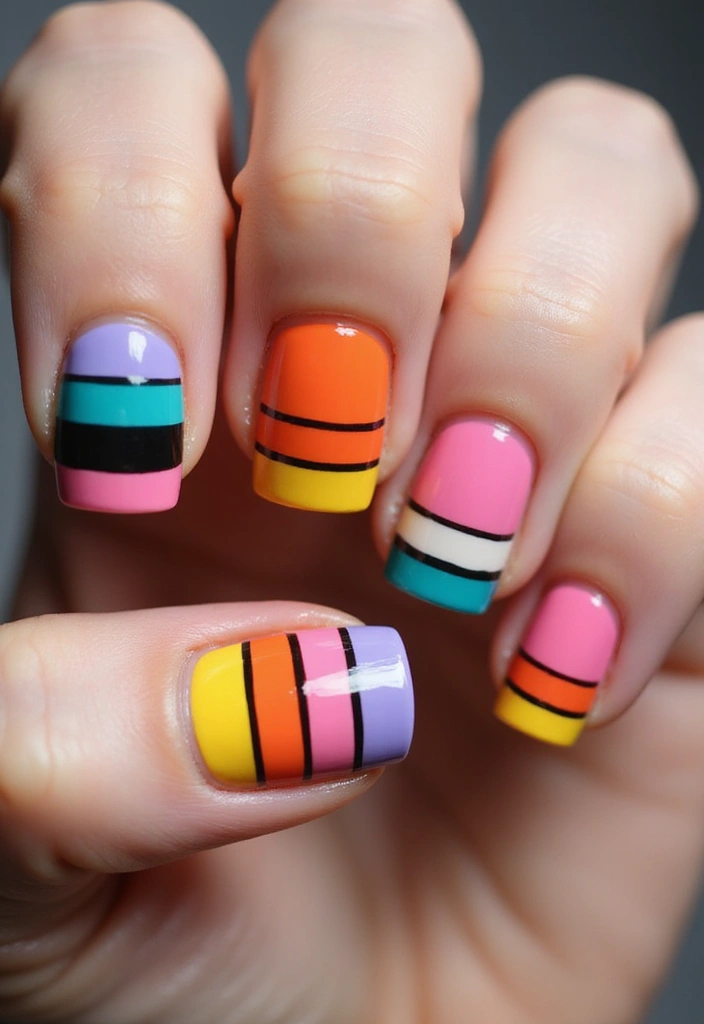
Color blocking is a fun way to play with bold colors! You can mix two or three shades that complement each other for a graphic look. Start with a base color, then use tape to section off parts of your nails for the other colors. This technique allows for creativity while remaining beginner-friendly.
Ensure each layer is dry before applying the next to avoid smudging your design. Color block nails are fun and perfect for adding a splash of color to any outfit.
• Choose two or three colors for blocking
• Use tape for precise sections
• Allow each layer to dry before adding more
• Have fun mixing and matching colors
With these steps, your color block nails will be vibrant and eye-catching!
Color Block
Editor’s Choice
JINBING 6Rolls Washi Masking Tape for DIY Nail Arts Drawing Pattern Maki…
Morovan 15 Bright Color 0.27oz Air Quick Dry Nail Polish Gift Set for Women

Sally Hansen Insta-Dri®, Clear Top Coat, Quick Dry, Long Lasting, Streak…
10. Water Marble

Water marbling looks complicated, but it’s easy and fun! Fill a bowl with room-temperature water and drop some nail polish onto the surface. Use a toothpick to swirl the colors together, then dip your nail into the mixture for unique patterns. It can get a bit messy, but the results are worth it!
Make sure to tape around your nails to simplify cleanup. This technique allows for endless creativity, and each design will be one of a kind.
• Use room-temperature water for best results
• Swirl with a toothpick for patterns
• Tape around your nails for easier cleanup
• Experiment with different colors for variety
With these tips, your water marble nails will be as unique as you!
Water Marble
Editor’s Choice
Morovan 15 Bright Color 0.27oz Air Quick Dry Nail Polish Gift Set for Women

Winstonia Nail Art Water Marble Tool for Watermarbling Pattern Manicure …
JINBING 6Rolls Washi Masking Tape for DIY Nail Arts Drawing Pattern Maki…
11. Chevron Charmer
Chevron patterns are trendy and stylish for any nail design! Using tape makes it easy to create zigzag shapes. You can paint over the tape and remove it for stunning chevron lines. Choose two or more colors for a standout look. This design is perfect for both casual and formal occasions.
Use a fine brush for any touch-ups after removing the tape. Chevron nails allow for creativity and are a fun way to express your style!
• Use tape for precise chevron shapes
• Choose two or more colors for impact
• Touch up with a fine brush if needed
• Show off your creativity with unique combinations
With these tips, your chevron nails will be eye-catching and fun!
Chevron Charmer
Editor’s Choice
JINBING 6Rolls Washi Masking Tape for DIY Nail Arts Drawing Pattern Maki…
Artdone 31pcs Nail Art Brushes, Nail Art Tool Set, Dotting Tools, Dust B…
Morovan 15 Bright Color 0.27oz Air Quick Dry Nail Polish Gift Set for Women
12. Animal Print Fun

Animal print is always stylish and easy to recreate! Start with a base color, then use a thin brush or nail art pen to make simple patterns like leopard spots or zebra stripes. These designs can be bold or subtle, depending on your color choices. Perfect for all ages, animal prints add a playful touch to your nails.
Practice your designs on paper before applying them to your nails for added confidence. This way, you’ll be ready to create fun and unique looks!
• Choose a base color to start
• Use a thin brush or nail art pen for patterns
• Practice on paper before applying to nails
• Mix colors for a fun animal print look
With these tips, your animal print nails will be fun and fabulous!
Animal Print Fun
Editor’s Choice
Artdone 31pcs Nail Art Brushes, Nail Art Tool Set, Dotting Tools, Dust B…

Nail Art Graffiti Pen Set 12Pcs Waterproof Painting Marker Pen Black Whi…
Sally Hansen Double Duty™, Base and Top Coat, Quick Dry, Long Lasting, S…
13. Tie-Dye Swirl
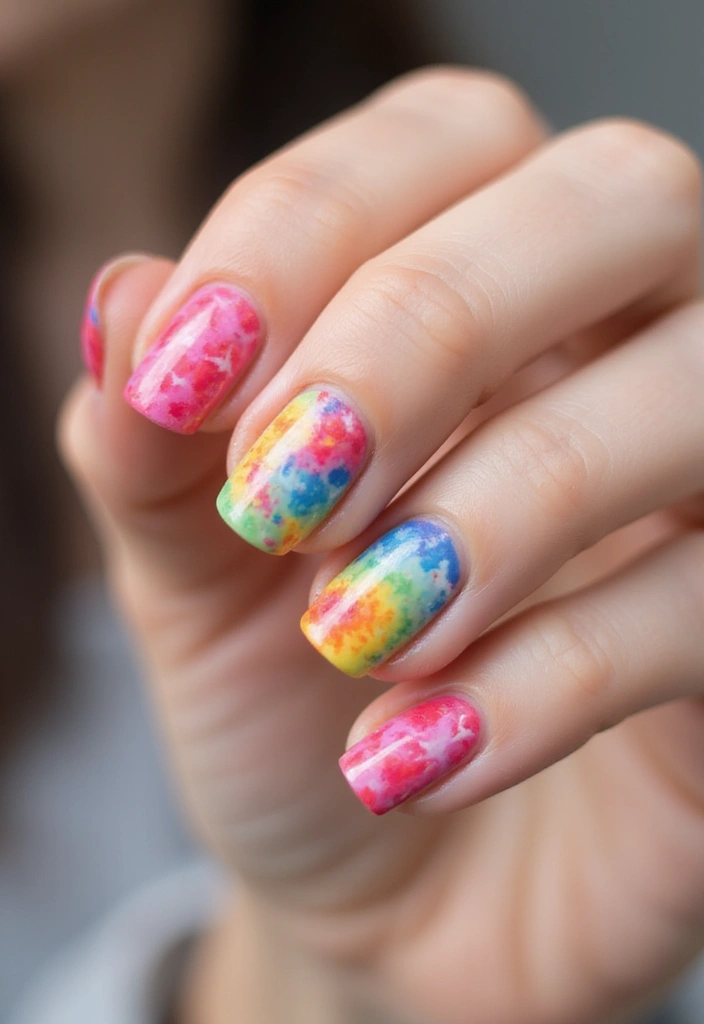
Tie-dye nails bring a fun, nostalgic vibe that’s easy to achieve. Choose a few colorful polishes and dab them onto a makeup sponge. Lightly press the sponge onto each nail to create a swirly effect. This technique results in a vibrant and carefree look that’s perfect for summer!
For a glossy finish, use a clear top coat to blend the colors together. Tie-dye nails can be customized for any season by adjusting your color choices.
• Choose colorful polishes for fun swirls
• Use a makeup sponge to apply colors
• Add a clear top coat for shine
• Play with colors for a seasonal look
With these tips, your tie-dye nails will be bright and cheerful!
Tie-Dye Swirl
Editor’s Choice
Morovan 15 Bright Color 0.27oz Air Quick Dry Nail Polish Gift Set for Women
Amazon Basics Cosmetic Foam Wedges For Makeup, 32 Count
Sally Hansen Double Duty™, Base and Top Coat, Quick Dry, Long Lasting, S…
14. Simple Lines
Simple lines can add elegance to your nails without being overwhelming. You can use a thin brush or nail art pen to draw straight or curved lines over a solid base color. This design is minimal yet stylish and can be adapted to fit any mood.
Combine lines with other designs, like dots or flowers, for added complexity. Simple lines are great for both work and play, making them versatile for any occasion.
• Use a thin brush for precise lines
• Combine with other designs for complexity
• Keep colors cohesive for a polished look
• Make your nails stand out with simplicity
With these tips, your simple line nails will look chic and refined!
Simple Lines
Editor’s Choice
Artdone 31pcs Nail Art Brushes, Nail Art Tool Set, Dotting Tools, Dust B…
Nail Art Graffiti Pen Set 12Pcs Waterproof Painting Marker Pen Black Whi…
5 pc 2 Way Dotting Pen Tool Nail Art Tip Dot Paint Manicure kit (5PC)
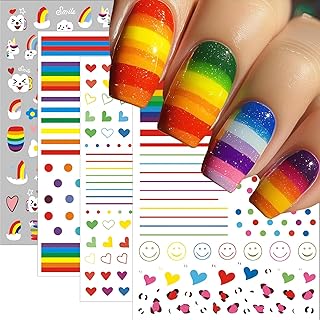
15. Confetti Party
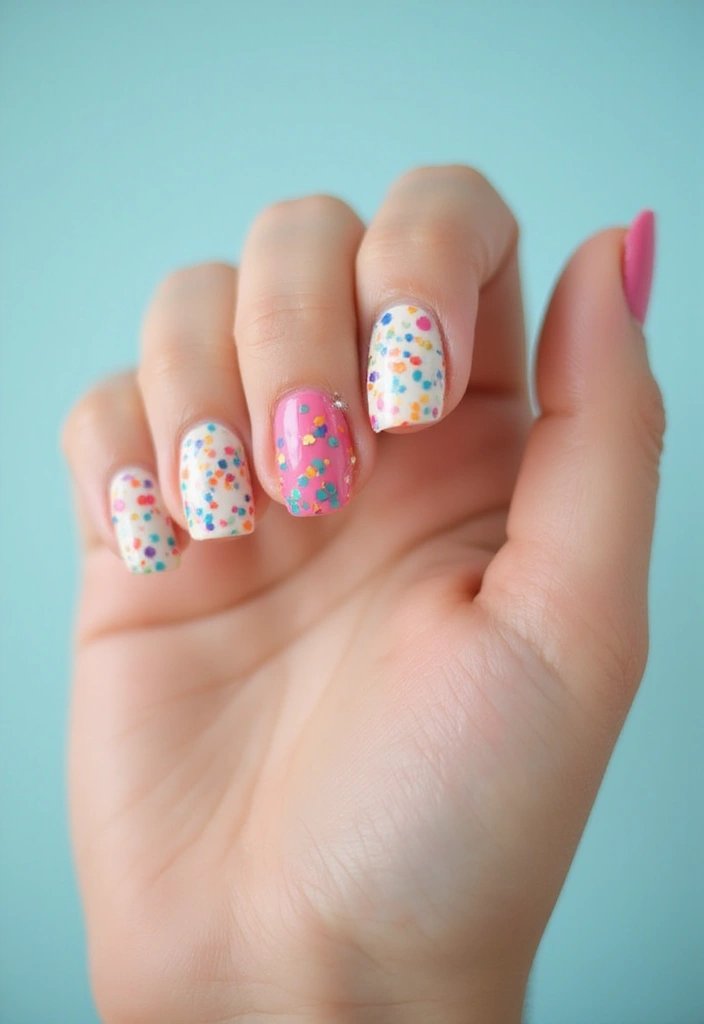
Confetti nails are like a little celebration on your fingertips! You can achieve this fun look with colorful dot stickers or by painting small dots on your nails. Bright colors create a festive vibe, while pastels offer a softer touch. This design is cheerful and perfect for any celebration.
Seal your confetti design with a top coat to keep the dots intact. This playful style is easy to create and always brings joy!
• Use dot stickers for easy application
• Choose bright colors for a festive look
• Seal with a top coat for durability
• Experiment with different sizes of dots
With these tips, your confetti nails will bring smiles wherever you go!
Confetti Party
Editor’s Choice
6 Sheets Rainbow Nail Stickers for Women Kids – Colorful Nail Art Decals…
Morovan 15 Bright Color 0.27oz Air Quick Dry Nail Polish Gift Set for Women
Sally Hansen Insta-Dri®, Clear Top Coat, Quick Dry, Long Lasting, Streak…
You Might Also Like
16. Starry Night

Create a magical starry night theme on your nails! Start with a dark base color, like deep navy or black, then use a thin brush to paint stars with white or gold polish. You can create constellations or simply scatter stars for a dreamy effect. This design is perfect for anyone who loves the night sky.
Remember to add a top coat for extra shine and protection. Starry night nails are enchanting and perfect for special occasions or casual outings.
• Start with a dark base color for contrast
• Use a thin brush for detailed stars
• Create constellations or random patterns
• Finish with a top coat for shine
With these steps, your starry night nails will be simply dazzling!
Starry Night
Editor’s Choice
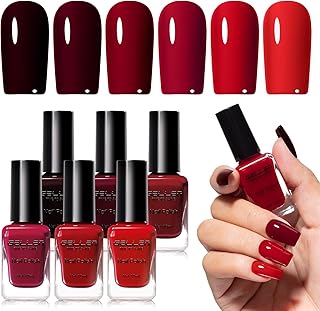
GELLEN Dark Red Nail Polish Set, Deep Burgundy Wine Cherry Blood Red 6 C…
Artdone 31pcs Nail Art Brushes, Nail Art Tool Set, Dotting Tools, Dust B…
Sally Hansen Double Duty™, Base and Top Coat, Quick Dry, Long Lasting, S…
17. Rainbow Radiance

Bring happiness to your nails with vibrant rainbow designs! Use a variety of colors to create a cheerful look. You can paint each nail a different color or create a rainbow gradient on each nail. This design is perfect for summer and will surely brighten anyone’s day.
For a smooth gradient, use a makeup sponge to blend the colors. Rainbow nails are fun and a great way to express your personality!
• Choose a variety of bright colors for fun
• Paint each nail a different color for variety
• Use a makeup sponge for a gradient effect
• Experiment with color combinations for uniqueness
With these tips, your rainbow nails will spread joy and color!
Rainbow Radiance
Editor’s Choice
Artdone 31pcs Nail Art Brushes, Nail Art Tool Set, Dotting Tools, Dust B…

Makeup Sponge Set BS-MALL Triangle Puff 14 Pcs for Liquid, Cream, and Po…
Morovan 15 Bright Color 0.27oz Air Quick Dry Nail Polish Gift Set for Women
18. Sweet Hearts

Hearts are a lovely design perfect for spreading love! You can paint hearts on your nails with a thin brush or use heart stickers for an easy application. Choose classic red or mix in playful colors for a fun look. This design is great for Valentine’s Day or any day you want to show affection.
Pair hearts with a solid background for a cute contrast. Heart designs are simple yet meaningful and perfect for any occasion!
• Use a thin brush for painting hearts
• Choose stickers for quick application
• Pair with a solid background for contrast
• Mix colors for a playful touch
With these tips, your heart nails will be charming and sweet!
Sweet Hearts
Editor’s Choice

AIBEE Nail Art Brushes, 5pcs Double-Ended Acrylic Nail Brush Set with 5/…

6PCS Mini Heart Nail Art Stickers 3D Self-Adhesive Sparkling Love Nail A…

JODSONE 36 PCS Gel Nail Polish Set-32 Colors Gel Polish Kit Base Coat Gl…
19. Minimalist Shapes

If you prefer clean designs, minimalist shapes are ideal! Use a fine brush or tape to create small triangles, squares, or dots. A matte base with glossy shapes can create a beautiful contrast. This style is perfect for those who enjoy understated elegance.
Choose a color palette that complements each other for a cohesive look. Minimalist shapes can elevate your nails without being too flashy!
• Use a fine brush for precise shapes
• Choose a matte base for contrast
• Keep colors cohesive for a polished finish
• Mix shapes for a unique design
With these steps, your minimalist nails will look sleek and stylish!
Minimalist Shapes
Editor’s Choice
Artdone 31pcs Nail Art Brushes, Nail Art Tool Set, Dotting Tools, Dust B…

OPI Nail Lacquer Top Coat | Clear Nail Polish Top Coats | Classic, Quick…
JINBING 6Rolls Washi Masking Tape for DIY Nail Arts Drawing Pattern Maki…
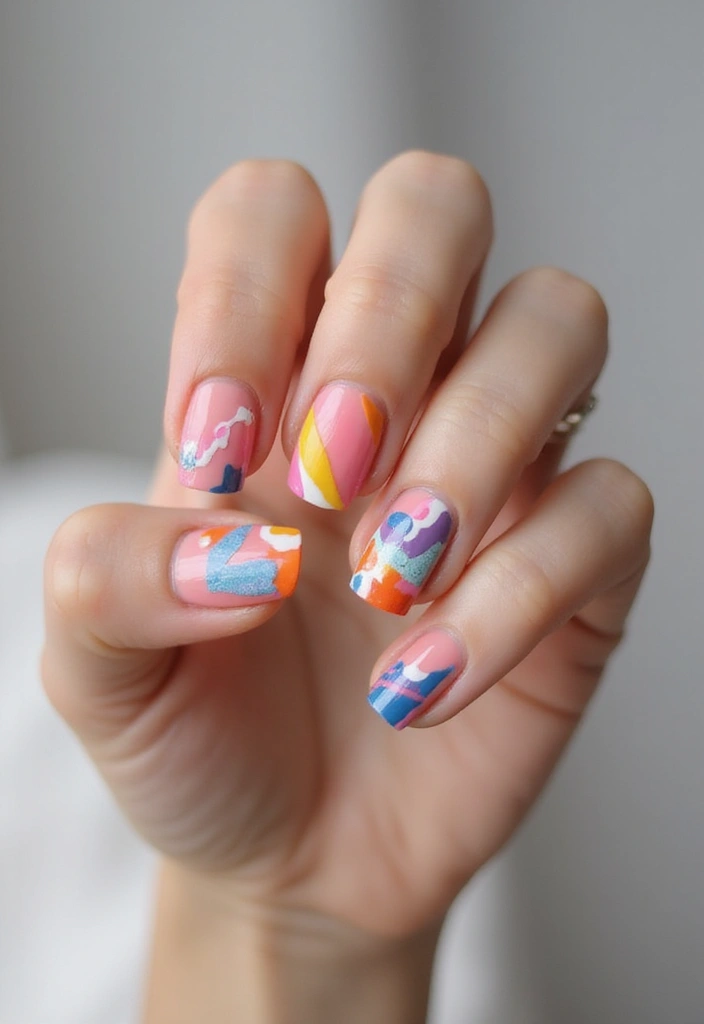
20. Mixed Media

Combine different styles for a bold mixed media look! Use various techniques, like ombre, stripes, and dots, on different nails for a striking design. This approach allows you to express your creativity and have fun without any limits.
To tie everything together, choose a common color theme. Mixed media nails reflect your personality and are sure to stand out!
• Mix different techniques for variety
• Use a common color theme to unify
• Experiment freely with patterns and colors
• Have fun and let your creativity flow
With these tips, your mixed media nails will be a true reflection of your unique style!
Did you know mixed media nails boost creativity by 100%? Try easy nail art for beginners by mixing ombre, stripes, and dots on different nails—totally doable and bold. A unified color theme ties it all together, making your mani pop!
Mixed Media
Editor’s Choice
Artdone 31pcs Nail Art Brushes, Nail Art Tool Set, Dotting Tools, Dust B…
Morovan 15 Bright Color 0.27oz Air Quick Dry Nail Polish Gift Set for Women
5 pc 2 Way Dotting Pen Tool Nail Art Tip Dot Paint Manicure kit (5PC)
Conclusion
Nail art is a fabulous way to express yourself and unleash your creativity!
With these easy designs, you can dive into the world of nail art without any fuss, no matter your skill level. Try out these stunning ideas, and don’t forget to share your favorites with friends! You might just inspire them to get creative with their own nails.
Note: We aim to provide accurate product links, but some may occasionally expire or become unavailable. If this happens, please search directly on Amazon for the product or a suitable alternative.
This post contains Amazon affiliate links, meaning we may earn a small commission if you purchase through our links, at no extra cost to you.
Frequently Asked Questions
What Are Some Easy Nail Art Designs That Beginners Can Try?
If you’re just starting out, you’ll love how simple and fun easy nail art designs can be! Think about trying classic looks like polka dots, stripes, or even a simple gradient.
You can use tools like dotting pens or tape to create those designs effortlessly. Remember, practice makes perfect, and before long, you’ll be impressing everyone with your beautiful nails!
What Supplies Do I Need for Easy Nail Art as a Beginner?
Getting started with easy nail art for beginners doesn’t require a ton of expensive supplies. Basic items like nail polish, a clear top coat, a base coat, and some simple tools like dotting tools or nail brushes are enough to kick off your nail art journey.
Don’t forget to grab some nail tape and a few sponges for those gradient effects! You’ll be amazed at what you can create with just these essentials.
How Do I Maintain My Nail Art Designs for Longer Wear?
To keep your easy nail art designs looking fresh for as long as possible, start with a good base coat. This helps your polish adhere better and prevents chipping.
After applying your designs, seal everything with a quality top coat, and consider reapplying it every few days for added protection. Remember to avoid hot water and harsh chemicals to prolong your stunning nail art!
Can I Use Nail Art Tools Even If I’m Not a Professional?
Absolutely! You don’t need to be a pro to use nail art tools. In fact, tools like dotting pens or striping brushes can make it easier for beginners to achieve beautiful designs.
Start with simple techniques, and as you get more comfortable, you can explore more complex designs. The key is to have fun and experiment—nail art is all about expressing your creativity!
Are There Any Common Mistakes Beginners Should Avoid in Nail Art?
Yes, there are a few common pitfalls to watch out for! One of the biggest mistakes is applying too thick a layer of polish, which can lead to smudging or uneven drying.
Another tip is to avoid rushing your designs; give each layer time to dry before adding more. Lastly, don’t forget to clean your tools regularly to ensure your easy nail art for beginners looks crisp and flawless every time!
Related Topics
easy nail art
beginner friendly
nail designs
simple techniques
trendy nail art
DIY manicures
quick nail ideas
seasonal nail trends
colorful patterns
minimalist nail art
creative nail tips
5-minute nail art


These nail art ideas are so cute! I tried one last weekend and ended up with glitter everywhere—my cat was not impressed! Which design are you most excited to try?
I love how easy these designs look! Just remember, if your nails come out looking like a toddler got a hold of a paint set, it’s all in the name of art, right? 😂
Did you know nail art has been popular since ancient Egypt? They even used henna to decorate their nails! Makes me feel like I’m joining a long tradition when I try these out.
I once tried to do ombre nails and ended up with a rainbow explosion on my hands! It took ages to clean up, but I got some great photos out of it! Have you had any funny nail art fails?