
I put this together because picking a gel nail look that fits your mood, season, and budget can be a chore. I know the feeling—nails should pop, not drain your time or wallet. If you want fresh designs without hours at the salon, this post is for you. I pulled together 20 stunning gel nail designs that are easy to copy, last long, and are perfect for selfies and everyday life.
If you love chic nails but hate overthinking every detail, this post is for you. If you are busy but still want a polished look that lasts, you’ll find options here. These ideas fit real days—work, weekends, date nights, and everything in between.
What you’ll get. Here is why this matters. Twenty designs explained in plain language, with color ideas, tool tips, and steps you can follow at home or with your favorite salon. You’ll find options for short and long nails, glossy and matte finishes, and accents that aren’t too fussy.
Designs you can actually copy. You’ll see categories like glossy solids, chic French twists, marble swirls, chrome shimmers, and tiny glitter tips. Each idea comes with a simple how-to and tips on what base colors suit your skin tone and the season.
How to recreate them at home. Start with clean nails and a solid base coat. Apply thin coats of color and cure between layers. For designs, use a fine striping brush, a dotting tool, or tape to keep lines clean. Finish with a top coat for shine or a matte top coat for a muted look. Keep your hands steady under the lamp and fans on for quick drying.
Ready to try. Grab your gel kit and pick a design to start. You can mix and match ideas to fit your mood. If you try one, share a photo and a tip. This is your moment to shine with nails that feel effortless and chic.
Contents
- 1. Floral Fantasy
- 2. Geometric Glam
- 3. Ombre Dreams
- 4. Glitter Galore
- 5. Marble Magic
- 6. Tropical Vibes
- 7. Classic French Twist
- 8. Animal Prints
- 9. Color Blocking
- 10. Minimalist Chic
- 11. Pastel Palette
- 12. Seasonal Styles
- 13. Neon Nights
- 14. Tie-Dye Delight
- 15. Textured Tips
- 16. Artistic Accents
- 17. Shimmer and Shine
- 18. Holiday Highlights
- 19. Custom Creations
- 20. Holographic Hues
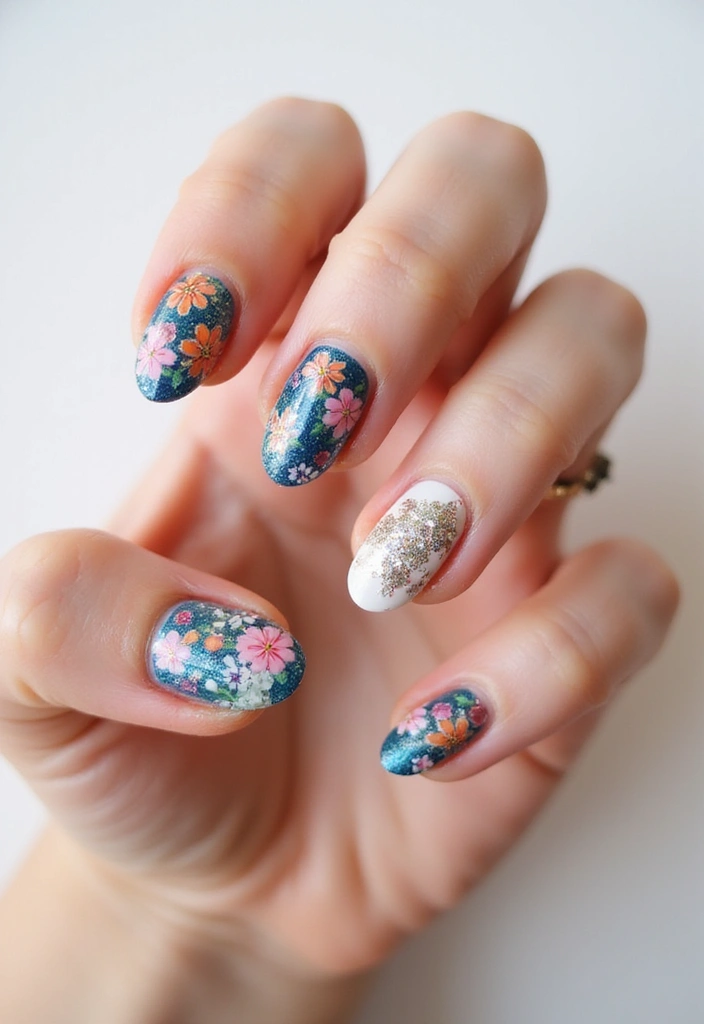
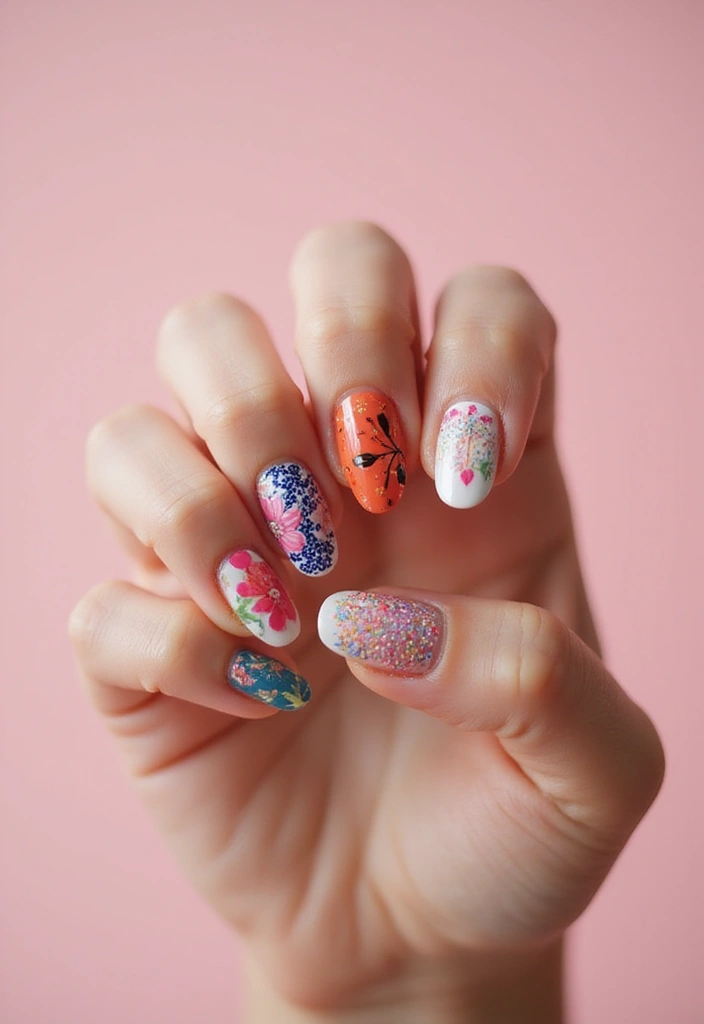
1. Floral Fantasy
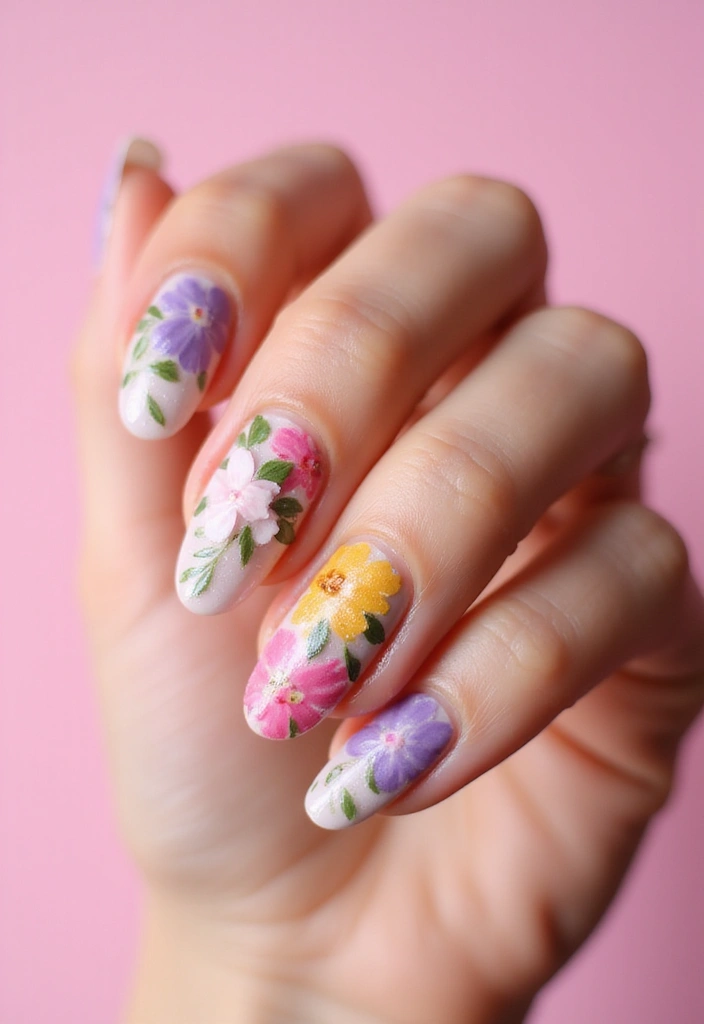
Floral nails stay fresh through the seasons. You can wear a soft pink palette or a bold black backdrop. This gel manicure brings a garden scene to your fingertips.
What you’ll need
– Gel base coat and gel top coat.
– Color gels in soft pink, sunny yellow, and fresh green.
– Black or white gel for contrast.
– A fine nail art brush, a dotting tool, and a clean mixing palette.
– A UV or LED lamp and a nail cleanser.
How to create the look
1) Prep your nails. Shape them and push back cuticles. Clean the surface.
2) Apply a thin base coat and cure under your lamp.
3) Paint the base with a soft pink or a stark black backdrop.
4) Create petals with quick, curved strokes. Layer pinks and yellows for depth.
5) Add leaves and centers. Green leaves frame each bloom; a tiny dot in the center finishes it.
6) Seal the design. Apply top coat and cure again.
7) Finish with a quick cleanse. Remove the tacky layer for a glassy shine.
Spring and summer vibes shine here. Keep layers thin to avoid edges that lift. Practice on a nail wheel before you wear the look. Take your time and enjoy the process.
1. Floral Fantasy
Editor’s Choice

Beetles 2 Pcs 15ml No Wipe Gel Top Coat and Base Coat Set – Shine Finish…

Artdone 31pcs Nail Art Brushes, Nail Art Tool Set, Dotting Tools, Dust B…

MelodySusie UV Nail Lamp, Plus30F UV Light, LED Dryer with 3 Timer, Smar…
2. Geometric Glam
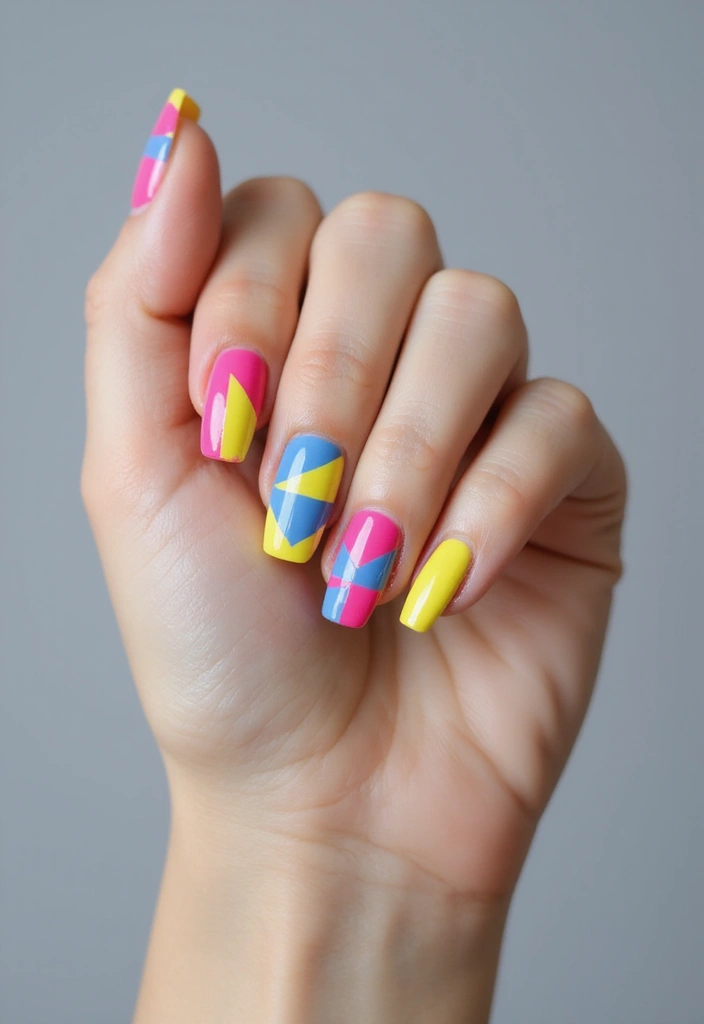
Geometric Glam
If you want clean lines and bold shapes, geometric nail art is a smart pick. Sharp lines and high contrast give your nails a modern, fresh feel. You can keep it classic with black and white or jump to neon colors for a playful pop.
Here is why this look fits many moods. It pairs well with casual outfits and can still steal the show at a party.
– Nail tape for crisp lines Use striping tape to guide straight, precise lines. Base your color first, place the tape where you want the line, paint, and lift the tape before the color dries for clean edges.
– Mix shapes Add triangles, squares, and little circles. Create a neat grid or a fun, offbeat pattern. The variety keeps the design interesting without looking busy.
– Finish options Try matte and glossy finishes on opposite nails or within the same design. Matte gives a refined look, while gloss adds shine and contrast.
This nail art is versatile enough for work days or nights out. It lets you express creativity while staying polished. For best results, keep lines steady and practice a tiny bit on a swatch nail first.
Next steps: choose a base color, pick a few shapes, and tape your grid carefully. Finish with a top coat to seal the look.
3. Ombre Dreams
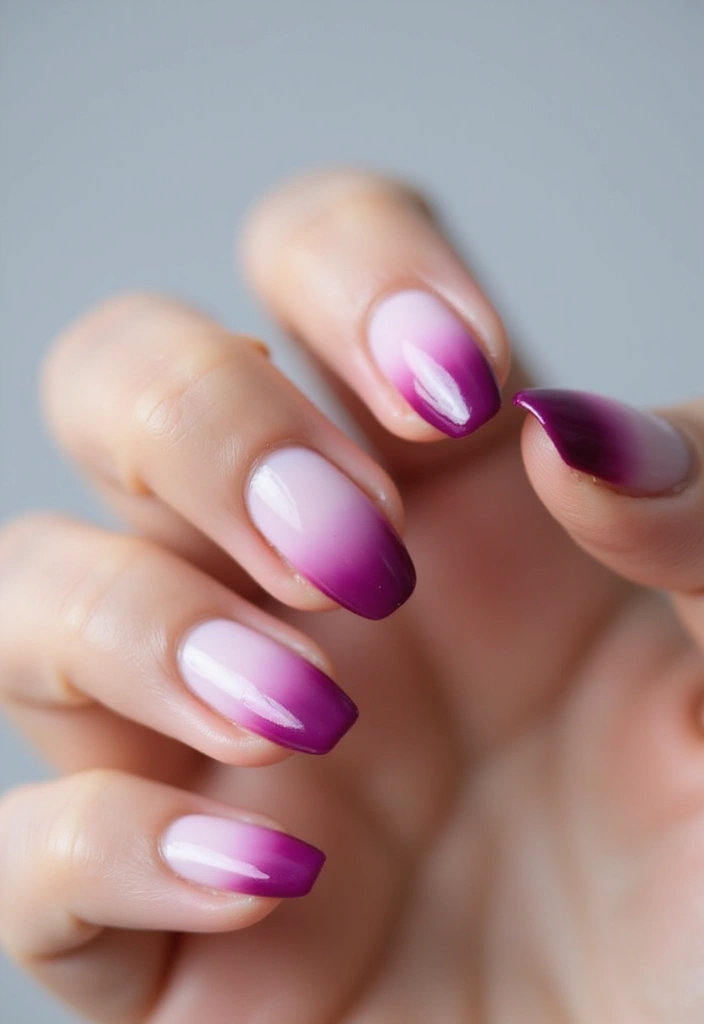
Want a nail look that flows from one color to the next? Ombre nails give you a smooth fade you can set to your mood. You can go soft with pastels or turn up the heat with bright hues. Either way, the finish looks clean and chic.
Ombre effect means colors blend into each other with no hard line. Gel polish helps this fade stay even and glossy, so the transition feels seamless.
Here is how you can make it at home:
1) Pick a base color. Choose a light shade that will show the fade clearly.
2) Gather two or three colors that go well together. Plan how they will stack—from base to tip.
3) Prep the nails. File and clean them, push back cuticles, and apply a thin base coat. Cure as directed.
4) Blend with a sponge. Put small strips of the second color on a clean makeup sponge. Gently dab the sponge on the nail, starting at the cuticle and moving toward the tip. If you use a third color, repeat with the tip area to finish the fade.
5) Seal with top coat. Cure, then add a second coat if you want extra shine.
Here is why this works for you: it fits any style and length, and it looks polished for work, a date, or a night out. Next steps: practice on a swatch nail first, so you nail the blend. With the right colors and a steady hand, your gel ombre will catch light and turn heads.
3. Ombre Dreams
Editor’s Choice

JODSONE Gel Nail Polish Kit with U V Light 32 Colors Gel Polish Nail + 4…

Soft Sponges with Grabbing Pen for Ombre and Aura Nail Art with Brush, P…

SUNUV UV LED Nail Lamp, Gel Light for Nail Polish UV Dryer with 3 Timers…
4. Glitter Galore
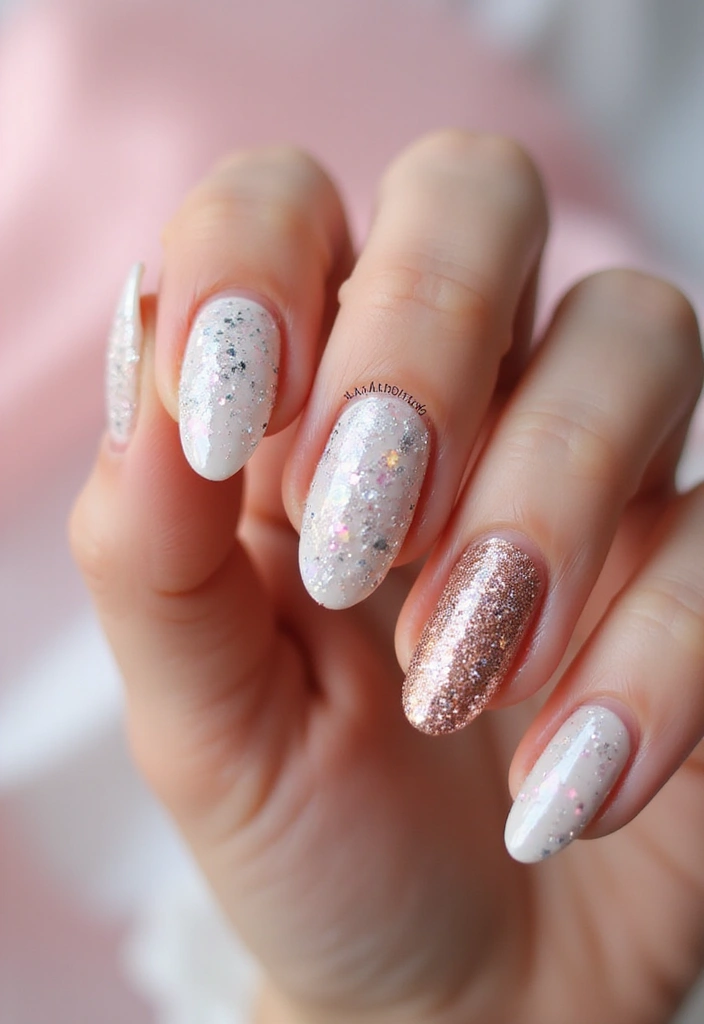
Chasing nails that catch light and turn heads? Glitter nails can do it in a blink. You can go big with chunky sparkle or keep a soft shimmer. Either way, shimmer adds energy to your look. Here is a simple way to make this design stay fresh.
– Base color: Choose a solid shade you love. Light pink, cream, or beige provides a clean stage for the glitter to pop.
– Layered glitter: Apply one thin coat of glitter over the base. Let it dry, then add a second coat for fuller sparkle without rough patches.
– Size mix: Use glitter in different sizes. Large shapes bring drama; tiny specks fill gaps and add depth.
– Top coat: Seal with a clear top coat. A glossy finish boosts the glow and helps wear longer. For a modern twist, try a matte top coat on a few nails or on an accent nail.
– Care tips: Wipe edges clean, avoid heavy glitters near cuticles, and reapply top coat every couple of days to maintain shine.
Glitter nails work for parties or a night out, but you can wear them anytime you want a bright, fun look. Let the light do the talking. You’ll love how easy it is to get a showy finish.
5. Marble Magic
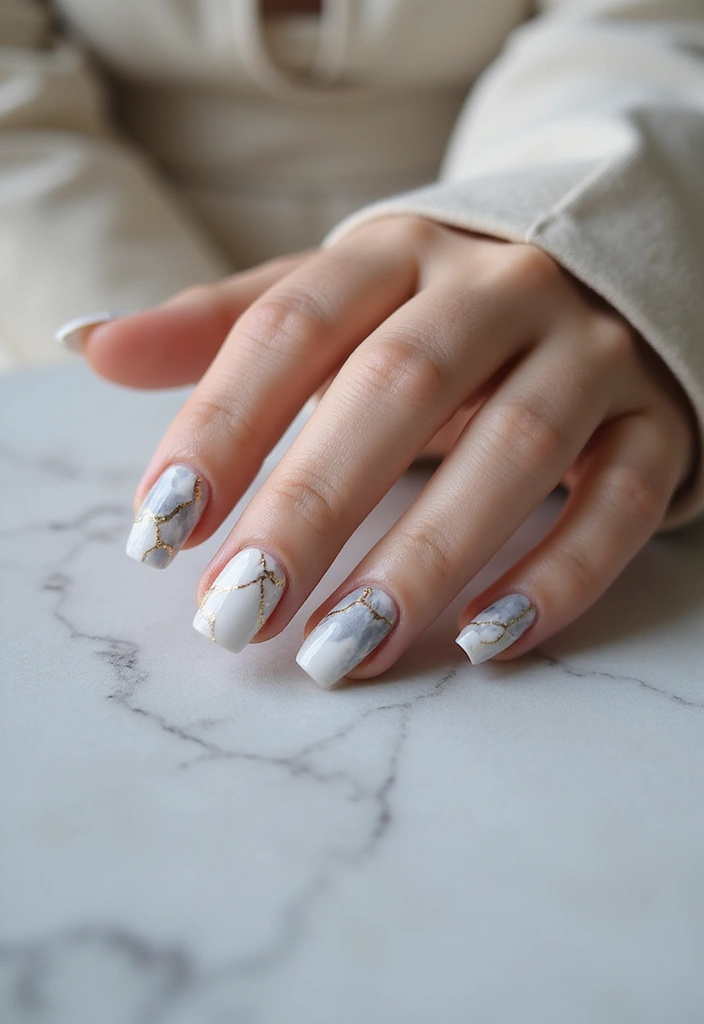
Marble Magic
You want nails that feel classy without hours of work. Marble nails give that stone look with a simple swirl. You get depth, shine, and a style that fits day or night.
Here is how to nail the marble effect:
– Pick two or three colors. A light base helps the veins show.
– Dip a thin brush or toothpick into the second color and swirl it over a wet line of white or nude polish. Move gently to create natural veins.
– Clean the brush as you go and blend the lines until you like the pattern.
– Finish with a glossy top coat to boost shine and seal the design.
Want more staying power? Use a base coat first. If you like, add a gel top.
Marble nails work for events and everyday wear. The look can be soft and subtle or bold with darker veins.
Tips to improve precision:
– Work quickly while the polish is tacky.
– Add a tiny dot of pale color at vein ends for depth.
– If you mess up, drag the color through the line to smooth it.
Next steps: pick colors and practice on one nail.
Marble nails stay neat with a clean base and steady strokes. Switch colors to match outfits and you’ll have a refined look.
5. Marble Magic
Editor’s Choice

JODSONE 23 PCS Gel Nail Polish Set with Base Glossy and Matte Top Coat M…
Artdone 31pcs Nail Art Brushes, Nail Art Tool Set, Dotting Tools, Dust B…

beetles Gel Polish No Wipe Gel Top Coat – Clear Color Top Coat Gel Nail …
6. Tropical Vibes
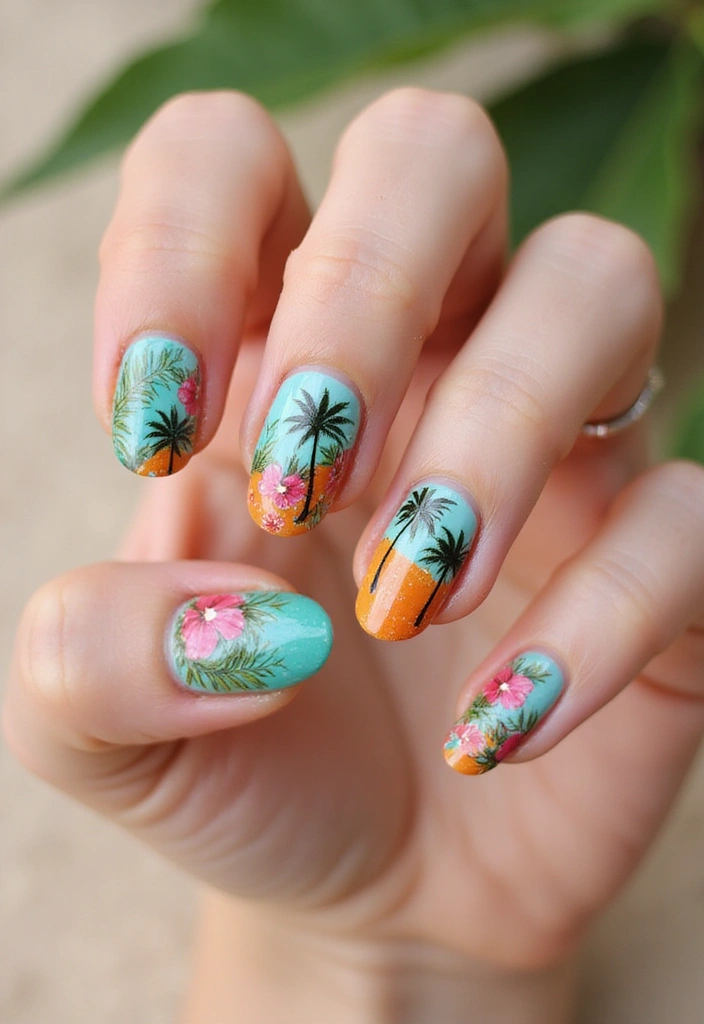
Here is why tropical nails work for you: they mix bold color with easy art to lift your mood. You get a beachy vibe at your fingertips.
– Step 1: pick bright summer shades. Try turquoise, coral, and sunny yellow for a true sunshine look.
– Step 2: add simple tropical designs. Palm leaves, hibiscus, and a tiny sunset stripe are perfect. If freehand drawing is tough, use stickers or stamping plates. This works for beginners.
– Step 3: finish with a glossy top coat. It locks in color, adds shine, and helps the design last.
Here is how to apply it so it lasts. Start with a clean base coat. Apply two coats of color, letting each dry. Then add the designs. Finish with the glossy top coat and cure under a lamp as needed.
Next steps: keep the look fresh. Use cuticle oil daily and reapply top coat every 2–3 days. If a nick shows up, fix it quickly with a quick brush of color and another coat.
If you want more variety, add a thin glitter stripe or a soft gradient sunset. This style fits vacations, weekends, or days when you want a spark of sunshine.
6. Tropical Vibes
Editor’s Choice

Beetles Gel Nail Polish Set, 36 Colors Neon Rainbow Bright Color Gel Pol…

Beetles Nail Stamp Gel 16Pcs French Tip Nail Stamp Kit with 8 Colors Sta…
beetles Gel Polish No Wipe Gel Top Coat – Clear Color Top Coat Gel Nail …
7. Classic French Twist
Looking for a French manicure? The white tip is classic, but a small twist can change the look. Here are ideas to try.
1. Colored tips. Swap white for a soft shade like blush pink or oyster. Keep the tip neat. Gel polish lasts longer.
2. Reverse French. Paint a nude base over the nail and add color at the cuticle. This look is bold yet clean, great for work.
3. Glitter or metallic edge. Add a thin glitter line along the tip or brush on a metallic edge in gold or rose gold. It adds a glow with any outfit.
This style suits many moments: job interviews, weddings, daily wear. It stays classy while letting your personality shine.
How to do it at home:
– Prep nails: shape, push back cuticles, buff, and wipe with alcohol.
– Apply a clear base coat; let it dry.
– Do the chosen color step: tip color, reverse base, or glitter accent.
– Seal with a glossy top coat.
Why it works: clean lines and a neat look. It is easy to wear with any outfit. It suits short, medium, or long nails.
Next steps: pick a style, grab a gel kit, and practice on a swatch first.
7. Classic French Twist
Editor’s Choice
JODSONE 23 PCS Gel Nail Polish Set with Base Glossy and Matte Top Coat M…

Beetles 31pcs Nail Art Brushes, Dotting Tools, Nail Art Pens, Dust Brush…

Nail File and Buffer (10 Pcs), Buffer Block Nail Files Double Sided 100/…
8. Animal Prints

Want nails that turn heads without a loud vibe? Animal print nails let you show your wild side with simple style. Leopard, zebra, or snake skin patterns look classy when you keep the base calm and lines clean. Here is a simple, repeatable method you can try this week.
1. Neutral base that lets the print pop – Pick a soft beige, taupe, or pale gray. Paint two thin coats and let each dry fully. A smooth base makes every print line look sharper.
2. Fine-detail print with a tiny brush – Dip a fine brush in black or dark brown. Sketch leopard spots, zebra stripes, or snake-skin scales. Keep the shapes small and imperfect for a natural feel. Work slowly and rest your hand on the table for steadiness.
3. Accent nails for balance – Paint one or two nails in a solid color that matches the base or creates contrast with the print. Try black on nude, or white on tan. Finish with a glossy top coat to seal the design.
What you’ll need
– Base coat and top coat
– Neutral polish and a dark color
– A fine brush or nail-art pen
– Optional: stamping plate for quick prints
Next steps
– Try leopard on one hand, zebra on the other for variety
– Wear this look on a night out or at a social event
8. Animal Prints
Editor’s Choice

Beetles 2 Pcs 15ml No Wipe Gel Top Coat and Base Coat Set – Shine Finish…
Metallic Nail Art Brushes, 5Pcs Liner Brush Set, UV Gel Polish Painting …

VNC 21 Pcs Nail Stamp Plates Set 16 Plate 2Stamper and 2 Scraper 1storag…
You might also like

9. Color Blocking
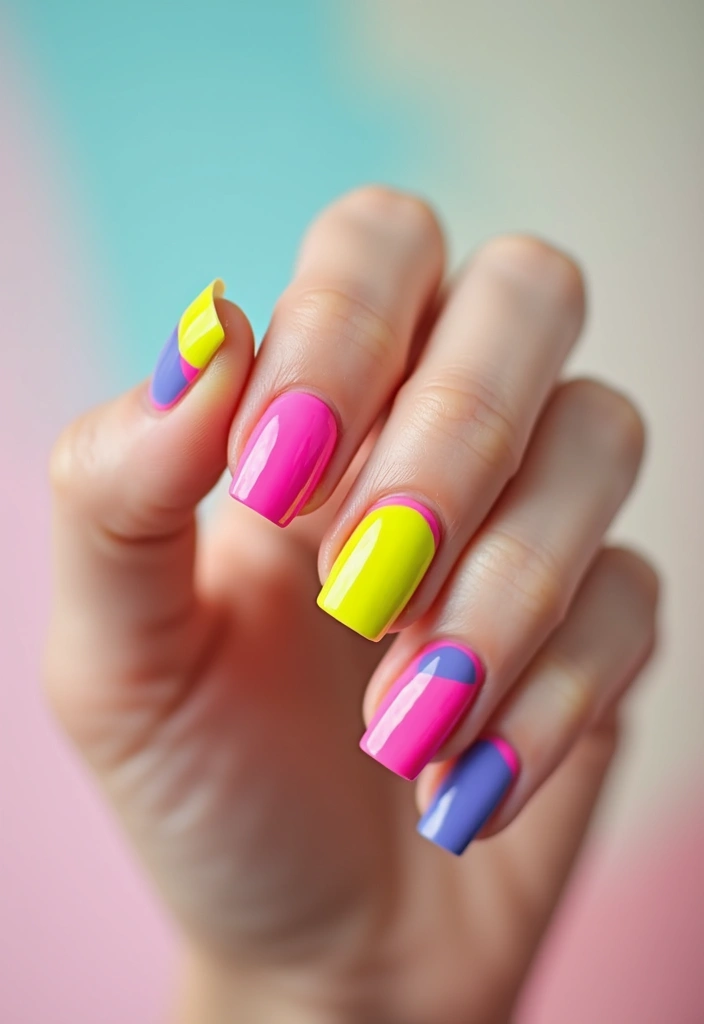
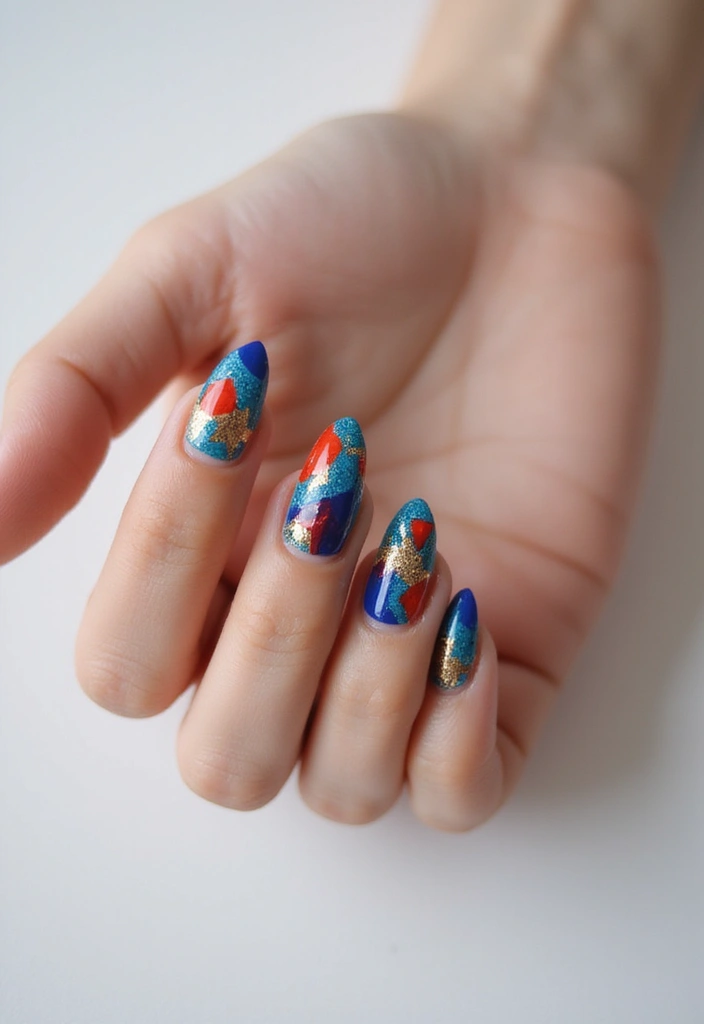
Color Blocking nails grab attention with bold color splits. Choose two or three shades that contrast or blend. The look can be playful or chic, depending on your color choices.
Here’s why it works. Clean blocks create sharp lines that make the gel nail art pop. You control the vibe by where you place each color.
To nail this style:
1. Choose two or three colors. Pick a base shade and one accent color. Try bold contrast like red and teal, or soft nude and pink.
2. Prep your nails. Apply a thin base coat, cure under lamp, then seal with a top coat to prevent staining.
3. Apply tape for crisp lines. Place tape where you want edges, press down firmly, then paint each section. Lift tape slowly to reveal clean edges.
4. Seal and cure. Add top coat over the blocks, cure, and wipe with cleanser if needed.
Tips
– Use nail tape or a fine brush for straight edges.
– Let each color dry before lifting the tape.
If you love bold looks, color blocking nails are a simple upgrade. Gel polish lasts long and makes a statement.
Next steps: gather shades, lock in your base, and practice on a nail wheel first.
9. Color Blocking
Editor’s Choice

beetles Gel Polish Set Fall Gel Nail Polish Kit 36 Pcs 32 Colors with Ba…
Gellen Gel Polish Remover Latex Tape for Nails, Fast Drying Liquid Latex…
SUNUV UV LED Nail Lamp, Gel Light for Nail Polish UV Dryer with 3 Timers…
10. Minimalist Chic
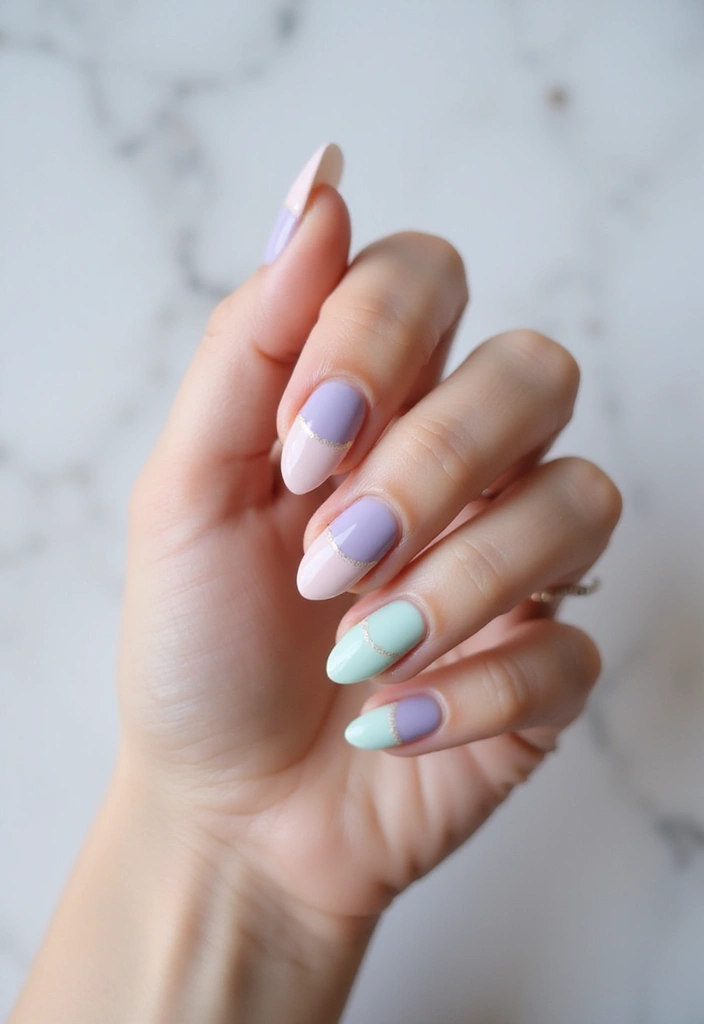
Want nails that look clean and stylish without shouting for attention? Minimalist gel nail designs deliver a quiet, chic vibe you can wear anywhere. You’ll get a neat, put-together look with easy upkeep.
What this style is
Soft pastels, neutral bases, and negative space come together for a calm, refined look. It’s all about restraint: simple lines, tiny details, and a flawless finish.
How to achieve it
1) Start with a smooth canvas. Push back cuticles and file nails to a clean shape. Apply a neutral gel base that fits your skin tone.
2) Add subtle art. Leave a small negative space near the cuticle or tip, then use a fine brush to paint tiny dots or thin stripes.
3) Lock in the look. Cover with a clear gel top coat and cure under a lamp. Keep edges tidy and remove any stray marks for a crisp finish.
Why you’ll love it
Neutral nails go with any outfit. They work for casual days and dressier events alike. The look stays polished as your nails grow out, so you don’t need frequent touchups.
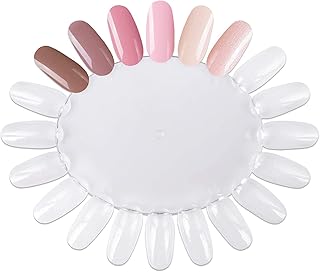
Color ideas to try
Pale pink, creamy beige, soft taupe, or a whisper of gray. These pastel nail colors keep the vibe soft and versatile.
Care and longevity
Choose a shield top coat to protect the design. Limit heavy chores on hands right after a fill to extend wear.
Here is why this approach works. Let’s break it down. Next steps: pick a base shade and a tiny dot or stripe to start.
10. Minimalist Chic
Editor’s Choice

beetles Gel Polish Whispers of Love Jelly Gel Nail Polish Set – 6 Colors…
Beetles 31pcs Nail Art Brushes, Dotting Tools, Nail Art Pens, Dust Brush…

268W UV LED Nail Lamp, LKE Nail Dryer for Gel Polish, 4 Timers UV Nail L…
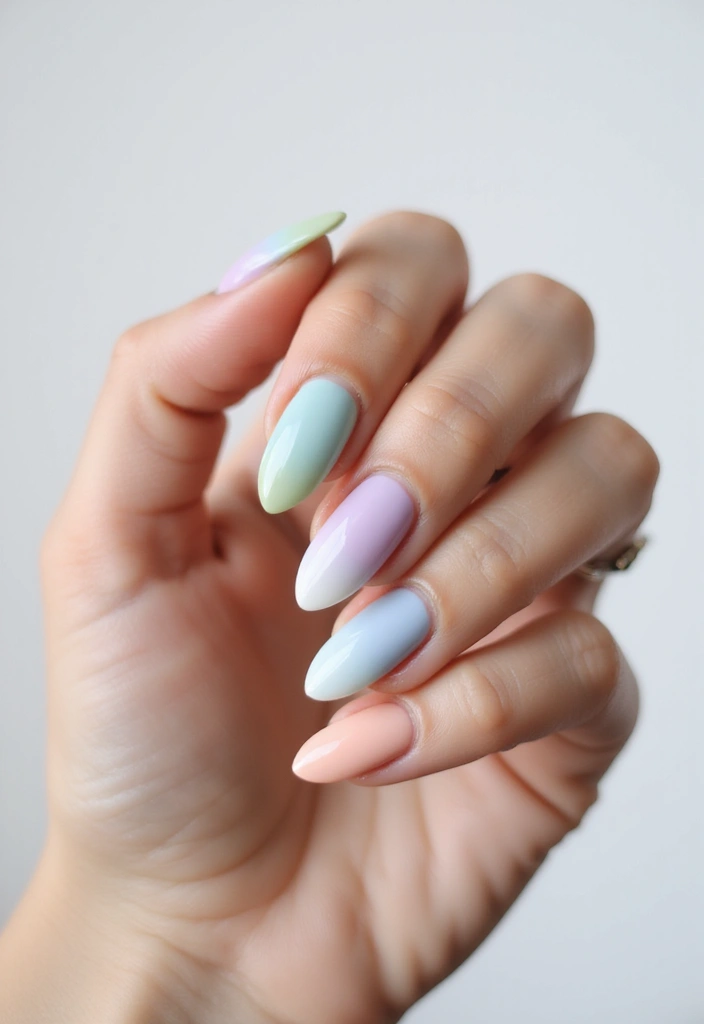
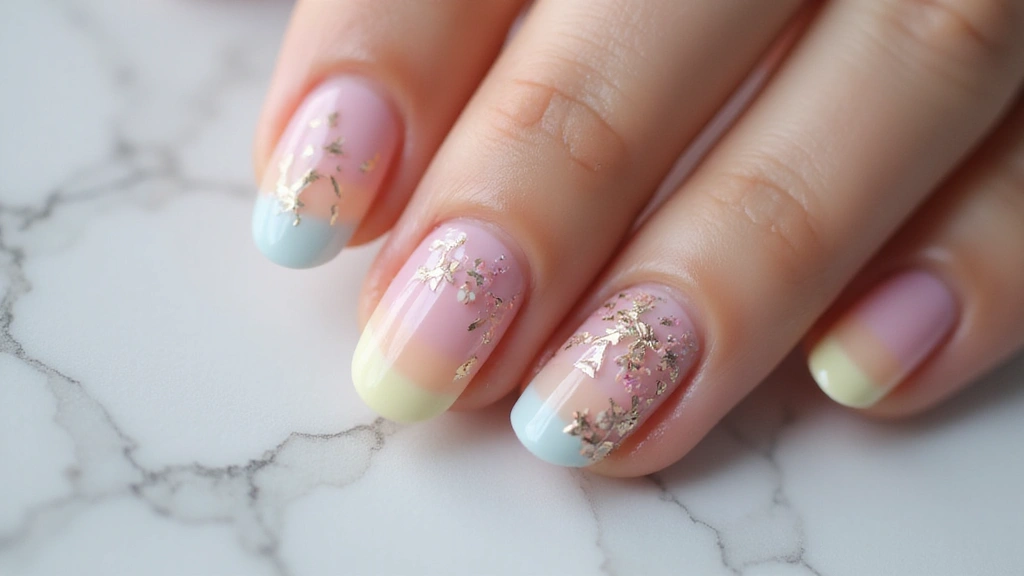
11. Pastel Palette
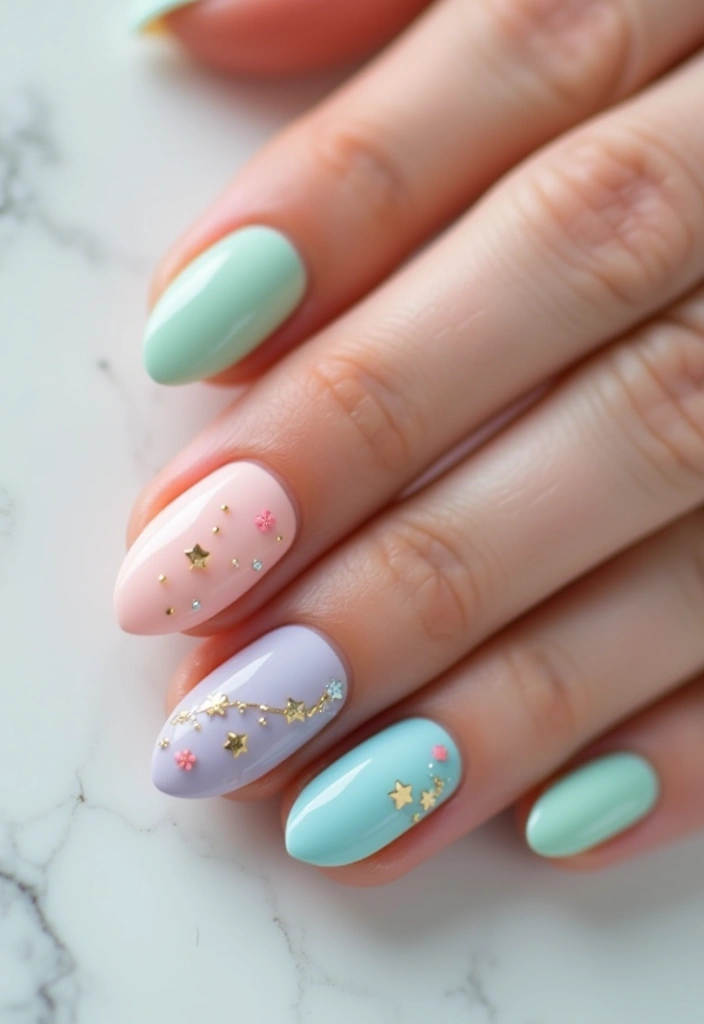
Pastel Palette
Soft colors feel calm and friendly. Pastel tones look light, sweet, and perfect for spring. On gel nails they stay glossy under the lamp and give you a fresh vibe all day. When you glance at your nails, they brighten your mood.
Here is why this style clicks with many people:
1. Mix different pastel shades for a playful, airy look.
2. Pair matte and glossy finishes for gentle contrast.
3. Add tiny designs like hearts or stars for extra charm.
Pastel nails work great for brunches, picnics, and spring outings. They stay quiet yet noticeable, so your outfit can shine.
Next steps to rock pastels at home:
– Start with clean nails. Push back cuticles and buff a smooth surface.
– Apply a gel base coat. Cure according to your lamp.
– Add two thin coats of your pastel gel color. Cure between coats.
– Finish with a top coat. Choose glossy or matte and cure again.
– Seal the edges by sealing the tips. This helps prevent chipping.
– If you want a little flair, use a tiny brush to add dots, hearts, or stars on one nail.
With the right prep and care, pastel gel nails stay pretty for days. They read as soft and stylish, never loud.
Pastel palettes aren’t just pretty; they’re mood boosters! Mix soft hues and playful designs for gel nail art that brightens your day and makes every glance at your nails a joyful moment.
11. Pastel Palette
Editor’s Choice

Born Pretty Pastel Gel Nail Polish Set Spring Summer Gel Polish Macaron …
SUNUV UV LED Nail Lamp, Gel Light for Nail Polish UV Dryer with 3 Timers…
Artdone 31pcs Nail Art Brushes, Nail Art Tool Set, Dotting Tools, Dust B…
12. Seasonal Styles
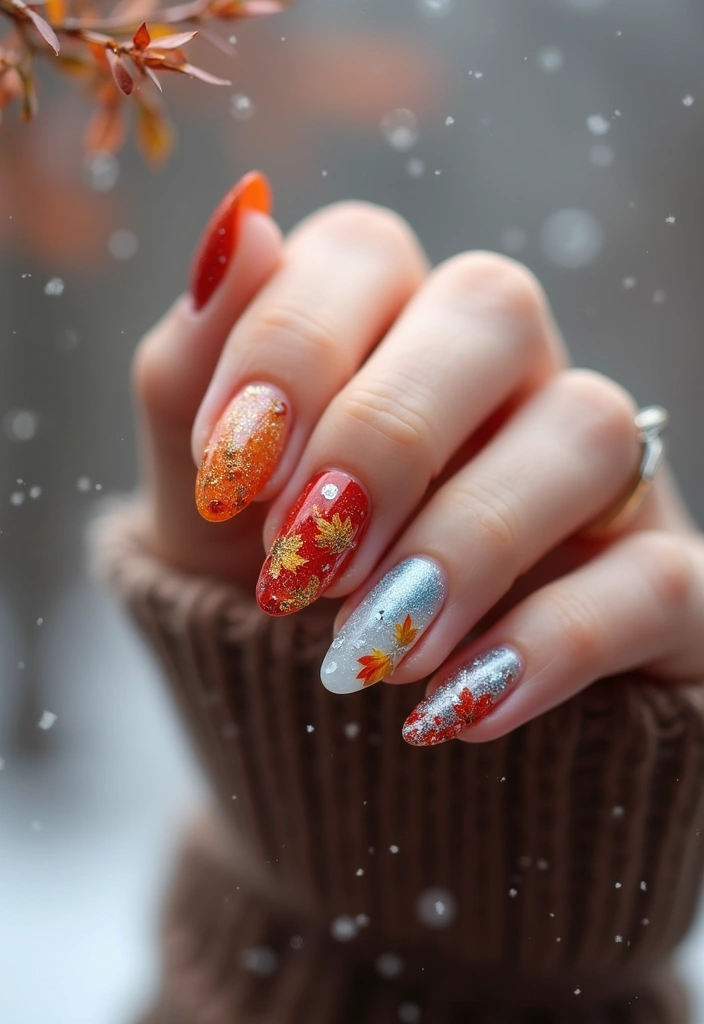
Seasonal Styles
You want nails that match the time of year. Seasonal nail designs keep your look fresh. Gel polish makes it easy to swap colors and patterns as the season shifts.
Here is why this works: it ties your style to the mood outside and gives you tiny art you can show off. It also helps you reuse ideas you already love.
Next steps:
– Pick a color story for the season. Fall hues: burnt orange, chestnut, moss green. Winter tones: icy blue, snowy white, charcoal.
– Add a simple motif. Autumn leaves, pumpkins; winter snowflakes, pine sprigs.
– Keep patterns quick and neat. Stripes, dots, tiny silhouettes.
– Finish right: seal with a strong top coat. Buff rough edges so your nail art stays smooth.
– Mix finishes for depth. Try a glossy base with a matte artwork, or a touch of fine glitter for frost.
Plan ahead: snap a quick photo at the end of each season. Save decals or decal sets to reuse later.
Be honest about limits: seasonal nails add fun, but you still want everyday wear. If your schedule is tight, choose one motif and a season-friendly color that fits most outfits.
End note: seasonal nail designs blend style with nature. They’re a way to show you care about your look.
12. Seasonal Styles
Editor’s Choice
JODSONE 23 PCS Gel Nail Polish Set with Base Glossy and Matte Top Coat M…
Beetles 31pcs Nail Art Brushes, Dotting Tools, Nail Art Pens, Dust Brush…
beetles Gel Polish No Wipe Gel Top Coat – Clear Color Top Coat Gel Nail …
13. Neon Nights
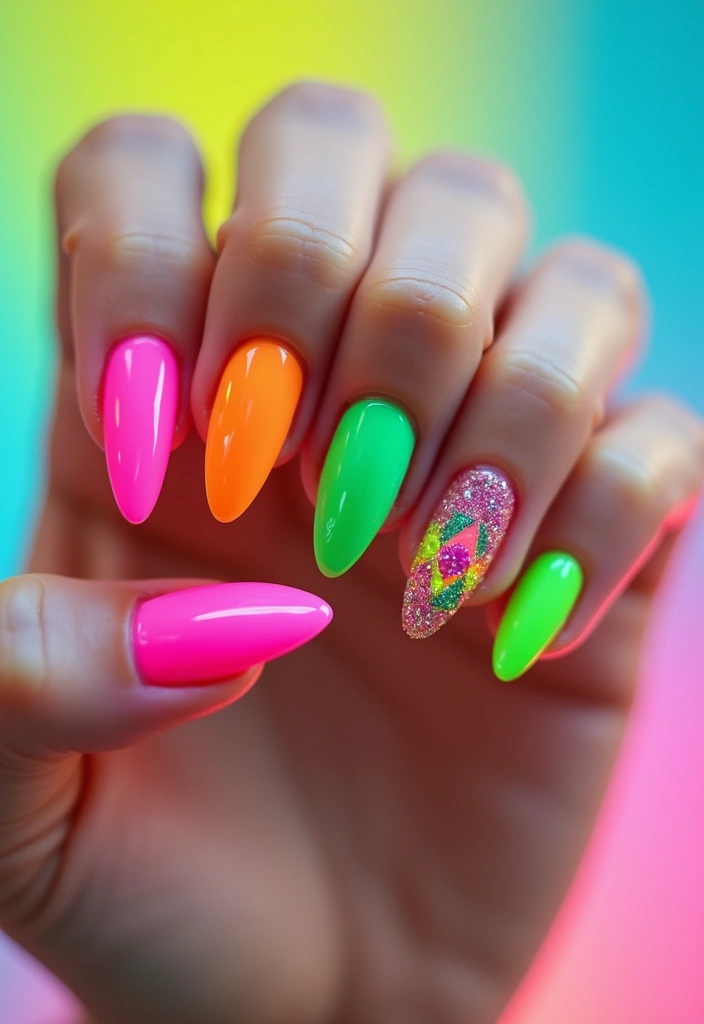
Neon nails grab attention with bright, electric colors. If you want your manicure to pop at a party or night out, neon shades are your go-to. They feel lively. Here’s how to nail the look.
– Start with a white gel base. This boosts brightness so the neon colors shine true.
– Try a two-tone neon gradient or mix several shades on one nail. Pink to orange, or lime to turquoise work well.
– Add black accents for contrast. Thin lines, dots, or a small silhouette make the design stand out.
Next steps and tips:
– Prep well. Shape nails, push back cuticles, and wipe with alcohol to remove oils.
– Cure each layer under a UV or LED lamp as directed by your gel system.
– For a smoother gradient, dab neon colors with a small makeup sponge and blend at the seam.
– Finish with a glossy top coat to seal color and add shine.
Why this works: the white base makes neon tones pop in photos and in real life. A top coat preserves the brightness, and black accents give the look edge.
Wear notes: neon nails read best in bright light and on camera. They still look bold in dim light and can glow softly under blacklight.
Next steps: choose two neon shades you love, try a simple stripe or diagonal design, and practice on a swatch nail before doing all fingers.
13. Neon Nights
Editor’s Choice

beetles Gel Polish Set – 36 Colors Neon Gel Nail Polish Pink Red Green B…
SUNUV UV LED Nail Lamp, Gel Light for Nail Polish UV Dryer with 3 Timers…
Artdone 31pcs Nail Art Brushes, Nail Art Tool Set, Dotting Tools, Dust B…
14. Tie-Dye Delight
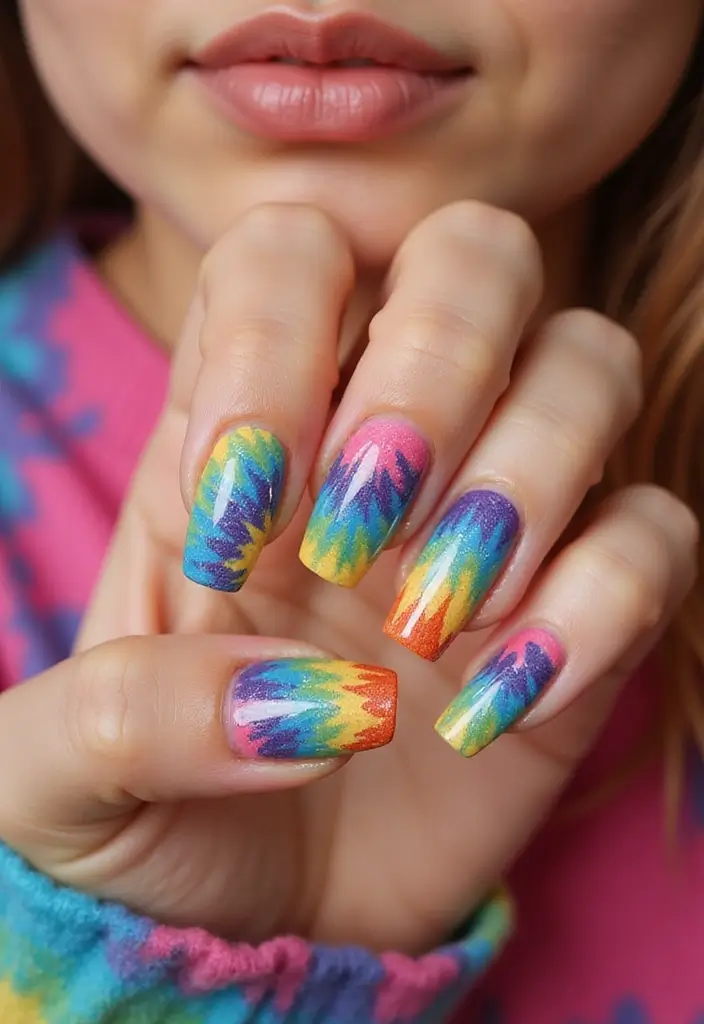
Tie-Dye Delight
Here is why tie-dye nails are a smart pick. They mix color with a retro vibe. You can wear them on sunny days, at fairs, and during beach trips. You’ll draw eyes as you walk by. You’ll feel playful when you wear this look.
– Prep and base Start with clean nails. Push back cuticles. Apply a light base coat to help colors pop. Let it dry before you move on.
– Choose your palette Pick three or four soft shades. Good combos are pink, yellow, light blue, and mint. Make sure the colors blend well for a smooth look.
– Apply with a sponge Use a cosmetic sponge to dab color onto each nail. Tap gently and lift to create curved, soft swirls. Avoid hard lines by not pressing too hard.
– Blend and refine Layer colors in small dabs. Build the swirl until it feels seamless. Stop when the mix looks like a soft wave on the nail.
– Seal the look Finish with a clear top coat. This locks in color and adds a gentle shine. Let it dry without rushing.
Tips: Practice on a spare nail or tile first. For best results, keep lines soft and colors misted. This style fits warm weather, festivals, or sunny days at the water.
Next steps: try it this weekend, compare outcomes, and tweak your color choices.
Why blend in when you can stand out? Tie-dye gel nail designs are your ticket to playful, vibrant vibes that catch every eye. Embrace color and let your nails do the talking this season!
14. Tie-Dye Delight
Editor’s Choice
beetles Gel Polish Set Fall Gel Nail Polish Kit 36 Pcs 32 Colors with Ba…

Top Coat Nail Polish Clear: Quick Dry Nail Polish No Chip High Shine Lon…
15. Textured Tips
Textured tips add depth to your gel nails. They use simple materials like sand, fine glitter, or a matte finish. You will notice how texture catches light as you move your hands. Here is how you can try textured gel nails at home.
– What you’ll need. You’ll need a clear gel base, a color you love, sand or fine glitter, a matte top coat, and a glossy top coat.
– Step 1. Prep your nails by cleaning, shaping, and gently pushing back cuticles.
– Step 2. Apply a thin base coat and cure under the lamp.
– Step 3. Paint two light coats of color and cure after each coat.
– Step 4. Create texture. While the gel is tacky, press on sand or glitter or dust a matte powder onto the nail.
– Step 5. Seal the texture. Use a glossy top coat for shine or a matte top coat for a soft, velvety look, then cure.
– Step 6. Finish the job. Gently smooth the edges with a soft file and wipe away any excess texture.
Textured nails stand out in photos and real life. They work well for chic events or everyday style. If you’re new to texture, start with one accent nail and keep the others smooth. You will still get a big effect.
15. Textured Tips
Editor’s Choice
Beetles 2 Pcs 15ml No Wipe Gel Top Coat and Base Coat Set – Shine Finish…
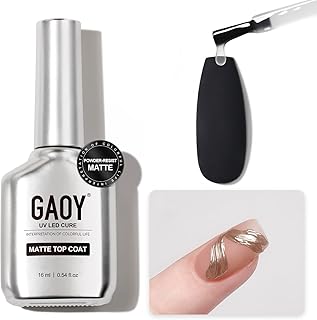
GAOY Matte Gel Top Coat, 16ml Powder-Resist Matte Finish for Detail Chro…
16. Artistic Accents
If you want to show your creative side, artistic accents on gel nails do it. You get color, shape, and your own vibe in one look. From abstract swirls to tiny portraits, your nails become a small gallery. Wear art that fits your mood or outfit.
Why artistic nails work: the base color makes the art pop. Thin lines read clearly on a calm background. A glossy top coat seals the design and helps it last through days of hand washing.
Step 1 – Start with a strong base
– Pick a base color that lets the artwork shine.
– If the art is bold, keep the base more muted to avoid crowding.
Step 2 – Master the fine tools
– Use fine brushes for lines and tiny details.
– Practice on a nail wheel or spare nail before you touch live nails.
Step 3 – Design with intent
– Let ideas come from abstract patterns, geometric shapes, or simple portraits you love.
– Begin with a few simple forms, then layer for depth.
Next steps: sketch your idea on a practice nail, then apply to one accent nail on real hands. Build in layers: base coat, art, and top coat. A clean line and a bright finish can spark compliments all week.
Let your nails be the canvas! Artistic accents on gel nail designs transform your fingertips into a unique expression of your style. Embrace creativity and show the world your vibe!
16. Artistic Accents
Editor’s Choice
Beetles 31pcs Nail Art Brushes, Dotting Tools, Nail Art Pens, Dust Brush…

modelones Gel Nail Polish Kit -6 Colors Fall Nude Pink Gel Polish Set Sk…
20Pcs False Nail Swatches Wheels Nail Wheel Art Plastic Nail Polish Disp…
17. Shimmer and Shine
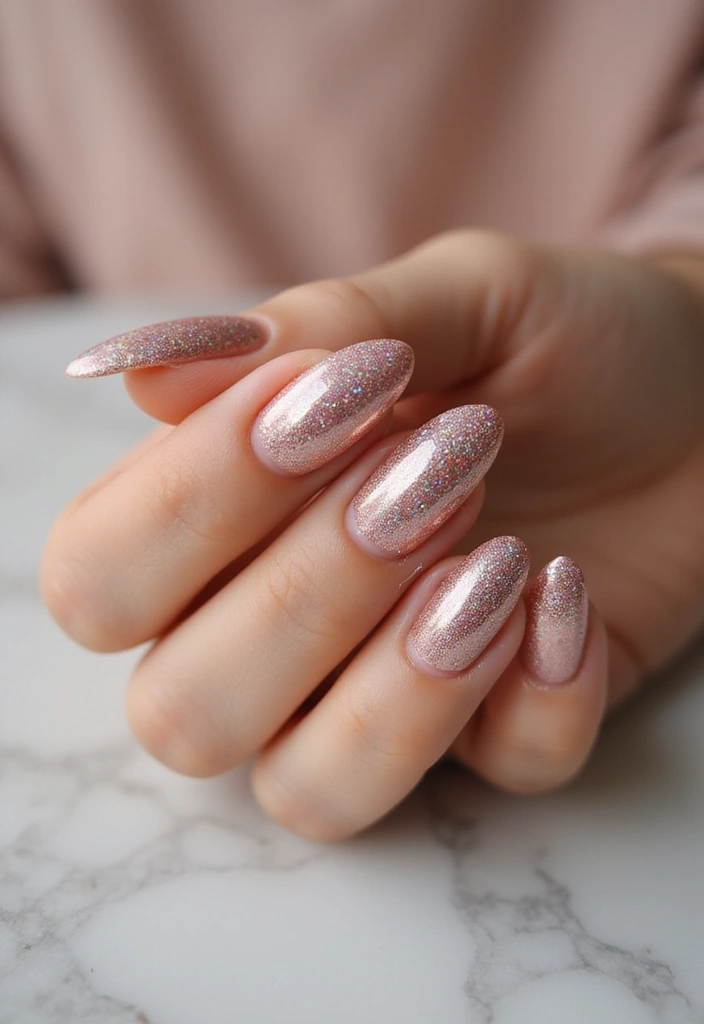
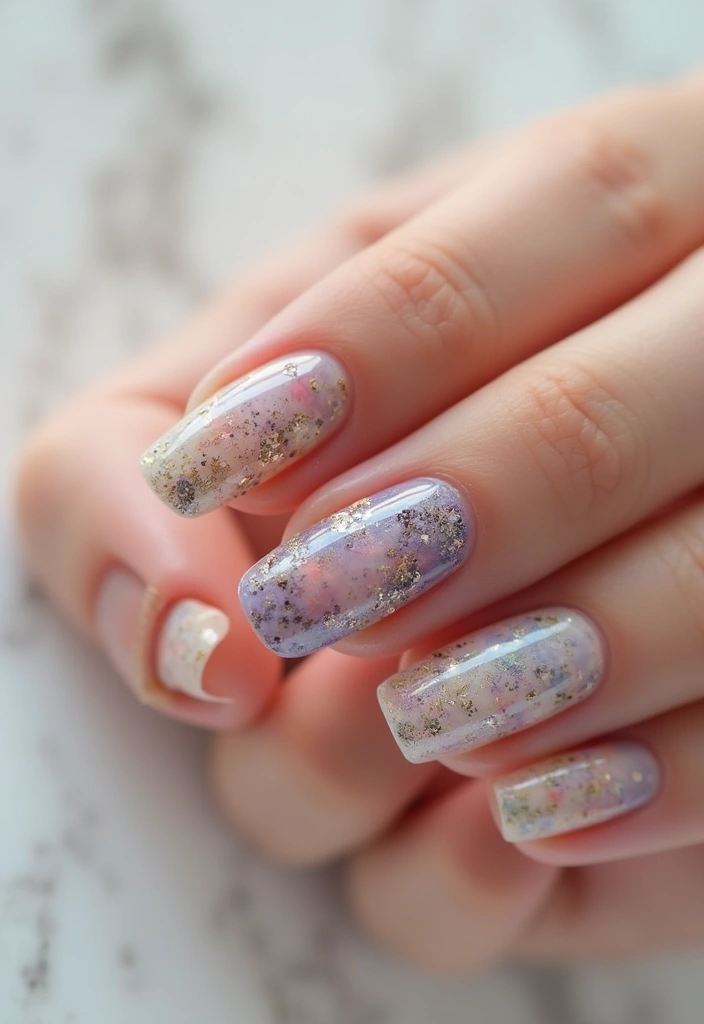
You want nails that catch light without looking loud. Shimmer nails bring a soft sparkle that moves with you. It’s a simple way to add shine to your gel design and still keep it classy. You get a polished, camera-ready finish that lasts.
Shimmer options
– Shimmer gel polish. It glides on smooth and adds glow in one coat.
– Loose glitter sealed with clear gel. This gives a juicy sparkle while staying durable.
How to apply
1) Prep your nails. Clean, file, and push back cuticles.
2) Put on a base gel coat and cure under the lamp.
3) Paint all nails with a nude or neutral gel shade and cure.
4) On 1 or 2 accent nails, add shimmer:
– If you use gel polish, brush a thin coat and cure.
– If you use loose glitter, dab a small amount onto the tacky layer, press gently, then seal with another clear gel layer and cure.
5) Finish with a top coat. Cure, wipe the sticky layer, and push back excess shine with a clean cotton pad. Apply cuticle oil for a smooth look.
Style tips
– Balance is key: keep most nails nude and reserve shimmer for 1–2 digits.
– Pair with soft neutrals like beige, taupe, or blush for a chic vibe.
– For a night-out glow, choose fine micro-glitter. Skip chunky glitter on every nail to avoid overwhelm.
Care and removal
– Be gentle when removing gel to protect your nails. Soak off or foil wrap as you were taught, then moisturize.
– If shine dulls, a quick top-coat refresh keeps your shimmer alive.
Next steps: pick your shimmer option and plan a two-nail accent look. You’ll have a dazzling gel style that doesn’t steal the show from your whole outfit.
A touch of shimmer on your gel nail designs can turn ordinary into extraordinary, giving your nails that polished, camera-ready finish that shines without stealing the show!
17. Shimmer and Shine
Editor’s Choice
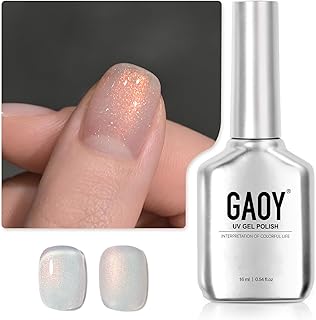
GAOY Shimmer Gel Nail Polish, 16ml Clear Glitter Gel Polish, UV Light Cu…
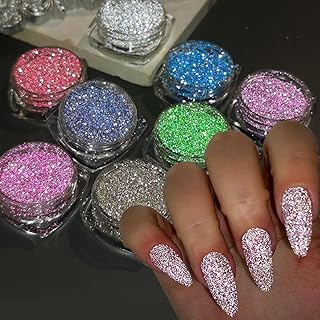
Reflective Glitter Powder Set, 8 Colors Sparkle Diamond Nail Glitter Dus…
beetles Gel Polish No Wipe Gel Top Coat – Clear Color Top Coat Gel Nail …
18. Holiday Highlights
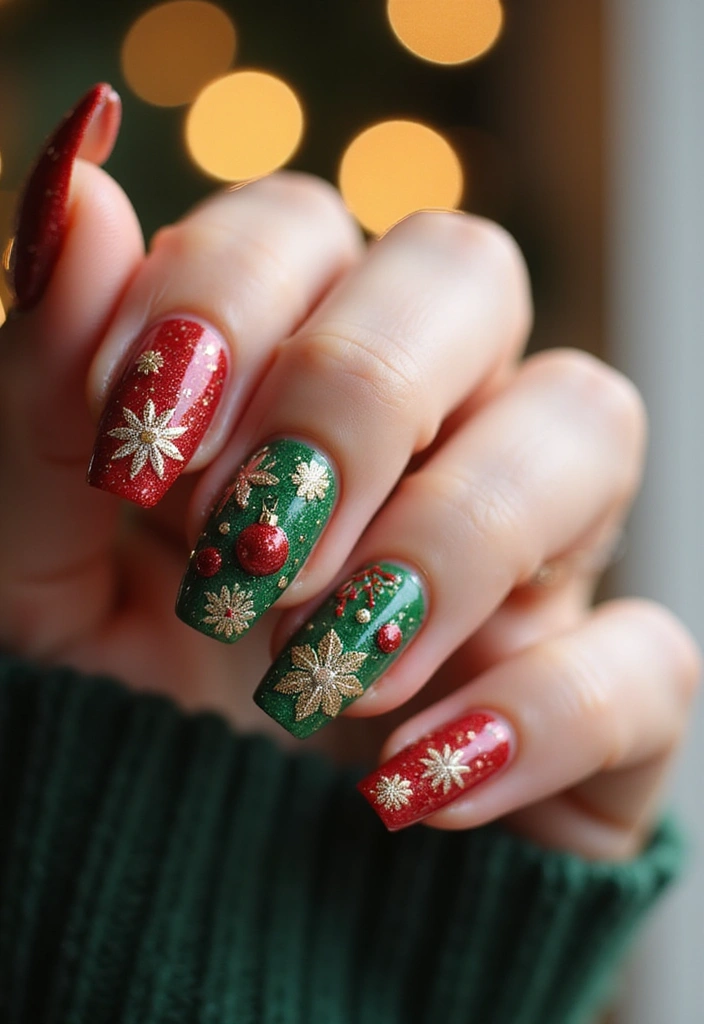
Want holiday nails that pop without hours of work? Gel nails give you a glossy finish that lasts through parties and meals. With a few steps, you can match each season and still keep things simple.
– Seasonal color base
Pick two shades that fit the holiday. Christmas loves red with green. New Year works with black and gold or silver glitter. Halloween pairs orange with black.
– Simple motifs
Add tiny snowflakes, candy canes, hearts, or stars with a fine brush or stamping plate. A white snowflake on red looks crisp at the tips. Let each layer cure.
– Tape for clean lines
Tape helps you get sharp edges. Place striping tape where you want a border, paint the rest, then peel. Cure and add a second color or top coat.
– Decals or stamping
Decals and stamping plates speed things up. Use holiday designs on the gel while it’s tacky, press, lift, cure, and seal with top coat.
– Finish and care
Seal with a gel top coat, cure, and wipe away the sticky layer. A touch of glitter at the tip adds a snowy glow. For a different look, try a matte finish.
Next steps: choose a look, gather a few tools, and try on one nail first to test your technique. Practice on a swatch nail to avoid mistakes.
18. Holiday Highlights
Editor’s Choice
JODSONE 23 PCS Gel Nail Polish Set with Base Glossy and Matte Top Coat M…
Beetles Nail Stamp Gel 16Pcs French Tip Nail Stamp Kit with 8 Colors Sta…
19. Custom Creations
You want nails that feel truly you. Custom gel nail designs make that possible. Work with a nail tech to turn an idea into real art on your fingertips. You get a look that fits your story and your life.
1) Gather ideas: Bring photos, color swatches, fabric samples, and little mementos that show your vibe. The more you show, the closer the design will be to you.
2) Choose colors and patterns: Pick a main shade and two accents. Think lines, dots, checks, or a flower. Decide if you want a shiny finish or a soft matte.
3) Add personal symbols: Include initials, a tiny heart, a favorite symbol, or a date. Put them on an accent nail so they pop but stay readable.
4) Decide length and technique: Talk about nail shape and how long you like them. Your artist can use hand painting, stamping, decals, or foil to fit your style.
5) Care and durability: Ask about top coats, curing times, and daily care. Protect the art with gloves, and touch up with fresh top coat as needed.
Next steps: share your ideas with a pro, review samples, and book your custom nails. You’ll love the result.
19. Custom Creations
Editor’s Choice
JODSONE 23 PCS Gel Nail Polish Set with Base Glossy and Matte Top Coat M…
Artdone 31pcs Nail Art Brushes, Nail Art Tool Set, Dotting Tools, Dust B…
Beetles Nail Stamp Gel 16Pcs French Tip Nail Stamp Kit with 8 Colors Sta…
20. Holographic Hues
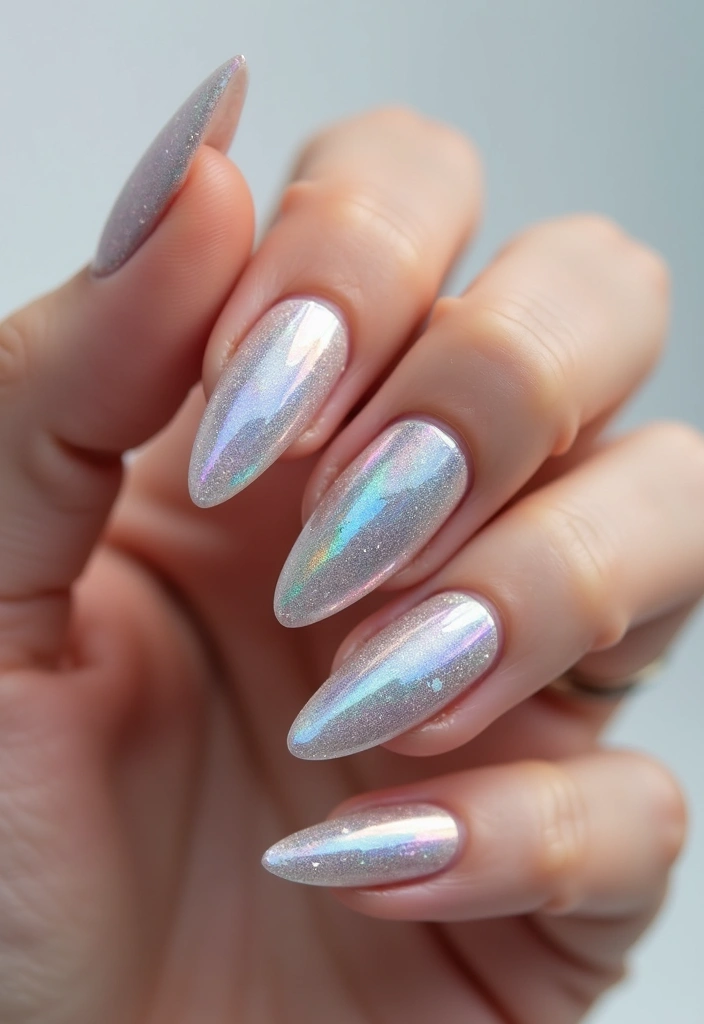
Here is why you should try holo nails. They catch light from every angle and make your fingertips pop.
Here is how to get the look:
– Start with a holographic top coat on your gel nails for a rainbow shine that shifts as you move.
– Try a sheer base color or clear gel under the holo layer so the shimmer really stands out.
– Pick colors that shift under different lights. Blues, pinks, and lilacs flash with movement, keeping your nails lively.
Let’s break it down with a simple design plan. Keep the design minimal so the holo effect stays the star. A single holo nail on one hand or a thin crescent at the tip reads chic and modern, not busy.
Next steps to apply successfully. Apply a thin base coat, cure under your LED/UV lamp, then add the holo layer in light, even strokes. Finish with a thin clear top coat to seal the shine and extend wear.
A few practical tips. Use proper gel applicators, wipe with isopropyl alcohol between layers, and cap the free edge with every coat. With the right tools, holo nails stay glossy, durable, and ready for photos.
If you want to switch looks fast, you can swap in holo powder for a more subtle glow. For day trips, keep nails short and neat; for parties, go bold with two holo accents.
20. Holographic Hues
Editor’s Choice
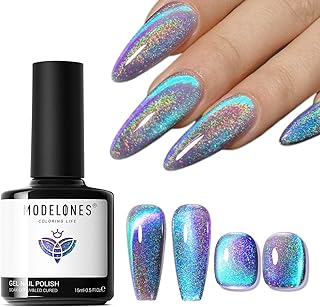
modelones 9D Magnetic Cat Eye Gel Nail Polish, 15 ML Glitter Holographic…
MelodySusie UV Nail Lamp, Plus30F UV Light, LED Dryer with 3 Timer, Smar…

5 Pcs Silicone Nail Tools Dual Tipped Nail Art Sculpture Pen Rhinestone …
Conclusion
These 20 stunning gel nail designs are just the tip of the iceberg! From floral patterns to holographic hues, there’s a world of creativity waiting for you at your fingertips.
Don’t be afraid to experiment and find what resonates with your style. Nail art is all about expressing yourself, so get ready to turn heads and inspire your friends with your fabulous new look!
Note: We aim to provide accurate product links, but some may occasionally expire or become unavailable. If this happens, please search directly on Amazon for the product or a suitable alternative.
This post contains Amazon affiliate links, meaning I may earn a small commission if you purchase through my links, at no extra cost to you.
Frequently Asked Questions
What are the best gel nail designs for beginners?
If you’re just starting with gel nail designs, consider simple styles like Ombre Dreams or Minimalist Chic. These designs are not only trendy but also easy to achieve, allowing you to build your confidence in nail art.
You can also experiment with Classic French Twist by swapping traditional white tips for soft colors or playful patterns. Remember, practice makes perfect!
How do I choose the right gel nail design for my mood?
Choosing the right gel nail design can be a fun way to express your mood! For a vibrant, energetic feel, go for Neon Nights or Tropical Vibes to reflect your sunny disposition. If you’re feeling calm, Pastel Palette or Floral Fantasy can bring a gentle touch to your look.
Think about the colors and styles that resonate with how you feel, and don’t hesitate to mix and match designs!
How long does a gel nail design typically last?
One of the best aspects of gel nail designs is their durability! A well-applied gel manicure can last anywhere from two to three weeks without chipping. However, factors like lifestyle, nail health, and maintenance can affect longevity.
To extend the life of your nails, avoid harsh chemicals and always wear gloves when doing chores. If you’re looking for a long-lasting design, opt for classic styles like Marble Magic or Textured Tips.
Can I do gel nail designs at home, or should I go to a salon?
You absolutely can do gel nail designs at home if you have the right tools and a little practice! Consider starting with simple designs like Glitter Galore or Color Blocking that don’t require intricate techniques. Be sure to invest in a good quality UV or LED lamp for curing the gel.
However, if you’re aiming for more complex styles or want a professional finish, visiting a salon can be a great choice. Nail technicians can create stunning designs that might be difficult to replicate at home.
What are some trendy colors for gel nail designs this season?
This season, bold and vibrant colors are all the rage! Think bright hues like turquoise and coral for that Tropical Vibes look or deep shades for Marble Magic. Pastels are also trendy, especially for spring; soft pinks and blues can give a fresh touch to your nails.
Don’t forget to explore holographic hues for a unique twist! Mixing colors and textures can keep your nail art exciting and fresh.
Related Topics
gel nail designs
nail art trends
floral nails
geometric nail art
ombre nails
neon colors
easy nail designs
seasonal nail art
minimalist nails
glitter nails
custom nail designs
holiday nail art


")


These gel nail designs are absolutely gorgeous! I can already imagine my friends asking where I got my nails done. What’s your favorite design from the list?
I tried a similar glitter design last year, but I ended up looking like a disco ball! 😂 Any tips on how to avoid that next time?
Did you know that gel nails can last up to three weeks without chipping? I was shocked when I found that out! It’s like magic for your fingertips!