
Romantic nail designs can brighten your day and add a touch of elegance to any outfit. As we head into seasons filled with love and celebration, you may find yourself craving some fresh nail art ideas. That’s exactly why I created this post. I wanted to gather a collection of easy romantic nail designs that beginners can try at home, even if you’ve never picked up a nail brush before.
If you’re someone who loves fashion and is eager to show off your creativity, this post is tailored just for you. Whether you have a date night planned or simply want to impress your friends, these designs will leave them in awe. With 20 easy designs on the list, you’re bound to find something that speaks to your romantic side while being beginner-friendly and fun to create.
Get ready to dive into a world of nail art that’s playful, stylish, and simple to achieve. From sweet gradients to charming floral patterns, you’ll discover designs that not only look great but also allow you to express your personality. Let’s explore how you can transform your nails into a stunning canvas that will wow everyone around you!
Key Takeaways
– You’ll find 20 romantic nail designs that are perfect for beginners and easy to replicate at home.
– Each design is curated to be beginner-friendly, ensuring that even those with little experience can feel confident while trying them.
– The list includes a variety of styles, from floral patterns to minimalist chic looks, catering to different tastes and preferences.
– Practical tips and techniques will be provided for each design, so you can follow along easily and achieve beautiful results.
– By the end of this post, you’ll not only have new nail art ideas but also the skills to impress your friends with your creativity!
Contents
- 1. Sweetheart Gradient
- 2. Floral Dream
- 3. Heartfelt Tips
- 4. Dainty Lace
- 5. Romantic Ombre
- 6. Sparkling Love
- 7. Minimalist Chic
- 8. Sweet Pastels
- 9. Moonlit Nights
- 10. Sweet Stripes
- 11. Vintage Roses
- 12. Whimsical Clouds
- 13. Jewel Tones
- 14. Starry Nights
- 15. Golden Accents
- 16. Delicate Chains
- 17. Classic Polka Dots
- 18. Glossy Marble
- 19. Sweet Bows
- 20. Lovely Glitter French Tips
1. Sweetheart Gradient
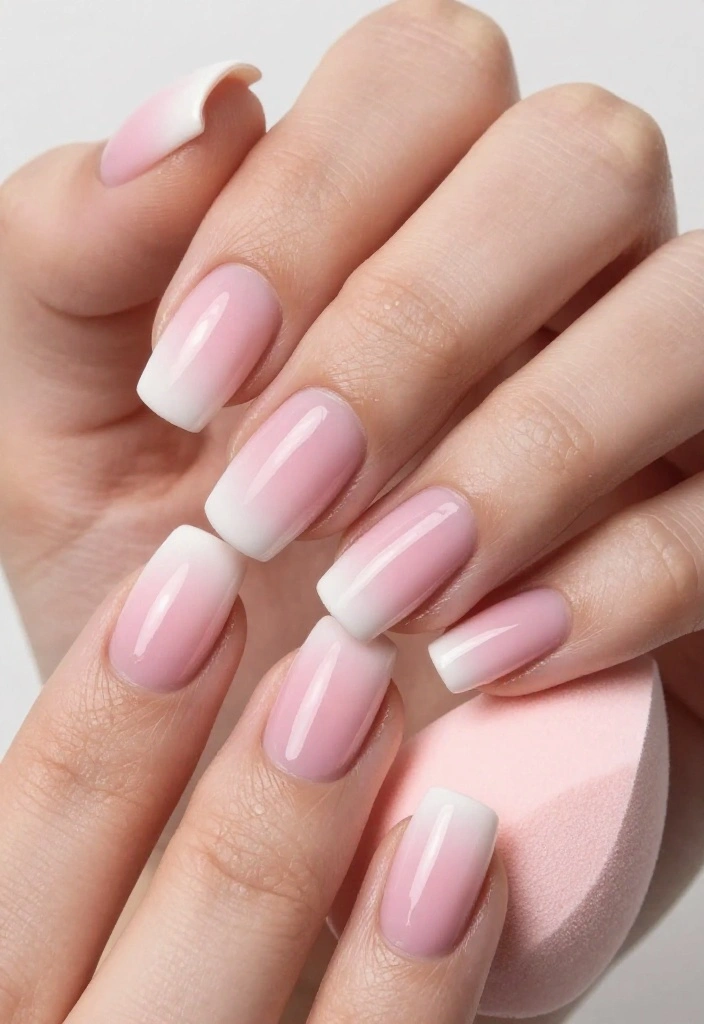
Imagine a soft gradient blending sweet pinks into creamy whites. This romantic design is simple yet striking, giving your nails a polished look that feels professional. Start with a protective base coat, then use two shades of pink alongside a nude color for that perfect ombre effect. With a makeup sponge, gently dab the lighter pink at your cuticles and the darker pink toward the tips, blending them seamlessly. Finish with a glossy topcoat to achieve that salon-fresh shine!
Make sure to work while the colors are wet to avoid streaks. This design is ideal for a romantic evening or a casual day out with friends.
1. Apply base coat.
2. Use pink shades on a makeup sponge.
3. Blend on nails.
4. Seal with topcoat.
Practice your sponging technique to master this delightful look!
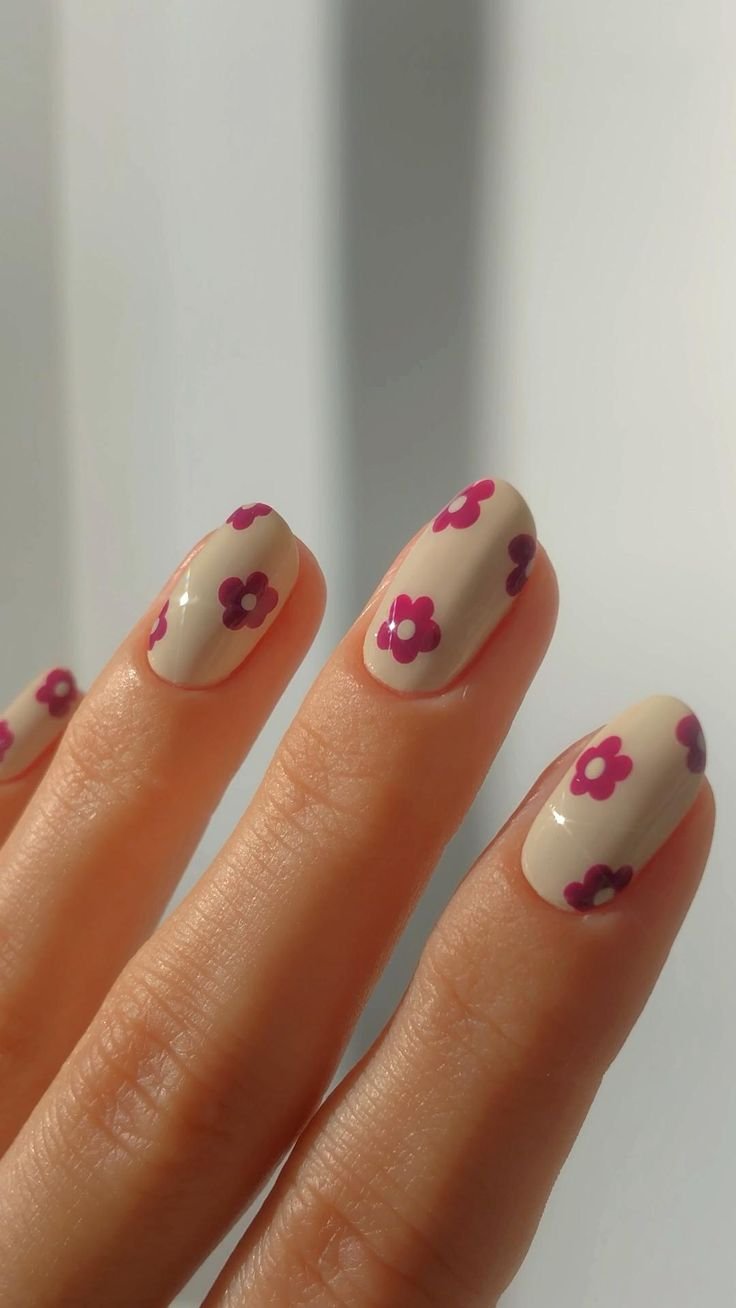
2. Floral Dream
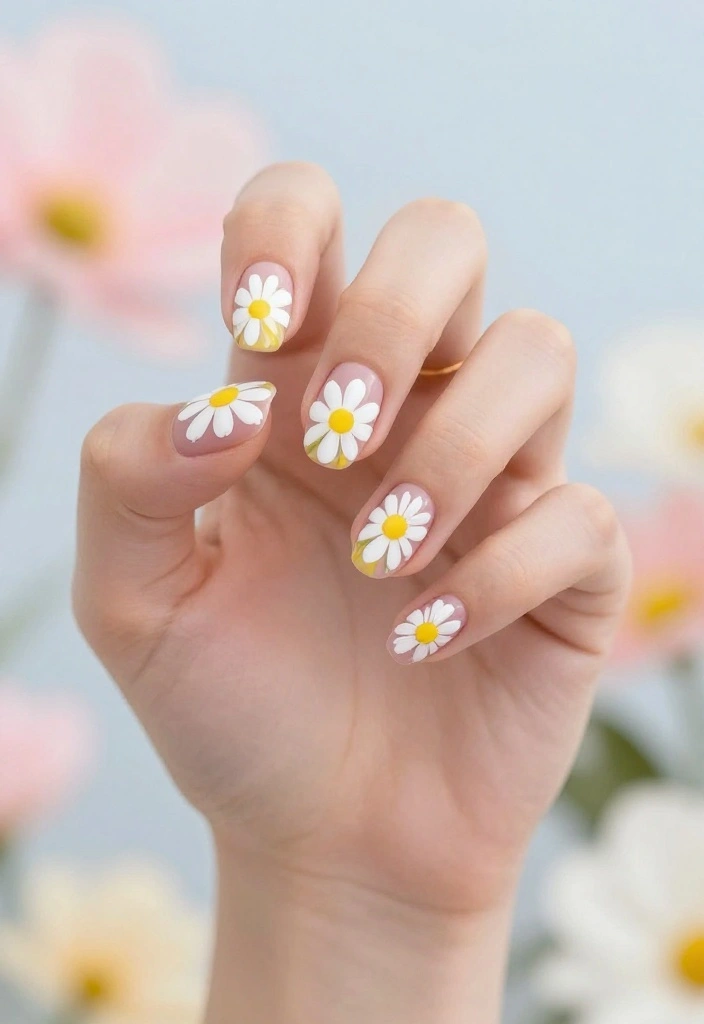
Floral patterns are timelessly romantic, perfect for those who adore a touch of nature. Start with a light base color like pale pink or soft mint green. Using a fine nail art brush, create simple flowers with white and a contrasting hue. Add a tiny yellow dot in the center of each flower for an eye-catching detail!
Don’t worry about making each flower perfect; little imperfections can add a unique charm. This design shines in the spring or summer, bringing a fresh and lively vibe to your fingertips.
1. Apply base coat.
2. Paint nails with a light color.
3. Create flowers using a brush.
4. Add details and topcoat.
Floral nail art is not just romantic; it’s also a fantastic conversation starter!
📹 Related Video: Easy Purple Flower Nails Art For Beginner 💖Vẽ Hoa💅 New Nails Design 💝 New Nails
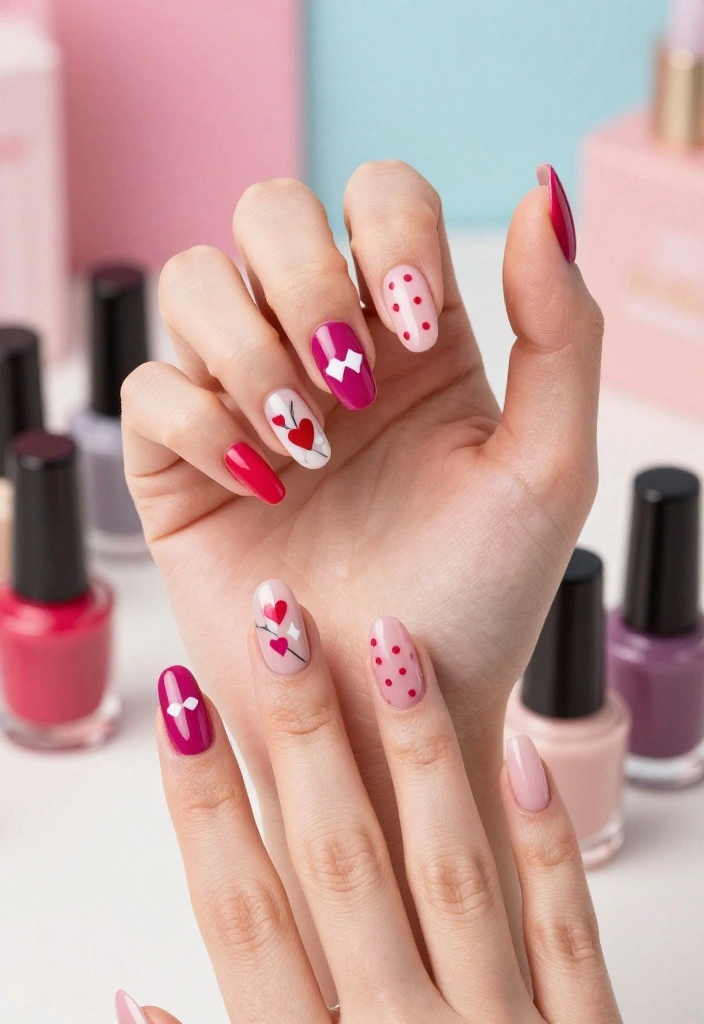
3. Heartfelt Tips
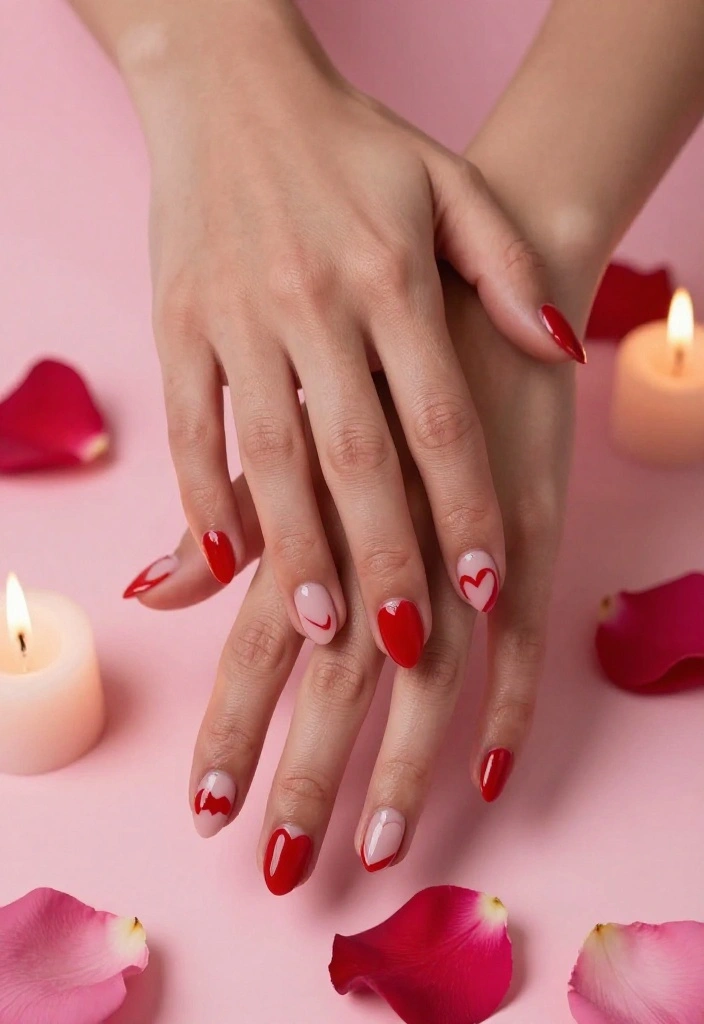
Express your affection with adorable heart designs! Start with a base coat of nude or gentle pink. Using a dotting tool or toothpick, create tiny hearts on your ring finger or across all nails for an endearing twist. Play with colors like red and gold to bring out a chic vibe.
Arrange the hearts in fun patterns, like vertically or diagonally, for a playful touch.
1. Apply base coat.
2. Paint nails with a base color.
3. Use a dotting tool to create hearts.
4. Seal with topcoat.
This design is especially perfect for Valentine’s Day or any romantic occasion!
4. Dainty Lace
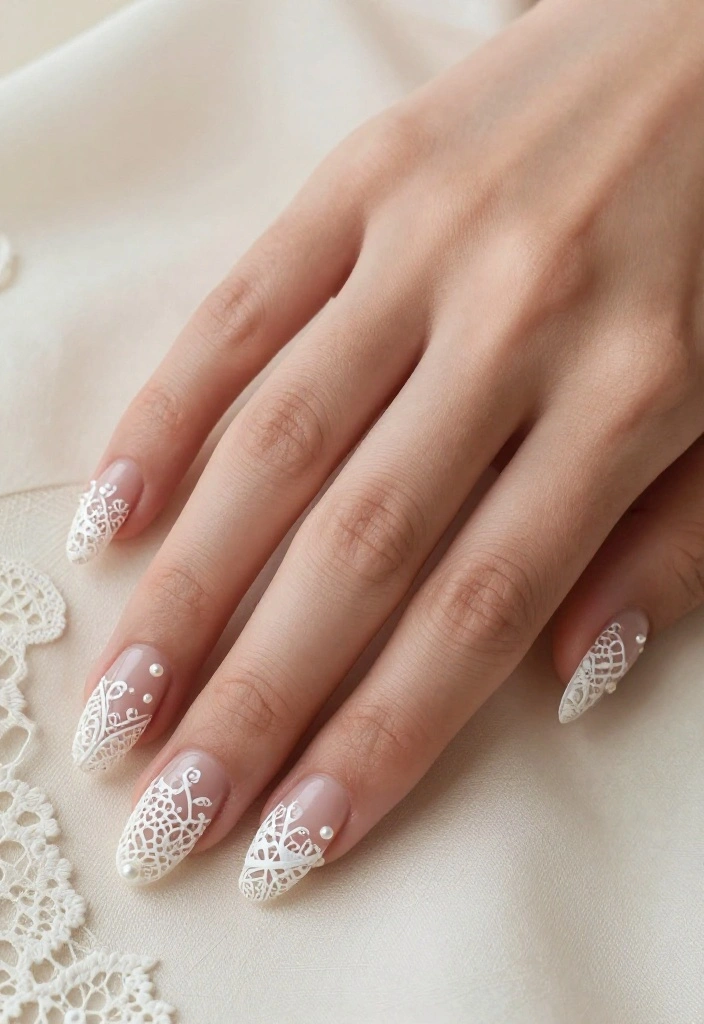
Capture the elegance of lace with this charming nail art. Start with a white or soft cream base, then use a fine brush to paint delicate lace patterns on top. For an extra touch of glam, consider adding tiny pearls or gems. This design is sophisticated yet surprisingly easy to master.
Begin with basic lines and gradually build your design as you gain confidence.
1. Apply base coat.
2. Paint nails with a light base color.
3. Use a fine brush to create lace patterns.
4. Add pearls and topcoat.
This design is perfect for formal events or a classy night out!
5. Romantic Ombre
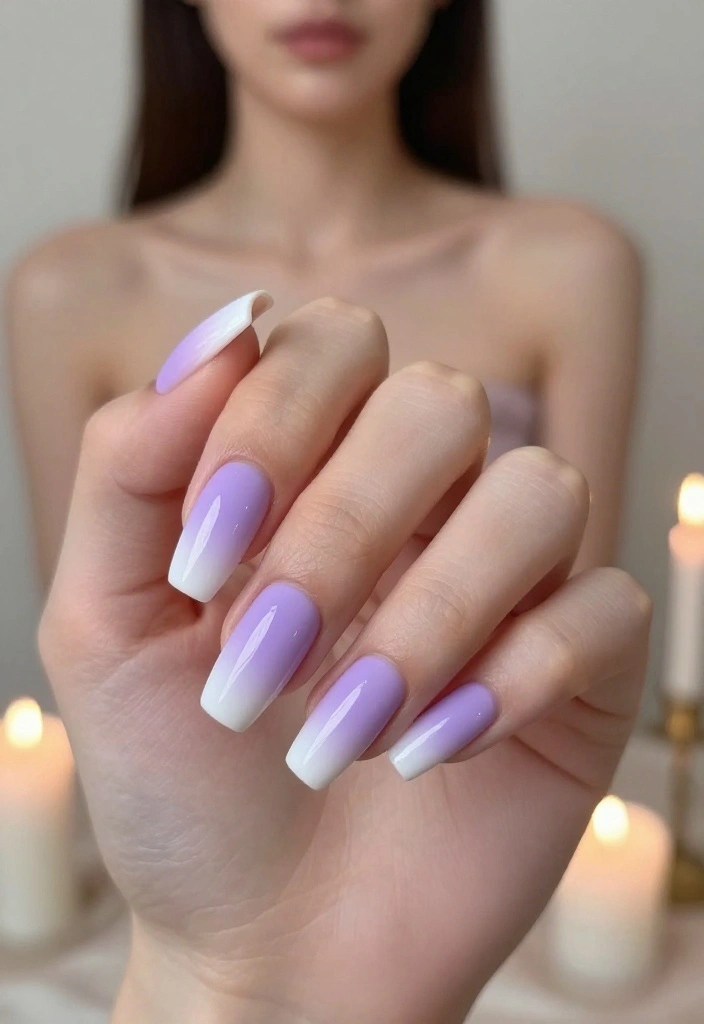
Ombre designs are visually stunning and simple to achieve with just a couple of colors. Select two shades that complement each other, like lavender and white. Begin with a base coat, then blend the colors using a makeup sponge for a seamless transition. Don’t forget a glossy topcoat to finish off your look!
1. Apply a base coat.
2. Paint nails with the lighter shade.
3. Use a sponge to blend the darker shade.
4. Seal with topcoat.
This elegant look is ideal for weddings or romantic evenings out, adding a touch of sophistication to your style!
How To Choose Romantic Nail Designs
Choosing the perfect romantic nail design can feel overwhelming, especially for beginners. With so many styles and techniques out there, how do you decide which one to try? Here’s a straightforward guide to help you make the best choice for your nails.
1. Nail Shape
Your nail shape can greatly impact the overall look of your design. Common shapes include square, oval, almond, and stiletto. Consider how each shape complements different romantic designs. For example, stiletto nails work well with intricate patterns, while square nails are great for minimalistic styles. Know your shape before you choose a design!
2. Color Palette
Colors set the mood for your romantic nail art. Soft pastels like pinks and lilacs often evoke a gentle, romantic vibe. Darker shades such as burgundy or deep red can create a bold, passionate look. Think about the occasion when choosing colors. A date night might call for deeper hues, while a spring wedding could suit lighter tones better.
3. Design Complexity
For beginners, it’s vital to assess your skill level. Some designs, like simple hearts or polka dots, are easy and quick to create. More intricate designs, like floral patterns or lace, require more patience and practice. Start with something you feel comfortable with, then gradually try more complex designs as your skills improve.
4. Nail Art Supplies
Before diving into nail art, ensure you have the right supplies. Basic essentials include a base coat, top coat, nail polish in your desired colors, and tools like dotting pens and brushes. Investing in quality nail art supplies will make your designs look professional and last longer. Make a checklist of what you need, so you won’t miss any important items!
5. Occasion
Consider where and when you’ll show off your nails. Are you preparing for a romantic dinner, a wedding, or just a casual outing? Tailor your design to fit the event. For example, glittery accents are perfect for festive occasions, while elegant nude shades may be best for everyday wear. Match your nail art with the vibe of the occasion.
6. Trends
Stay updated with current nail art trends. Social media platforms like Instagram and Pinterest are fantastic resources for inspiration. Trends can range from color schemes to specific designs, like ombre or negative space. While it’s essential to choose a style you love, incorporating trendy elements can make your nails feel fresh and modern.
Pro Tip: Don’t be afraid to mix and match! You can combine different colors and designs to create something uniquely yours. If you love a minimalist look but want to add a touch of romance, consider using a nude base with delicate hearts or flowers. This blend can give your nails a personal touch while keeping them beginner-friendly.
By keeping these points in mind, you can select the perfect romantic nail design that not only fits your style but also wows your friends. Remember that practice makes perfect, so give yourself time to experiment and enjoy the process!
6. Sparkling Love
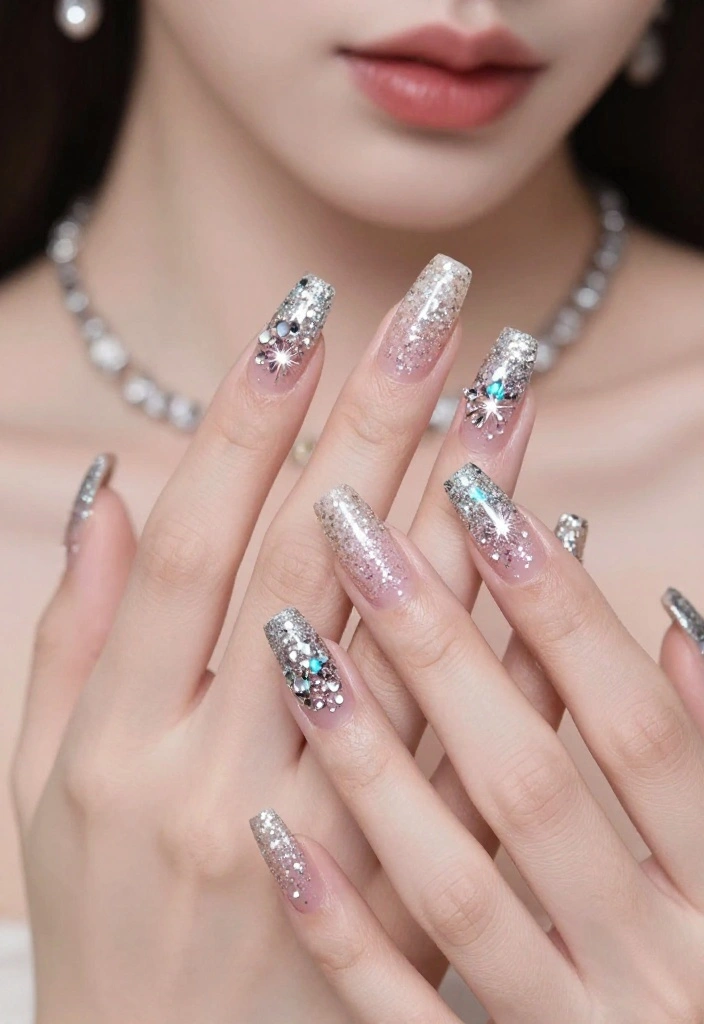
Add a touch of sparkle to your nails with glitter! Start with a light base color and focus the glitter on the tips for a dazzling gradient effect. Mixing different sizes of glitter can create added texture and interest. This design is easy, fun, and guaranteed to catch everyone’s eye.
1. Apply base coat.
2. Paint nails with a light color.
3. Apply glitter to tips using a brush.
4. Seal with topcoat.
This sparkling design is perfect for parties or any time you want to feel fabulous!
7. Minimalist Chic
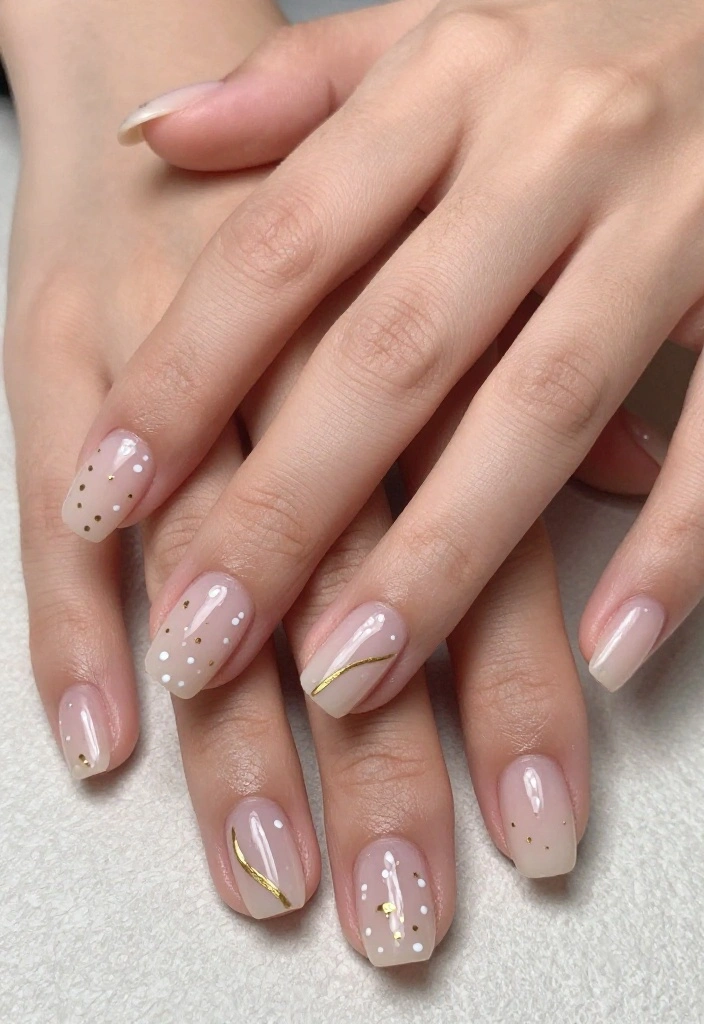
For a more subtle approach, minimalist designs can offer a romantic touch. Begin with a clear or nude base and add tiny dots or lines in white or gold for a sleek effect. This style is perfect for work or casual outings, providing elegance without being overwhelming.
1. Apply a base coat.
2. Choose a nude or clear polish.
3. Use a dotting tool for small designs.
4. Seal with topcoat.
Minimalist nail art is versatile and pairs beautifully with any outfit, making it a favorite among beginners!
8. Sweet Pastels
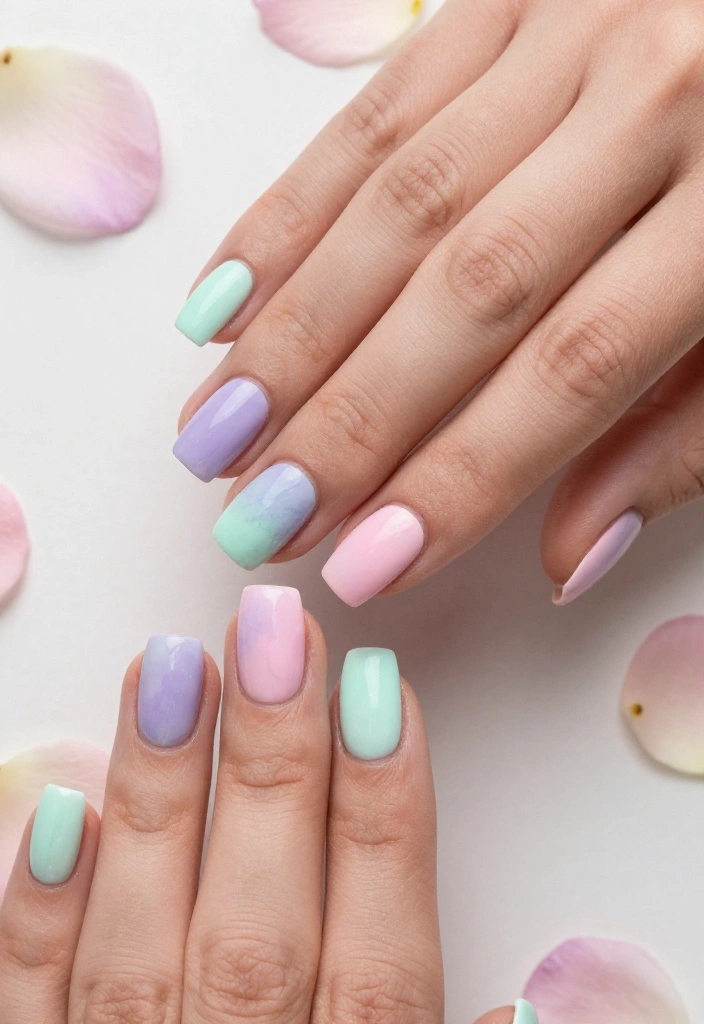
Pastel shades embody romance! Select soft colors like mint, lavender, and baby pink. You can paint each nail a different color or create a soft watercolor effect by blending the colors together. This design is cheerful and perfect for the spring season!
1. Apply a base coat.
2. Carefully layer each pastel color.
3. Blend edges for a watercolor look.
4. Finish with topcoat.
This playful design will surely bring smiles and compliments your way!
You might also like

9. Moonlit Nights
Create a mesmerizing night sky effect with deep blues and black, featuring moon and star accents. Start with a dark base and use a thin brush to add little stars and crescent shapes. This design is intriguing and perfect for adding a touch of mystery to your look.
1. Apply a dark base coat.
2. Use a brush for moon and star designs.
3. Choose a matte or glossy finish.
This design is a wonderful way to express your unique style and can be your secret romantic vibe!
10. Sweet Stripes
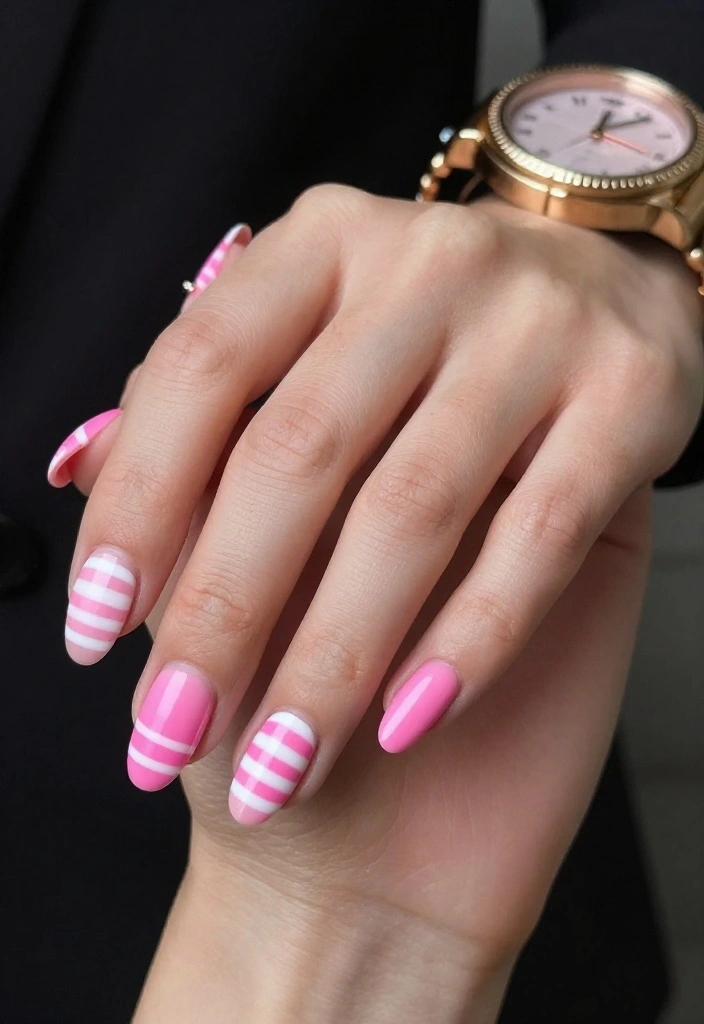
Stripes are simple yet chic! Choose two contrasting colors, like pink and white, and use striping tape or a brush to create parallel lines. This design is straightforward and adds a modern twist to romantic nails.
1. Apply a base coat.
2. Use striping tape or freehand lines.
3. Alternate colors for a fun look.
4. Seal with topcoat.
Perfect for any occasion, striped nails are both playful and elegant!
11. Vintage Roses
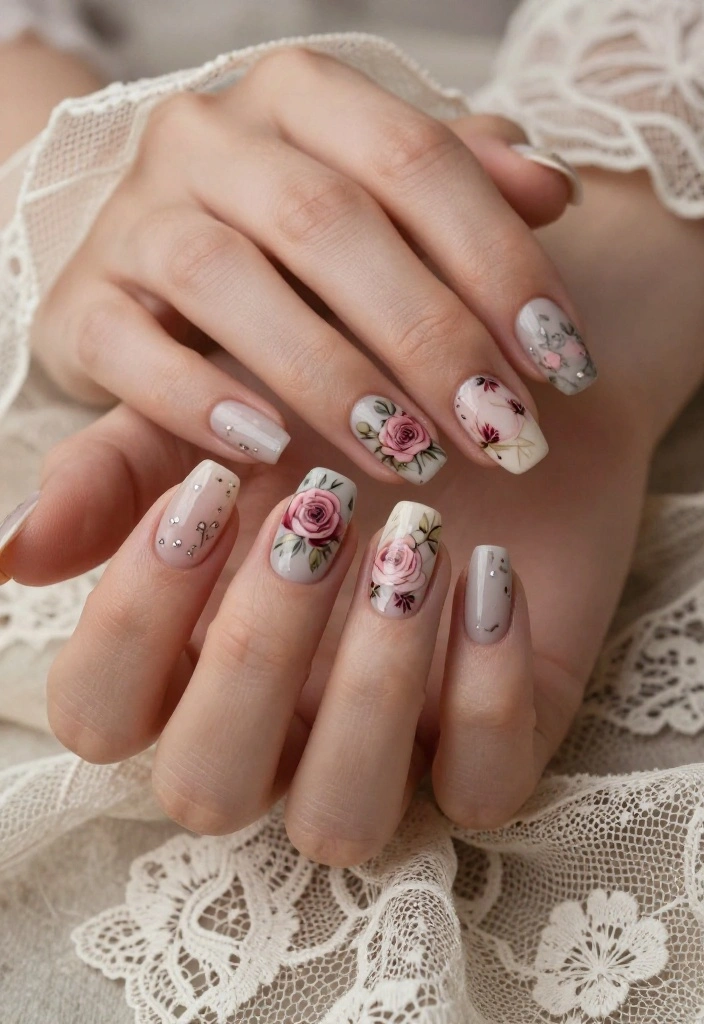
Bring vintage glam to your nails with charming rose designs. Start with a soft background color, then use a fine brush to delicately paint tiny roses. Opt for muted colors to achieve that classic vintage feel. This design instantly elevates your nail game and is ideal for romantic evenings.
1. Apply base coat.
2. Paint nails with a soft shade.
3. Create rose designs with a brush.
4. Finish with a topcoat.
Vintage roses add a timeless charm, making them a romantic favorite!
12. Whimsical Clouds
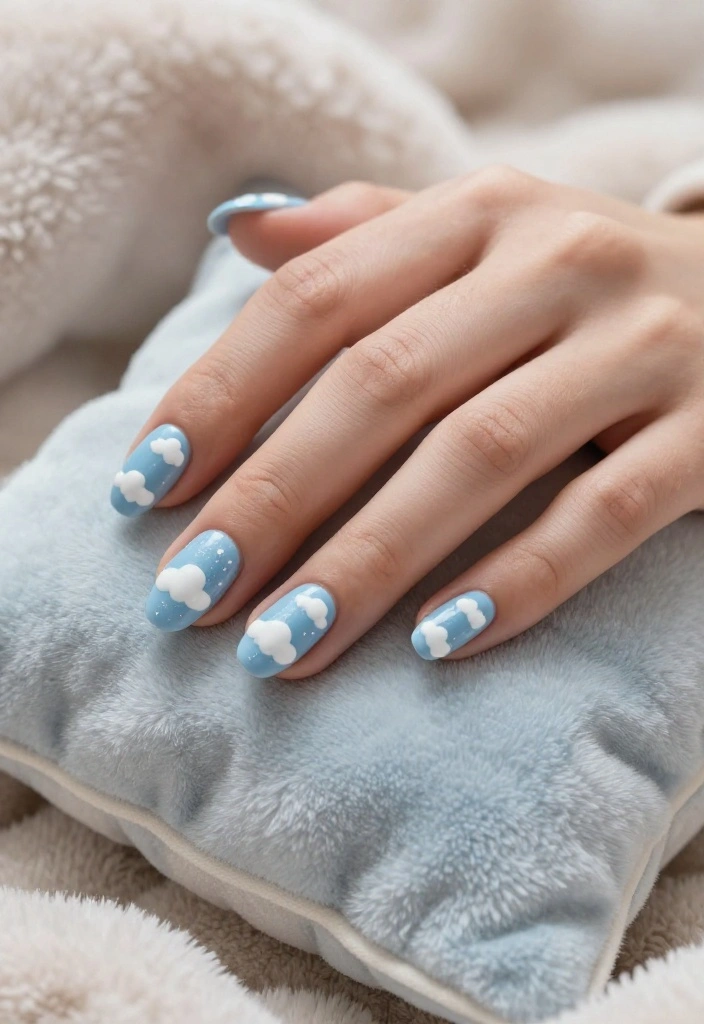
Create adorable cloud designs that radiate cuteness! Start with a light blue base and use white polish to form fluffy clouds. Add a sprinkle of glitter for a dreamy touch! This design captures the essence of love and is perfect for those who cherish creativity.
1. Apply base coat.
2. Paint nails with light blue color.
3. Use a brush to create cloud shapes.
4. Add glitter and topcoat.
These whimsical nails are sure to bring a smile to your face!
Clouds on your nails aren’t just cute—they spark creativity and wrap you in romance. Start with a light blue base, dab white to form fluffy clouds, then seal with glitter for a dreamy finish—perfect for romantic nails you’ll share with friends.
13. Jewel Tones
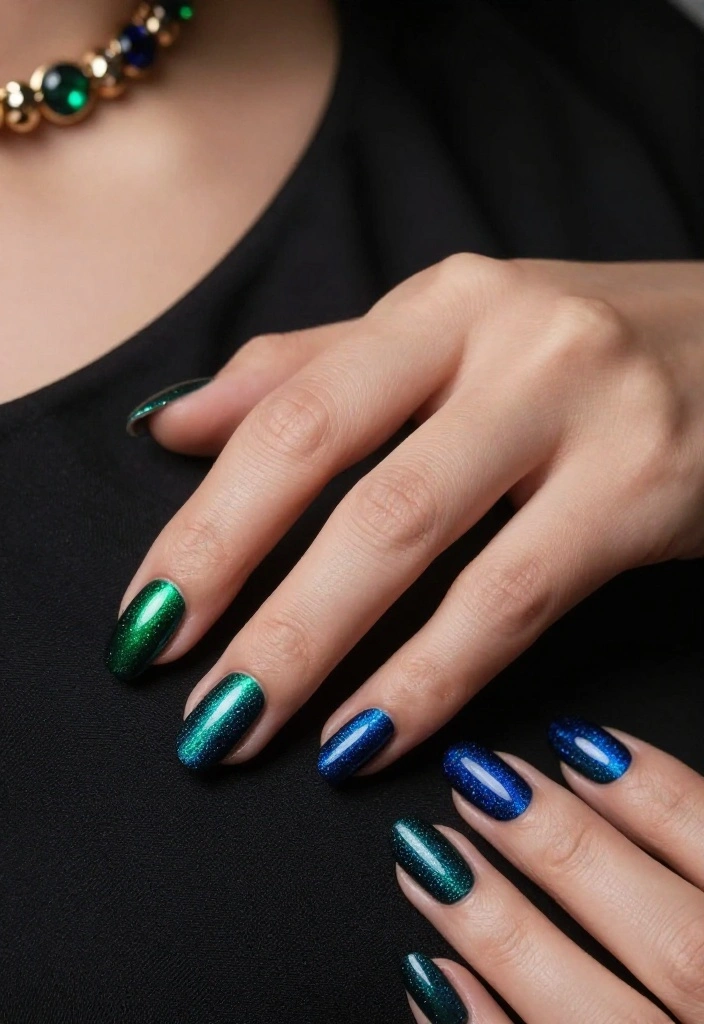
Rich jewel tones like emerald and sapphire add an air of elegance to your nails. Paint each nail a different jewel color and finish with a glossy coat for a luxurious appearance. This design is eye-catching and perfect for special occasions.
1. Apply base coat.
2. Use jewel-toned polishes.
3. Paint each nail a different color.
4. Finish with topcoat.
These classy nails reflect style and sophistication, making them great for parties or date nights!
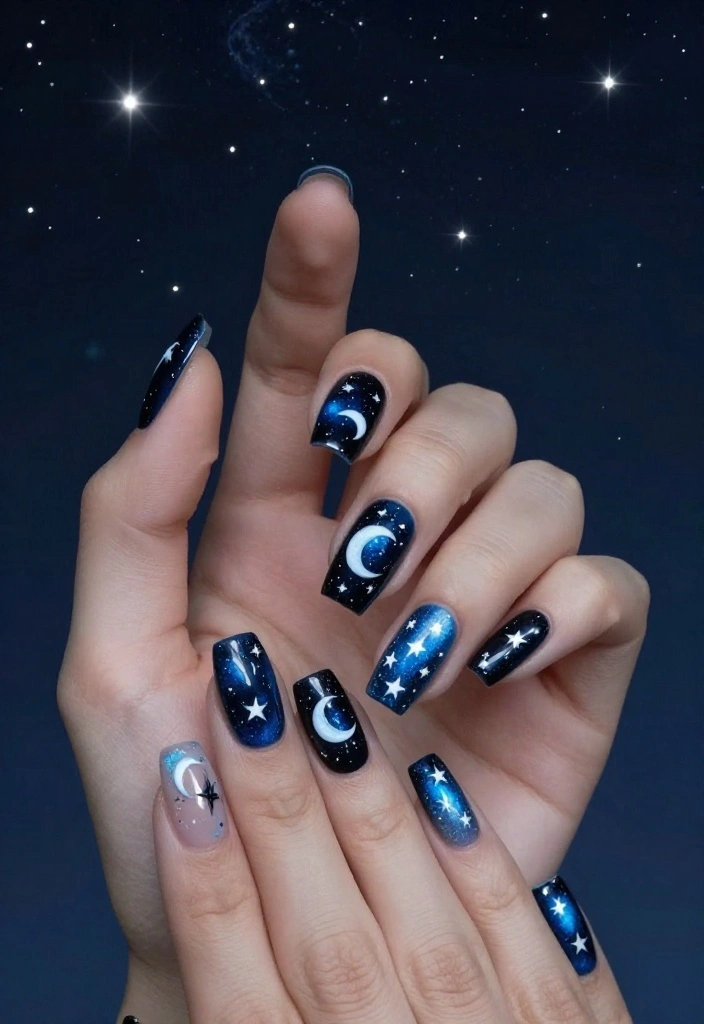
14. Starry Nights
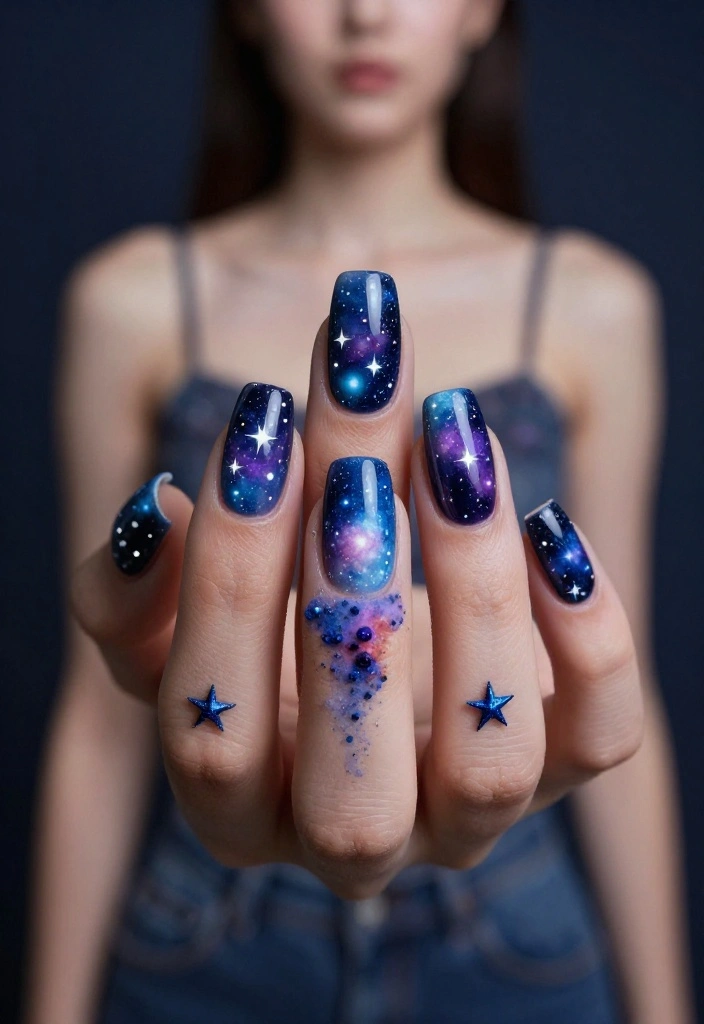
Channel the beauty of the night sky with stunning galaxy designs in dark blues and purples. Swirl the colors together with a sponge for a captivating galaxy effect, then use a dotting tool to add stars! This design is a showstopper, perfect for stargazers.
1. Apply dark base coat.
2. Blend dark blues and purples with a sponge.
3. Use a dotting tool to create stars.
4. Seal with topcoat.
These nails will captivate and inspire dreams, making them perfect for romantic night skies!
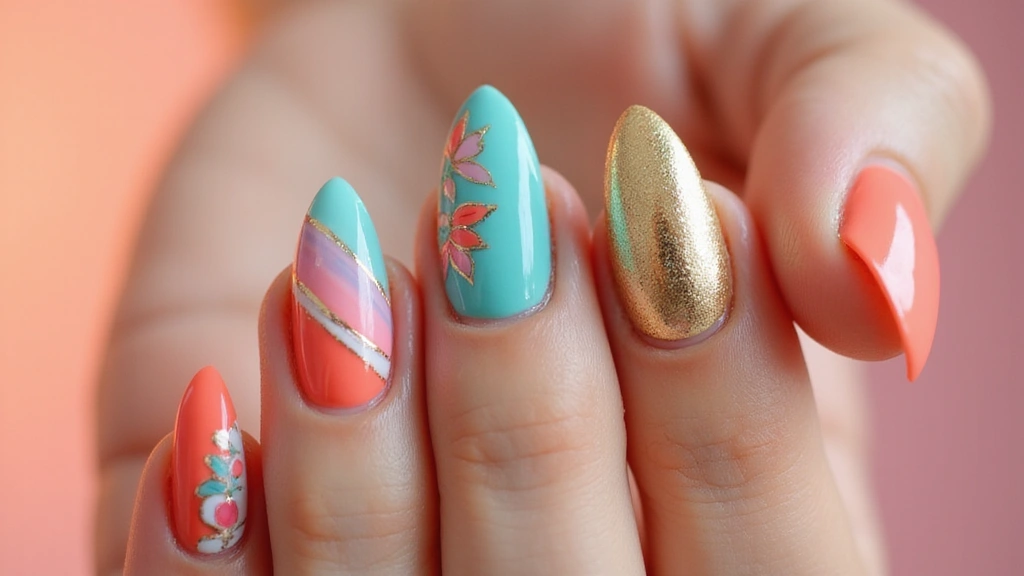
15. Golden Accents
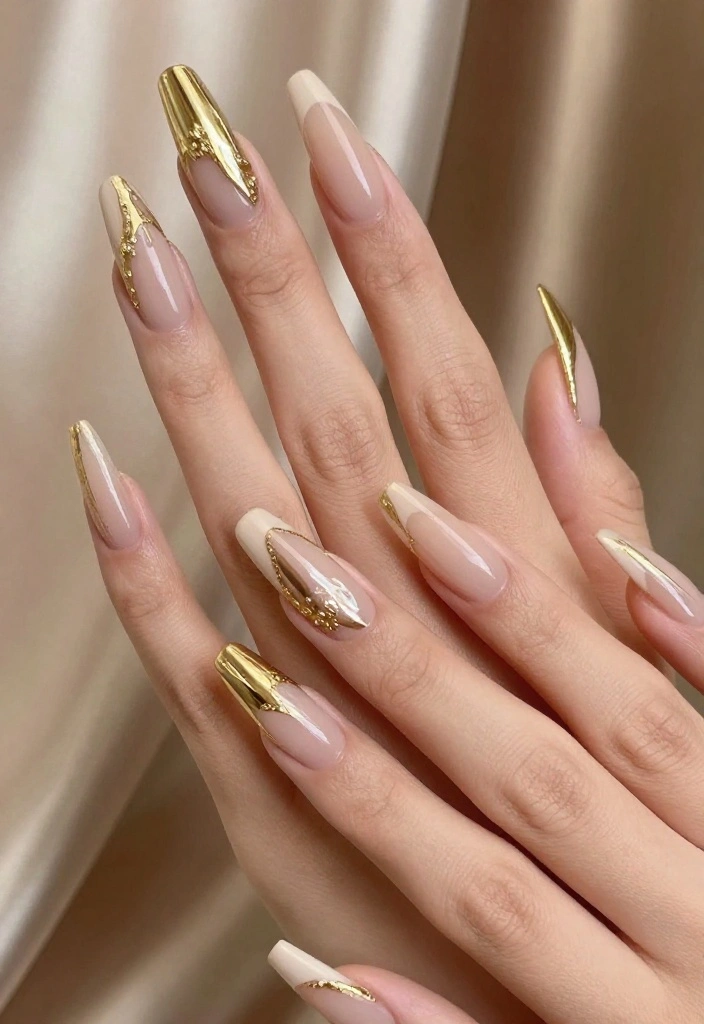
Incorporating gold accents can elevate any nail design in an instant. Start with a nude base and use gold foil or polish to create stunning patterns or lines. This design is simple yet exudes luxury, perfect for any romantic occasion.
1. Apply base coat.
2. Paint nails with nude polish.
3. Add gold accents using foil or polish.
4. Seal with topcoat.
Golden accents add that touch of glamour and sophistication that everyone adores!
You Might Also Like
16. Delicate Chains
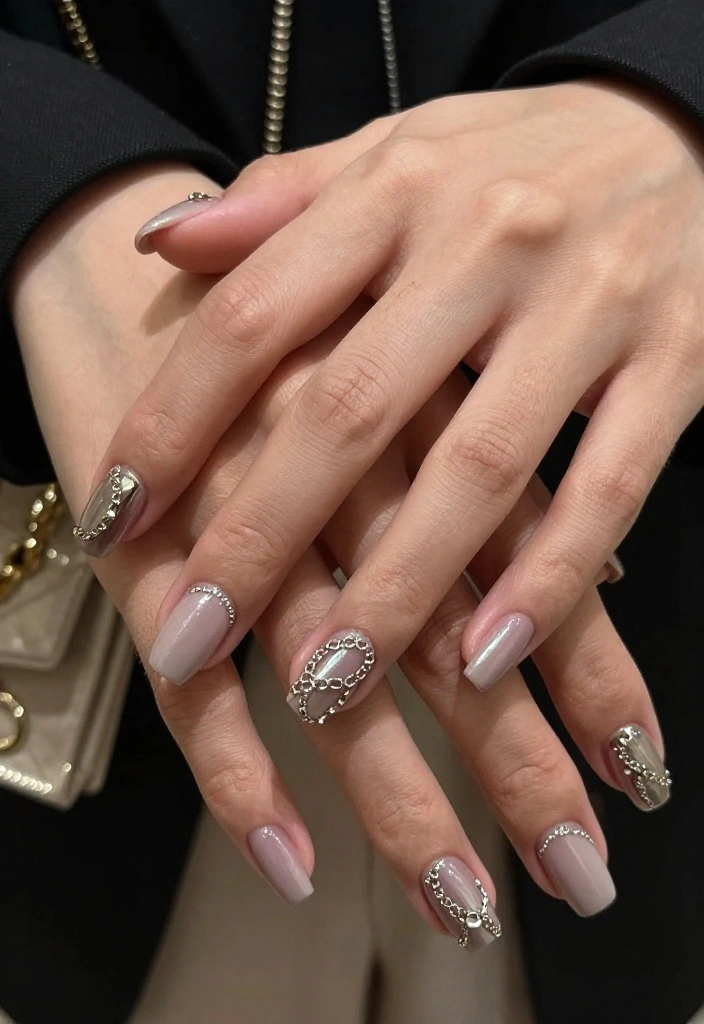
Chain designs add a unique twist to romantic nails. Start with a solid base color and use a fine brush to create small chain links across your nails. This design beautifully combines simplicity with chic elegance, offering an eye-catching look!
1. Apply base coat.
2. Paint nails with a solid color.
3. Use a fine brush to create chain designs.
4. Finish with topcoat.
This design is perfect for making a statement while keeping it romantic!
17. Classic Polka Dots

Polka dots are timeless! Start with a bright base color like cherry red or turquoise, then add contrasting white polka dots using a dotting tool. This fun design radiates joy and can be easily created for a playful look.
1. Apply base coat.
2. Paint nails with a bright color.
3. Use a dotting tool for dots.
4. Seal with topcoat.
Perfect for casual outings, polka dots bring a cheerful vibe to your nails!
18. Glossy Marble
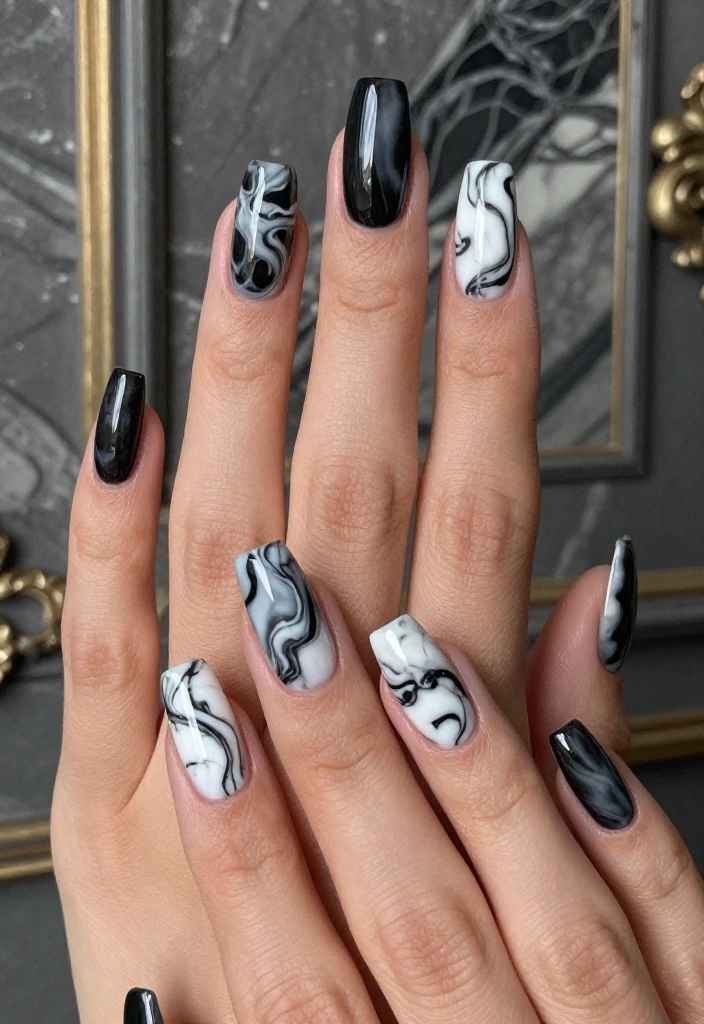
Achieve an elegant marble effect using white, black, and gray. This design looks intricate but is actually quite straightforward! Swirl the colors together and finish with a topcoat for a polished appearance.
1. Apply a base coat.
2. Use a brush to swirl colors together.
3. Let it dry and add topcoat.
Marble nails are classy and versatile, suitable for any occasion!
Romantic nails don’t have to be complicated. With a simple base coat and a quick swirl of white, black, and gray, you’ll nail a glossy marble look that’s chic, beginner-friendly, and perfect for any occasion.
19. Sweet Bows
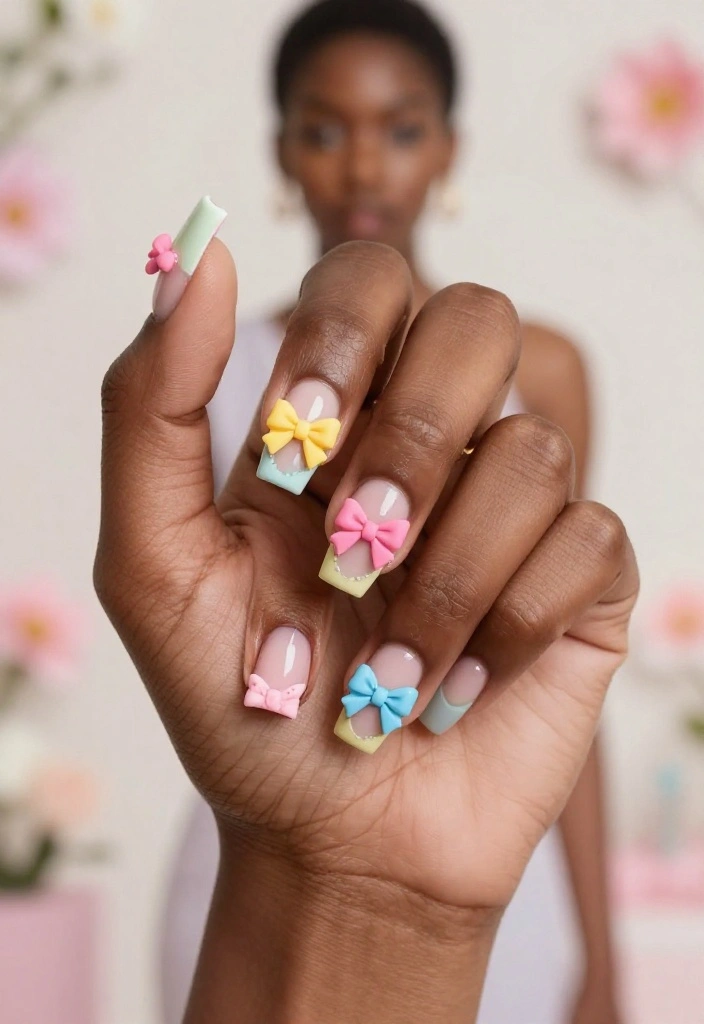
Add a cute flair with tiny bows! Start with a base color of your choice and use a fine brush or stickers to create adorable bows on your nails. This design is charming and perfect for adding a feminine touch to your overall look.
1. Apply base coat.
2. Paint nails with a solid color.
3. Create bow designs using a brush or stickers.
4. Seal with topcoat.
These sweet bows are delightful and bring a flirtatious feel to any outfit!
Sweet bows make Romantic Nails feel effortless—like a tiny piece of chic you can wear. Start with a base color, then add delicate bows with a fine brush or stickers, and seal with topcoat for long-lasting charm.
20. Lovely Glitter French Tips
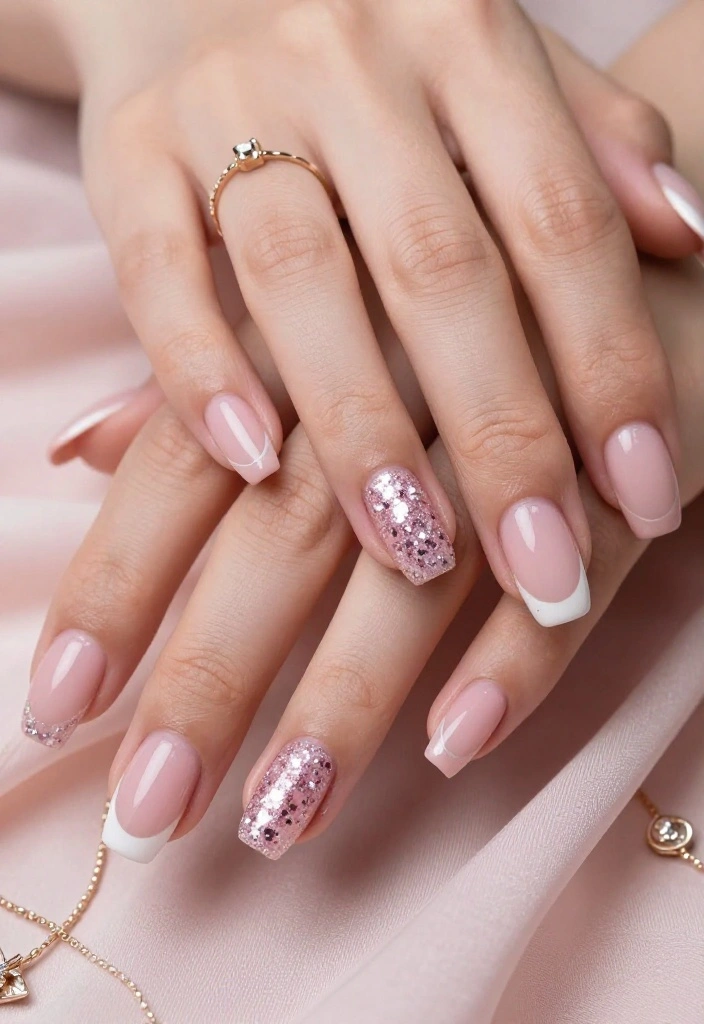
Put a romantic twist on the classic French tip with glitter! Start with a light pink base and add glitter to the tips for a stunning finish. This design is perfect for special occasions or whenever you want to feel extra fabulous!
1. Apply a base coat.
2. Paint nails with light pink polish.
3. Apply glitter to tips.
4. Finish with topcoat.
These lovely glitter tips modernize a traditional look, making it fresh and fun!
Conclusion
With these 20 easy romantic nail designs, you’re all set to impress your friends and add a touch of love to your everyday style! From playful hearts to elegant ombres, there’s a design for every mood and occasion.
Don’t be afraid to experiment and make these designs your own. Remember, nail art is all about creativity and fun! What will you try first?
Frequently Asked Questions
What makes Romantic Nails a great choice for beginners?
Romantic Nails are a great choice for beginners because they rely on soft colors and simple accents rather than intricate artwork.
Start with a clean base, pick a romantic shade like nude, pink, or mauve, apply two thin coats, then add a delicate accent such as a single dot or a fine stripe. Finish with a top coat to seal it in. These steps keep things beginner-friendly and highlight easy designs that still wow your friends.
Which design in the list is the easiest to recreate for beginners, and what basic steps should I follow?
While all 20 designs are beginner-friendly, many readers find design #6 the easiest to recreate. If your article spotlights #6, it’s designed to be beginner-friendly and emphasizes easy designs with minimal steps.
Simple steps: 1) Apply base coat and let it dry. 2) Paint with a soft romantic shade in two thin coats. 3) Use a dotting tool or toothpick to add one tiny heart or dot as the accent. 4) Seal with a top coat. This approach helps you master Romantic Nails quickly.
How can I customize Romantic Nails for different occasions?
You can tailor Romantic Nails for any event by changing color, finish, and a small accent. For date night, try a satin or pearl finish with a metallic touch on one nail.
For a wedding or formal event, stay with a soft nude or blush pink and add a tiny shimmer or delicate line for elegance.
For everyday or a girls’ night, go matte and keep it simple with a single heart or stripe on an accent nail. All of these options stay beginner-friendly and maintain the romantic vibe.
What tools and products do I need to create beginner-friendly Romantic Nails?
Here’s a basic starter kit: base coat, top coat, two romantic shades, a dotting tool or toothpick, nail tape or a fine brush for lines, remover, cotton pads, and cuticle oil. Start with one accent nail to keep things simple and beginner-friendly.
How can I make Romantic Nails last longer and avoid chipping?
To make your Romantic Nails last longer, start with clean, prepped nails: push back cuticles, file smooth, and wipe away oils. Use a ridge-filling base coat, apply two thin coats of your shade, and cap the free edge. Finish with a durable top coat and re-apply every 2–3 days. Wear gloves for chores that chip polish to protect your manicure.
Related Topics
romantic nails
easy designs
nail art beginners
beginner friendly
quick nail tips
trendy nail styles
DIY nail designs
simple techniques
seasonal nail art
chic nail art
nail art ideas
wow factor nails


")
I love these nail designs! They look so fun and easy to try. Have you ever had a nail design go hilariously wrong at a party?
These designs are adorable! I once tried to paint hearts on my nails, but they ended up looking like blobs. At least I had a good laugh! What’s your favorite design from the list?
Did you know that the average person spends about 4 years of their life getting ready? With these cute nail designs, those years will be much more enjoyable!