
Why I made this post. Winter has me craving nails that look polished and calm. I want looks that stay classy from morning meetings to evening plans. I searched for designs that hold up through cold days and busy schedules. So I pulled together 20 classy winter nail art designs that fit the season.
Who it’s for. If you love a clean, chic vibe and want nails that work for work, for home, and for small parties, this is for you. This is for people who want low maintenance nails that still stand out. It is for nail art lovers who prefer subtle sparkle, smooth lines, and timeless colors. Whether you are a beginner or you dabble in tiny details, you will find something you can copy.
What you’ll get. A set of 20 winter designs you can recreate at home. The ideas range from glossy deep reds to frosty neutrals and bold blues. Some use foil, some use delicate stripes, some use tiny crystals. I include color suggestions, finishes, and easy steps so you can try them this week. You will learn how to mix textures without going overboard.
From a deep burgundy with a velvet look to an icy blue with crisp white lines, these ideas feel warm and sharp. One design pairs a dark base with a slim silver stripe for a modern touch. Another uses taupe with a tiny crystal accent for subtle sparkle. A fourth option layers matte black with delicate foil for a night-out vibe. You should know these are all doable with common tools.
How to try them. Start with clean nails and a good base coat. Pick a base color and apply two coats for depth. Use tape or a fine brush to draw lines or shapes. Add accents like foil, rhinestones, or small dots. Finish with a top coat to seal and add shine. If you use gel polish, cure under a lamp as directed. If you use regular polish, let each layer dry fully before moving on.
Next steps are simple. Pick one design that fits your vibe this week. Gather a few supplies now so you can test one on a weekend. Try to match your outfit or mood. If you go for it, share a photo and tag me so I can see your take on these classy winter nails.
Contents
- 1. Snowy Tips
- 2. Frosted Ombre
- 3. Nordic Knits
- 4. Glittering Snowflakes
- 5. Elegant Metallics
- 6. Classy Plaid
- 7. Jewel Tones
- 8. Cozy Textures
- 9. Festive Red and Gold
- 10. Subtle Matte
- 11. Jewel Accents
- 12. Whimsical Winter Wonderland
- 13. Negative Space Elegance
- 14. Winter Floral
- 15. Icy Glitter Geode
- 16. Frosted Pastels
- 17. Ice Crystal Charm
- 18. Classy Black and White
- 19. Shimmering Gradient
- 20. Stylish Stripes
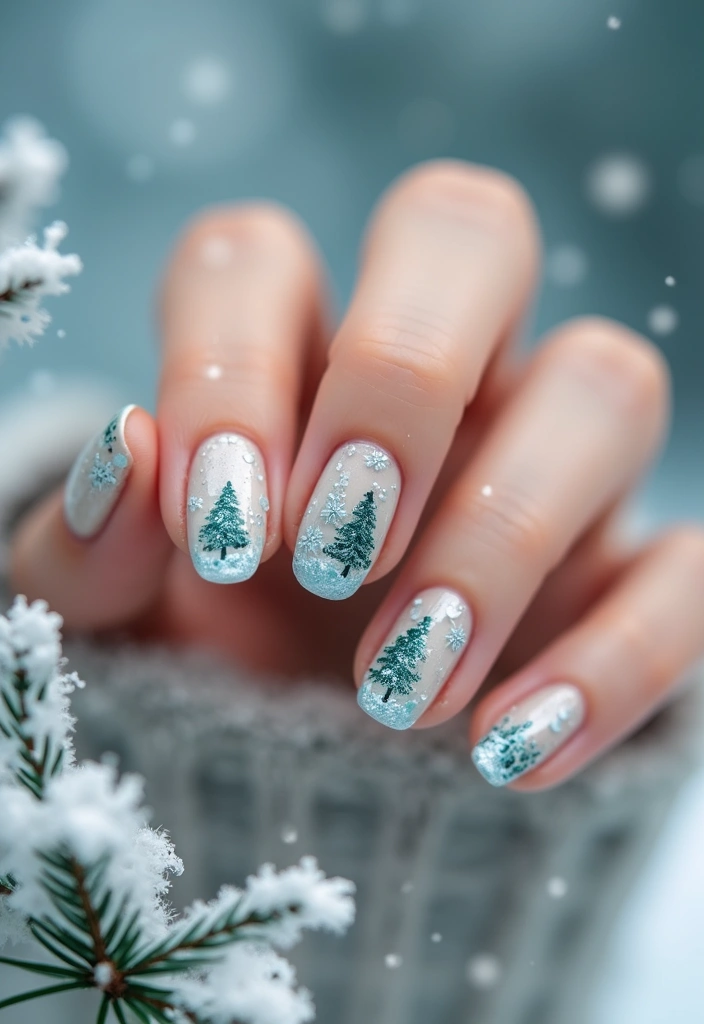
1. Snowy Tips
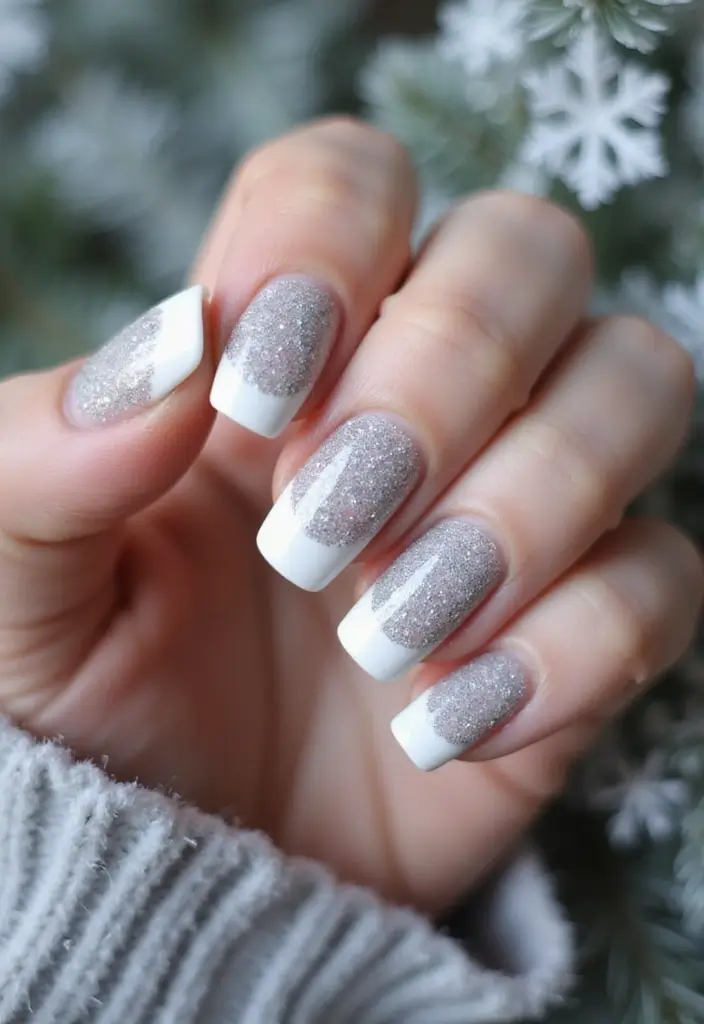
You want a winter nail design that looks classy but is easy to do. Snowy Tips give you a refined French look with white tips that sparkle like fresh snow.
Start with a soft base color. Nude or blush is a great choice. Paint smoothly and let it dry. Use a white polish or a nail art brush to shape a clean French tip. While the white is still wet, dust on a tiny amount of glitter for a subtle frost.
Tips for perfection:
– Prepare a smooth surface with a thin base coat before you color.
– For longer wear, use gel polish or finish with a gel top coat.
– Try different base colors, such as warm beige or pale pink, to match different outfits.
This look echoes winter landscapes and stays polished through busy days. It works for work, errands, or nights out, and you can dial up or down the glitter to your taste. Want a quick upgrade you can do in minutes? Here is why it fits your season: it is clean, versatile, and easy to pair with most outfits.
Snowy Tips
Editor’s Choice
Base Top Coat Nail Polish: Clear Quick Dry High Glossy Nail Polish Shiny…

AZUREBEAUTY Warm White Nail Polish – Quick Dry, Long-Lasting, Natural Gl…

Holographic Nail Art Kits 6 Boxes 3D Glitter Metallic Shining Flakes Acr…
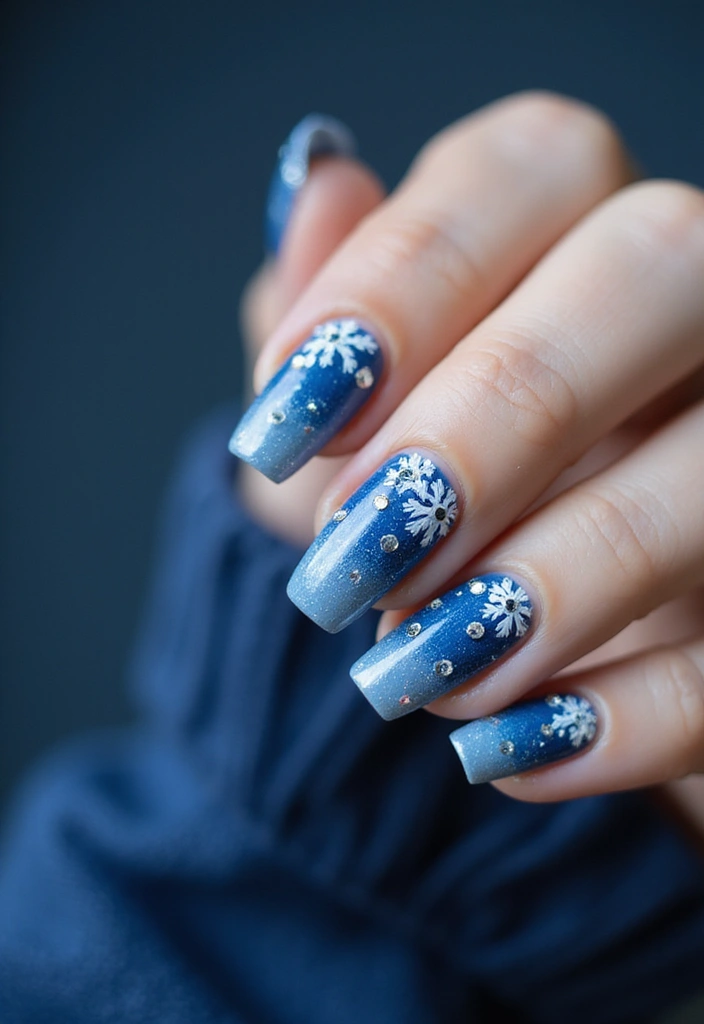
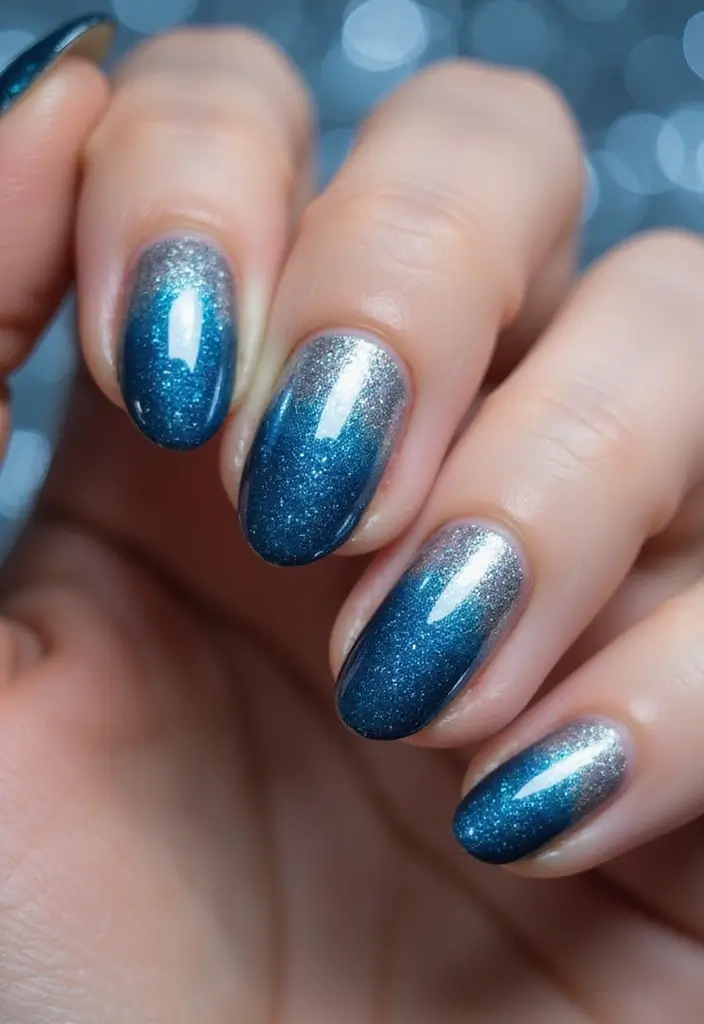
2. Frosted Ombre
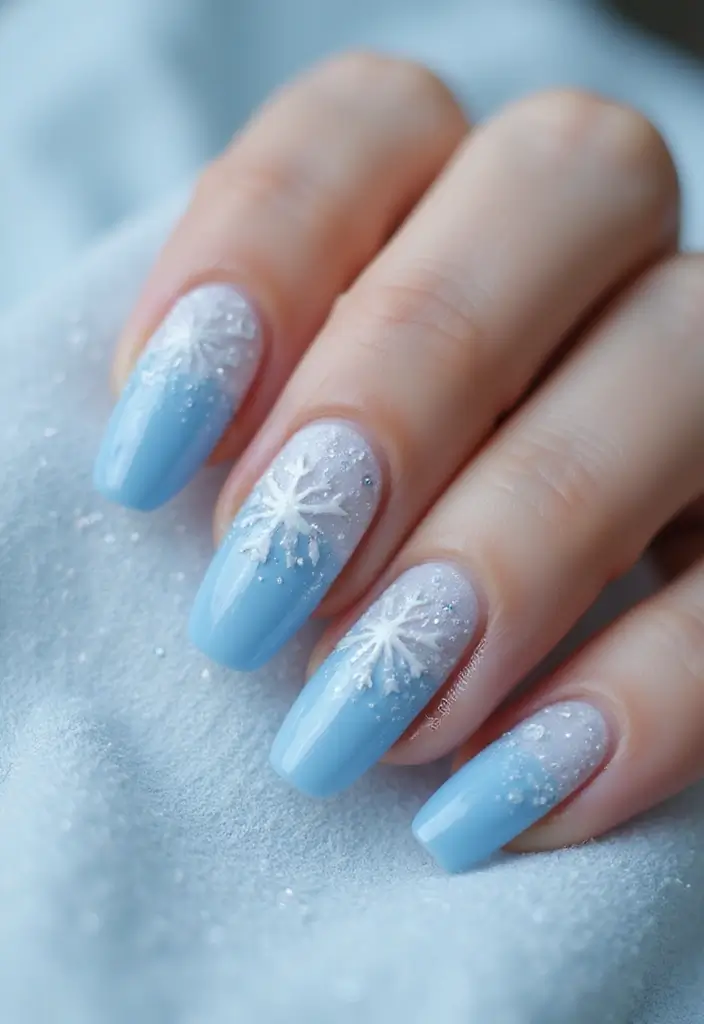
You want a winter nail look that stands out without shouting. Frosted Ombre gives you a soft glow with a cool frost edge. Here is how to do it.
What you need
– Icy blue nail polish
– Frosty white or silver polish
– A small makeup sponge
– Clear top coat
– Optional glitter
– Optional matte top coat
Step by step
1) Prep your nails. Clean, push back cuticles, shape edges.
2) Base layer. Apply two coats of icy blue. Let dry.
3) Create the fade. Dab white or silver on the sponge. Press at the tip and blend toward the middle. Tap until the gradient looks smooth.
4) Clean up. Use a small brush with remover to fix edges.
5) Add sparkle. Brush glitter along the tips for a subtle glow.
6) Seal the look. Choose a shiny top coat for a glassy finish, or a matte top coat for a frosted vibe. Let dry.
Why this works
– The sponge helps blend colors evenly for a soft transition.
– The frosted gradient mimics winter light on snow.
– Tiny glitter at the tips adds a night-sky touch.
Next steps
– Pair with knit wear to finish the look.
– Keep nails hydrated to maintain the shine.
– Try a thin silver line along the cuticle for extra depth.
Frosted Ombre
Editor’s Choice
OPI Nail Lacquer Nail Polish | Opaque Light Blue Green Shimmer Chip Resi…

Revlon Super Lustrous Nail Polish, Chip-Resistant & Longwear Formula, Hi…
Amazon Basics Cosmetic Foam Wedges For Makeup, 32 Count
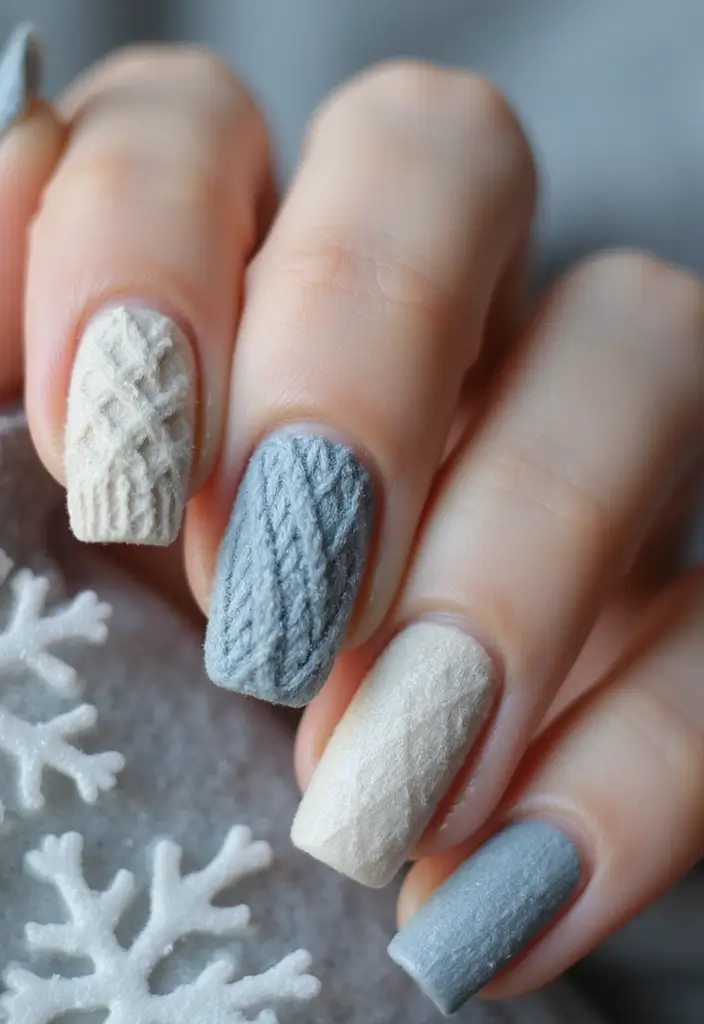
3. Nordic Knits
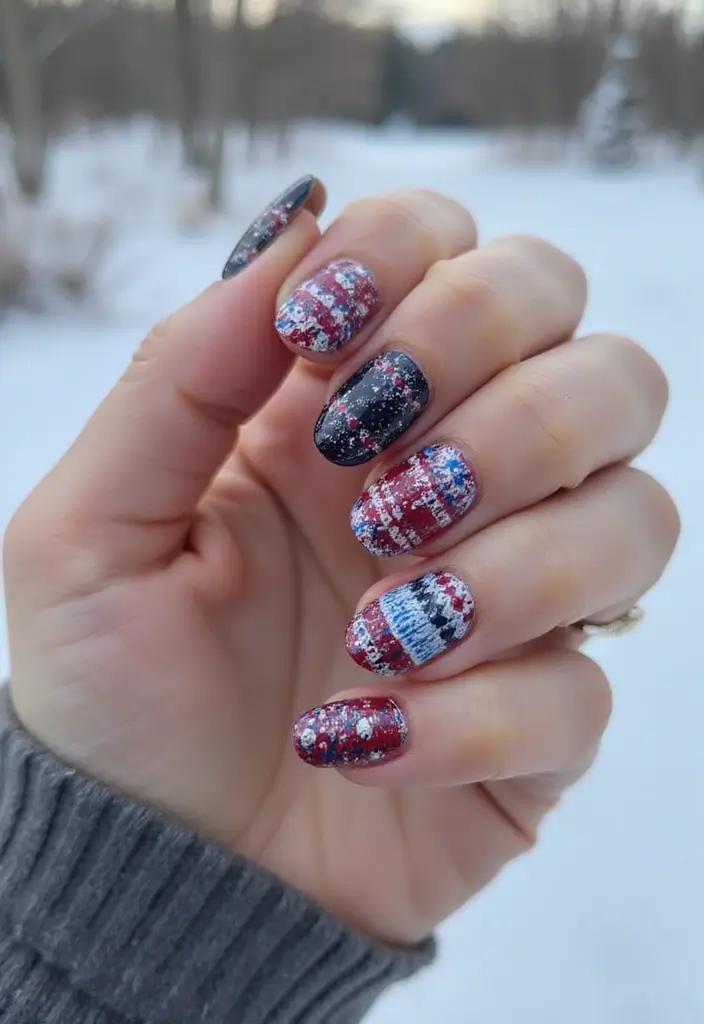
You want nails that feel warm and stylish without a lot of fuss. Nordic knits nail art gives that cozy vibe. It copies sweater stitches on a solid base color like deep red, navy, or soft gray. The result looks snug and ready for cold nights.
Here is why this works. It’s easy to mix colors for a playful twist. Knit patterns add texture you can see and almost feel. You can make one nail stand out with a lighter shade.
What you need
– Nail stamping plates with knit patterns
– A few base colors (red, navy, gray)
– A stamping tool, scraper, and clean-up brush
– A clear, glossy top coat
How to nail it
– Prep nails and push back the cuticles
– Paint the base and let it dry
– Pick a knit pattern and stamp it on
– Clean the edges, then top coat
– Make one accent nail for a pop
Tips
– Test the pattern on a nail wheel first
– Use a thin top coat so the pattern stays sharp
– Don’t flood the plate; less is more
– Add a touch of sparkle on one nail
Care and durability
– Re-apply top coat every few days
– Be gentle with hands after a fresh stamp
Next steps
– Start with two base colors and one knit pattern
Nordic Knits
Editor’s Choice

SILPECWEE 10Pcs Nail Art Stamping Plates Set Animals Design Nail Image S…

Saviland French Tip Nail Stamp – 4PCS Nail Art Stamper Kit Clear Silicon…

Top Coat Nail Polish Clear: Quick Dry Nail Polish No Chip High Shine Lon…
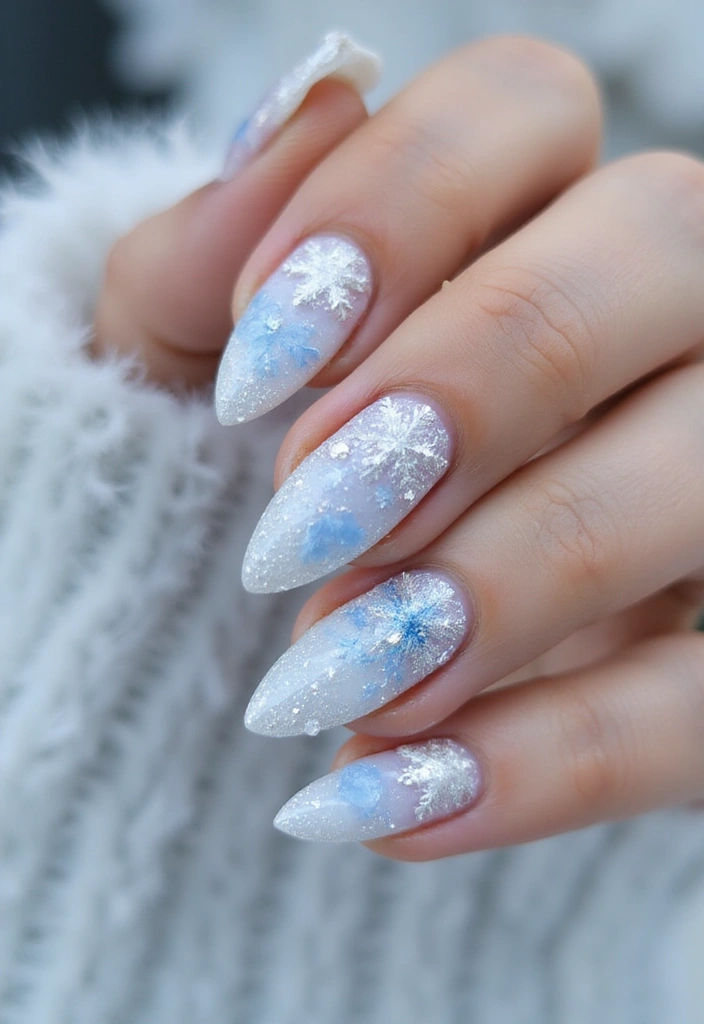
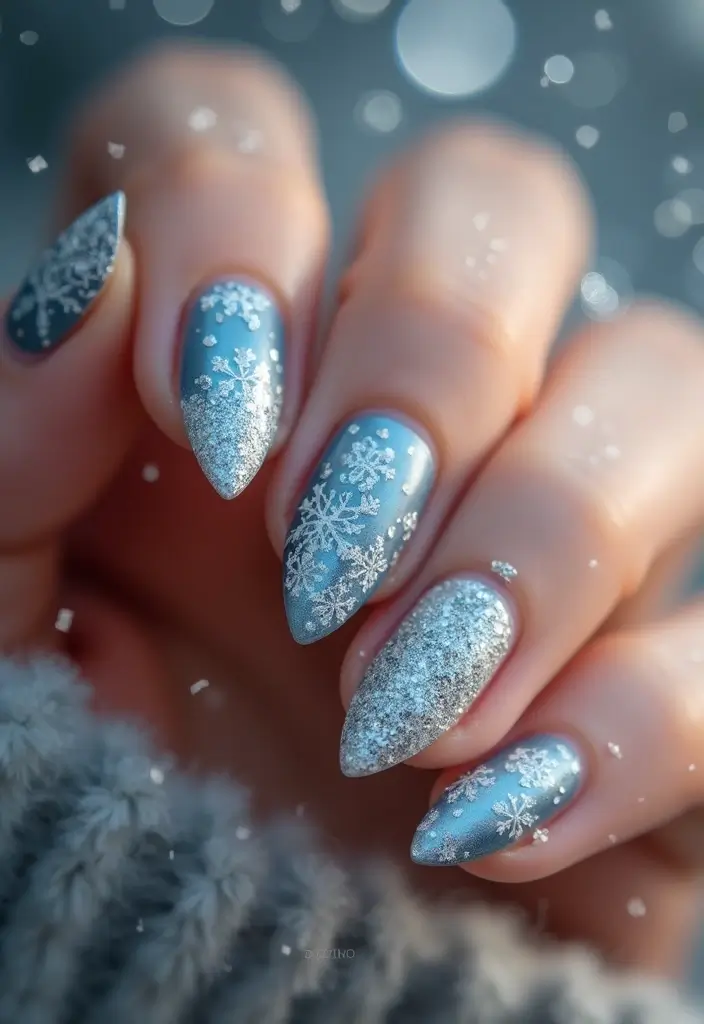
4. Glittering Snowflakes
If you want winter nails that feel festive but still classy, snowflakes are a perfect pick. They look cool and grown up on any shade.
Here is how to get a clean, eye catching snowflake design.
– Base color: Pick a deep shade. Dark blue or black makes white snowflakes pop.
– Create the snowflakes: Use white polish with a fine brush to draw tiny snowflakes, or use snowflake stickers for quick results. Mix different sizes for a more real look.
– Finish options: Matte finish gives a chic, modern vibe. Glossy finish adds a touch of elegance.
– Add sparkle: Place a tiny rhinestone at the center of a few flakes for extra shine.
– Seal it in: Top coat cups it all together and keeps the design smooth and lasting.
Pro tips:
– Mix different snowflake sizes for a natural feel.
– Nail stickers are handy if freehand snowflakes feel tricky.
– Decide on matte or glossy early to keep the style steady.
– Rhinestones are optional but they boost sparkle.
This look captures winter magic while staying stylish and easy to wear. Next steps: try it on one hand first, then go for both hands when you’re ready.
Glittering Snowflakes
Editor’s Choice

Artdone 31pcs Nail Art Brushes, Nail Art Tool Set, Dotting Tools, Dust B…
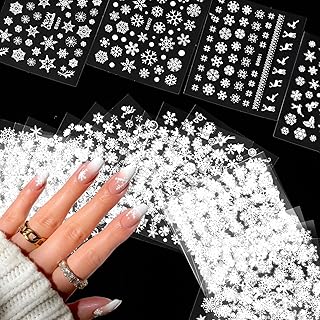
30 Sheets Christmas Nail Art Stickers Decals 3D Self-Adhesive Snowflake …

Nail Art Rhinestones Kit HUETFAT 2400pcs Nail Gems Ab Flatback Rhineston…
5. Elegant Metallics
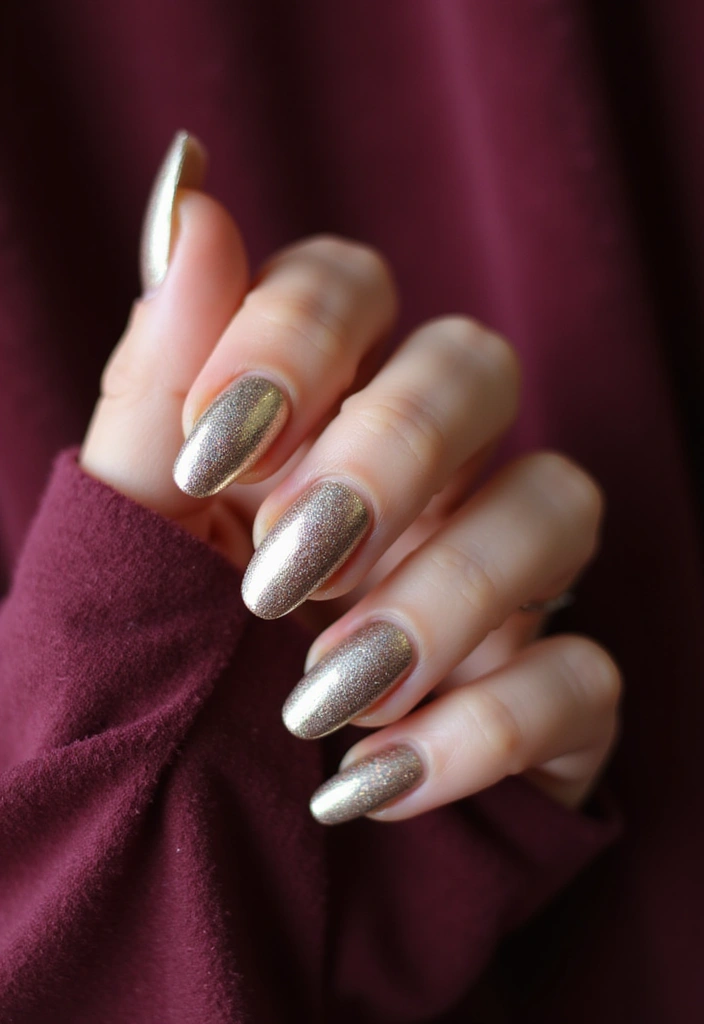
Want nails that shine this winter without a lot of work? Metallic nails help you get there. Gold and silver catch light at holiday parties. Let’s break it down for a chic, easy look.
What to try:
– Paint all nails with a rich metallic polish in gold or silver.
– Or mix shades on alternating nails for a modern twist.
– Both options read bold and classy.
Why it works:
Metallic nails grab attention. They suit dark dresses, velvet tops, and simple sweaters. They look polished in photos and in person.
How to apply:
– Start with a clean base coat for smooth color.
– Apply thin coats. Build to reach full opacity.
– Finish with a top coat to boost shine and prolong wear.
– For extra flair, add geometric shapes in a contrasting color on one or two nails.
Next steps:
With these steps, you’ll have party-ready metallic nail designs. This winter, your nails will glow in gold or silver and still stay easy to manage. Perfect for photos.
Tips for wear and removal:
– Keep chips at bay with a fast-drying top coat.
– If a nail chips, fix it with a quick touch-up.
– To remove metallic polish, wrap the nail with foil and peel.
Elegant Metallics
Editor’s Choice
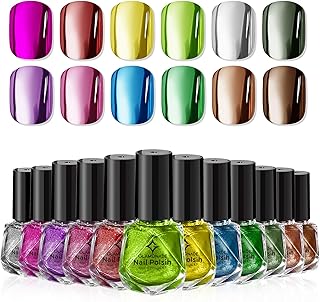
Metallic Nail Polish Set Fingernail: Chrome Mirror Holographic Nail Poli…
Top Coat Nail Polish Clear: Quick Dry Nail Polish No Chip High Shine Lon…

AddFavor Nail Stamper Kit 7pcs Nail Stamping Plates Geometric Mandala Fl…
6. Classy Plaid
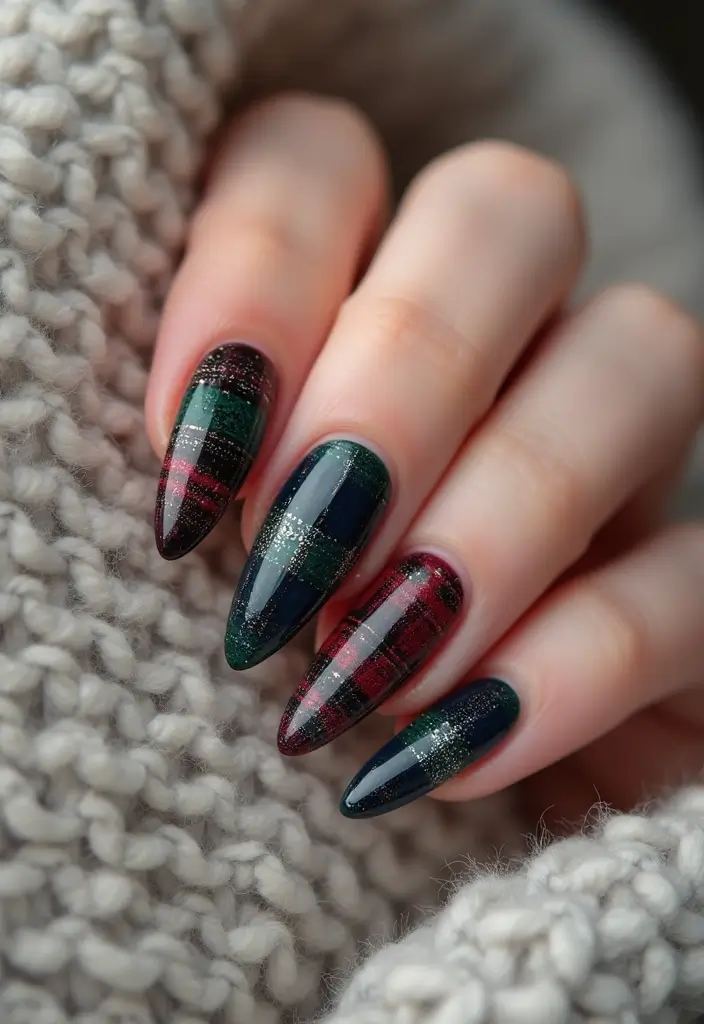
Plaid nails bring warmth and elegance to winter. It feels festive without shouting. You can create a classy plaid with a few tools and careful steps.
What you need
– Base color (cream, burgundy, or forest green)
– Two plaid colors that mix well with your base
– Thin nail art brush or striping tape
– Clear top coat
Steps
1. Paint a clean base and let it dry completely.
2. Map the plaid lines with striping tape. Place vertical and horizontal lines to form neat squares.
3. Paint over the taped areas with the second color using a fine brush. Carefully lift the tape away while the design is still a little tacky to keep edges sharp.
4. Add a second coat if lines look thin or uneven.
5. Finish with a glossy top coat to seal the design. For a softer vibe, you can opt for a matte top coat.
Tips
– Choose warm tones like burgundy, forest green, and cream for a cozy feel.
– Blend plaid with solid blocks for a clean, modern look.
– Tidy up tiny mistakes with a small brush dipped in remover.
This plaid style stays cozy yet refined, great for winter gatherings and everyday wear.
Classy Plaid
Editor’s Choice

60 Colors Nail Striping Tape Line 2 Pieces Nail Tape Dispensers Free Tap…
Artdone 31pcs Nail Art Brushes, Nail Art Tool Set, Dotting Tools, Dust B…
Top Coat Nail Polish Clear: Quick Dry Nail Polish No Chip High Shine Lon…
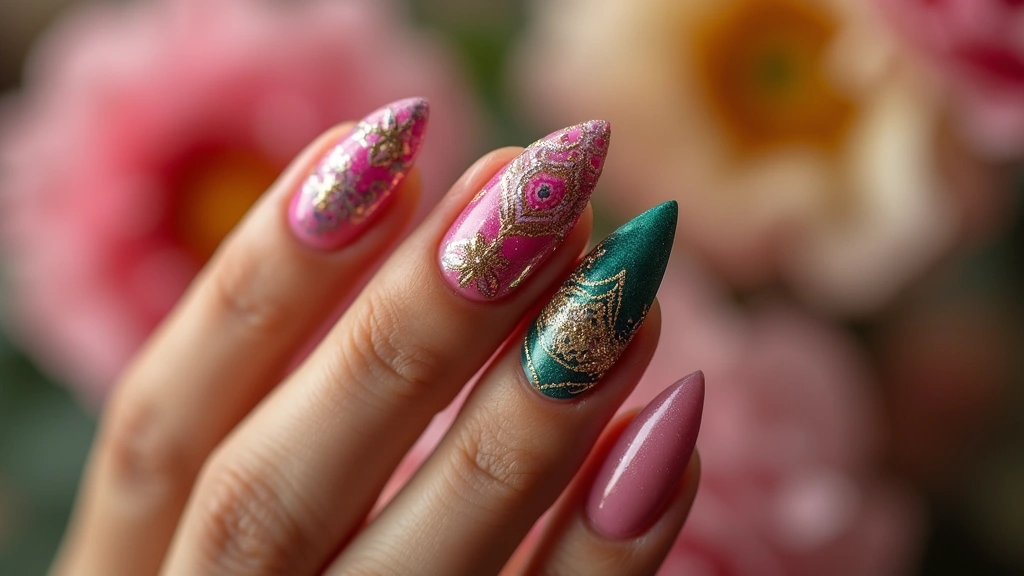
7. Jewel Tones

Jewel Tones
Winter is here and you want nails that look like a bold accessory. Jewel tones do that with ease. Think emerald green, deep sapphire, and burgundy. They glow in dim light and pop in the sun. You will feel dressed up without much effort.
Next steps: pick a shade, prep nails, and apply with care. Start with clean nails. Push back cuticles and smooth the surface. Apply a base primer to help the color stay bright and even.
Paint two even coats of your chosen jewel tone. Let each coat dry. Then add one of these ideas: a few accent nails with a delicate pattern, or a thin strip of gold foil for a touch of luxury. Finish with a top coat to seal the shine.
Application tips:
– Use a base primer for deep color payoff.
– Incorporate metallic elements for a glamorous touch.
– Add a matte top coat to contrast glossy nails with matte accents.
Jewel tones work for quick errands or dressy nights. They catch the eye, yet stay versatile. Pair emerald with gold jewelry for a classic look. A sapphire nail can echo winter skies. Burgundy nails pair well with black outfits or berry lip colors.
Jewel Tones
Editor’s Choice
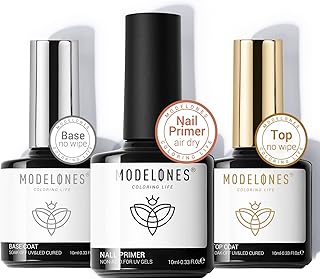
modelones Gel Top Coat and Base Coat With Nail Primer, 3 Pcs No Wipe Cle…
Holographic Nail Glitter Gold Foils for Kit, 12 Grids Sparkly Ultra-Thin…
8. Cozy Textures
Winter can feel flat. Cozy textures add warmth to your nails. Use textured polishes or powders to mimic knit, flannel, or faux fur. A light base color makes the texture pop. Pair it with a matte top coat for a soft, warm look.
Here is why it works: texture catches light in a way that feels inviting.
– Start with a pale base. Cream, pale pink, or icy gray work well.
– Add texture on one or two nails. Try a textured powder or a knit-look wrap.
– Keep the rest simple. A clean solid color balances the look.
– Try an accent nail. A tiny faux fur patch or a woven pattern adds interest.
– Finish with a matte top coat. It seals the texture and reduces glare.
Tips:
– Experiment with textured powders for extra depth.
– Pair textures with simple designs for balance.
– Use textured polish on accent nails only for a bold statement.
To keep it simple, start with one textured nail. It reads chic and dries fast. You can mix textures by using powder on one nail and a knit wrap on another. You get a warm, layered look without overdoing it.
This approach keeps your nails warm and stylish all season.
Cozy Textures
Editor’s Choice

Black White Nail Glitter Powder, 6 Jars Extra Fine Sugar Glitter for Nai…
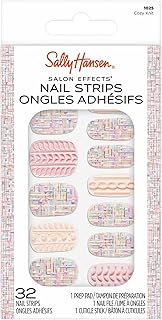
Sally Hansen Salon Effects, Cozy Knit, Nail Strips, No UV Light Needed,…
Matte Top Coat Nail Polish: Clear Quick Dry Nail Polish Fast Air Drying …
You might also like
9. Festive Red and Gold
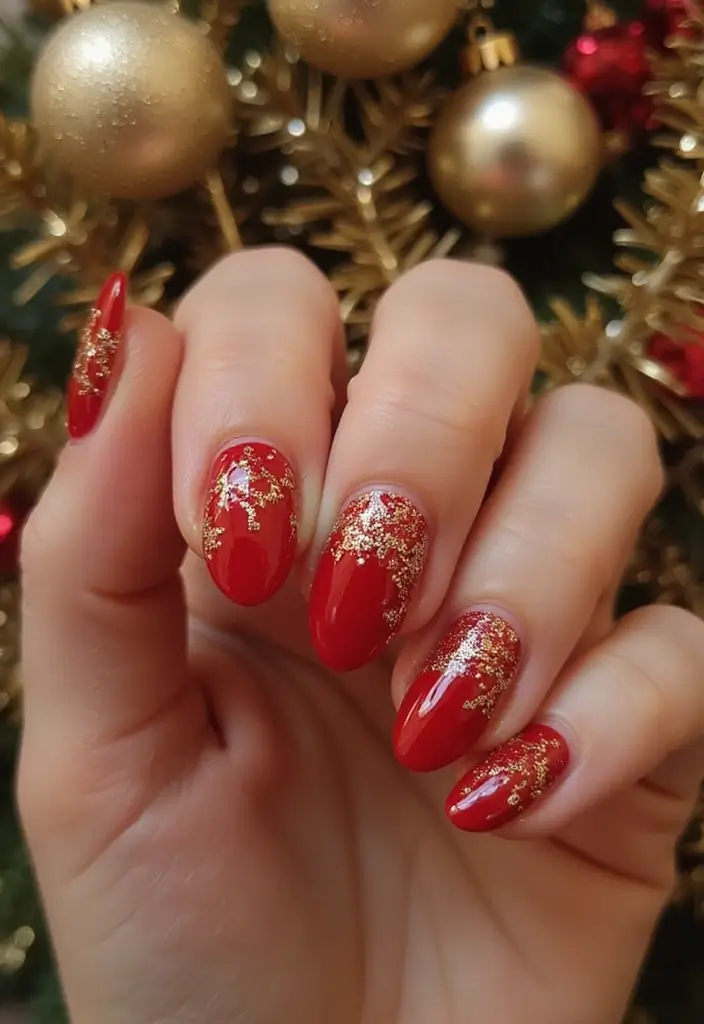
You want nails that feel festive yet chic. Festive red and gold nail art does the job. A glossy red base with gold accents catches the light. Try simple stripes, tiny dots, or gold foil for a luxurious touch.
What you need
– Red nail polish
– Gold nail polish
– Thin striping brush or nail tape
– Dotting tool or a sharp pin
– Gold foil sheets
– Clear top coat
How to do it
– Start with clean nails. Push back cuticles.
– Apply a base coat. Let it dry.
– Paint two coats of glossy red. Wait for full dry.
– Add gold details. Use stripes, dots, or a small foil patch.
– Seal with a clear top coat. Let it fully set.
Tips for lasting shine
– Do each layer in thin coats. Dry fully between steps.
– Tap foil sheets lightly to avoid rough edges.
– Use a top coat every other day to keep the shine.
Why it works
– Red fits winter parties. Gold adds luxury without being flashy.
– This look pairs with gold jewelry and warm outfits.
– It stays nice through holiday events.
Next steps
– Try different gold patterns. A single diagonal line can look modern.
– Set aside 20 minutes for a fresh mani before a party.
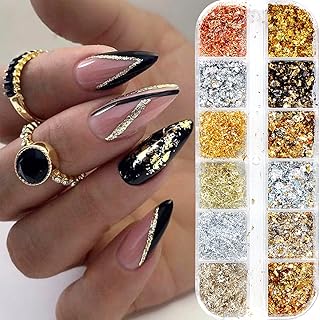
Festive Red and Gold
Editor’s Choice
RARJSM Metallic Nail Art Gel Liner Bronze Gold Mirror Chrome 3D Effect G…

Nail Art Tools Set, Nail Stand for Press on Holder for Painting Nails, N…
10. Subtle Matte
You want nails that look polished but not loud. Subtle matte nails give you a quiet, refined vibe.
They fit winter, catching light softly with knitwear.
Choose muted winter colors. Think pastel blues, cool greys, and dusty taupe. These shades stay elegant under scarves and wool coats.
To get the look, prep nails, apply two even coats, and finish with a matte top coat. Let each layer dry fully so the surface stays smooth. If you want longer wear, seal the tip as you paint.
Here is why this works. The matte finish hides tiny chips and keeps the color true longer in cold weather. It also pairs well with velvet, wool, and knits.
Tips for a chic finish:
– Use a matte top coat over color for a velvety finish.
– Add minimal designs like tiny dots or fine lines in the same color family.
– Pair with soft fabrics and textures in your outfits for a cohesive look.
Subtle matte nails suit anyone who wants a classy but low-key style.
Practical variations include a solid matte shade, a soft gradient between two muted colors, or a small negative space design.
Keep the elements tiny and neat.
Next steps: pick a shade you love and test the matte top coat.
Subtle Matte
Editor’s Choice
Beetles Matte Gel Top Coat for Gel Nail Polish,15ML Chrome Proof Matte T…

modelones Jelly Nail Polish of 6 Colors Sheer Nude Mini Nail Polish Set …

5PCS Dotting Pens with 3 PCS Nail Painting Brushes, Nail Art Design Tools
11. Jewel Accents
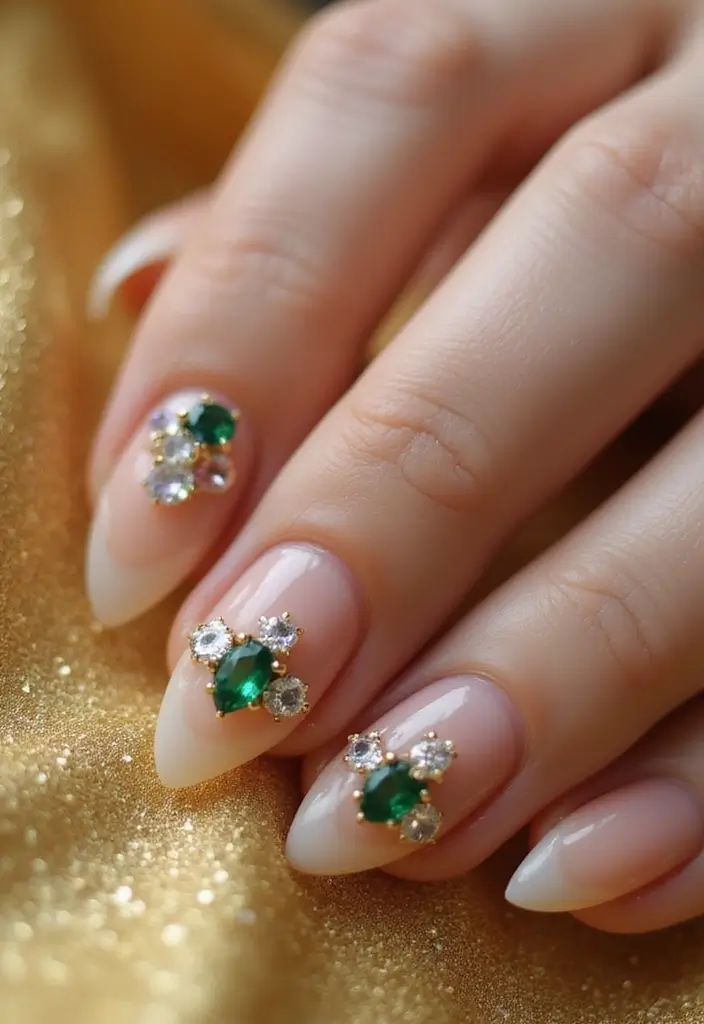
Looking for a winter nails vibe that sparkles without stealing the show? Jewel accents are a smart pick. A single gem-studded nail can catch the light from every angle and add a touch of luxury to any outfit.
What you need
– Small rhinestones or crystals
– Strong nail glue
– Your chosen base color
– Tweezers or a dotting tool
– A clear top coat
How to apply
– Start with clean, dry nails. Push back cuticles and lightly buff the surface.
– Paint all nails with your base color. Let it dry completely.
– Choose one accent nail for the jewels. Put a tiny dot of glue where you want each stone.
– Place the stones with tweezers. Press gently for about 10 seconds to help them grip.
– Finish with a generous top coat to seal the design and keep the gems in place.
Tips to nail it
– Use a strong glue so the jewels stay put through daily tasks.
– Balance out the shine. Keep the other nails simple or use a subtle finish.
– You can pair a glossy top coat with a matte base on the non-accent nails for contrast.
Next steps: try a soft pink or deep navy base to let the jewels pop. This look is classy enough for a winter party, a cozy date, or a workday with style.
Jewel Accents
Editor’s Choice

Makartt Nail Rhinestone Glue: Super Strong Gel Glue for Nail Art Decorat…

KISS PowerFlex Maximum Speed Nail Glue – Fast Drying Adhesive for Glue-O…
5PCS Dotting Pens with 3 PCS Nail Painting Brushes, Nail Art Design Tools
12. Whimsical Winter Wonderland
Whimsical Winter Wonderland
You want nails that feel festive without shouting. A whimsical winter wonderland lets you show art. Start with a pale blue or white base. It sets an icy backdrop for tiny scenes.
What you’ll need
– Fine paint brushes and a dotting tool
– Acrylic nail paints in white, blue, and a touch of green
– A clear gloss top coat and a little patience
Design approach
– Keep one simple scene per nail. Less is more, especially on short nails.
– Paint mountains with a curved white line. Fill lightly so they look frosty.
– Add trees as simple triangles or small silhouettes.
– Dot small stars or snowflakes in silver or pale yellow. Let some nails be mostly sky, others a story.
Step-by-step break down
1) Prep and base coat. Buff, clean, and dry.
2) Base color. Apply two coats of pale blue or white. Let dry.
3) Scene details. Use the fine brush for mountains, trees, and stars.
4) Finish. Seal with a glossy top coat for a bright, wet look.
Next steps
Wait for each layer to dry. Avoid crowding nails. This design shines in light and catches the eye from afar.
Craft your own whimsical winter wonderland on your nails! A touch of creativity and a soft color palette can turn your fingertips into a festive canvas that speaks volumes while keeping it classy.
Whimsical Winter Wonderland
Editor’s Choice

PANDAFLY Detail Paint Brushes Set, 15pcs Miniature Brushes for Fine Deta…

Acrylic Nail Kit for Beginners: Clear White Pink Powder and Liquid Set P…

Rust-Oleum 334029 Painter’s Touch 2X Ultra Cover Spray Paint, 12 oz, Glo…
13. Negative Space Elegance
You want a nail look that feels chic but not loud. Negative space lets your natural nail peek through while you add winter hues. The result is polished, modern, and easy to wear from work to weekend.
Here is how to pull it off.
– Start with clean nails and a solid base. A clear or pale base helps the cutouts stand out.
– On the nail, place masking tape to mark the spaces you want to keep bare. Think bands, triangles, or small circles.
– Choose a winter color set. Think icy blue, soft gray, creamy white, pine green, or cranberry. Paint inside the taped areas first.
– Peel the tape while the polish is still a touch wet. This shows crisp edges and keeps the negative space clean.
– Add a second color if you want more detail. You can create stripes, geometric shapes, or gentle curves around the bare spaces.
– Finish with a top coat. A glossy coat gives a bright, crisp look. A matte top coat brings a sculpted, fashion-forward vibe.
Execution tips:
– Use striping tape for clean lines that stay sharp.
– Try geometric shapes or abstract lines for variety.
– A matte top coat gives a contemporary feel.
This design proves that less can be more, making it a must-try for the winter season. For best results, practice on one nail first, then carry the pattern across a couple more when you feel confident.
Negative Space Elegance
Editor’s Choice

Artdone 38Pcs Nail Striping Tape Lines Kit With Nail Art Pens Dotting To…

modelones Nail Polish Set 6 Colors Red Green Glitter Mini Nail polish Se…
Beetles Matte Gel Top Coat for Gel Nail Polish,15ML Chrome Proof Matte T…
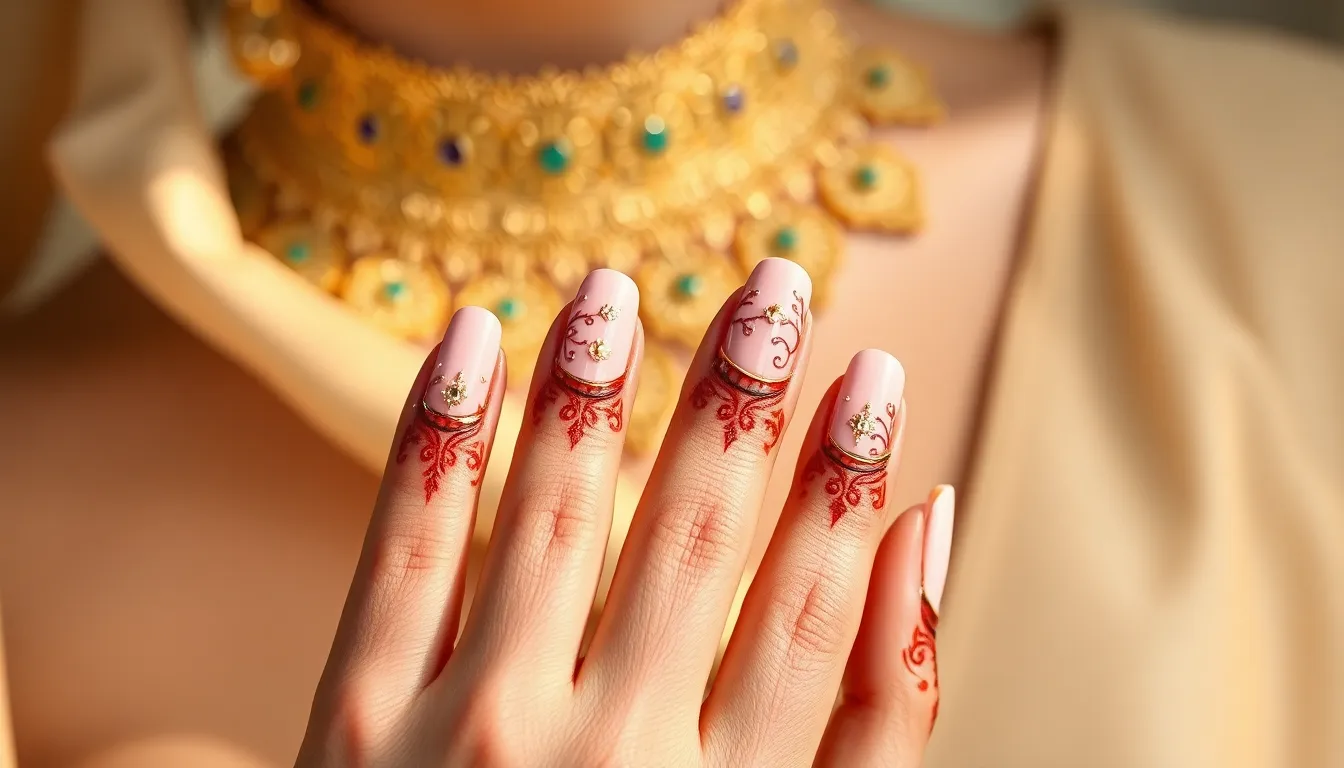
14. Winter Floral
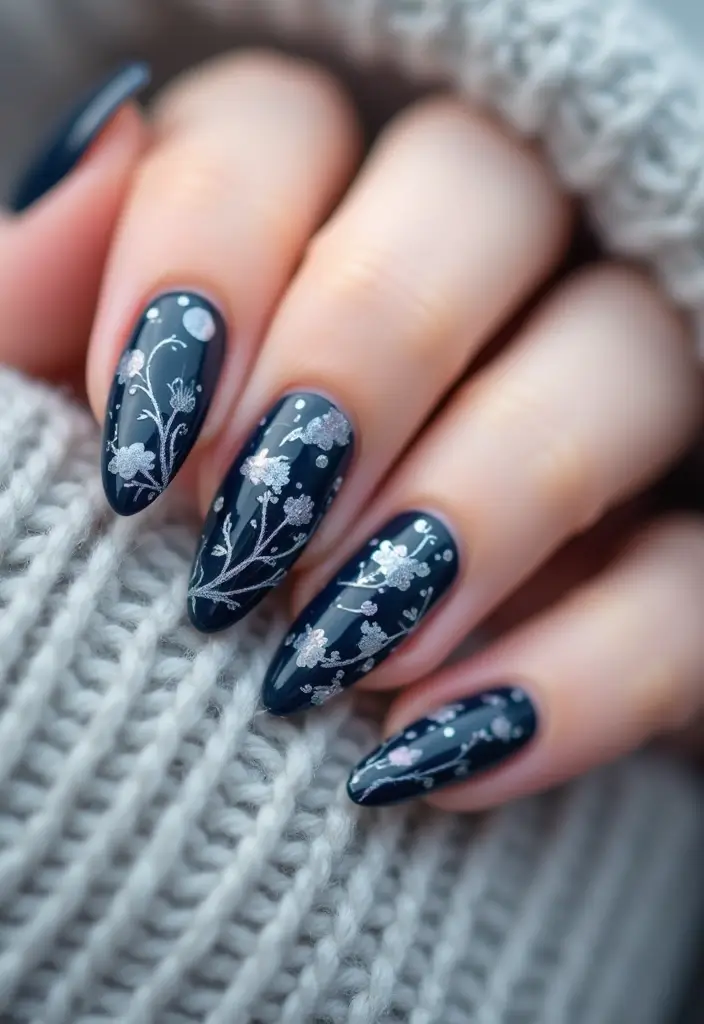
Winter can feel drab, but your nails can stay chic all season. Winter Floral nails offer a classy, festive twist that works with gloves and cozy outfits. Start with a dark base so the flowers stand out, then paint delicate blooms in white or icy hues for a chilly, elegant look. This method gives your nails a fresh take on the winter palette.
Design tips:
– Mix different flowers to add depth and movement.
– Use a fine brush or a toothpick for tiny petals and clean edges.
– Finish with a glossy top coat to make the blossoms pop and to help them last.
Here is why this style fits winter: the dark backdrop makes a bold statement, while pale blossoms feel light and seasonal. You can keep the look simple or turn it into a mini bouquet on each nail. It pairs well with knits, boots, and silver jewelry.
Try these looks:
– Look one features a navy base with white flowers and soft gray leaves for a frosty touch.
– Look two uses a deep burgundy base with icy blue blooms and a hint of silver glitter.
Next steps: gather a fine brush, a couple of white and icy blue polish shades, and a top coat. Practice on a few nails first to get clean petals, then finish with a glaze that lasts through winter days.
Winter is the perfect canvas for your nails—dark bases and delicate floral designs create a chic statement that complements every cozy outfit. Embrace the cold with a splash of elegance!
Winter Floral
Editor’s Choice
Artdone 31pcs Nail Art Brushes, Nail Art Tool Set, Dotting Tools, Dust B…
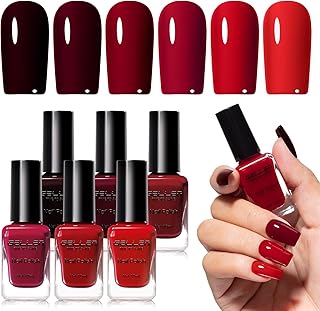
GELLEN Dark Red Nail Polish Set, Deep Burgundy Wine Cherry Blood Red 6 C…
Top Coat Nail Polish Clear: Quick Dry Nail Polish No Chip High Shine Lon…
15. Icy Glitter Geode

Want nails that catch the frost and glow under street lights? Icy Glitter Geode gives you that wintry edge. Start with a dark base. Choose midnight blue, charcoal, or deep plum. Let it dry fully so the crystal bits lay flat.
Next, add your geode glow. Use lighter shades like pale blue, icy white, and a touch of silver glitter. Dab with a small sponge to blend softly. Tap in tiny crystal shards near the cuticle and along the tips to mimic natural geodes. The goal is depth, not a flat color.
Then layer more. Build the look by adding thin strokes of lighter colors over the dark base. Let each layer dry before the next. This creates the glowing edges you see in real geodes.
Add sparkle. Place a concentrated dot or thin ridge of glitter along the crystal lines. A little goes a long way, so start small and add as needed.
Finish with a sealing top coat. This locks in the shine and stops glitter from flaking. A fast-drying top coat helps too.
Optional: dust a hint of holo micro-glitter over the center for a frosty star effect.
Tips for a stunning finish:
– Layer glitter for depth
– Use a sponge technique for a smooth blend
– Seal with a top coat to keep the sparkle alive
This design is bold and classy, ready for winter nights out.
Icy Glitter Geode
Editor’s Choice

OPI Nail Lacquer Midnight Mantra | Opaque Dark Blue Crème Chip Resistant…

MIZHSE Translucent Shimmering Nail Polish, Quick Dry Clear Glitter White…
Top Coat Nail Polish Clear: Quick Dry Nail Polish No Chip High Shine Lon…
You Might Also Like
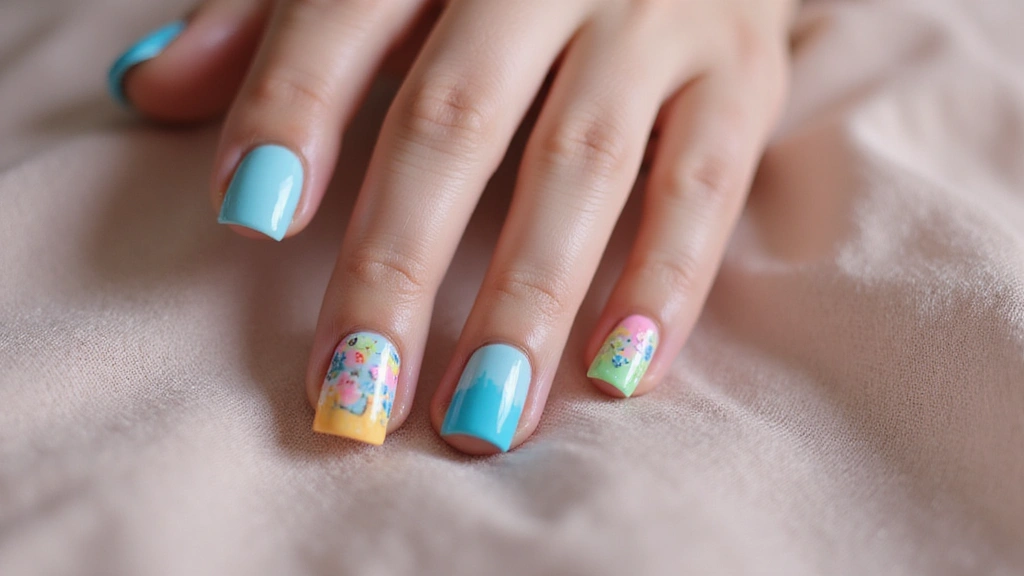
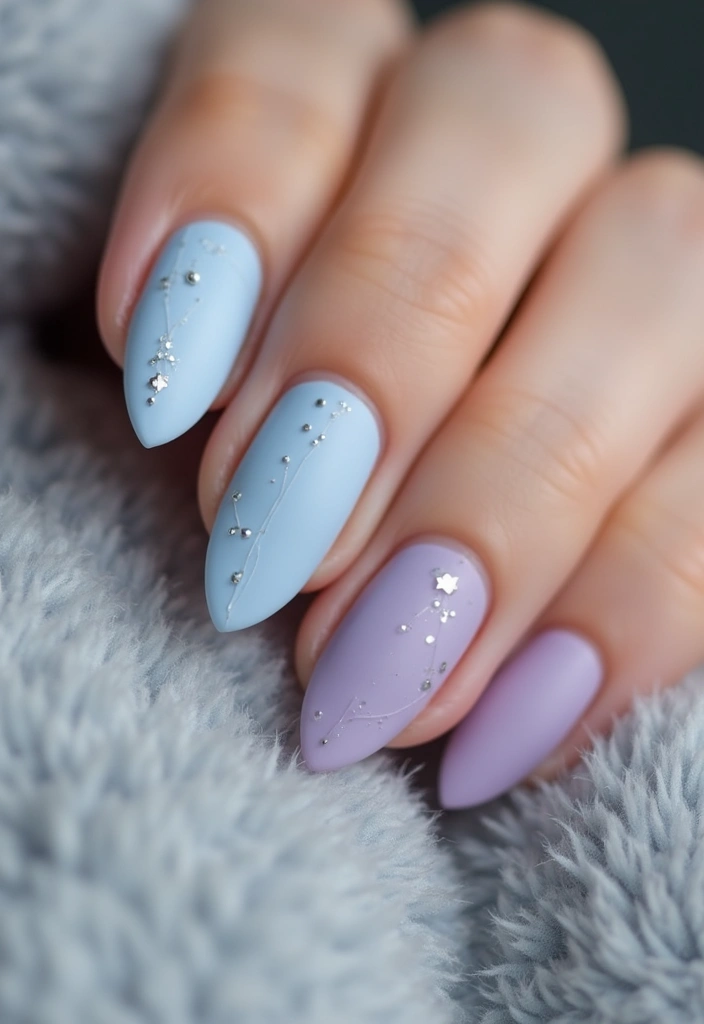
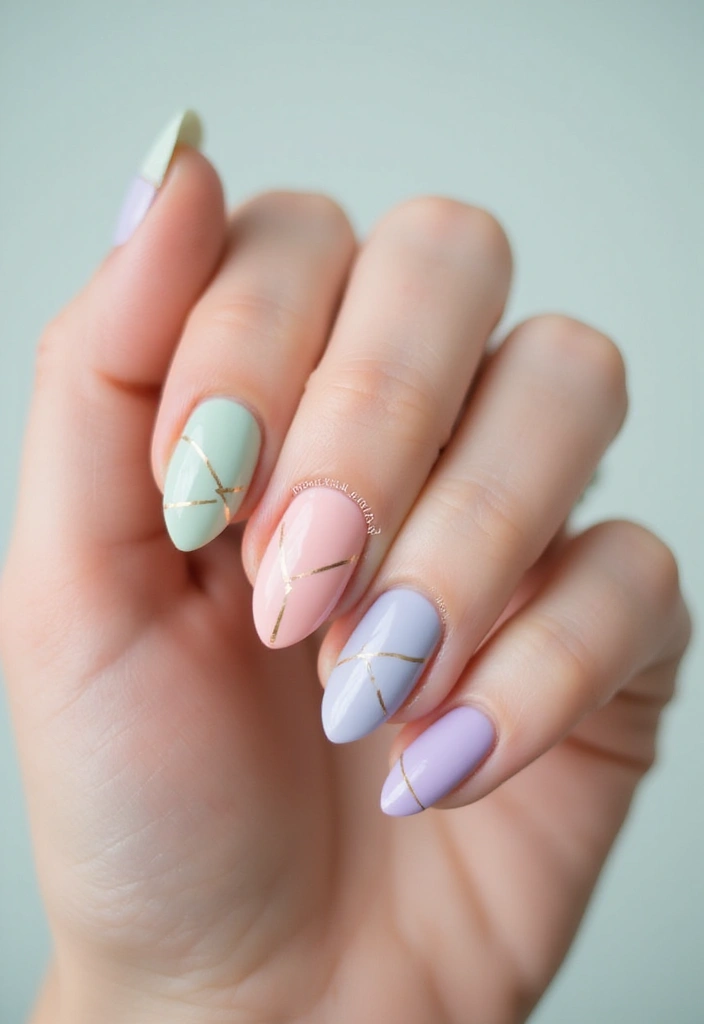
16. Frosted Pastels
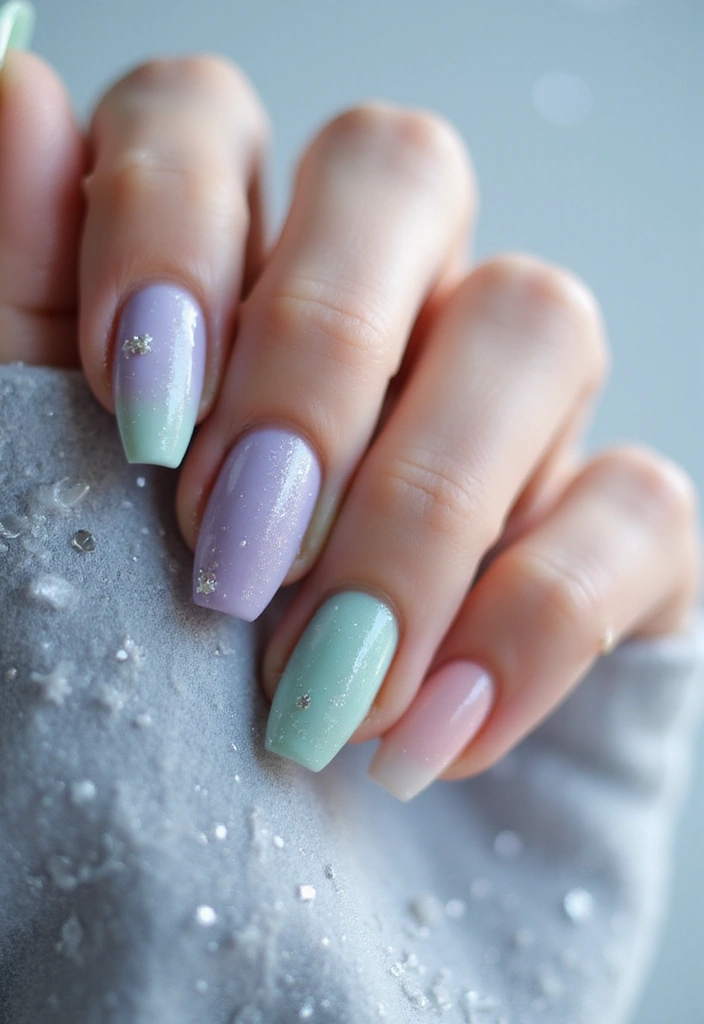
Winter asks for calm, clean color. Frosted pastels give you a soft look with a touch of ice. Think lavender, mint, or pale pink. The frosted layer comes from a light dab with a sponge on top of a pale base.
Why it works: You keep color in view, but the finish reads quiet and chic.
How to apply:
– Prep your nails. Clean, shape, and push back cuticles.
– Apply a clear base coat. Let it dry.
– Paint one thin coat of your chosen pastel. Let it dry.
– Use a small makeup sponge. Gently dab on the frosted layer. Build the haze slowly for a subtle look.
– Add sparkle on one nail if you want a playful touch.
– Finish with a matte top coat for a velvety feel or a gloss top coat for shine.
Mix and match tips:
– Combine two pastels for a soft blend. Lavender with pale blue, or mint with soft pink.
– Short nails read bigger when you frost the whole nail; long nails can have frosting on the center or tips.
Care and wear:
– Recoat with clear top coat after a few days to extend wear.
– Use mild remover when you want a change.
This design stays quiet yet stylish. It suits everyday wear and special occasions.
Frosted Pastels
Editor’s Choice

Beetles Pastel Nail Polish Set -6 Colors Pink Blue Yellow Nude Pink Purp…

Soft Sponges with Grabbing Pen for Ombre and Aura Nail Art with Brush, P…
Matte Top Coat Nail Polish: Clear Quick Dry Nail Polish Fast Air Drying …
17. Ice Crystal Charm
You want a winter nail look that feels clean and classy. Ice Crystal Charm gives that icy shine without too much glare. Start with a light base so the details stand out. Use a fine brush to draw ice crystals in natural shapes. Keep the lines thin and crisp. Finish with a glossy top coat for a true crystal glow.
Creative tips:
– Practice the crystal patterns on paper first to steady your hand.
– Add small rhinestones at edges or gaps to boost the crystal feel.
– Use a clear base coat to protect nails as you work.
Here is why it works: a sheer base makes white lines pop. Thin strokes mimic real ice, giving a delicate look. Layer soft whites with a touch of pale blue for depth. If you want extra sparkle, place a tiny rhinestone where light would hit, then seal with top coat.
Next steps: choose a pale, sheer base, grab a fine liner brush, and test one crystal pattern on a single nail. Keep the other nails simple to let the design shine. This winter look stays elegant through the season. It works on short nails too, and keeps the look clean overall.
Ice Crystal Charm
Editor’s Choice

Artdone Metallic Nail Art Pens, Liner Brushes Set, 5PCS Black Color Nail…
Makartt Nail Rhinestone Glue: Super Strong Gel Glue for Nail Art Decorat…

beetles Gel Polish No Wipe Gel Top Coat – Clear Color Top Coat Gel Nail …
18. Classy Black and White

Classy Black and White Nail Art
You want nails that stay chic all winter. Black and white nail art does that. It is clean, clear, and easy to wear with many outfits.
Here is why this look works. The black base makes white details pop. The contrast stays sharp in daylight and in winter gloom.
Here is how to do it. Start with a base coat. Add black polish. Let it dry. Then place white designs with tape or a fine brush.
– Pattern ideas: stripes, dots, houndstooth, chevron, or a thin white tip with a black edge.
– Keeping lines neat: use tape, press it down, and lift slowly. A dotting tool helps for clean dots.
– Finish options: a glossy top coat gives shiny nails. A matte top coat gives a soft, chic feel.
– Negative space twist: leave part of the nail clear for a modern effect.
Next steps and practical tips. Pair this look with a sleek coat. It works with black, gray, and neutral outfits. Use a dotting tool, a fine brush, and tape for sharp edges.
Maintenance tip. Apply top coat every few days to protect the design. If a line wobbles, fix it quickly with small correction strokes.
With a little practice, you gain crisp nails that fit winter perfectly. Try a different pattern next time to keep the look fresh.
In winter, let your nails do the talking! Classy black and white nail art designs are the perfect way to add a chic touch to any outfit while staying effortlessly stylish.
Classy Black and White
Editor’s Choice

Augshy 19pcs Mandala Dotting Tools Set Pen Dotting Tools Mandala Stencil…

3pcs/Set Nail Art Tape Roll Wrap Adhesive Decoration Edge Guide Tips Des…

OPI Nail Lacquer Top Coat | Clear Nail Polish Top Coats | Classic, Quick…
19. Shimmering Gradient
Shimmering Gradient
Winter light loves nails that glow. A shimmering gradient blends a dark base into a sparkly tip. You can make this look your own by tweaking the colors.
– Colors: choose wintry shades like deep navy, icy blue, and silver.
– How to apply: prep with base coat. On a small makeup sponge, lay the colors from dark at the bottom to light at the top. Press gently to blend. Repeat once if needed.
– Glitter touch: brush a thin line of glitter near the tips for extra sparkle.
– Seal the look: finish with a high-shine top coat.
Tips for success:
– Use a makeup sponge to get the best gradient.
– Add glitter at the tips for extra shine.
– Seal with a high-shine top coat to bring it all together.
This design feels chic and versatile. It suits daily wear and party nights. You can tailor it by swapping colors, adjusting glitter density, or keeping a soft frost shade for a subtler glow. With proper prep and thin layers, it lasts. It’s quick to learn and looks great in photos. Give it a try this weekend.
This winter, let your nails shine bright! Try a shimmering gradient with deep navy fading into icy blue, and watch your style glow like the season’s first snowfall.
Shimmering Gradient
Editor’s Choice
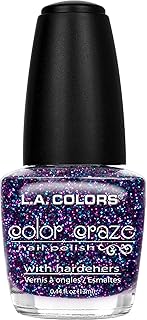
Soft Sponges with Grabbing Pen for Ombre and Aura Nail Art with Brush, P…
L.A. COLORS Color Craze Nail Polish, Glitter Bomb CNP543
Top Coat Nail Polish Clear: Quick Dry Nail Polish No Chip High Shine Lon…
20. Stylish Stripes
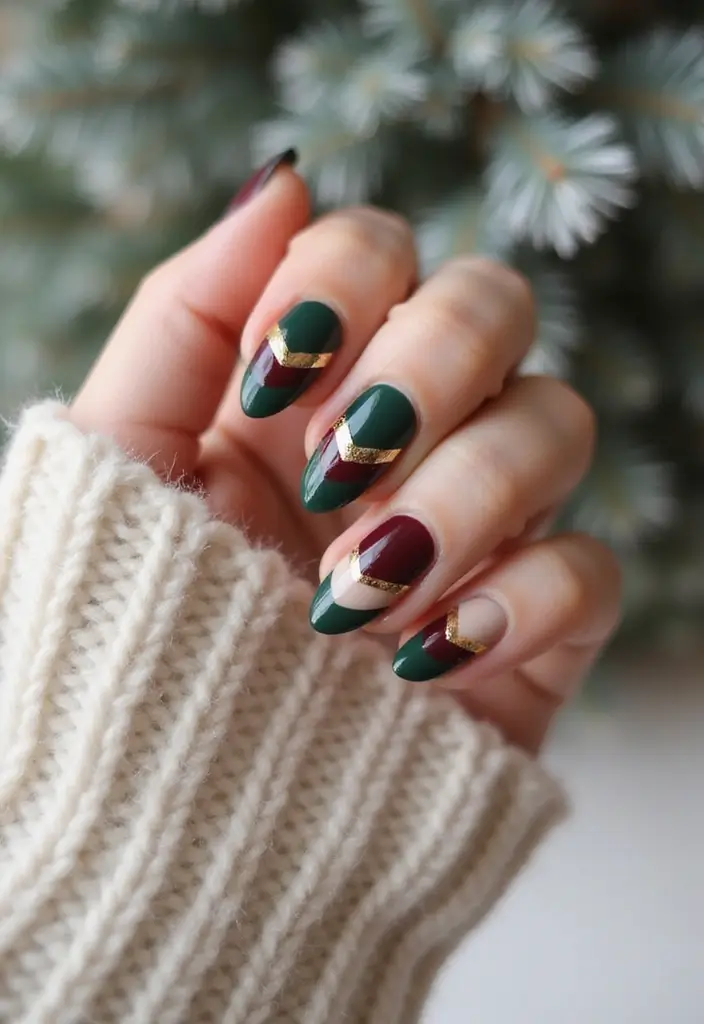
Do you want a look that feels chic but not loud? Stripes add a winter-friendly vibe. Pick deep hues like dark green with gold, or keep it classic black and white. Start with a clean base coat so the lines sit sharp. Then add stripes in lines of different widths. Use a nail art brush or striping tape to keep edges clean. Let each stripe dry before you add the next.
Here is why stripes work: they add motion and contrast without crowding the nail.
How to do it:
– Apply one smooth base color and let it dry.
– Create stripes with a fine brush or tape. Press the tape down firmly to prevent bleeding.
– Vary the stripe width on each nail for a playful yet classy look.
– Finish with a glossy top coat for shine or a matte top coat on a glossy base for a chic contrast.
– If you want a softer winter look, choose muted tones and thin lines.
– For a bold moment, pair thick stripes with metallic accents.
The result fits many winter occasions, from work days to holiday gatherings. Stripes work on short or long nails. This makes the look easy to wear daily. You can switch colors with the season. It stays chic all winter. Seal with a top coat to help it last.
Stylish Stripes
Editor’s Choice
Artdone 31pcs Nail Art Brushes, Nail Art Tool Set, Dotting Tools, Dust B…

Nail Art Striping Tape Lines Kit 36 pcs 1mm 2mm 3mm Nail Tape Strips for…

OPI Nail Lacquer Top Coat | Clear Nail Polish Top Coats | Classic, Quick…
Conclusion
With these 20 classy winter nail art designs, your nails will surely be a standout feature of your winter wardrobe. Each design offers a blend of elegance and creativity, perfect for any occasion this season.
Whether you prefer subtle elegance or bold statements, there’s something here for everyone. This winter, let your nails reflect your unique style and embrace the beauty of the season!
Note: We aim to provide accurate product links, but some may occasionally expire or become unavailable. If this happens, please search directly on Amazon for the product or a suitable alternative.
This post contains Amazon affiliate links, meaning I may earn a small commission if you purchase through my links, at no extra cost to you.
Frequently Asked Questions
What Are the Key Trends for Classy Winter Nail Art Designs?
This winter, classy nail art designs are all about elegance and subtlety. Think soft color palettes, such as muted pastels and deep jewel tones, paired with chic designs like snowy tips and frosted ombre. These styles are perfect for adding a touch of sophistication to your winter wardrobe while keeping your nails polished and stylish!
How Can I Achieve a Classy Nail Art Look at Home?
You don’t need to visit a salon to get classy winter nail art! Start with a clean base coat and choose your favorite design from the article. For instance, the Nordic knits design requires just a solid base color and a fine brush for the pattern. Don’t forget to finish with a top coat for that extra shine and durability!
What Supplies Do I Need for Winter Nail Art Designs?
To create stunning winter nail art, gather some essential supplies: a base coat, your chosen nail polish colors (think winter hues), a top coat for finishing, and nail art tools like brushes, dotting tools, or even a sponge for effects like frosted pastels. With these items, you can easily experiment with various designs!
Are There Any Quick Nail Art Designs for Busy Days?
Absolutely! If you’re short on time, opt for simple designs like glittering snowflakes or stylish stripes. These looks can be achieved in a matter of minutes, making them perfect for a quick winter touch-up. Choose a solid base color and let your creativity shine with minimal effort!
How Do I Care for My Winter Nail Art to Make It Last?
To keep your classy winter nail art looking fabulous, start with a good base coat to prevent chipping. Apply a top coat every few days to maintain shine and durability. Additionally, avoid using your nails as tools and keep them moisturized to prevent dryness and breakage. With the right care, your winter designs will stand out all season long!
Related Topics
winter nail art
classy designs
festive nails
easy techniques
elegant styles
jewel tones
glitter accents
cozy textures
matte finishes
advanced nail art
holiday ready
nail art trends

")


I love the idea of classy winter nail art! I tried a snowflake design last year and ended up with more snow on my hands than on my nails. Have you tried any of these designs yet?
These nail art ideas are adorable! I once tried to paint candy canes on my nails, but they ended up looking like twisted spaghetti instead. What’s your funniest nail art fail?
Did you know that the average person spends about 2 weeks of their life painting their nails? That’s a lot of time for creativity! Which design are you thinking of trying first?
I remember trying out a winter wonderland theme for my nails, and I accidentally got glitter everywhere! My cat looked like a disco ball for days. Have you had a similar glitter explosion?
If you’re looking for a quick tip, try using a base coat before your nail art! It really helps the colors pop and makes your designs last longer. Happy painting!