
Are you ready to elevate your nail game? This blog post dives into the exciting world of DIY acrylic nail designs. I created this guide because we all want flawless nails that reflect our personalities. Whether you’re preparing for a special event or just looking to add a bit of flair to your everyday style, these nail ideas will surely inspire you.
If you’re a fashion enthusiast who loves nail art, you’ve landed in the right spot. From simple designs to intricate masterpieces, this post is aimed at anyone eager to explore their creativity with DIY nails. You’ll find tips and tricks that make creating beautiful acrylic nails both fun and accessible.
Get ready to unlock 14 stunning designs that are bound to transform your look. Each design comes with its own charm and character, ensuring there’s something for everyone. You won’t want to miss out on these unique nail ideas, especially the surprise gem at #9! Let’s jump right in and discover how to amp up your nail art!
Key Takeaways
– Variety of Designs: Explore 14 unique DIY acrylic nail designs to suit any occasion or mood, ensuring you have plenty of options to choose from. – Creative Techniques: Discover different nail art techniques, such as ombre, marbling, and negative space, that can elevate your nail game to the next level. – Step-by-Step Guidance: Each design comes with clear instructions, making it easy for you to replicate these stunning looks at home. – Materials List: Get a comprehensive list of materials needed for each design, so you can be fully prepared before you start. – Personal Touch: Embrace your creativity by customizing each design to reflect your personal style, making your nails truly one-of-a-kind.Contents
- 1. Classic French Twist
- 2. Galaxy Nails
- 3. Ombre Delight
- 4. Floral Fantasy
- 5. Glitter Bomb
- 6. Geometric Glam
- 7. Marbled Magic
- 8. Negative Space
- 9. Textured Touch
- 10. Animal Print Chic
- 11. Color Blocked Perfection
- 12. Scrabble Nails
- 13. Seasonal Splendor
- 14. Rainbow Brights
1. Classic French Twist
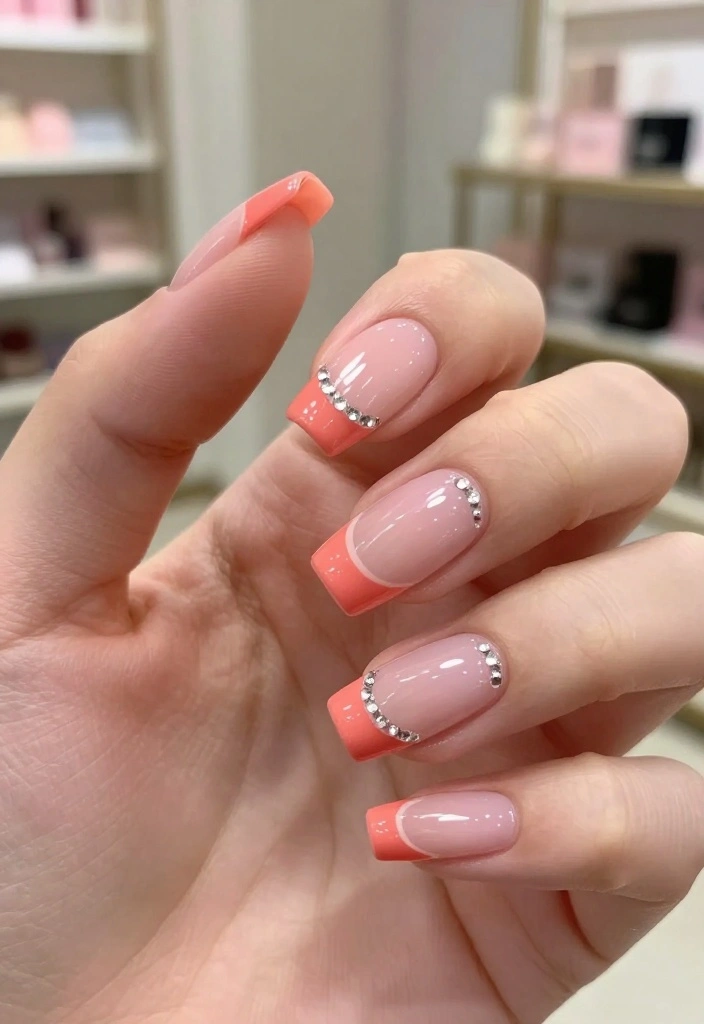
The classic French manicure gets a chic upgrade with acrylics. By swapping traditional white tips for vibrant hues like coral or soft pastels, you create a fresh and elegant look. This updated style beautifully balances sophistication and playful charm, making it perfect for any setting.
Outfit Pieces:
– Coral or pastel acrylic tips
– Clear base coat
– Optional: tiny rhinestones for added sparkle
Styling Tips:
– Use a thin brush for precise tip application.
– Ensure a smooth finish by sealing with a glossy top coat.
– This design shines at brunches, weddings, or casual outings.
Whether you’re dressing up for a special event or keeping it casual, this twist on a classic is sure to impress.
How To Choose the Right Acrylic Nail Design
Choosing the perfect acrylic nail design can be overwhelming with so many options available. Whether you want something elegant, bold, or playful, it’s essential to consider a few key factors. Here’s a simple guide to help you select the best acrylic nail idea that suits your style and needs. 1. Consider Your Style Preference Your personal style plays a huge role in the design you choose. Think about whether you prefer classic looks or modern, trendy designs. For instance, if you favor a minimalist vibe, a classic French twist may be ideal. Alternatively, if you love vibrant colors and patterns, go for something bold like galaxy nails or rainbow brights.2. Think About the Occasion Different occasions call for different nail styles. Are you preparing for a wedding, a job interview, or a night out? For formal events, soft and elegant designs like floral fantasy or ombre delight work well. For casual outings, you can experiment with playful designs like scrabble nails or animal print chic. Always tailor your choice to match the event you’re attending.
3. Assess Your Nail Length and Shape Not all designs look good on every nail length or shape. If you have short nails, intricate designs might not show well. Consider opting for simple patterns like geometric glam or negative space. If your nails are long, you can explore more detailed designs such as marbled magic or textured touch. Choose a design that complements your natural nail shape and length.
4. Evaluate Your Skill Level If you’re planning to create your acrylic nails at home, it’s crucial to assess your skill level. Some designs require advanced techniques. For beginners, start with simpler designs like color-blocked perfection or glitter bomb. As you gain confidence, you can tackle more complex designs like ombre or floral patterns. Make sure to practice and don’t rush the process—perfection takes time!
5. Choose Colors Wisely Color choice can dramatically affect your overall nail design. Consider colors that complement your skin tone and wardrobe. Neutral colors work well for versatility, while bright colors can make a statement. For a trendy look, consider seasonal colors or a mix for a rainbow effect. Take time to swatch colors on a small sample before committing!
6. Set a Budget Finally, consider your budget. Some designs might require more materials or take longer to create, which could increase costs. If you’re DIY-ing, factor in the price of acrylic powders, brushes, and any special tools needed. If you plan to visit a salon, ask about pricing for different designs beforehand to avoid surprises.
Pro Tip: Always have a backup design in mind! Sometimes your first choice might not work out due to time constraints or materials. Having a second option ensures you still achieve a look you love without stress.
By considering these factors, you can choose the right acrylic nail design that fits your style and needs. Enjoy the process of selecting your design and have fun creating beautiful DIY nails!
2. Galaxy Nails
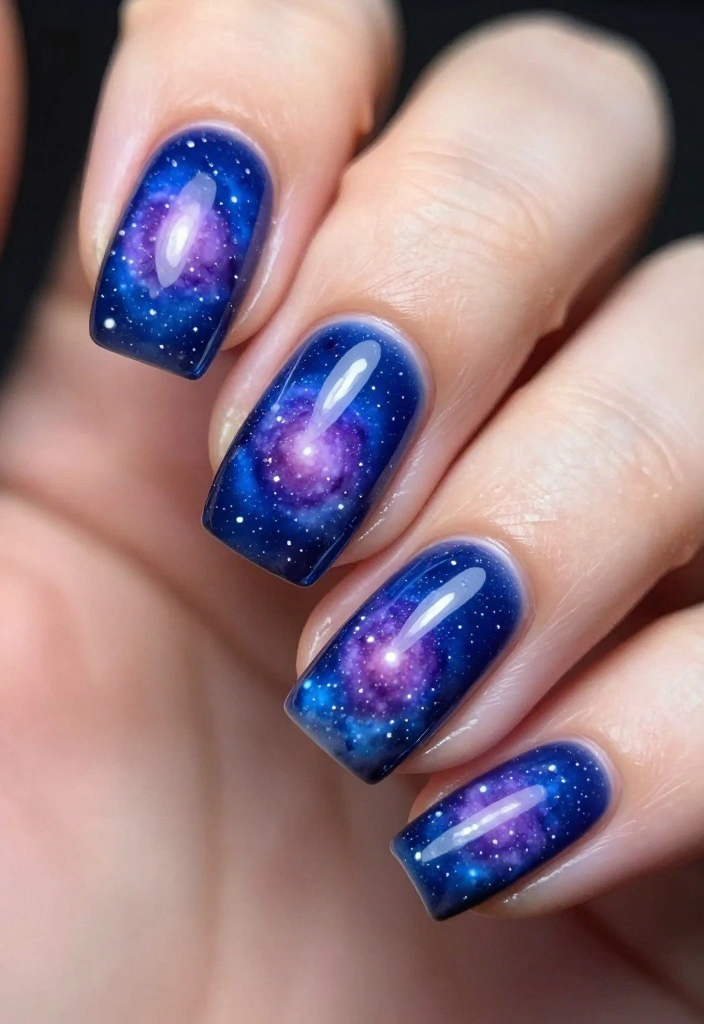
Dive into the cosmos with stunning galaxy nails that captivate the eye! Using deep shades like navy, purple, and black, you can mimic the vastness of space. The sponge technique allows for a seamless blend of colors, creating a mesmerizing effect that’s perfect for those who love to stand out.
Outfit Pieces:
– Black base coat
– Dark blue, purple, and pink polishes
– White or silver polish for stars
Styling Tips:
– Keep a fan handy as layers dry quickly.
– Apply a glossy top coat for a stellar finish.
– Great for parties or when you want to express your adventurous side.
With galaxy nails, your fingertips become a canvas of cosmic wonder that’s sure to turn heads.
3. Ombre Delight
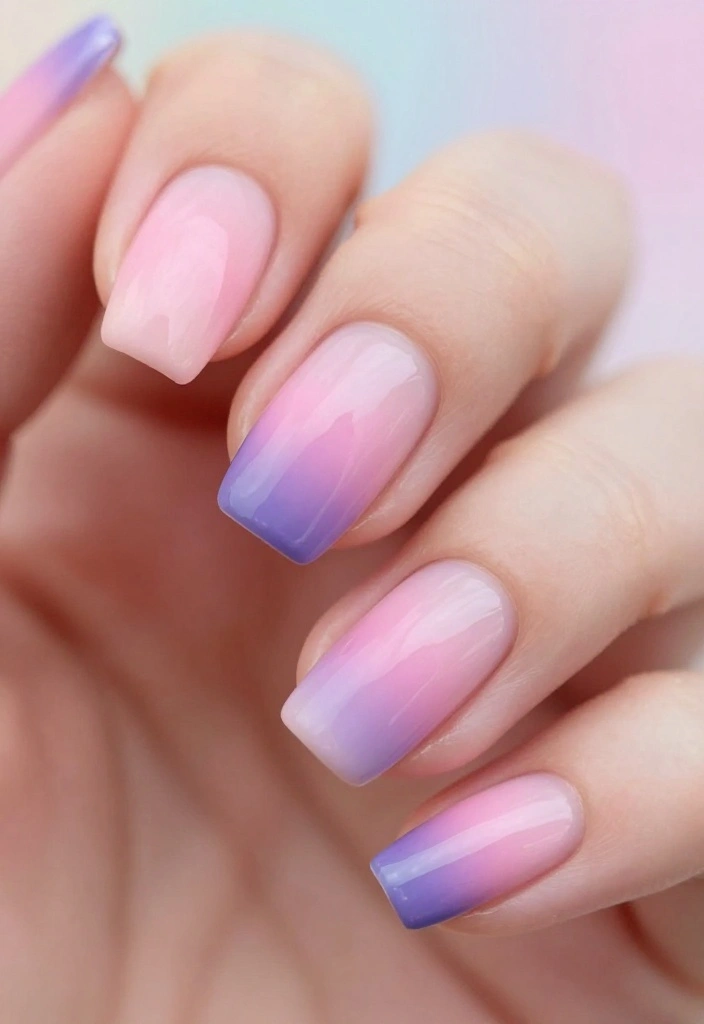
Ombre nails are the perfect choice for those who adore blending colors. This trendy design transitions smoothly from one shade to another, offering endless possibilities from soft pinks to bold oranges. The makeup sponge technique ensures a flawless gradient, making your nails a conversation starter.
Outfit Pieces:
– White base coat
– At least two polish colors for blending
Styling Tips:
– Choose colors that complement your skin tone for the best effect.
– Finish with a matte top coat for a chic look.
– Ideal for seasonal transitions or when you want to stand out.
Ombre nails allow you to express your style uniquely while catching everyone’s eye!
Fun fact: Ombre nails cut coloring time by over 40% when you blend colors with a makeup sponge. The smooth gradient makes nail ideas acrylic pop, from soft pinks to bold oranges. A quick swipe, and you’re ready to shine.
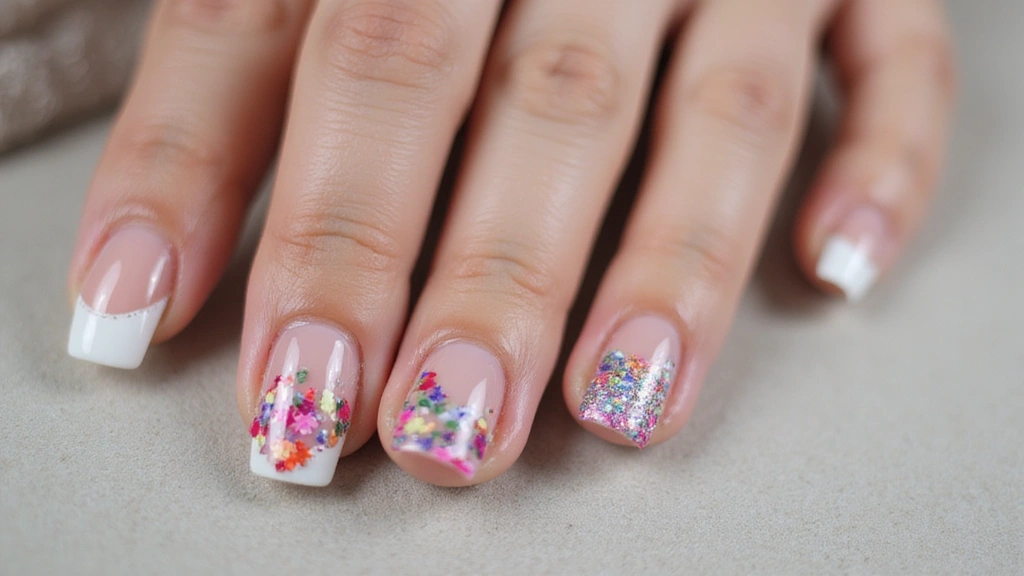
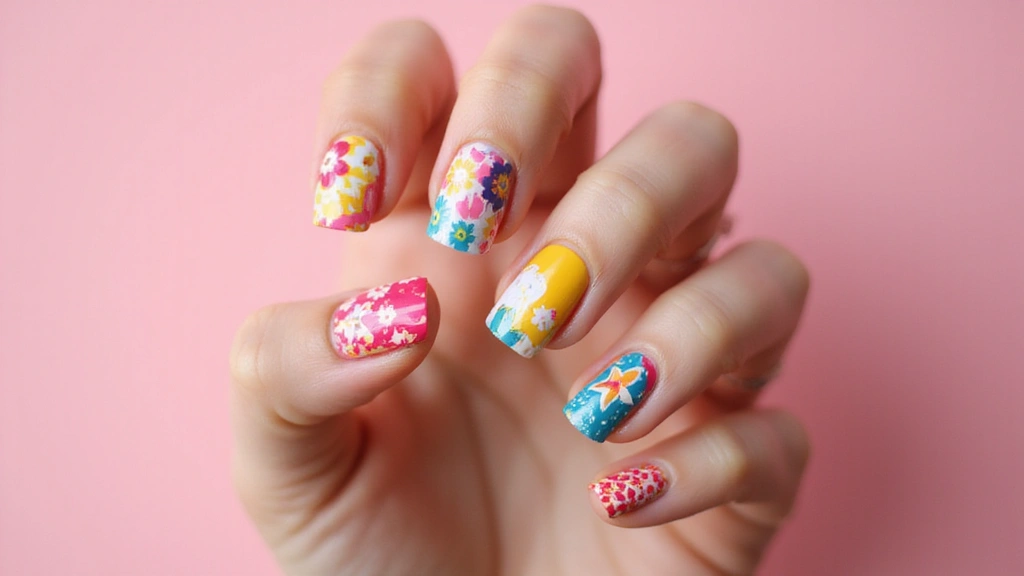
4. Floral Fantasy
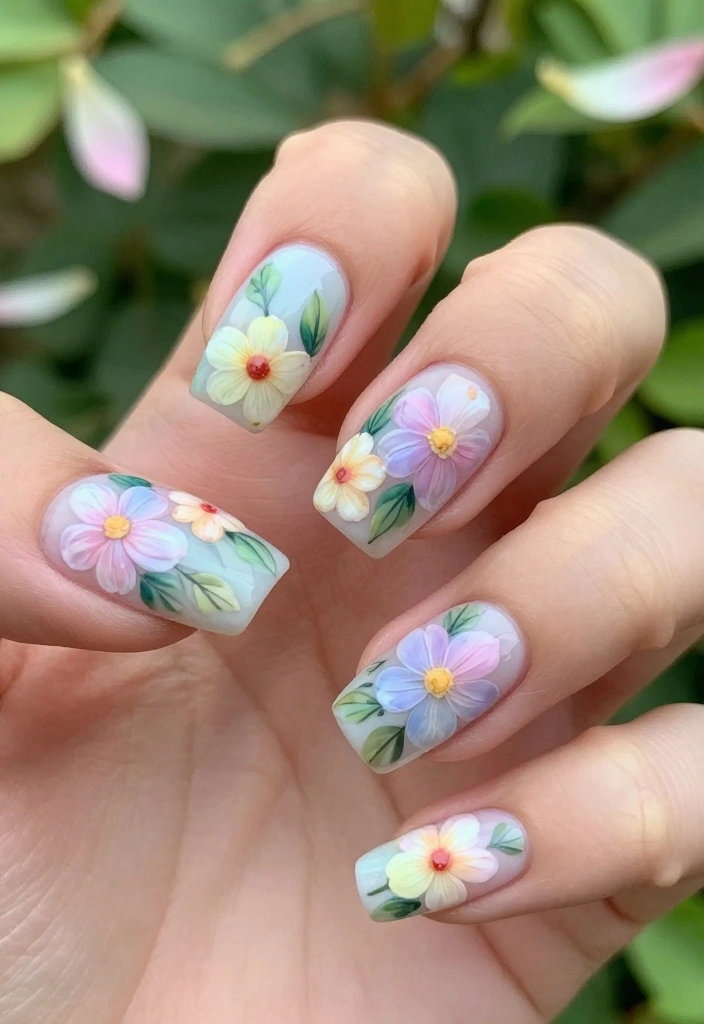
Add a charming touch to your look with floral acrylic nails! Whether you choose soft pastels or vibrant colors, the blooming flowers create a whimsical vibe. These designs can be paired with tiny leaves or vines to bring your nails to life, making them ideal for spring events or garden parties.
Outfit Pieces:
– Base color of your choice
– Acrylic paints for floral designs
Styling Tips:
– Use a detail brush for intricate floral patterns.
– Seal everything with a glossy top coat for durability.
– Perfect for anyone looking to add a touch of nature to their style.
Floral nails are timeless and elevate any look with their beauty!
📹 Related Video: How to create 3D acrylic flowers | beginner nail tutorial | 3d flowers
5. Glitter Bomb
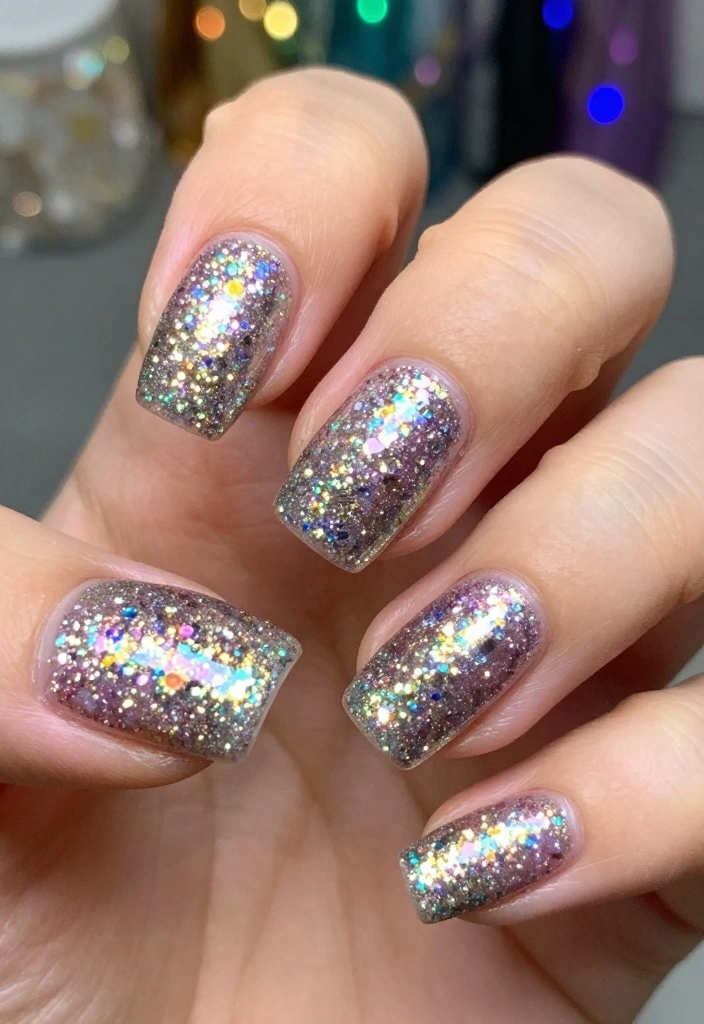
For those who love a bit of sparkle, glitter nails are the ultimate choice! Cover your nails in shimmering glitter for a dazzling effect. You can mix colors for a fun color-blocked look or stick to a single shade for classic glam. The key is a strong base coat followed by adhesive to ensure long-lasting wear.
Outfit Pieces:
– Base coat
– Adhesive layer (glue or polish)
– Glitter in your chosen color(s)
Styling Tips:
– Use a clean brush to apply glitter evenly.
– Mix fine and chunky glitters for added texture.
– Perfect for celebrations and parties where you want to shine.
With glitter nails, you’ll radiate glamour and fun!
6. Geometric Glam
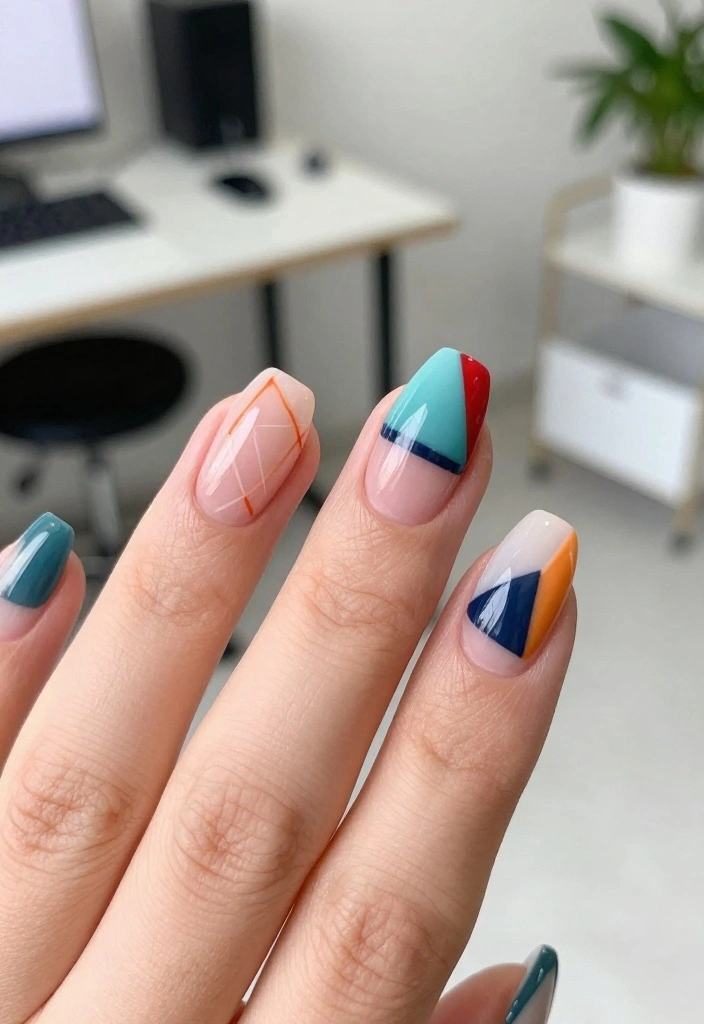
Geometric nails bring a trendy and modern flair to your fingertips! With sharp lines and contrasting colors, this design lets your creativity shine. Use tape to achieve crisp edges, allowing the geometric shapes to take center stage for a chic look that works for any occasion.
Outfit Pieces:
– Base coat
– Tape for clean shapes
– Various nail polish colors for filling
Styling Tips:
– Keep the design minimalistic to avoid overcrowding.
– Choose a solid base color to enhance the geometric shapes.
– Ideal for anyone who loves contemporary styles.
Geometric nails are a bold way to express your unique personality!
You might also like

7. Marbled Magic
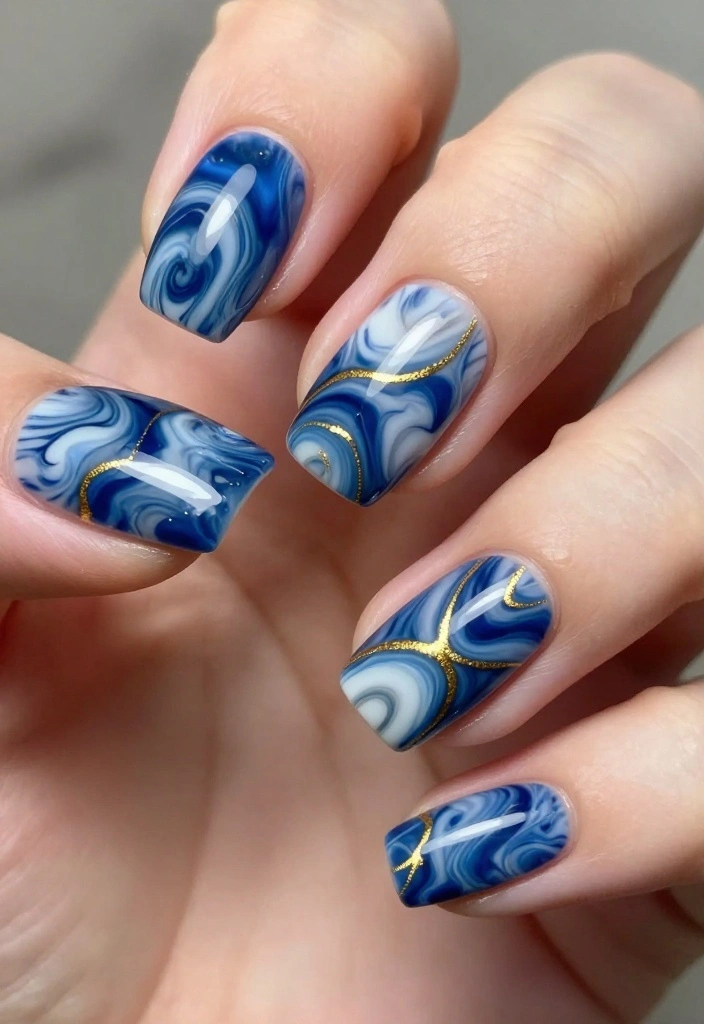
Create a luxurious look with marbled nails that are surprisingly easy to achieve! Using a water marbling technique, you can swirl colors together to mimic the elegance of marble stone. It’s all about choosing complementary shades for a stunning and sophisticated finish.
Outfit Pieces:
– Room temperature water
– Various nail polish colors
Styling Tips:
– Work quickly to prevent the polish from drying too soon.
– Seal your design with a top coat to protect the marbled effect.
– Perfect for special occasions or when you want to feel glamorous.
Marbled nails are sure to impress with their unique and eye-catching look!
Marbled nails are a chic twist on nail ideas acrylic—yet they’re surprisingly easy. Swirl two complementary shades in water, glide on the nail, and finish with a quick seal—your nails become art you can wear.
8. Negative Space

Negative space nails are a contemporary and artistic way to showcase your creativity. They utilize the natural nail as part of the design, making bold contrasts with vibrant colors. By isolating specific areas with tape, you can create stunning shapes that enhance your manicure’s overall appeal.
Outfit Pieces:
– Clear base coat
– Tape for creating shapes
– Nail polish in your chosen colors
Styling Tips:
– Keep the design simple with one or two colors for focus.
– Remove the tape carefully for clean lines.
– Great for both casual and formal settings.
Negative space nails make a bold statement, ensuring your manicure stands out!
9. Textured Touch
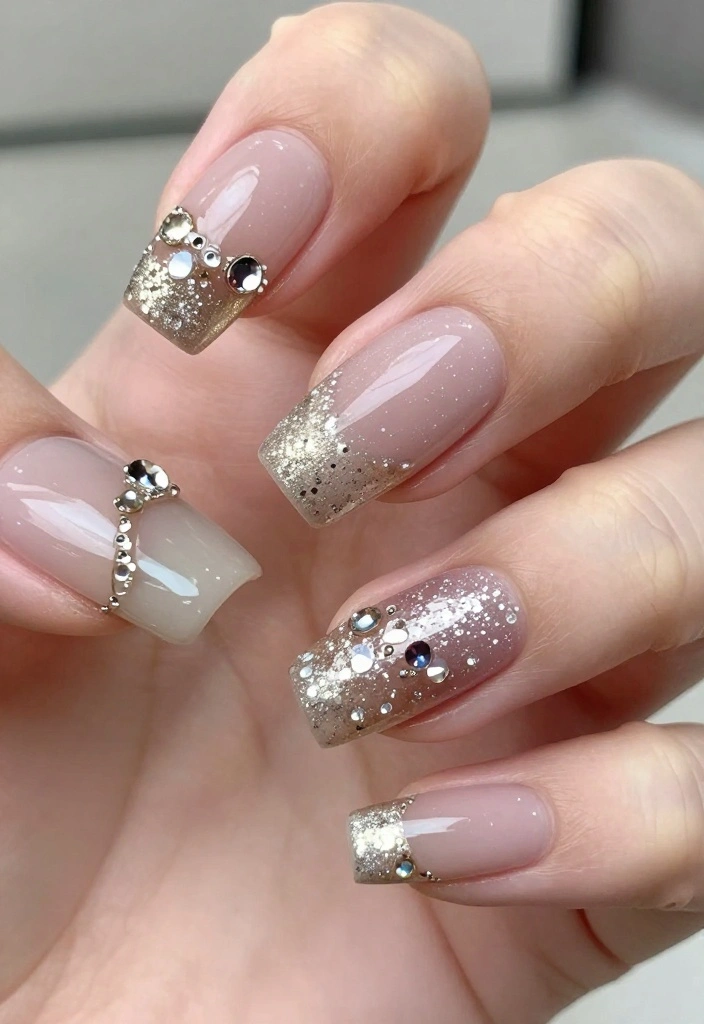
Elevate your acrylic nails with textures that add depth and intrigue! Incorporating elements like matte finishes, foils, or 3D embellishments gives your nails a unique flair. Combining a matte base with glossy accents can create a beautiful contrast that’s hard to ignore.
Outfit Pieces:
– Matte finish base coat
– Desired embellishments (foils, beads, etc.)
Styling Tips:
– Use clear adhesive for attaching embellishments.
– Seal everything with a top coat for durability.
– Perfect for anyone looking for a standout look.
Textured nails add a fun twist and are bound to impress anyone who sees them!
10. Animal Print Chic
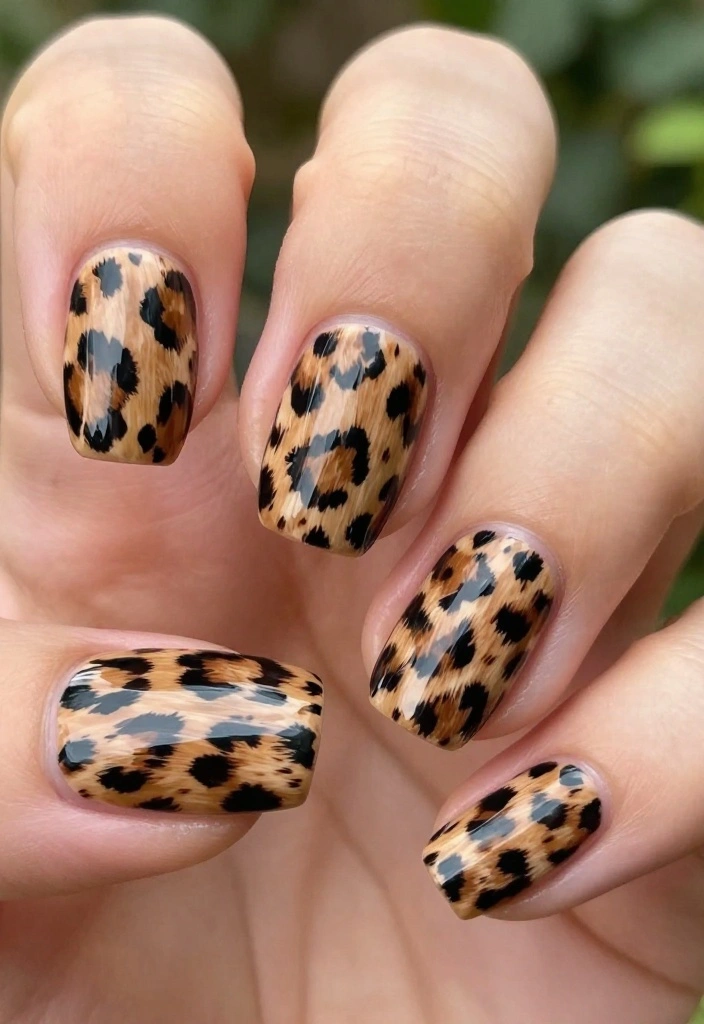
Show off your wild side with animal print acrylic nails that make a statement! From classic leopard spots to bold zebra stripes, these designs let you express your personality. Choose complementary colors or mix patterns for a fun and playful look that works for any casual outing.
Outfit Pieces:
– Base coat
– Fine brush for detailing
– Various nail polish colors for patterns
Styling Tips:
– Practice on paper first for the best results.
– Seal with a glossy top coat for a polished finish.
– Ideal for showcasing your fun-loving spirit.
Animal print nails are a fierce way to elevate your style!
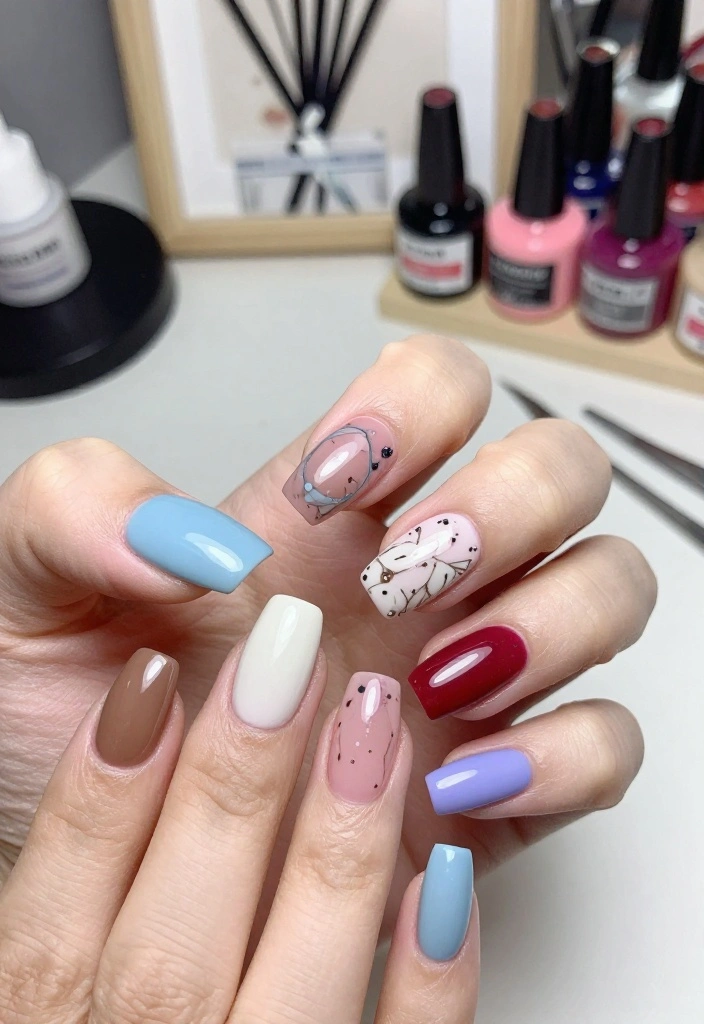
11. Color Blocked Perfection
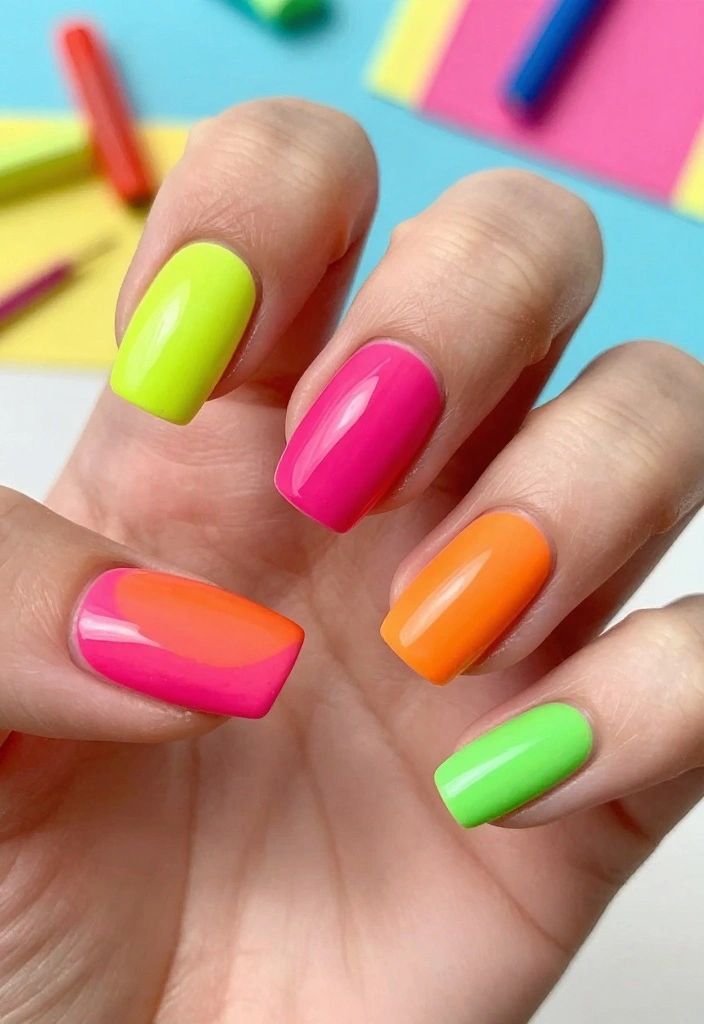
Color-blocked nails offer a playful and creative way to showcase your favorite hues! This design features sections of different colors on each nail, creating a vibrant visual impact. Experiment with bright neon colors or complementary tones to achieve a look that turns heads.
Outfit Pieces:
– Base coat
– Tape for sections
– Various nail polish colors for filling
Styling Tips:
– Ensure colors are dry before applying the next for clean lines.
– Remove the tape while the polish is wet for the best results.
– Perfect for anyone wanting to add a pop of color to their style.
Color-blocked nails provide endless opportunities for creativity and fun!
You Might Also Like

12. Scrabble Nails
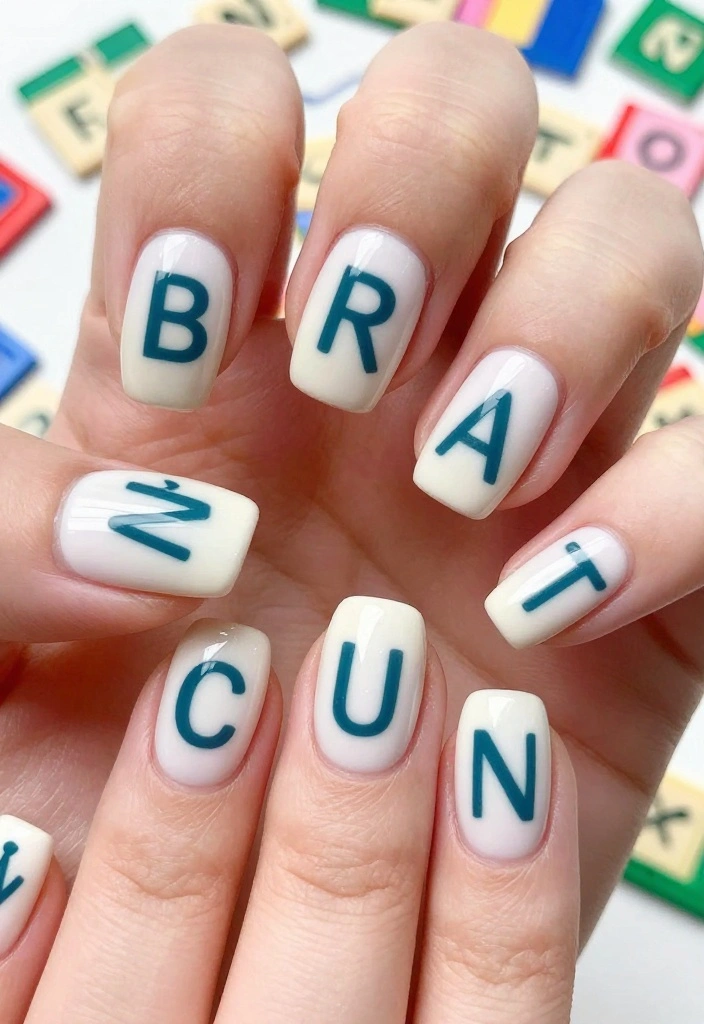
Unleash your creativity with scrabble nails that allow you to express your favorite words or phrases! Using tiny letters or prints, you can create a unique and personalized design that reflects your personality. This style is perfect for those who love word games or want to make a fun statement.
Outfit Pieces:
– Base coat
– Solid color polish for the background
– Small brush or letter stickers for precision
Styling Tips:
– Choose a contrasting base color for maximum visibility.
– Seal with a top coat for a lasting design.
– Great for game nights or casual outings with friends.
Scrabble nails are a quirky way to showcase who you are!
13. Seasonal Splendor

Celebrate the beauty of each season with nails that reflect nature’s changing palette! From autumn leaves to winter snowflakes, seasonal designs can be both playful and elegant. Choose colors and patterns that evoke the essence of each season for a manicure that tells a story.
Outfit Pieces:
– Base coat in your seasonal color
– Stickers or nail polish for designs
Styling Tips:
– Use a fine brush for detailed designs.
– Seal everything with a top coat to protect your art.
– Perfect for showcasing your style throughout the year.
Seasonal nails allow you to express your creativity while celebrating the beauty of nature!
14. Rainbow Brights
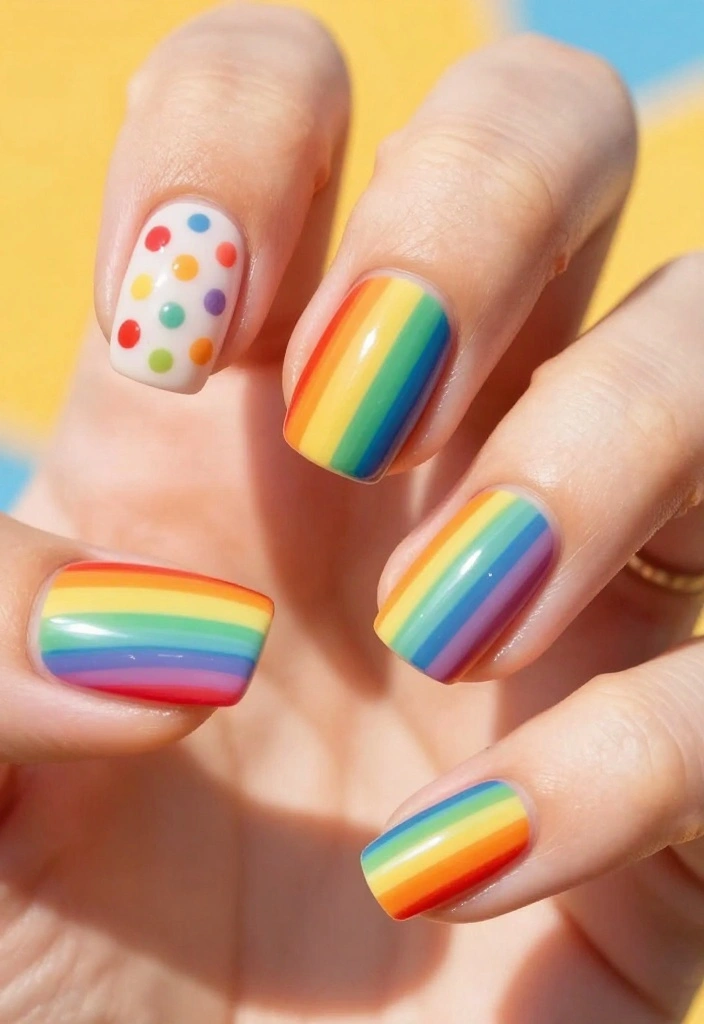
Brighten your day with rainbow nails that celebrate color and joy! This vibrant design can feature stripes, polka dots, or a lovely gradient effect. Choose bold, bright colors for a statement look or softer pastels for a more subtle vibe that still catches the eye.
Outfit Pieces:
– Neutral base coat
– A selection of rainbow colors
Styling Tips:
– Use a fine brush for precise detailing.
– Arrange colors in a way that pleases your eye for harmony.
– Ideal for festivals or whenever you want to spread happiness.
Rainbow nails are all about fun, positivity, and letting your creativity shine!
Fun fact: bold rainbow nails grab 2x more photos in the feed than subtle shades. When you pair bright colors with a clean base, your nail ideas acrylic look instantly signals confidence and playfulness—perfect for a party-ready style.
Conclusion
With these 14 DIY acrylic nail designs, your creativity knows no bounds! Whether you lean towards classic elegance or bold statement styles, there’s something for everyone to try at home. So gather your supplies, unleash your inner artist, and let your nails do the talking!
Frequently Asked Questions
What are the best beginner-friendly nail ideas acrylic from the 14 DIY designs?
If you’re new to nail ideas acrylic, start with simple designs from the 14 DIY designs and build confidence. Prep your nails by filing, pushing back cuticles, and wiping with an acrylic-safe cleaner. Choose a single color or a two-tone design to keep it manageable. Practice with nail tips or a practice finger, then gradually add easy accents like stripes or dots. Use a fine nail art brush or a nail art pen for clean lines, and finish with a glossy top coat to seal your work. Remember to cap the edges with top coat so they don’t snag. Allow each layer to dry fully before applying the next. With patience, you can master these nail art ideas and elevate your DIY nails game.
How can I recreate design #9 from the article at home without professional tools?
Design #9 often uses a bold focal nail with a clean, contrasting secondary color. To recreate it at home without pro tools:
1) Gather supplies: base coat, top coat, two colors, striping tape, a dotting tool or toothpick, and a small clean brush.
2) Prep nails (file, push back cuticles, lightly buff).
3) Apply a thin base coat and let it dry.
4) Use striping tape to section the accent nail, paint the block color, then carefully lift the tape.
5) Add fine details with a dotting tool or thin brush.
6) Finish with a top coat and allow full cure time.
7) Hydrate cuticles with oil after it dries.
What tools and supplies do I need for DIY nails and acrylic nail ideas?
To nail these nail ideas acrylic from home, you’ll want a solid kit and good tools:
• An acrylic system (monomer, polymer) or a gel kit if you prefer gel.
• A quality acrylic brush and nail tips or forms.
• Nail file set, buffer, and cuticle pusher.
• Primer, base coat, and a strong top coat.
• Nail art tools: dotting tool, striping brush, fine liner brush, and tape.
• Cleanup supplies: acetone, cotton balls, lint-free wipes.
• Optional: nail glue, cuticle oil, and a nail dehydrator.
With these essentials, you’ll be ready to try a variety of nail art looks and experiment with DIY nails.
How long do DIY acrylic nail designs last and how can I maintain them to prevent chipping?
DIY acrylic nails can last about 1-3 weeks with proper care. Tips for longevity: keep nails dry for the first 24 hours, wear gloves for chores, avoid using nails as tools, and apply a fresh layer of top coat every 2-3 days. Schedule fills or light reshaping every 10-14 days to prevent lifting. Limit exposure to hot water and harsh chemicals, and regularly moisturize cuticles to keep the surrounding skin healthy. This will help your nail art stay vibrant for longer while you enjoy your DIY nails.
How do I remove DIY acrylic nails safely at home without damaging my natural nails?
Safely remove acrylic nails at home:
1) Soak cotton balls in pure acetone, place on each nail, and wrap with foil. Wait 10-15 minutes until the acrylic softens.
2) Gently push off softened acrylic with an orangewood stick. If needed, repeat soaking for stubborn bits.
3) Lightly file remaining residue and avoid forcing it off.
4) Wash hands, apply a nail strengthener or cuticle oil, and moisturize.
5) Give your nails a break before starting a new set to recover. If nails feel painful or severely damaged, consider consulting a professional.
Related Topics


Wow, these nail designs are so creative! I’ve been trying to find a way to spice up my nails for the summer. Which one are you excited to try first?
I love these ideas! Honestly, my last attempt at nail art ended up looking like a toddler got a hold of nail polish. At least my dog thought it was funny!
Did you know that painting your nails can actually boost your mood? It makes sense, especially when you see how pretty they can look!